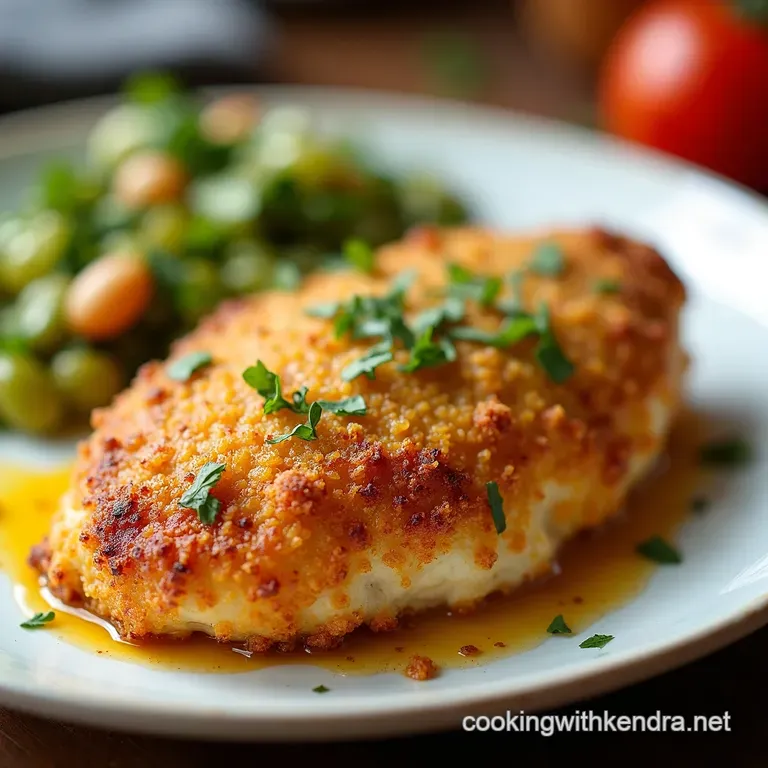
Golden Crusted Juicy the Effortless Crispy Baked Parmesan Chicken
- Why This Baked Parmesan Chicken Beats the Deep Fryer
- Unlocking Maximum Crunch Without All the Oil
- Gathering Your Crispy Parmesan Chicken Components
- The Assembly Line: Coating Your Chicken Pieces
- Baking Protocol for Unbeatable Crispy Baked Parmesan Chicken
- Elevating Your Parmesan Chicken Experience
- Troubleshooting and Flavor Customization
- Frequently Asked Questions
- 📝 Recipe Card
Why This Baked Parmesan Chicken Beats the Deep Fryer
There’s an almost magical quality to perfectly fried chicken that audible crunch when you bite in. However, mastering the deep fryer at home can be intimidating, messy, and frankly, a bit heavy on the clean-up.
That is precisely why mastering the art of Crispy Baked Parmesan Chicken is such a game changer for home cooks. This approach delivers 95% of the texture satisfaction with a fraction of the oil and effort.
We are transforming humble chicken breasts into golden crusted masterpieces using the power of a hot oven and strategic coating. This Easy Crispy Baked Chicken recipe proves you don't need submersion in hot oil to achieve true textural excellence.
Unlocking Maximum Crunch Without All the Oil
The key to achieving that deep fried texture while baking lies in two core principles: maximizing surface area exposure and using the right type of breading. For this Baked Parmesan Chicken Recipe , we are utilizing Panko breadcrumbs, which are lighter and flakier than standard breadcrumbs, providing superior crisping capabilities in dry heat.
On top of that,, elevating your game means utilizing high heat and a proper rack setup to ensure air circulates beneath the crust, preventing that dreadful soggy bottom that plagues many home baked attempts.
The Secret to Golden, Non-Soggy Chicken
The secret weapon here is the wire rack. Placing the chicken on a rack set atop a baking sheet ensures that steam rising from the cooking meat escapes, rather than settling beneath the crust and turning it limp.
When preparing Crispy Baked Chicken Breast , ensure the chicken is patted completely dry before it ever touches the flour. Any residual moisture will steam the breading upon contact with heat, halting the crisping process before it can even begin.
A light brush of olive oil over the top of the coating also encourages a beautiful, even golden sheen as it bakes.
Perfect For Weeknight Dinners or Weekend Feasts
This recipe is incredibly adaptable. For a fast weeknight solution, using thin cutlets ensures they cook through in under 20 minutes, making this the ideal Easy Crispy Baked Chicken .
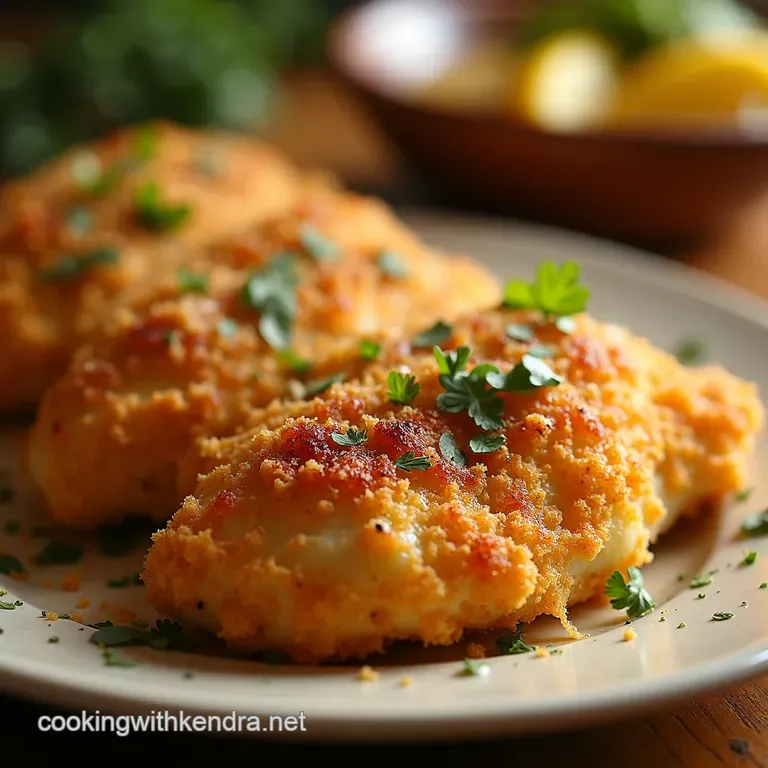
Conversely, when serving for a weekend gathering, the impressive presentation of these crusted pieces elevates the plate instantly. Whether you are whipping up Crispy Baked Chicken Tenders for kids or serving a full breast for guests, the consistent, high-quality results are dependable.
Achieving the Ultimate Juicy Interior
Crunchy exterior aside, a dry chicken breast is a tragedy. To guarantee a juicy interior while baking, we take two preparatory steps. First, ensuring all pieces are of uniform thickness (by gently pounding thicker areas if necessary) promotes even cooking.
Second, the robust, flavourful coating acts as a protective shield, trapping the natural moisture within the meat. We aim for an internal temperature of 165° F ( 74° C), but removing it slightly before this mark and letting it rest ensures carryover cooking finishes the job without drying out the fibres.
Gathering Your Crispy Parmesan Chicken Components
Crafting exceptional Oven Fried Parmesan Chicken begins long before the oven is preheated. It requires selecting high-quality ingredients for each stage of the breading process. We need a foundation layer, a binder, and the star flavour component the crunchy topping.
Remember, every component contributes to the overall success of the final Crispy Baked Parmesan Chicken Thighs or breasts you create.
Selecting the Best Parmesan Cheese Grating
The quality of your cheese is paramount when making Crispy Garlic Parmesan Chicken or any variation thereof. Skip the shelf stable, pre-grated shaker varieties entirely. They contain anti caking agents that prevent smooth melting and proper crisping.
Instead, opt for a wedge of authentic Parmigiano Reggiano or a high-quality domestic Parmesan, and grate it yourself very finely. This fine texture integrates perfectly with the Panko, creating a seamless, deeply savoury crust that browns beautifully without burning prematurely.
Binder Ingredients: Achieving Adhesion
The binder must be sticky enough to hold the heavy Parmesan mixture firmly to the raw meat. We rely on a classic three stage setup. The initial dredge in seasoned flour helps the wet binder stick, and the wet binder eggs whisked with a splash of milk is the glue.
This combination ensures that when you press the chicken firmly into the final coating, that crust adheres securely throughout the entire baking process.
Necessary Equipment for Baking Success
While the ingredients are key, the tools determine execution. You absolutely require a large, rimmed baking sheet. Crucially, you must have a wire cooling rack that fits inside this sheet. This elevated platform is what separates truly Crispy Baked Chicken from merely browned chicken.
Plus,, having three shallow dishes lined up makes the assembly line process fast and efficient, minimizing cross contamination between stations.
Related Recipes Worth Trying
- Golden Comfort Chicken Buttered Noodles Recipe 50 Mins — Forget bland pasta This easy Chicken Buttered Noodles recipe delivers a deeply savoury creamy sauce using browned butter and Parmesan A perfect easy dinner idea
- Best Creamy Oven Baked Chicken Thighs Recipe Easy Dinner — Discover how to make foolproof Creamy Oven Baked Chicken Thighs with crispy skin and a rich sauce This Baked Chicken Thighs In Cream Sauce recipe is pure...
- The Ultimate 30Minute Honey Garlic Chicken Recipe — Whip up this Easy Honey Garlic Chicken in just 30 minutesa weeknight hero with a truly glossy irresistible sauce Guaranteed to become your new favourite...
The Assembly Line: Coating Your Chicken Pieces
Efficiency is the hallmark of a great Panko Chicken Parmesan Baked session. Setting up your three dishes flour, egg wash, and Panko/Parmesan mix in sequence allows you to move swiftly. First, the chicken pieces, pounded or trimmed to uniform thickness, must be completely dry.
They travel first through the seasoned flour, where they receive a light dusting. Next, they are submerged briefly in the egg wash, ensuring every crevice is coated. Finally, the magic happens in the third dish.
Baking Protocol for Unbeatable Crispy Baked Parmesan Chicken
With all components prepped and the oven roaring, it's time for execution. Follow these steps precisely to ensure your coating remains intact and your meat remains moist.
Prep Work: Tenderizing and Setting Up Stations
Before any coating begins, preheat your oven to 400° F ( 200° C). Prepare your rack lined baking sheet and lightly spray the rack with cooking oil. Set up your three dredging dishes.
Ensure your seasoned flour includes salt, pepper, and perhaps a touch of paprika for visual warmth. The Panko coating should be heavily scented with Parmesan and Italian seasoning this is where the flavour lives.
The Double Dip Technique for a Thicker Crust
For true, robust crunch suitable for Crispy Baked Parmesan Chicken Thighs (which take longer to cook), we employ a slight double dip variation. After taking the chicken out of the egg wash and pressing it firmly into the Parmesan/Panko mixture (Stage 3), press it once more firmly back into the mixture before setting it aside.
This ensures a dense, protective layer that won't shatter under high heat.
Oven Temperature Precision for Golden Perfection
Bake at 400° F ( 200° C). This higher temperature is essential for crisping the Panko before the chicken overcooks. Place the coated pieces onto the prepared rack.
For a standard 6-ounce chicken breast, baking time will hover between 20 and 25 minutes. If you are cooking Crispy Baked Chicken Tenders , check them closer to the 18-minute mark.
Always rely on an instant read thermometer; 165° F ( 74° C) is the goal.
Resting the Chicken: A Crucial Final Step
Once removed from the oven, resist the urge to slice immediately. Transfer the cooked pieces onto a clean cutting board (or keep them on the rack if you wish to maintain maximum crispness).
Allowing the Crispy Baked Parmesan Chicken to rest for five minutes permits the juices, which have rushed to the surface during cooking, to redistribute back into the muscle fibres, ensuring a tender, succulent bite every time.
Elevating Your Parmesan Chicken Experience
While the base recipe is spectacular, a few minor additions can transform this dish into a signature meal. Think about incorporating finely minced fresh garlic or shallots directly into the Panko mixture this creates an incredible Crispy Garlic Parmesan Chicken profile as the garlic toasts gently on the crust.
Alternatively, a light mist of lemon zest over the finished product before serving brightens the savoury Parmesan beautifully.
Troubleshooting and Flavor Customization
Even expert cooks hit minor snags. If your crust starts looking a little pale halfway through cooking, you can carefully slide the baking sheet onto a lower rack for the last 5 minutes, or quickly move the broiler on high for 60 seconds, watching constantly to prevent scorching.
Understanding how to adjust the core components allows for endless variation.
Ideal Side Dishes to Pair With This Crunch
Because this Baked Parmesan Chicken Recipe is rich, salty, and deeply satisfying, it demands something fresh and acidic alongside it. Steamed green beans tossed simply with olive oil and sea salt provide necessary vegetable balance.
For a heartier meal, creamy polenta or simple roasted potatoes dressed with rosemary provide a wonderful textural counterpoint to the sharp crunch of the coating.
Storing Leftovers and Reheating for Freshness
Leftovers are best stored in a single layer in an airtight container in the refrigerator for up to three days. To revive that cherished crunch, avoid the microwave entirely. The best reheating method is the toaster oven or a conventional oven set to 350° F ( 175° C).
Place the chicken directly on the wire rack (if you have one) or a baking sheet and heat for about 8– 10 minutes until the exterior is hot and crisp again.
Spice Variations: Adding a Little Kick to the Crust
For those who enjoy a bit of heat, customizing the spice profile is easy. Introducing a small amount of smoked paprika into the flour adds depth and colour, while cayenne pepper or crushed red pepper flakes sprinkled into the Panko mixture immediately shifts this toward a spicy profile.
For a herbaceous twist, finely chop fresh rosemary and add it to the Parmesan coating for an aromatic, earthy version of Crispy Baked Parmesan Chicken .

Frequently Asked Questions
Why isn't my Crispy Baked Parmesan Chicken as crunchy as I hoped?
Ah, the eternal quest for oven crispiness! The biggest culprit is usually moisture; make sure your chicken breasts are absolutely bone dry before dredging, and for heaven's sake, use that wire rack so air can circulate underneath.
Also, don't skimp on pressing that final Parmesan Panko mixture on a firm press ensures a good bond.
Can I make this Crispy Baked Parmesan Chicken ahead of time?
You can certainly prep the dredging ahead of time, but I wouldn't recommend coating the chicken until you're ready to bake it, as the breading will start to get soggy waiting around.
If you must prep early, freeze the coated cutlets on a tray for about 30 minutes, then bake straight from frozen you might need an extra 5-10 minutes in the oven.
What's the best way to ensure the chicken cooks through without burning the crust?
The secret here is uniformity and temperature control. Try to pound your chicken breasts to an even thickness, perhaps about 3/4 inch, so they cook at the same rate. Baking at 400°F (200°C) is the sweet spot; if the crust browns too quickly, simply tent it loosely with foil for the final 5-10 minutes of cooking.
I don't have Panko; can I use regular breadcrumbs in this recipe?
You absolutely can soldier on with regular fine breadcrumbs, but you won't get quite the same airy, shatteringly crisp texture Panko provides they tend to compact more. If you use regular crumbs, consider toasting them lightly in a dry pan beforehand to give them a slight head start on crispness!
How should I store leftovers of the Crispy Baked Parmesan Chicken?
For the best experience, leftovers should be eaten the next day, but for storage, let the chicken cool completely, then keep it in an airtight container in the fridge for up to three days.
To reheat and salvage some crispness, skip the microwave entirely and pop it in a toaster oven or a hot 400°F oven until heated through it’s far superior!
Baked Panko Parmesan Chicken

Ingredients:
Instructions:
Nutrition Facts:
| Calories | 2117 kcal |
|---|---|
| Protein | 38.6 g |
| Fat | 44.2 g |
| Carbs | 99.6 g |
| Fiber | 26.6 g |
| Sodium | 742 mg |
