Blooming Onion Recipe
- Time: Active 1 hours 5 mins, Passive 25 minutes, Total 1 hours 30 mins
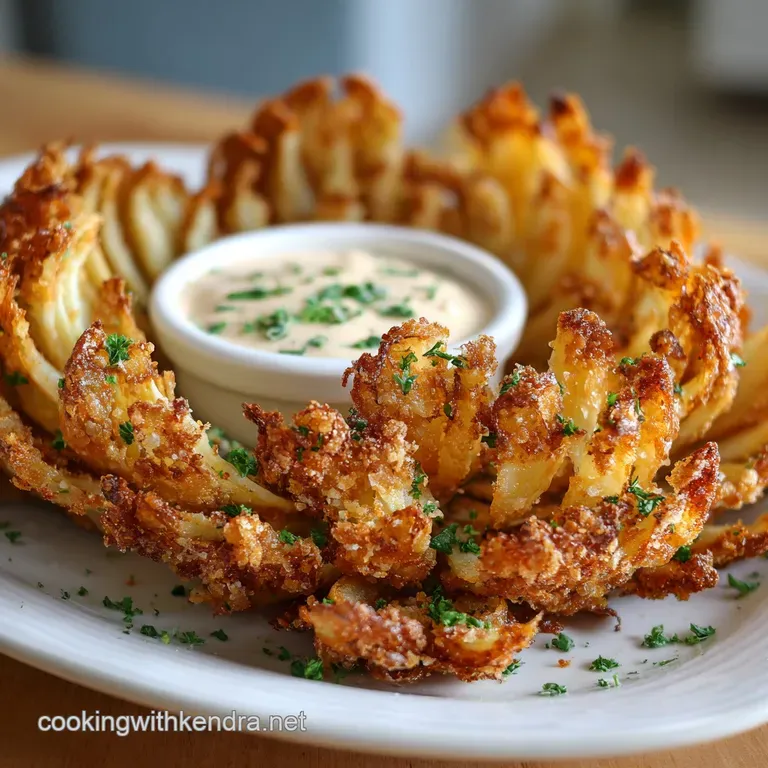
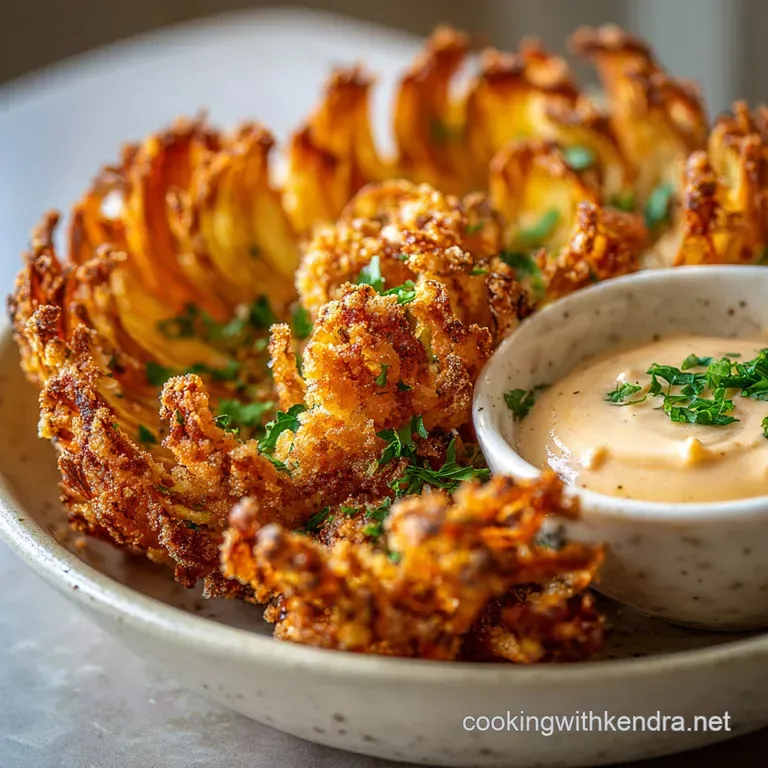
- Flavor/Texture Hook: Deeply savory, spiced crunch with a velvety horseradish dipping sauce.
- Perfect for: Game day gatherings, steakhouse themed dinners, or impressive party appetizers.
- The Secret to a Perfect Restaurant Style Blooming Onion Recipe
- The Physics of the Shatter Crisp Crust
- Vital Yields and Timing for Your Fried Appetizer
- The Secret Elements for an Authentic Battered Onion
- Necessary Kitchen Tools for This Restaurant Style Classic
- Master Every Step to Achieve That Signature Bloom
- How to Avoid Sogginess and Floury Centers
- Customizing Your Spice Level and Smart Ingredient Swaps
- Storing and Reheating Your Crispy Fried Onion
- Plating Like a Pro for Maximum Visual Impact
- Very High in Sodium
- Recipe FAQs
- 📝 Recipe Card
The Secret to a Perfect Restaurant Style Blooming Onion Recipe
The moment that massive, golden blossom hits the center of the table, everything else disappears. You know that specific sound? It’s not just a crunch; it’s a literal shatter of seasoned crust that gives way to a tender, steaming sweet onion petal. I remember the first time I tried to make this at home.
I didn't use an ice bath, I rushed the dredging, and I ended up with a sad, soggy onion clump that tasted mostly of raw flour. It was a greasy heartbreak, but it taught me exactly what NOT to do.
Now, when I drop a prepared Vidalia into the hot oil, the sizzle is music to my ears. The aroma of smoked paprika and garlic powder fills the kitchen, smelling exactly like those high end steakhouses we all love.
Getting that signature "bloom" isn't about luck; it’s about precision cutting and a very specific temperature shock. We’re going to walk through how to get those petals to stand up tall and proud so every single nook and cranny gets coated in that addictive, spicy breading.
The beauty of this dish lies in the contrast. You have the aggressive, jagged edges of the fried coating paired with the cooling, velvety sting of the horseradish dipping sauce. It's messy, it's bold, and it's honestly the most fun you can have with a vegetable. If you've ever felt intimidated by the "bloom," don't be.
I've made all the mistakes for you, from the "raw middle" syndrome to the "breading falling off" catastrophe. We’re going to nail it together this time.
The Physics of the Shatter Crisp Crust
Cold Water Expansion: Soaking the cut onion in ice water forces the petals to draw in moisture and physically pull apart, creating the "bloom" shape before it ever touches the flour.
Starch Protein Synergy: The combination of cornstarch and all purpose flour creates a brittle, glass like exterior that stays crispy longer than flour alone.
Thermal Shock: Dropping a cold, hydrated onion into 375°F (190°C) oil causes an immediate steam release, which pushes the breading outward and creates those airy, light pockets of crunch.
| Cooking Method | Cook Time | Texture Outcome | Best For |
|---|---|---|---|
| Deep Frying | 7-10 minutes | Maximum shatter crisp | Authentic steakhouse experience |
| Air Frying | 20-25 minutes | Leaner, toasted crunch | Daily snacking/Healthy swap |
| Oven Baking | 30-35 minutes | Softer, roasted petals | Hands off preparation |
Deep frying remains the gold standard for this specific dish because the oil can penetrate the deep crevices between the petals. While the air fryer is a great tool for a How to Cook recipe, the traditional bloom really craves that total immersion to cook the core onion without burning the tips.
Vital Yields and Timing for Your Fried Appetizer
| Component | Measurement | Science Role | Pro Secret |
|---|---|---|---|
| Large Sweet Onion | 1 lb (approx. 450g) | Structural Base | Use Vidalia for high sugar content |
| Cornstarch | 0.5 cup | Moisture Barrier | Prevents the flour from getting gummy |
| Smoked Paprika | 2 tbsp | Flavor/Color | Provides the signature deep orange hue |
| Large Eggs | 2 units | Protein Binder | Acts as the glue for the heavy dredge |
The Secret Elements for an Authentic Battered Onion
To get this right, you need a massive sweet onion. Think Vidalia or Walla Walla anything with a high sugar content and a low "sulfur" bite. For the dry dredge, you'll need 2 cups of all purpose flour, 0.5 cup of cornstarch, 2 tablespoons of smoked paprika, 1 tablespoon of garlic powder, 1 teaspoon of cayenne pepper, 1 teaspoon of dried oregano, 2 teaspoons of kosher salt, and 1 teaspoon of cracked black pepper.
Why this? The cornstarch is non negotiable for a brittle, long lasting crunch that doesn't go limp.
For the wet wash, grab 2 large eggs and 1 cup of whole milk. Don't swap this for skim; you need the fat. For the legendary sauce, mix 0.5 cup of mayonnaise, 2 tablespoons of creamy horseradish, 2 teaspoons of ketchup, 0.5 teaspoon of paprika, 0.25 teaspoon of garlic salt, and a dash of dried thyme.
Why this? Horseradish provides the necessary "nasal heat" to cut through the richness of the fried coating.
Necessary Kitchen Tools for This Restaurant Style Classic
You don’t need a fancy "onion blossom" cutter, though they exist. A sharp chef's knife is actually better for control. You will also need a large bowl for the ice bath and a deep, heavy bottomed pot like a Dutch oven for frying.
A wire spider or a large slotted spoon is essential for lifting the onion out without breaking the delicate petals.
Using a thermometer is the only way to ensure your oil stays at the right temperature. If the oil drops too low, the onion will absorb grease like a sponge; too high, and you'll have a burnt exterior and a raw, crunchy middle. If you're looking for a side that's a bit lighter to prep while the oil heats, you might enjoy the ease of the Homemade Olive recipe for a fresh salad pairing.
Master Every Step to Achieve That Signature Bloom
- Prep the onion. Trim 1 cm off the pointy top of the 1 lb sweet onion, leaving the root end fully intact. Note: If you cut the root off, the whole thing will fall apart.
- Execute the bloom cut. Place the onion cut side down. Make 4 vertical cuts (North, South, East, West), stopping 1 cm from the root. Make 3 additional cuts within each quarter for 16 total petals.
- Shock in ice water. Submerge the onion in a bowl of ice cold water for 45 minutes until the petals naturally fan out.
- Dry thoroughly. Remove from water and invert onto paper towels for 10 minutes. Note: Moisture is the enemy of a crispy crust.
- Mix the dry dredge. Whisk the 2 cups flour, cornstarch, paprika, garlic powder, cayenne, oregano, salt, and pepper in a large bowl.
- Prepare the egg wash. Whisk the 2 eggs and 1 cup milk in a separate deep bowl until no streaks of yolk remain.
- The first coating. Place the onion in the flour mixture. Use your fingers to gently separate petals, ensuring flour hits every surface. Invert and shake off excess.
- The wet dip. Submerge the floured onion in the egg wash. Turn it to ensure the liquid gets deep into the center.
- The final dredge. Return the onion to the flour. Spoon flour over it and inside the petals until it looks fully "snow covered".
- Fry to perfection. Heat oil to 375°F (190°C). Lower the onion root side up into the oil. Fry for 3 minutes, flip, and fry for 4 minutes until deep golden and crackling.
Chef's Tip: Freeze the breaded onion for 15 minutes right before frying. This "sets" the breading so it doesn't fall off the moment it hits the hot oil.
How to Avoid Sogginess and Floury Centers
The biggest heartbreak is pulling a beautiful onion out of the fryer only to find a pocket of raw, dry flour in the center. This happens when the egg wash doesn't reach the core. When you are doing the wet dip, don't be afraid to get your hands in there and gently pry the petals apart while the onion is submerged.
It’s messy, but it’s the only way to ensure the "glue" is everywhere.
Another issue is the "grease bomb" effect. This usually happens if you overcrowd the pot or let the oil temperature drop. If you're making more than one, always wait for the oil to return to 375°F (190°C) before dropping the second onion. Much like making Totally Tasty Refried recipe, temperature control is everything for texture.
Why Your Petals Are Sticking
If your onion looks more like a ball than a flower, you skipped the ice bath or didn't cut deep enough. The ice water creates "turgor pressure" in the cells, forcing them to stiffen and pull away from each other. If they are still tight, use the tip of your knife to gently encourage the separation before dredging.
Avoiding the Floury Core
This is caused by "clumping." After the final flour dredge, turn the onion upside down over the bowl and give it a firm shake. You want a thin, even layer on every surface, not a thick paste. If you see white clumps, use a dry pastry brush to flick them away.
| Problem | Root Cause | Solution |
|---|---|---|
| Breading falling off | Onion was too wet | Pat dry with paper towels after ice bath |
| Burnt tips/Raw center | Oil was too hot | Maintain 375°F and flip halfway through |
| Soggy/Oily texture | Oil was too cold | Use a thermometer; don't fry below 350°F |
- ✓ Use a wooden chopstick to test oil: if bubbles sizzle around it, you're close.
- ✓ Always fry root side up first to set the petal shape.
- ✓ Drain on a wire rack, not paper towels, to prevent steaming the bottom.
- ✓ Season with an extra pinch of salt the second it comes out of the oil.
Customizing Your Spice Level and Smart Ingredient Swaps
You can easily adjust the "heat" of this blooming onion recipe by playing with the cayenne levels. If you want a more "Low Country" feel, swap the paprika for a heavy dusting of Old Bay seasoning. The core technique remains the same, but the flavor profile can shift from steakhouse classic to coastal flair very easily.
| Original Ingredient | Substitute | Why It Works |
|---|---|---|
| Whole Milk | Buttermilk | Adds a tangy zip and tenderizes the onion. |
| Cayenne Pepper | Chipotle Powder | Adds a smoky, earthy heat instead of sharp spice. |
| Creamy Horseradish | Greek Yogurt + Wasabi | Provides a similar "nasal" kick with more protein. |
If you are looking for a different vibe, try the "Texas Red" variation. Add a teaspoon of chili powder and a pinch of cumin to the flour. This pairs beautifully with a side of ranch dressing instead of the traditional horseradish sauce.
Storing and Reheating Your Crispy Fried Onion
Look, fried food is best eaten immediately. However, if you have leftovers, do not I repeat, DO NOT put them in the microwave. You will end up with a rubbery, sad mess. Store leftovers in an airtight container in the fridge for up to 2 days.
To reheat, use an air fryer at 375°F (190°C) for 3-5 minutes, or a conventional oven at 400°F (200°C) for 8 minutes on a wire rack.
For zero waste, if your onion petals break off during the cutting process, don't toss them! Toss those bits in the leftover dredge and egg wash to make "onion straws." They fry up in about 60 seconds and make a killer topping for salads or burgers.
Even the leftover dipping sauce can be used as a spread for a roast beef sandwich the next day.
Plating Like a Pro for Maximum Visual Impact
Presentation is half the fun with this dish. To get that perfect "well" in the center for your sauce, use a small circular biscuit cutter or even a shot glass to gently press down the center petals right after frying while they are still warm. This creates a stable "nest" for your sauce ramekin to sit in.
Place the bloom on a large wooden board or a dark ceramic plate to make the golden orange color pop. Garnish with a sprinkle of fresh chopped parsley or chives for a hit of green. It provides a much needed visual contrast to the deep fried tones.
Serve it while the steam is still rising; the sound of those petals being pulled apart is the best dinner bell you'll ever ring.
The "Center Well" Technique
After the onion has drained for two minutes, take a small spoon and gently push the very center petals outward. This doesn't just make room for the sauce; it ensures the very middle of the onion the thickest part gets a bit more airflow to finish "setting" so it isn't mushy when people reach the end of the appetizer.
Garnish for Contrast
While the steakhouse version is usually served plain, a heavy dusting of extra smoked paprika right before serving adds a professional, polished look. If you want to go the extra mile, a few lemon wedges on the side can be squeezed over the onion to provide a bright acidity that wakes up all those heavy, savory flavors.

Very High in Sodium
1245 mg mg of sodium per serving (54% of daily value)
The American Heart Association recommends limiting sodium intake to about 2,300mg per day.
Tips to Reduce Sodium in Your Blooming Onion
-
Reduce Added Salt-25%
Eliminate the Kosher salt (2 tsp) in the dry mix and the Garlic Salt (0.25 tsp) in the sauce. Taste and add a tiny pinch of regular salt only if needed.
-
Fresh Garlic Over Garlic Powder-15%
Replace garlic powder in the dry mix with freshly minced garlic. Use about 1-2 cloves for a similar flavor profile.
-
Low Sodium Ketchup-10%
Use low-sodium ketchup in the sauce. This simple swap can significantly reduce sodium without sacrificing flavor.
-
Spice it Up Naturally
Instead of relying solely on salt, boost flavor with extra amounts of cayenne pepper, smoked paprika, cracked black pepper and dried oregano. These natural seasonings are sodium free.
Recipe FAQs
What is the secret to a crispy blooming onion?
Yes, it's all about temperature shock and proper dredging. Dropping a cold, hydrated onion into hot oil (375°F) causes an immediate steam release, puffing out the breading. Make sure each petal is thoroughly coated in the flour and cornstarch mixture before the wet dip and final dredge.
What is the blooming onion batter made of?
It's a two-part system: a dry dredge and a wet wash. The dry dredge typically includes all-purpose flour, cornstarch, and a blend of spices like paprika, garlic powder, and cayenne. The wet wash is usually eggs beaten with milk or buttermilk, acting as the binder for the final, seasoned flour coating.
The cornstarch is crucial for that signature shatter crisp texture.
What is the best way to prepare a blooming onion?
Cut, soak, dry, dredge, dip, dredge, and fry. Start by trimming the top and making deep petal cuts from the top down, stopping at the root. Submerge the onion in ice water for at least 45 minutes until petals fan out.
Thoroughly pat dry, then proceed with the double dredging and deep frying at 375°F until golden brown.
Why do you soak a blooming onion in water?
To encourage the petals to naturally fan out and create the "bloom" shape. Soaking the cut onion in ice water forces the cells to absorb moisture and expand, physically pushing the petals apart.
This also helps create a firmer structure before it hits the hot oil, which is a key technique similar to how we manage dough hydration in recipes like Focaccia Bread Recipe.
How do I prevent my blooming onion's breading from falling off?
Ensure the onion is thoroughly dry after its ice bath and don't rush the dredging. Any residual moisture will prevent the batter from adhering properly. Gently pressing the flour into the petals and letting the breaded onion rest for a few minutes before frying can also help set the coating.
Can I make a blooming onion without deep frying?
Yes, air frying or baking can yield good results, though with a slightly different texture. An air fryer at 375°F for about 20-25 minutes will give you a toasted, crispier coating, while oven baking at 400°F for 30-35 minutes will result in softer, roasted petals.
For a more hands off approach, you might find our method for Boiled Sweet Potatoes: The Essential Guide to Perfect Cooking helpful in understanding cooking times for root vegetables.
What kind of onion is best for a blooming onion?
A large sweet onion is ideal, like a Vidalia or Walla Walla. These varieties have a higher sugar content and a milder flavor profile, which caramelizes beautifully when fried and complements the savory spices without being overpowering. This sweetness is similar to the natural sugars that develop in ingredients like in our Chicken Tomato Sauce Recipe: Rich, Slow Simmered Comfort Sugo.
Blooming Onion Recipe

Ingredients:
Instructions:
Nutrition Facts:
| Calories | 648 calories |
|---|---|
| Protein | 12.8 g |
| Fat | 34.2 g |
| Carbs | 76.4 g |
| Fiber | 4.1 g |
| Sugar | 4.9 g |
| Sodium | 1245 mg |
