Cheese Whirls: a Savory Snack Delight
- Whirls of Cheese: The Snack Dreams Are Made Of
- Essential Ingredients Guide
- Professional Cooking Method: Mastering Cheese Whirls
- Pro Tips & Secrets for Cheese Whirls
- Perfect Presentation: Plating Your Cheese Whirls
- Storage & Make-Ahead Magic
- Creative Variations to Explore
- Complete Nutrition Guide
- Expert FAQ Solutions
- Wrapping It Up
- 📝 Recipe Card
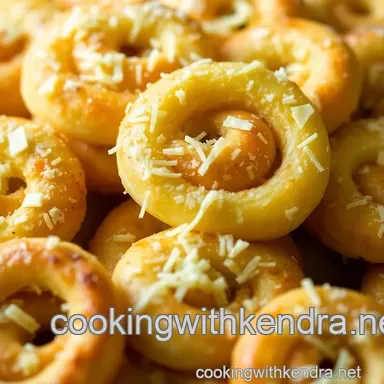
Whirls of Cheese: The Snack Dreams Are Made Of
You ever find yourself just craving a snack that hits all the right spots? picture this: it’s sunday afternoon, i’m lounging around, minding my business, and then bam! suddenly, i’m thinking about cheese whirls.
Honestly, what could be better than flaky pastry that twirls around gooey, melty cheese? i mean, can you even think of a cheese snack recipe that packs more joy? if you can’t, then let’s dive into these delicious cheese whirls that’ve got a little bit of history, a whole lot of flavor, and a sprinkle of nostalgia.
A Brief History and Modern Appeal
These little beauties, cheese whirls, actually trace their roots to classic savory pastry recipes from europe. back in the day, before snacks were processed to the max, folks made these cheesy treats from scratch.
Fast forward to today, and they’ve taken on a life of their own at parties and casual gatherings. honestly, who hasn’t seen cheese whirls as part of a spread at a get-together? they’re the unsung heroes of the appetizer table!
So, how long does it take to whip these up? well, you’re looking at about 1 hour and 5 minutes for total prep and cooking time.
The good news? it’s an easy recipe that anyone can tackle, which means no advanced baking skills are required! fancy, huh? not to mention, you can make about 24 cheese whirls with a modest grocery budget, especially if you’re snagging ingredients on sale.
Why You’ll Love These Cheese Whirls
Let me hit you with the good stuff: health benefits and nutrition highlights . cheese whirls, while fitting into the category of cheesy snacks , can also be loaded with fresh herbs and just a hint of spice.
You can even sneak in some veggies, like spinach for a little green love . they’re perfect for parties, game days, or when you just want to treat yourself to something delicious without breaking the bank or wrecking your diet completely.
Plus, one of the best perks about cheese whirls? you can customize them! you’ve got options galore try a bacon cheese swirl or get all fancy with a blend of various cheeses.
The best cheese filling can be whatever you love most. who doesn’t want a cheesy dough recipe that lets you play around?
Now, if you’re caught in the appetizer recipes with cheese universe and looking for something that's delicious, quick, and fun, cheese whirls are a no-brainer.
They also work beautifully for festive snack ideas like super bowl sunday or any holiday gathering. i mean, seriously, they’ll have your guests lining up for seconds.
Ready to look into into the Cheese Whirls?
Alright, friends, i’ve given you all the hype about these little bites of heaven. now you're probably brainstorming on how to make your own batch of homemade cheese whirls! plus, whether you want to dip them in a tangy ranch sauce or maybe whip up a garlic aioli, the options are endless.
Ready to bring the cheesy goodness into your kitchen?
Let’s get this cheese party started! Next up, we’ll dive into what you actually need to make these little rounds of deliciousness!
Essential Ingredients Guide
When it comes to whipping up tasty treats like cheese whirls , it’s all about having the right ingredients on hand! let’s dive into this essential ingredients guide, and i’ll share some tips and tricks that i’ve picked up along the way.
Whether you’re a newbie or a seasoned pro, i've got you covered.
Premium Core Components
First off, let’s talk about premium core components . Here’s a solid list of what you need to stock up on:
- 2 cups all-purpose flour (240 g) : It’s your go-to for most baking. Look for a fine texture and stay away from any clumps!
- ½ cup unsalted butter, cold & cubed (113 g) : Grab a brand that says “premium” on it. Cold butter is key for flaky pastry, trust me!
- 1 cup shredded cheese (like cheddar) : The best cheese filling makes all the difference. Go for the real stuff no pre-shredded mixes if you can avoid it!
Keep these babies in a cool, dry place to maintain their freshness. butter can be a bit of a diva, so keep it in the fridge until you’re ready to use it.
Oh, and always check the expiration dates!
Signature Seasoning Blend
Now that you have your core ingredients, don’t forget your signature seasoning blend ! It’s what elevates those cheese snacks to serious levels of yum:
- Essential spice combinations : Think garlic powder or paprika to bring out the cheese flavor!
- Herb selections and pairings : Fresh chives work wonders in cheese whirls. You could even toss in some cheese and chive recipes if you’re feeling fancy.
- Flavor enhancers : A sprinkle of freshly cracked black pepper adds a kick!
This is also where you can get all regional with it. Toss in some Cajun seasonings for a little southern flair, or go classic with Italian herbs.
Smart Substitutions
Life happens, and sometimes you need to improvise. That’s where smart substitutions come into play:
- Common alternatives : If you’re out of chives, green onions work just fine!
- Dietary modifications : Want to keep it gluten-free? Swap the all-purpose flour for a gluten-free blend, but make sure it contains xanthan gum.
- Emergency replacements : Run out of cheese? Get creative! Any snack with a hint of dairy usually works in a pinch.
Honestly, making substitutes can lead to some of the best mistakes uh, I mean creations ! You never know until you try.
Kitchen Equipment Essentials
Now, let’s chat about the tools of the trade. Having the right kitchen equipment essentials can make or break your snack game!
- Must have tools : A good rolling pin is a lifesaver for these cheese whirls. And don’t forget your baking sheet and parchment paper nobody wants to deal with a sticky situation!
- Preparation tips : Keeping your workspace tidy not only helps you find stuff but also keeps your head in the game.
- Storage solutions : Pop those cheese whirls in an airtight container for about 2-3 days. If you know they’re not gonna be gone that quickly, freeze some! They hold up great and taste just as good once warmed.
So, with all these must haves, you’ll be ready to tackle the best cheesy snacks .
Whether you’re making cheesy snacks for a party or just a cozy night in, having the right ingredients, spices, and tools will ensure everything you whip up shines.
No flops here; just delicious cheddar cheese appetizers . if you need to, take a moment to refer back to this guide as you prep.
Ready to get to the fun part? Let’s dive into the instructions for whipping up these quick savory snacks! You won’t regret it!
Professional Cooking Method: Mastering Cheese Whirls
When it comes to cooking, there’s something magical about not just throwing ingredients together, but really diving into techniques that can make even the simplest snacks shine.
Let’s take a peek into professional cooking methods that elevate your cheese whirls from good to outstanding! trust me, you’ll want these flaky pastry beauties at every get-together.
Essential Preparation Steps
First things first, mise en place is where it all starts. this fancy french term just means having everything ready before you start cooking.
Measure out your ingredients for those easy cheese appetizers and chop your chives. having all your ducks in a row can save you from last minute chaos.
Next, let’s talk time management . you don’t want to burn the cheese whirls while you’re busy chasing after a rogue ingredient.
Set a timer, especially during baking. those cheesy snacks deserve your full attention, and timing precision is key to achieving that golden brown color.
Also, organization is vital. rearranging your kitchen workspace can reduce stress. keep tool and ingredients at hand, making it easier to whip up those delicious snacks.
Oh, and remember the safety considerations ! always handle knives and hot ovens with care. trust me, it’s no fun to get burned while trying to impress your friends with rustic cheese snacks .
Step-by-step Process
Now for the fun part! Here’s how to make killer cheese whirls :
Make the dough : in a bowl, whisk together 2 cups of all-purpose flour, 1 teaspoon of baking powder, and ½ teaspoon of salt.
Cut in ½ cup of cold, cubed butter until it looks like coarse crumbs. then, add cold water slowly until you form a dough.
Chill the Dough : Wrap it up in plastic and pop it in the fridge for 30 minutes . That’s when the magic happens!
Prepare the filling : while your dough chills, mix 1 cup of shredded cheese , 2 tablespoons of chopped fresh chives, 1 teaspoon of garlic powder, and a pinch of paprika.
The flavors mingle, creating the best cheese filling !
Roll the Dough : Once chilled, roll it out to about ¼ inch thick.
Add Filling : Spread the cheesy goodness evenly on the dough and press lightly to stick it down.
Roll and Slice : Roll it up tightly and slice into 1 inch pieces.
Bake : Preheat your oven to 375° F ( 190° C) . Bake for 12- 15 minutes until they’re golden and crispy.
Expert Techniques
Let’s get into some pro tips. cold butter is your friend when making those cheesy dough recipes . keeping it cold means a flakier pastry! if your dough isn’t working, sometimes the culprit is overmixing.
Just gently combine your ingredients to avoid a tough result.
Also, check quality checkpoints midway through baking. If they’re browning unevenly, you might want to rotate the baking sheet. Honestly, nothing ruins your dipping sauces for cheese whirls quite like undercooked snacks.
If you encounter issues, don’t fret! Troubleshooting is part of the cooking journey. A sprinkle of flour can fix a sticky dough, or if they’re not rising right, check your baking powder!
Success Strategies
Don't feel bad if your first batch isn't perfect. we’ve all been there! some common mistakes to dodge include failing to chill your dough (it really matters!) and not cutting pieces evenly.
Variety is the spice of life, so feel free to try variations. swap out cheese for herb infused options or add some bacon.
Quality assurance starts before you even hit the oven. make a note of anything that didn’t work last time and adjust.
For those nights when you're scrambling, remember, you can prep the dough ahead of time and keep it in the fridge.
Is your party approaching? Consider these party snack ideas a go-to recipe. I mean, who doesn’t love crispy cheese whirls just out of the oven?
Alright, my friend. with these tools under your belt, you’re ready to rock those homemade cheese whirls like a pro.
Don’t forget to check in for those fun variations or tips. cooking is about creativity, and every batch is a chance to experiment!
Stay tuned for some additional information that’ll help you take this cheesy adventure even further. You won’t want to miss out!
Pro Tips & Secrets for Cheese Whirls
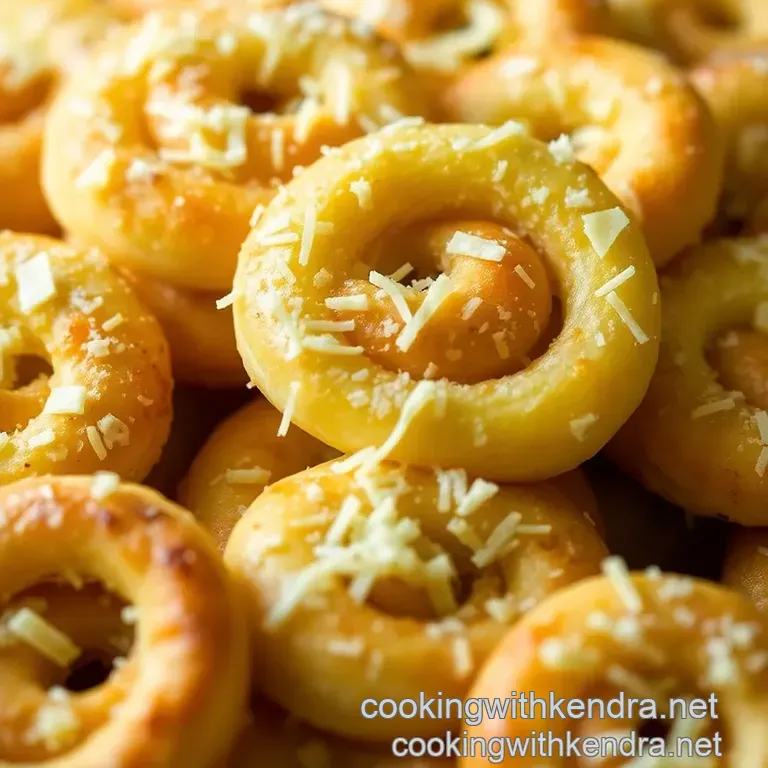
Oh my gosh, cheese whirls are ( literally ) one of the best cheese snack recipes you can whip up at home.
They’re flaky, cheesy, and completely addictive! now, before you dive into baking these crispy delights, let’s chat about some pro tips and secrets i’ve picked up over the years.
First off, when it comes to that flaky pastry texture, make sure to use cold butter. seriously, don’t even think about room temperature butter! it’s all about keeping that dough chilled so it remains nice and flaky when baked.
Also, dough chilling is your best friend; a quick 30 minutes in the fridge can make a world of difference.
For flavor enhancement, try mixing in some herbs. i’m talking about basil, thyme, or even a little italian seasoning if you’re feeling fancy.
Trust me, it takes the basic cheese whirls straight to flavor town. and if you want it even cheesier (who wouldn’t?), mix different kinds of cheese like a blend of cheddar and mozzarella.
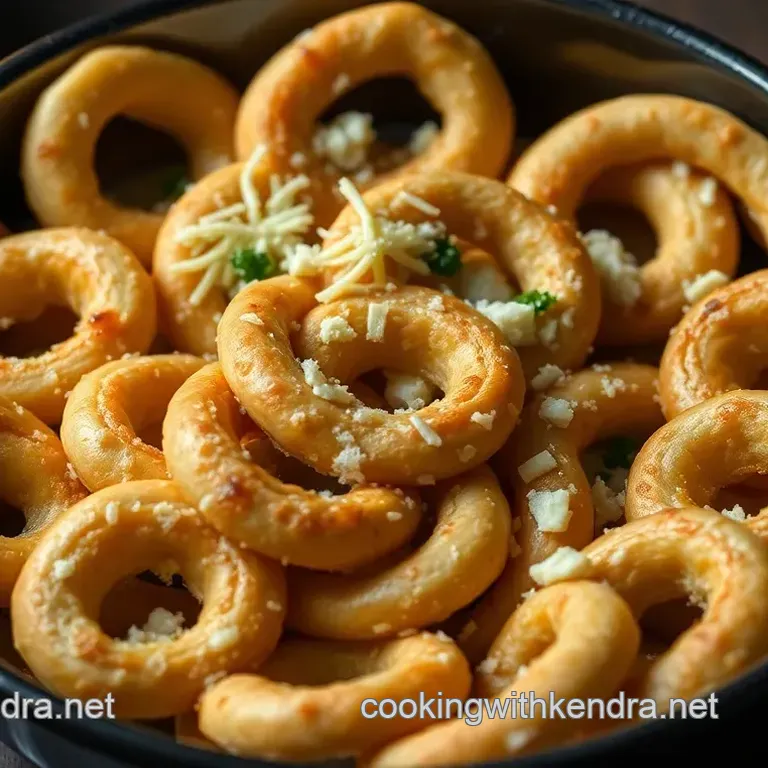
Perfect Presentation: Plating Your Cheese Whirls
Okay, so you’ve baked these little beauties. Now comes the fun part trying to make your cheesy snacks look just as good as they taste! Presentation is everything, right?
First, think about your plating techniques . a simple white platter always makes those golden brown whirls pop. you could stack them high or lay them out in a fun spiral for some visual flair.
Then, let’s talk garnishes. fresh herbs like chives or parsley not only add a pop of color but also scream "i’m fancy!" you can sprinkle them right on top or lay them around the edges of your platter.
Don’t forget about your dipping sauces for cheese whirls ! a bit of ranch, aioli, or even a spicy sriracha mayo can amp up your appetizer game.
Colorful sauces beside those crispy cheese whirls? yes, please!
Storage & make-ahead Magic
Here’s the deal sometimes you just want to have snacks ready to go, and i totally feel you! you can make-ahead these cheese whirls and enjoy them later.
After baking, let them cool completely, and then store them in an airtight container. they’ll be good for about 3-4 days, but let me tell you, they never last that long in my house!
If you want to freeze them, do so before baking. just roll, slice, and place on a baking sheet to freeze them individually.
Once they’re frozen, pop them into a freezer bag. when you’re ready for a treat, pull some out, and bake them straight from the freezer.
It’s that easy!
Creative Variations to Explore
Who needs to stick to just one flavor? This is where it gets exciting, fam! Sometimes I crave a little change, and that’s when I pull out the creativity card.
You can throw in some spinach cheese whirls for a veggie kick, or if it's bacon you're after, toss in some crispy bacon bits for the ultimate indulgence.
There’s also gluten-free flour for those looking for a gluten-free option. don’t feel restricted; mix and match your favorite ingredients!
Also, depending on the season, experiment with ingredients. In the spring, how about adding fresh asparagus? For winter, maybe go for roasted red peppers. Honestly, the choices are endless!
Complete Nutrition Guide
While cheese whirls are a treat, it’s good to know what you’re eating. Typically, two cheese whirls clock in around 180 calories with 6 grams of protein and 12 grams of fat.
If you’re trying to be mindful of your intake, serve them alongside a fresh salad or lighter fare. they make a great light meal idea with cheese , especially with the right accompaniments.
Expert FAQ Solutions
So, you might wonder, "what if my cheese whirls turn out soggy?" a common struggle, i get that. if your dough is rolled too thick or doesn’t bake long enough, you might have some issues.
Just be sure to cut them evenly and check them at the lower end of the baking time.
If you’re curious about variations, just swap in different cheeses or add herbs. the best part about these pastries is that they’re super forgiving and adapt easily to what you have on hand.
Wrapping It Up
There you have it, friends! cheese whirls are not just a great appetizer recipe with cheese they’re versatile, delicious, and oh-so-fun to make.
Perfect for gatherings or just a mid-week snack, everyone will love them. grab your apron, kick back, and enjoy crafting these savory delights.
Your tastebuds will thank you big time!
Cheese Whirls A Savory Snack Delight