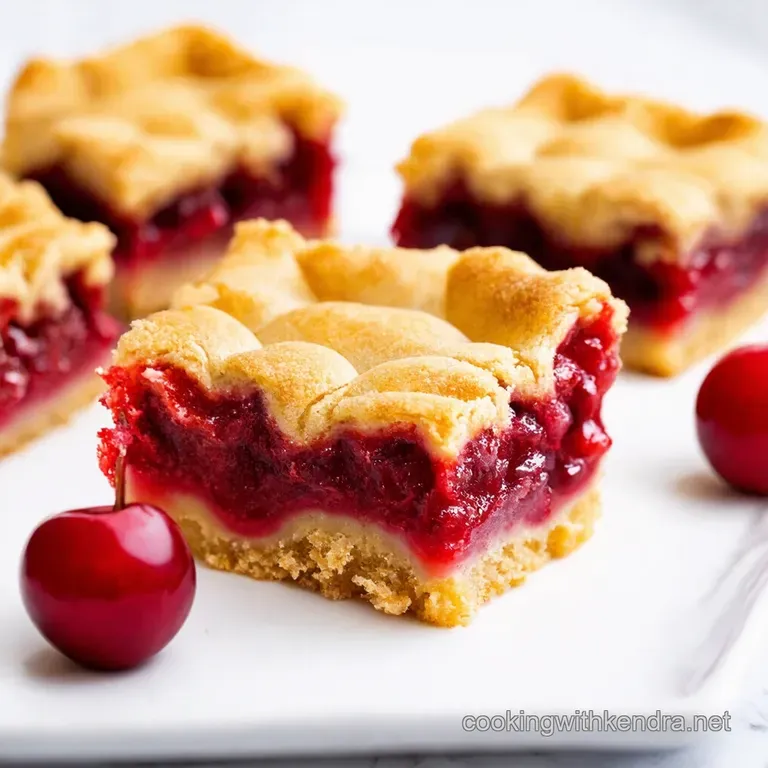
Cherry Pie Bars a Slice of Summer Sunshine
Recipe Introduction: Cherry Pie Bars
Quick Hook: Ever get a hankering for cherry pie, but can't be bothered with the whole pie-making shebang? Cherry pie bars are your answer, my friend! They're packed with that classic cherry flavor, without all the fuss.
Brief Overview: These cherry pie bars are like a slice of Americana. It tastes like an apple pie but made of Cherries.
This dessert is Easy, quick, a great way to use seasonal fruits. We're talking 1 hour 25 minutes from start to finish, and it yields 16 bars.
Perfect for sharing.
Main Benefits: These bars pack a nutritional punch from the cherries. Enjoy them at a picnic, or as a treat on a summer night. What makes them special? The delightful simplicity!
Cherry Pie Bars: A Slice of Summer Sunshine
Honestly, who doesn't love a good cherry pie ? But sometimes, you just don't have the time or energy to roll out pastry.
That's where these cherry pie bars come in. They give you all that delicious cherry goodness in a fraction of the time.
Okay, let's bake up a strategy that's as delicious as these cherry pie bars sound!
This recipe for Easy cherry pie bars is super simple. It uses a crumbly base and topping, so no need to worry about perfect pie crusts.
What Makes These Cherry Pie Bars Special?
These cherry pie bars are more than just easy. The combination of sweet and tart cherries nestled between the buttery base and topping makes the perfect bite.
Plus, the almond extract (optional, but recommended!) adds a little something extra.
Health Benefits and Perfect Occasions
Cherries are packed with antioxidants, so you can almost convince yourself these Cherry dessert bars are healthy. Almost!
They're perfect for summer BBQs. Whip up a batch of these crumbly cherry pie bars . Everyone will love them. Trust me.
From Our Kitchen to Yours
This recipe uses fresh or canned cherries. Honestly, both work great. I once used frozen cherries in a pinch. They turned out great.
Before we dive into the ingredients, I want to share my biggest tip: don't overbake the bars! You want them to be golden brown. You don't want them to be burnt.
Ingredients You'll Need
Ingredients & Equipment
Okay, let's bake up some cherry pie bars ! Honestly, the ingredients are pretty straightforward. Nothing too fancy here, thank goodness! These bars are a summer dessert staple.
Main Ingredients
- All-purpose flour: 2 cups (250g) .
- Unsalted butter: 1 cup (2 sticks/227g) , cold. Make sure it's really cold.
- Granulated sugar: ½ cup (100g) .
- Light brown sugar: ½ cup (60g) , packed.
- Salt: ½ teaspoon (2.5ml) .
- Almond extract: ½ teaspoon (2.5ml) (optional, but adds a lovely touch).
- Fresh cherries: 4 cups (approximately 600g) , pitted. Alternatively, use 2 cans (14oz/400g each) cherry pie filling.
- Granulated sugar (for filling): ¼ cup (50g) , adjust to taste.
- Cornstarch: 2 tablespoons (15g) .
- Lemon juice: 1 tablespoon (15ml) .
- Almond extract (for filling): ½ teaspoon (2.5ml) (optional).
- Pinch of salt (for filling).
- Milk or cream (for topping): 1 tablespoon .
- Sanding sugar or granulated sugar (for topping): 1 tablespoon .
For the butter, quality matters. Use a good brand. Trust me, you can tell the difference. And if you are using canned cherries, make sure is is high-quality cherry pie filling.
Seasoning Notes
A little almond extract enhances the cherry flavor. You know? It's a subtle but noticeable difference. If you are not a fan or don't have it, vanilla extract works.
Don't skip the lemon juice though! A little bit of lemon juice is necessary to balance the sweetness.
For a bit of warmth, add a pinch of cinnamon or nutmeg to the crumb mixture. Honestly, it is so good! I like cinnamon the most.
Equipment Needed
- 9x13 inch baking pan . A must have for any baker.
- Parchment paper . Makes cleanup a breeze.
- Large mixing bowl . For the crumb mixture.
- Pastry blender or food processor . For cutting in the butter. Alternatively, use your fingers.
- Measuring cups and spoons . To get the measurements right.
- Cherry pitter . If using fresh cherries. Seriously, this thing is a lifesaver.
- Small saucepan . For the cherry filling (if using fresh cherries).
- Wire rack . For cooling the cherry pie bars .
If you don't have a pastry blender, just use two knives or your fingertips to cut the butter into the flour. Trust me, it works just fine.
Alright, let's bake up a strategy that's as delicious as these cherry pie bars sound! I am so excited to share this recipe with you.
Crumbly Goodness: Making Cherry Pie Bars the Easy Way
These cherry pie bars are, honestly, my go-to for summer parties. They're so much easier than a whole pie, and everyone loves 'em.
Think of them as individual slices of happiness! These are seriously easy cherry pie bars . You know? Let's get baking!
Prep Steps: Operation Mise en Place!
First things first, let's get organised. This is what I learned from MasterChef. Make sure you've got all your ingredients measured out.
It saves so much time later. Cut that 1 cup (2 sticks/227g) cold butter into cubes and have it ready.
For real! If using fresh cherries, get them pitted (trust me, a cherry pitter is a game changer!). Remember, butter must be cold! Safety reminder: watch those fingers when pitting cherries!
step-by-step: From Mess to Masterpiece
Here's how it all comes together.
- Line your 9x13 inch pan with parchment paper. This prevents the cherry pie bars from sticking.
- Mix 2 cups (250g) flour , 1 cup (2 sticks/227g) cold butter , ½ cup (100g) granulated sugar , ½ cup (60g) brown sugar , ½ teaspoon (2.5ml) salt , and ½ teaspoon (2.5ml) almond extract together until crumbly. I like using my fingertips!
- Press half the mixture into the pan and chill for 30 minutes . So, I learned this from my mum!
- If using fresh cherries, cook them with ¼ cup (50g) sugar , 2 tablespoons (15g) cornstarch , 1 tablespoon (15ml) lemon juice , ½ teaspoon (2.5ml) almond extract , and a pinch of salt until thickened.
- Spread the cherry filling over the chilled crust, then sprinkle with the remaining crumb mixture.
- Bake at 375° F ( 190° C) for 35- 40 minutes , until golden brown.
- Cool completely before cutting.
Pro Tips: Level Up Your Bar Game
Want to make these even better? A touch of almond extract really enhances the cherry flavor. Also, don't overmix the crumb. It should resemble coarse crumbs, not a dough!
Common Mistakes Oh my gosh, I've made these cherry pie bars so many times and have some good pointers. The recipe calls for cold butter.
But I once used softened butter, and it was an absolute disaster. The bars were greasy. It also helps to check that you have enough cherry filling for all the bars.
If you want to make-ahead, you can freeze the baked bars, then thaw before serving. Let cool completely and cut into your easy cherry pie bars ! They are the perfect summer dessert recipes .
Okay, let's bake up a strategy that's as delicious as these cherry pie bars sound!
Recipe Notes for the Best Cherry Pie Bars Ever!
Alright, let's dive into some extra bits 'n' bobs that'll make your cherry pie bars absolutely top-notch. These are less about rigid rules and more about making the recipe your own, innit? Think of it as adding your own personal twist, like knowing all the words to Bohemian Rhapsody.
Easy cherry pie bars can be even easier with these tips!
Serving Suggestions: Make 'Em Look Swish!
Honestly, presentation matters! A simple dusting of icing sugar on top of these cherry pie bars makes them look proper fancy.
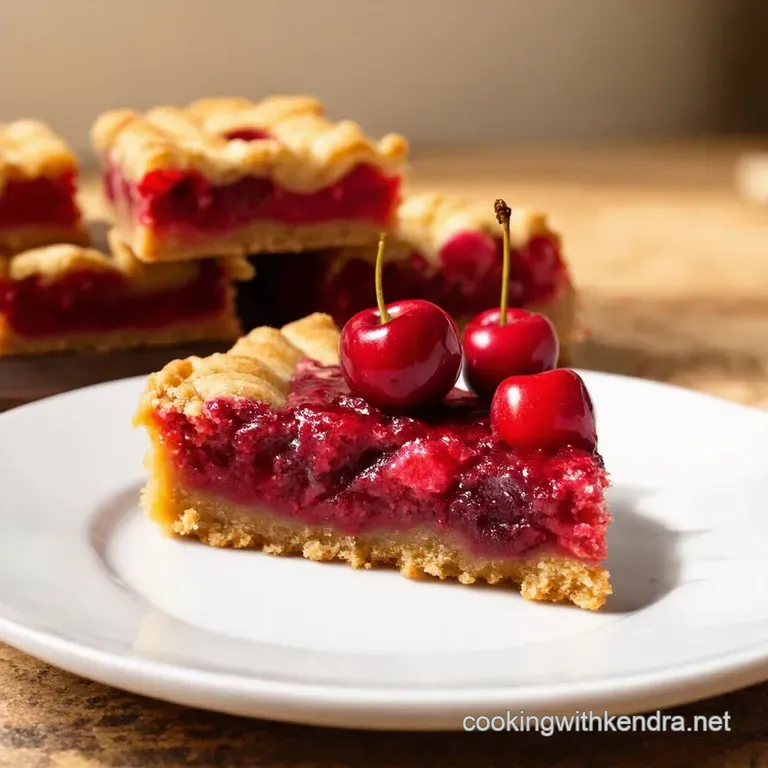
I reckon cutting them into neat little squares and arranging them on a plate makes them look extra inviting. Serve them warm with a scoop of vanilla ice cream, or a dollop of freshly whipped cream - bloody lovely!
For a bit of a twist, try pairing them with a crisp glass of iced tea or lemonade . On a cold day, a cup of warm milk can also make them so comforting.
Storage Tips: Keep 'Em Fresh!
Pop any leftover cherry pie bars into an airtight container. They'll happily sit in the fridge for up to 3 days.
Honestly, they never last that long in my house! If you want to freeze them, wrap them individually in cling film then pop them into a freezer bag.
They'll keep for up to 2 months. Defrost them overnight in the fridge before enjoying.
Reheating is easy. A quick zap in the microwave for a few seconds does the trick, or you can warm them gently in the oven. Warning: The filling might be hot !
Variations: Put Your Spin on It!
Fancy a change? How about swapping some of the cherries for other berries? Blueberries or raspberries would be lush. For a little dietary adaptation , you could use a gluten-free flour blend to make these suitable for those with allergies.
A gluten-free flour does the trick!
You could also add a handful of chopped pecans or walnuts to the crumb topping for a bit of extra crunch.
Or, if you are feeling adventurous, try using other stone fruits like peaches or plums when cherries are not in season.
Remember to adjust the sugar level according to the fruit's sweetness.
Nutrition Basics: Not Just a Treat!
Okay, these are cherry pie bars , so let's not pretend they're health food. But they're made with real fruit, which is a win! They do contain fibre and some vitamins from the cherries.
However, they are also relatively high in sugar and fats. It's all about moderation, innit? A little slice of happiness now and then won't hurt.
The perfect Summer dessert recipes !
So go on, give these cherry pie bars a go! They are simple to make and perfect for sharing. Get creative, have fun, and enjoy the process. You've got this!

Frequently Asked Questions
Can I use canned cherry pie filling for these cherry pie bars? Is it like cheating?
Absolutely! Using canned cherry pie filling is a perfectly acceptable shortcut, especially when you're short on time or fresh cherries aren't in season. Think of it as using a ready-made stock instead of making your own still delicious, just a bit quicker. It's all about what works for you, darling!
How do I stop my cherry pie bars from being soggy? Nobody wants a soggy bottom!
A soggy bottom is a baker's worst nightmare! To avoid it, make sure your crumb base is pressed firmly into the pan and chilled well before adding the cherry filling. Also, don't overfill the bars too much moisture from the filling can lead to sogginess.
Finally, let the bars cool completely before cutting this allows the filling to set properly.
Can I freeze cherry pie bars? I need to prep ahead for a bake sale!
Yes, you can definitely freeze these cherry pie bars! Let them cool completely, then cut them into squares. Wrap each square individually in plastic wrap, then place them in a freezer safe container or bag. They'll keep well for up to 2-3 months. When ready to serve, thaw them in the refrigerator overnight.
What other fruits can I use instead of cherries in these pie bars? I fancy a change!
Feel free to get creative with your fillings! Blueberries, raspberries, blackberries, or even a mix of berries would work beautifully in these pie bars. You can also try using apples or peaches for a different twist. Just adjust the sugar in the filling to taste, depending on the sweetness of the fruit you choose.
Consider stone fruits, such as plums, apricots or peaches.
How can I make these cherry pie bars gluten-free?
Making these bars gluten-free is easier than you might think! Simply substitute the all-purpose flour with a good quality gluten-free all-purpose flour blend. Make sure the blend contains xanthan gum or add it separately, as it helps bind the ingredients together and gives the crust a better texture.
Always check all other ingredients to make sure they are gluten-free.
How do I store leftover cherry pie bars to keep them fresh?
To keep your cherry pie bars fresh and delicious, store them in an airtight container at room temperature. They will usually keep for up to 3-4 days this way. If you live in a warm climate, you might want to store them in the refrigerator to prevent them from spoiling.
Just bring them to room temperature before serving for the best flavor and texture!
Cherry Pie Bars A Slice Of Summer Sunshine

Ingredients:
Instructions:
Nutrition Facts:
| Calories | 320 calories |
|---|---|
| Fat | 18g |
| Fiber | 2g |
