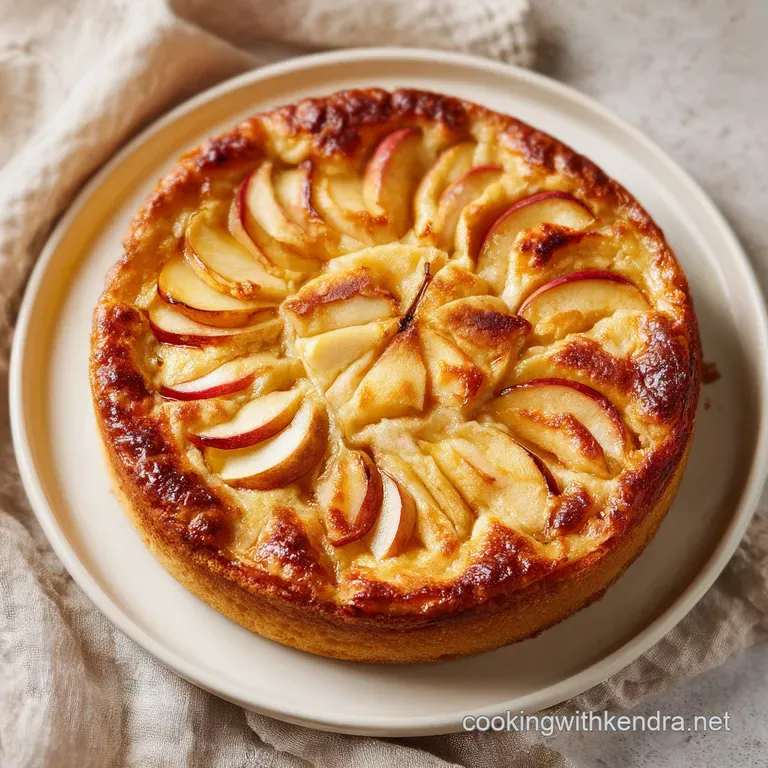
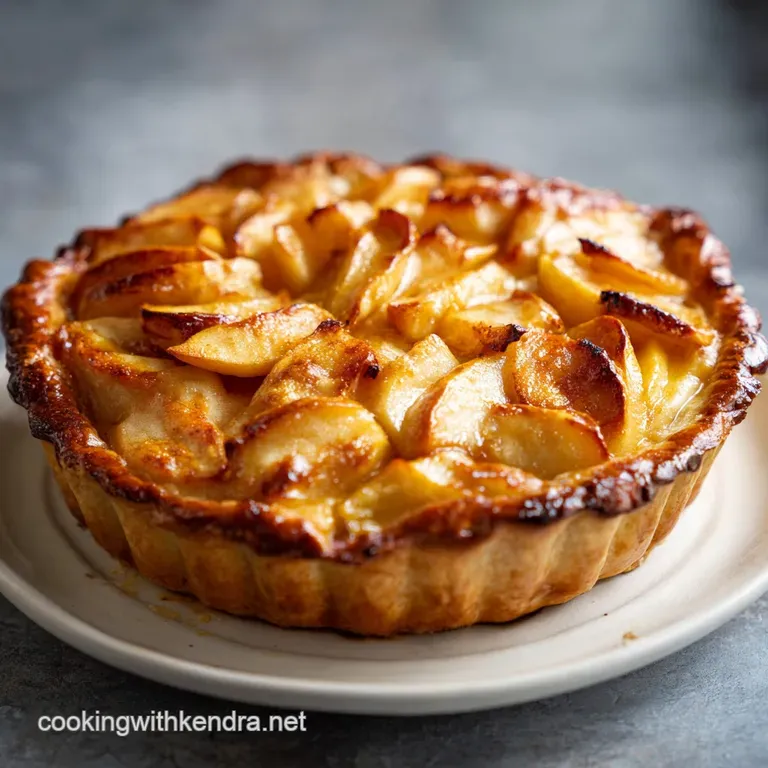
Classic Apples for Pie Recipe
- Time: Active 45 minutes, Passive 50 minutes, Total 1 hours 35 mins
- Flavor/Texture Hook: Flaky crust with a syrupy, cinnamon spiced center
- Perfect for: Holiday gatherings or a cozy Sunday family dinner
- Mastering the Best Apples for Pie Recipe
- Achieving the Perfect Fruit Texture
- Essential Recipe Specifications
- Selecting the Finest Pie Ingredients
- Tools for a Flawless Bake
- Step-By-Step Baking Instructions
- Fixing Common Baking Problems
- Creative Filling Variations
- Storing Your Leftover Slices
- Serving Suggestions and Pairings
- Recipe FAQs
- 📝 Recipe Card
Mastering the Best Apples for Pie Recipe
The smell of a warm kitchen is basically a hug you can taste. I still remember the first time I tried to make a pie from scratch back in my early twenties. I was so excited, but I made the rookie mistake of using whatever apples were on sale.
Halfway through baking, I looked through the oven glass and saw a literal lake of juice bubbling over the sides, smoking up the house. When I finally cut into it, the top crust was floating like a raft over a sea of mush.
It was a disaster, but it taught me that the secret isn't just in the crust it is entirely about how you handle the fruit.
We are going for that specific contrast: a shatter crisp crust against fruit that has softened but still holds its shape when you bite into it. You want a filling that doesn't run away across the plate when you serve it. I have spent years testing which varieties hold up to the heat and which ones just quit.
This recipe is the culmination of all those soggy bottoms and burnt sugar smells I had to endure to get it right. Trust me, once you see how these slices turn into a velvety, spiced gold, you will never go back to the canned stuff.
Right then, let's talk about why we are doing things a certain way. We aren't just tossing fruit with sugar and hoping for the best. We are using a bit of kitchen science to make sure the physics of the pie work in our favor. This method ensures the apples release their juices early so they can be thickened into a glossy syrup that coats every single wedge. If you want to make sure your fruit stays vibrant and beautiful before it even hits the dough, check out my Applesolutely Fresh How recipe for some quick prep tricks.
Achieving the Perfect Fruit Texture
- Pectin Stability: Granny Smith apples are high in pectin and acid, which keeps the cellular structure firm even after 50 minutes of intense heat.
- Starch Gelatinization: The cornstarch waits until it hits 175°F (80°C) to hydrate, binding the apple juices into a thick, pourable glaze rather than a watery mess.
- Hygroscopic Action: Sugar draws out the internal moisture of the fruit through osmosis before baking, preventing the fruit from shrinking too much inside the crust.
- Enzymatic Prevention: The lemon juice lowers the pH on the surface of the fruit, stopping the polyphenol oxidase from turning your beautiful slices brown.
| Cooking Method | Time | Resulting Texture | Best For |
|---|---|---|---|
| Raw Toss | 50 mins | Firm, distinct slices | Classic texture |
| Pre-Sauté | 65 mins | Soft, jammy, concentrated | Deep dish pies |
| Macerated | 90 mins | Silky, stable, no gap | Preventing soggy bottoms |
Using the maceration method - letting the sugar sit on the fruit for a bit - is the real "aha!" moment for many bakers. It allows the apples to settle, which means you can pack more fruit into the pie shell without worrying about a massive air pocket forming at the top. This filling is the heart of what makes My Apple Pie recipe a family legend every Thanksgiving.
Essential Recipe Specifications
When you are deep in the flour, you need the numbers to be clear. This recipe is designed for a standard 9 inch (23 cm) deep dish pie plate. If you use a shallow tin, you might have some leftover filling, which, honestly, is great over oatmeal the next morning.
| Component | Metric Quantity | Role in the Dish |
|---|---|---|
| Mixed Apples | 1.8 kg (4 lbs) | The structural foundation and main flavor |
| Granulated Sugar | 150g (3/4 cup) | Sweetens and draws out fruit juices |
| Unsalted Butter | 28g (2 tbsp) | Adds a silky mouthfeel and rich finish |
| Cornstarch | 16g (2 tbsp) | The primary thickening agent for the syrup |
The combination of granulated and brown sugar is non negotiable for me. The white sugar provides the clean sweetness, while the brown sugar brings that molasses heavy Southern comfort vibe that makes the kitchen smell like heaven.
Selecting the Finest Pie Ingredients
- 4 lbs (1.8 kg) Apples: I use a 50/50 split of Granny Smith and Pink Lady. The Granny Smiths provide the tart bite, while the Pink Ladies bring a floral, honey like sweetness.
- 1 tbsp Lemon Juice: This provides the necessary acidity to balance the sugar and keep the fruit bright.
- 3/4 cup (150g) Granulated Sugar: Essential for the syrup base.
- 1/4 cup (50g) Light Brown Sugar: Adds depth and a hint of caramel.
- 2 tbsp Cornstarch: This is your insurance policy against a runny pie.
- 1 tsp Ground Cinnamon: The classic warm spice.
- 1/4 tsp Ground Nutmeg: Adds a woodsy, complex note.
- 1/8 tsp Ground Cloves: Just a pinch for that "what is that secret ingredient?" flavor.
- 2 tbsp Unsalted Butter: Cubed and dotted over the fruit to create a velvety sauce.
- 1 double pie crust: Chilled is mandatory; we want those fat pockets to stay solid until they hit the oven.
- 1 egg & 1 tbsp water: For the egg wash that creates a glossy, golden sheen.
- 1 tbsp Coarse Sparkling Sugar: For that professional, crunch topped finish.
| Original Ingredient | Substitute | Why It Works |
|---|---|---|
| Cornstarch | Tapioca Starch | Provides a clear, glossy set. Note: Use 3 tbsp instead of 2. |
| Pink Lady Apples | Honeycrisp | Similar sweetness and firm texture. Note: Slightly more juice, may need more starch. |
| Light Brown Sugar | Dark Brown Sugar | Deeper molasses flavor. Note: Will result in a darker, richer filling. |
If you are looking for a variation that feels a bit more like a crumble, you can swap the top crust for the topping found in Grandmas Apple Streusel recipe. It adds a buttery, brown sugar crunch that is hard to beat.
Tools for a Flawless Bake
You don't need a professional kitchen, but a few specific tools make this process much smoother. First, a heavy bottomed vegetable peeler is a lifesaver when you are going through 1.8 kg of fruit. I prefer the Y shaped ones because they give you better leverage.
A sharp chef's knife is crucial for getting those 6 mm (1/4 inch) slices. If they are too thick, they won't soften in time; too thin, and they turn into applesauce. I also highly recommend a glass pie plate. Why? Because you can actually see the bottom crust.
You want to see that the pastry has turned a dark, golden brown before you pull it out. If it looks pale through the glass, it's going to be doughy. Finally, a rimmed baking sheet is essential to catch any drips because cleaning burnt sugar off the floor of your oven is a task I wouldn't wish on my worst enemy.
step-by-step Baking Instructions
- Prep the fruit. Peel, core, and slice your 1.8 kg of apples into 6 mm wedges. Note: Consistent thickness ensures even cooking.
- Macerate the slices. Toss the apples with 1 tbsp lemon juice, 150g granulated sugar, and 50g brown sugar. Wait 30 mins until the fruit is sitting in a pool of its own syrup.
- Thicken the mix. Stir in the 16g cornstarch, 1 tsp cinnamon, 1/4 tsp nutmeg, and 1/8 tsp cloves. Coat every slice until the white powder disappears.
- Prepare the base. Roll out your bottom crust and fit it into the 9 inch plate. Note: Don't stretch the dough, or it will shrink back during baking.
- Fill the shell. Pile the apples into the crust, mounding them slightly in the center. Pour the leftover juices over the top.
- Add the fat. Dot the 28g of butter cubes evenly over the apple pile. Note: This creates the rich sauce inside the pie.
- Seal the pie. Place the top crust over the fruit, crimp the edges, and cut 4-5 vents. Allow steam to escape so the crust stays crisp.
- Wash and sugar. Whisk the egg and water, brush it over the entire top, and sprinkle heavily with the sparkling sugar.
- Bake the pie. Place on a baking sheet at 200°C (400°F) for 20 mins, then drop the temp to 180°C (350°F) for 30-35 mins. Bake until juices sizzle and the crust is deep gold.
- Cool completely. Rest the pie for at least 3 hours. Note: This is the hardest part, but the filling needs time to set.
Fixing Common Baking Problems
The Soggy Bottom Blues
Nothing ruins a pie faster than a wet, doughy bottom crust. This usually happens because the oven isn't hot enough or the fruit released too much moisture too quickly. If the heat doesn't hit that bottom plate immediately, the dough just soaks up the apple juice like a sponge.
| Problem | Root Cause | Solution |
|---|---|---|
| Raw Bottom Crust | Low heat at the base | Bake on the lowest oven rack or use a preheated pizza stone. |
| Runny Filling | Under baking | Bake until you see thick, slow bubbles popping through the vents. |
| Burnt Edges | High heat exposure | Wrap the crust edges in foil after the first 20 minutes of baking. |
Common Mistakes Checklist
- ✓ Pat the apple slices dry if they seem excessively wet after macerating (but keep the syrup!).
- ✓ Preheat your oven for at least 20 minutes before the pie goes in.
- ✓ Do not skip the egg wash; it's the difference between a dull crust and a professional one.
- ✓ Avoid using soft apples like Red Delicious; they will disintegrate into mush.
- ✓ Always place a tray under the pie to prevent smoke from sugar drips.
Apples Turning to Mush
If your slices lose their shape entirely, you likely used a "soft" variety or sliced them too thin. Varieties like Gala or McIntosh are delicious for eating raw but they collapse under high heat.
Stick to the firmer varieties mentioned above, and make sure you aren't over mixing the fruit after adding the sugar, as this can break the delicate edges of the slices.
Creative Filling Variations
The Salted Caramel Twist
If you want to take this to a decadent place, replace the brown sugar with a 1/2 cup of homemade salted caramel sauce tossed directly with the apples. It creates a gooey, sticky interior that is absolutely sinful. Just be sure to add an extra teaspoon of cornstarch to account for the extra liquid in the caramel.
Dietary Swaps
For those who need a gluten-free option, you can use a 1 to-1 gluten-free flour blend for the crust. The filling is naturally gluten-free if you use cornstarch! If you need to avoid dairy, swap the butter dots for a high-quality vegan butter stick or even a bit of refined coconut oil.
The flavor will be slightly more tropical but still very satisfying.
Storing Your Leftover Slices
Apple pie is one of those rare things that might actually taste better the next day. You can keep it on the counter, covered loosely with foil, for about 2 days. If you want it to last longer, pop it in the fridge for up to 5 days.
Just know that the crust will lose some of its "shatter" in the refrigerator due to the moisture. To bring it back to life, heat a slice in a 150°C (300°F) oven for about 10 minutes rather than using the microwave, which will make it rubbery.
For freezing, you can actually freeze the entire pie unbaked! Wrap it tightly in three layers of plastic wrap and then foil. It will stay good for 3 months. When you're ready to eat, bake it straight from frozen just add about 15-20 minutes to the total bake time.
If you have leftover apple peels, don't throw them out! Toss them with a little sugar and cinnamon and bake them at 150°C until they are crispy apple chips. It's a zero waste snack that's weirdly addictive.
Serving Suggestions and Pairings
The Classic A La Mode
Is it even apple pie if there isn't a melting scoop of vanilla bean ice cream on top? The cold, creamy dairy cutting through the warm, spiced fruit is the ultimate flavor experience.
If you want to get fancy, a dollop of bourbon infused whipped cream adds a grown up touch that complements the nutmeg and cloves beautifully.
Sharp Cheddar Contrast
This is an old school Southern and New England tradition that sounds strange until you try it. Serve a slice of extra sharp white cheddar cheese alongside the warm pie. The salty, savory tang of the cheese vibrates against the sweet apples in a way that is totally addictive. It's the same principle as a salted caramel that sweet and salty balance is a total winner. For a different fruit forward dessert, you might also enjoy How to Make recipe which uses a similar spice profile but in a dense, moist cake form.

Recipe FAQs
What type of apples are best for making apple pies?
A mix of tart and sweet, firm varieties. Use a 50/50 blend like Granny Smith (for tartness and pectin) and Honeycrisp or Pink Lady (for sweetness and structure). This combination ensures your filling has depth and doesn't turn to soup.
Should I cook apples before putting them in a pie?
No, pre-cooking is generally unnecessary if sliced correctly. Macerating the apples with sugar draws out moisture, which you then thicken with starch before baking. If you enjoyed mastering that moisture control here, apply the same skill to balancing liquids in our Macaroni and Cheese recipe.
Can I use any apples to make apple pie?
No, avoid soft varieties like Red Delicious. Soft apples break down too quickly under heat, leading to a mushy filling and potential gaps between the crust and the fruit.
What are the top 5 apples for baking?
Granny Smith, Honeycrisp, Pink Lady, Braeburn, and Jonagold. These varieties maintain their shape well, offer a good balance of acid and sugar, and resist turning soft during the long bake time required for a flaky crust.
How do I prevent my apple pie filling from being runny?
Macerate the apples first to release initial liquid, then use a starch thickener. Toss apples with sugar and let them sit for 30 minutes; drain off the excess liquid, mix that liquid with cornstarch, and then toss it back with the apples before filling the shell.
Is it true that I must use a lattice top to vent steam?
No, this is a common misconception. Steam must escape, but you can use simple slits or a decorative cutout top instead of a full lattice. Ensure you make at least five deep, clear cuts in the top crust to prevent it from exploding or becoming soggy.
How long should the pie cool before slicing?
Cool for a minimum of three hours at room temperature. This resting period is non-negotiable because it allows the starch in the filling to fully hydrate and set into a glossy sauce. Slicing too soon releases all the trapped liquid.
Classic Apples For Pie Recipe

Ingredients:
Instructions:
Nutrition Facts:
| Calories | 478 calories |
|---|---|
| Protein | 4.1 g |
| Fat | 19.5 g |
| Carbs | 74.8 g |
| Fiber | 5.2 g |
| Sugar | 43.5 g |
| Sodium | 345 mg |
