The Quintessential Crisscross Chewy Classic Peanut Butter Cookies
- The Definitive Guide to Achieving That Perfect Peanut Butter Cookie Texture
- Gathering the Essential Building Blocks for Nutty Perfection
- A Closer Look at Component Quality: Ingredient Spotlight
- Step-by-Step Mastery: From Creaming to Cooling Rack
- Techniques That Guarantee Uniformity and Perfect Spreading
- Troubleshooting Common Baking Hurdles and Pro-Level Enhancements
- Storage Solutions to Keep Your Treats Freshly Baked for Longer
- Recipe FAQs
- 📝 Recipe Card
The Definitive Guide to Achieving That Perfect Peanut Butter Cookie Texture
Right then, pull up a stool! Nothing beats a truly cracking batch of Peanut Butter Cookies. They are the ultimate comfort food a proper hug in biscuit form. We're going to nail that perfect balance: delightfully soft and chewy on the inside, with just that right amount of classic criss cross fork marks on top.
Forget those dry, crumbly imitations; this recipe yields the benchmark peanut butter cookie. Rich with nutty, salty sweet flavour and boasting that signature satisfying chew, these biscuits harken back to the simple, glorious baking of childhood kitchens across the pond.
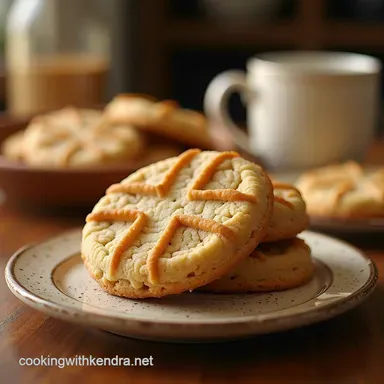
They are quick to assemble and universally adored perfect for dunking in a cuppa or scoffing down straight from the cooling rack. This is the blueprint for the definitive, foolproof classic American Peanut Butter Cookie.
Unlocking the Secret to Incredibly Soft Centres and Crisp Edges
Achieving textural perfection in these treats hinges on a few crucial ingredient choices. We aim for the coveted Peanut Butter Cookies Chewy quality, which requires moisture. That moisture comes predominantly from the sugar balance.
By incorporating both granulated sugar for spread and structure, and light brown sugar which contains molasses we ensure the centre remains tender and moist long after baking. On top of that,, the fat content must be managed carefully.
The recipe relies on creaming softened butter with the peanut butter to incorporate air, which prevents a dense final product.
Our Foolproof Guarantee: The Most Reliable Peanut Butter Cookie Method
This approach falls squarely under the Easy Peanut Butter Cookies Recipe category. The process utilizes the standard creaming method, which is incredibly forgiving, provided you respect the mixing times.
We actively discourage shortcuts that bypass the chilling stage, as this single step guarantees the cookies hold their shape beautifully. If you follow the measurements precisely, you are guaranteed a batch of the Best Peanut Butter Cookies imaginable.
We’ve also made careful considerations for those seeking Peanut Butter Cookies No Eggs options later, but for this classic iteration, the egg plays a vital binding and moistening role.
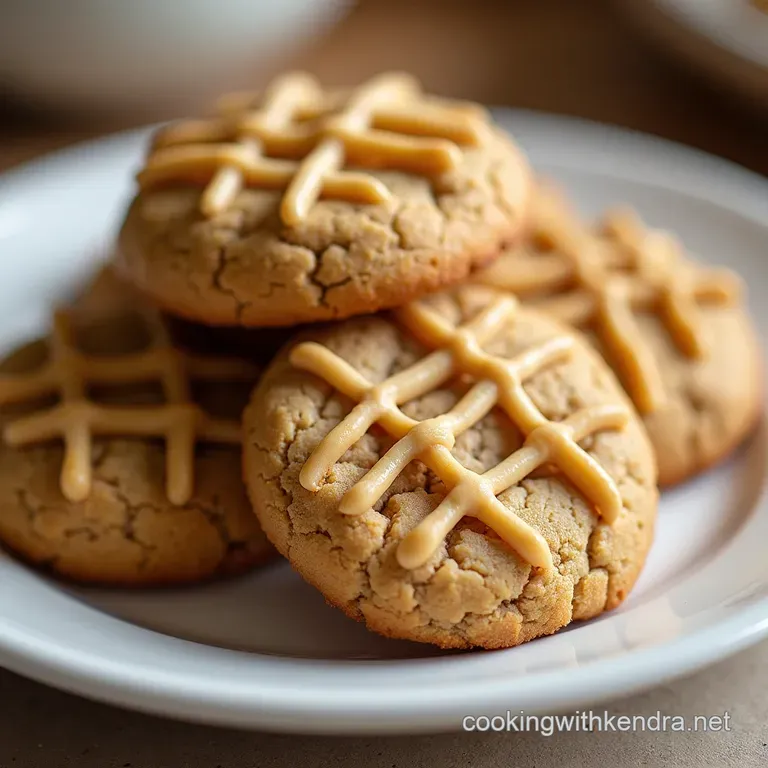
Understanding the Magic Behind the Signature Criss Cross Imprint
That iconic cross hatch pattern isn't just for aesthetics; it serves a very practical purpose in crafting superior Peanut Butter Cookies . Because peanut butter dough is quite dense and naturally resists spreading during baking, pressing it down before it enters the oven ensures a flatter, more evenly cooked cookie.
The fork press achieves two things simultaneously: it gently compresses the centre to encourage spreading around the edges, and it breaks the surface tension, allowing heat to penetrate more evenly for that desired soft interior structure.
Gathering the Essential Building Blocks for Nutty Perfection
To embark on this baking journey, you'll need a curated set of ingredients that work in harmony. This isn't a five minute wonder using just three ingredients, although those versions exist; rather, this is the superior, full flavoured experience.
You will be aiming to yield approximately 20 to 24 medium sized biscuits from this blueprint. The total time commitment is surprisingly low, involving about 15 minutes of active preparation, followed by a necessary 30-minute chill period, and only 10 to 12 minutes of oven time per sheet.
A Closer Look at Component Quality: Ingredient Spotlight
The quality of your components dramatically affects the final flavour profile of your Peanut Butter Cookies . While the ingredient list is straightforward, every element contributes significantly to the final result.
Precise Measurements for Your Batch of Delicious Peanut Butter Cookies
For a batch that delivers on promise, precision matters. You will need 1 ½ cups (180 g) of all-purpose flour, balanced by 1 teaspoon of baking soda and ½ teaspoon of fine sea salt.
The sweeteners are critical: ½ cup (100 g) of bright, sparkling granulated sugar provides structure, while an equal measure of packed light brown sugar brings that necessary depth and chewiness. Finally, one large room temperature egg and one teaspoon of pure vanilla extract round out the liquid components.
Selecting the Optimal Peanut Butter Consistency for Baking Success
This is perhaps the most crucial non-flour tip for successful Peanut Butter Cookies Recipe execution. You must use standard, emulsified, shelf stable commercial peanut butter (the kind that doesn't require stirring).
Natural peanut butter, where the oil separates, contains too much free flowing fat, which will cause your cookies to spread uncontrollably, leading to greasy, flat results. Stick to the conventional, creamy variety to ensure the dough holds its structure perfectly.
Necessary Utensils: Tools to Master This Cookie Craft
While this is an Easy bake, the right tools make the process seamless. An electric mixer, whether a stand mixer or a reliable hand held unit, is highly recommended for effectively creaming the butter and sugars.
You will need standard baking sheets, ideally lined with parchment paper or silicone mats for effortless release. Crucially, have a sturdy fork ready for applying the signature criss cross pattern a tool simple in concept but essential in execution.
Related Recipes Worth Trying
- The Ultimate Creamy Tortellini Minestrone with Toasted Sage Butter — This Creamy Tortellini Minestrone Soup Recipe is pure comfort We elevate classic veg soup with Parmesan cream and a stunning sage butter finish Easy...
- Best Homemade Creamy Butterbeer Recipe for Movie Nights — Forget the theme park queues This easy homemade Butterbeer recipe delivers rich butterscotch flavour and a pillowy foam topping Make the ultimate Harry...
- Nannys Buttery Raspberry Almond Thumbprint Cookies Recipe — Master the ultimate British teatime treat These buttery almond thumbprint cookies burst with tart raspberry jam Easy recipe for perfect biscuits every time
step-by-step Mastery: From Creaming to Cooling Rack

The transformation from simple pantry staples to warm, nutty delights follows a clear, linear path. Start by preheating your oven to a reliable 375° F ( 190° C) and preparing your baking surfaces.
In one bowl, whisk together your dry components: the flour, baking soda, and salt. In the mixer bowl, begin the foundation by beating the softened butter, peanut butter, and both sugars until the mixture becomes noticeably lighter in colour and fluffier in texture this aerates the dough, ensuring a lighter lift.
Next, incorporate the egg and vanilla until they are just incorporated, scraping down the sides to ensure everything is homogenous. Finally, introduce the dry mix gradually, mixing only until the last streaks of flour disappear. Overmixing at this stage develops gluten unnecessarily, leading to tougher cookies.
Techniques That Guarantee Uniformity and Perfect Spreading
Once the dough is formed, how you handle it before it hits the oven dictates the final cookie architecture. Remember, uniform size ensures uniform baking times across the entire sheet.
The Proper Method for Creaming Butter and Sugars
Creaming is not just about mixing; it’s about aeration. When beating the butter and sugars together, you are forcing microscopic air bubbles into the fat structure. This trapped air expands in the heat of the oven, giving lift and preventing the cookies from becoming overly dense pucks.
Beat this mixture for a good two to three minutes until it visibly lightens in colour and gains volume, creating that essential base for your Peanut Butter Cookies .
Executing the Iconic Fork Press Without Deflating the Dough Balls
After chilling the dough balls (a step vital for managing spread), place them on your prepared sheets, spacing them about two inches apart. To create the iconic look, take a clean fork and gently press down on the top of a dough ball to flatten it slightly.
Then, rotate the fork 90 degrees and press again to form the cross. This action is gentle; you are not trying to squash the dough flat against the sheet, but rather to initiate the spreading process evenly.
Baking Dynamics: Temperature Settings for Maximum Chewiness
Baking these Peanut Butter Cookies Chewy requires a slightly counter intuitive approach to doneness. Maintain the oven at 375° F ( 190° C).
The key is to remove the cookies when the edges are a delicate golden brown, but the very centre still looks slightly soft and underbaked. They must look just done.
As they rest on the hot baking sheet for the initial five minutes, residual heat will complete the baking process gently, setting the centre just enough to achieve that perfect gooey interior.
Troubleshooting Common Baking Hurdles and Pro-Level Enhancements
Even with the most reliable Peanut Butter Cookies Recipe , hiccups can occur. If your cookies spread too thin, it almost always means the dough wasn't chilled long enough, or you used natural peanut butter.
If this happens, remove the sheet from the oven and, using the back of a small spoon, gently nudge the edges back toward the centre before the cookies firm up entirely. For pro-level enhancements, consider folding in ¾ cup of semi sweet chocolate chips to create phenomenal Peanut Butter Cookies with Chocolate Chips , or sprinkle a touch of flaky sea salt over the top just after the fork press.
Storage Solutions to Keep Your Treats Freshly Baked for Longer
These treats are best enjoyed within the first 48 hours, but proper storage extends their life. Once completely cooled on a wire rack, store them in an airtight container at room temperature for up to a week. Avoid storing them in the refrigerator, as this can actually dry them out prematurely.
For longer preservation, these freeze exceptionally well; stack them between layers of parchment paper in a freezer safe bag for up to three months.
When to Experiment: Delicious Twists on the Traditional Recipe
While the classic flavour profile is king, experimentation keeps baking fun. If you are looking for a richer texture, substitute 2 tablespoons of the all-purpose flour with almond flour. For a surprisingly addictive flavour punch, try adding that pinch of flaky Maldon sea salt right before baking.
Should you need a similar, yet entirely nut-free option, sunflower seed butter is an excellent stand-in for achieving Peanut Butter Cookies No Eggs (though for that variation, you might want to add an extra half tablespoon of milk to adjust consistency).
The Science of Chilling: Does Dough Rest Actually Improve These Cookies?
Absolutely, yes. The 30-minute minimum chilling time is essential. Beyond preventing excessive spread, chilling allows the flour to fully hydrate. This means the flour absorbs moisture from the liquid ingredients, resulting in a less gritty mouthfeel and a better overall texture contributing directly to that satisfying Peanut Butter Cookies Chewy experience.
While a slightly longer rest is sometimes beneficial, 30 minutes is the minimum requirement to significantly improve structure.
Nutritional Snapshot: Understanding What's in Your Favourite Treat
As a delightful indulgence, these cookies offer a caloric treat rooted primarily in fats and sugars, balanced by a decent protein contribution from the peanut butter. On average, you can estimate each cookie to contain roughly 190 210 calories.
They provide about 4 grams of protein, around 11 grams of fat, and roughly 24 grams of carbohydrates, with about 13 grams of sugar derived from the brown and white sugars used. They are designed for enjoyment, not dieting, making them perfect alongside a glass of whole milk.

Recipe FAQs
Why do my Peanut Butter Cookies keep spreading out like pancakes in the oven?
Ah, the dreaded 'cookie puddle'! This usually happens for two reasons: either your oven temperature is running too low, or you skipped chilling the dough. Make sure your oven is properly preheated to 375°F (190°C) and don't skimp on that mandatory 30-minute chill time it firms up the butter, which is key to preventing flat biscuits.
Can I use natural, runny peanut butter instead of the standard creamy kind?
I'd strongly advise against it if you want that classic texture. Natural, stir and-scrape peanut butter contains too much oil that separates during mixing, leading to greasy, thin cookies that don't hold their shape well. Stick to the standard, emulsified brands like Jif or Skippy for the best results here.
How do I store leftover Peanut Butter Cookies so they stay chewy?
The secret to keeping that satisfying chew is managing air circulation. Once completely cool, store them in an airtight container at room temperature, but add half a slice of white bread to the container the moisture from the bread transfers to the cookies, keeping them soft.
They should keep well for about five days.
Can I make these Peanut Butter Cookies vegan or gluten-free?
Absolutely! To make them vegan, swap the butter for a firm vegan butter block and use a flax egg substitute (1 tablespoon ground flaxseed mixed with 3 tablespoons water, set for 5 minutes).
For gluten-free, you can usually swap the flour 1:1 with a good quality 'cup-for-cup' gluten-free blend, though they might be slightly more delicate.
I’ve done the criss cross, but what's the best way to get that perfect golden edge without drying out the middle?
It’s all about watching them like a hawk during the last few minutes! You want to pull the tray out when the edges look golden brown, but the centres still look slightly soft and puffy almost underdone.
They continue to set up beautifully as they rest on the hot baking sheet for those vital five minutes post oven.
Classic Chewy Peanut Butter Cookies
Ingredients:
Instructions:
Nutrition Facts:
| Calories | 123 kcal |
|---|---|
| Protein | 2.1 g |
| Fat | 6.0 g |
| Carbs | 14.5 g |
| Fiber | 0.4 g |
| Sodium | 1285 mg |
