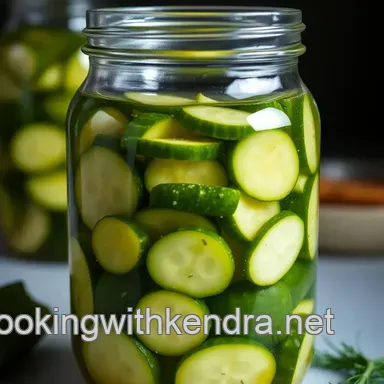
Classic Dill Pickles: Crunchy, Zesty, and Full of Flavor!
- Look into into the Crunchy World of Pickles
- A Quick Overview of Pickling
- The Benefits of Homemade Pickles
- Essential Ingredients Guide
- Look into Into the World of Professional Cooking: Mastering the Art of Pickling
- Additional Recipe Information: look into Deeper into the Pickle World!
- Frequently Asked Questions
- 📝 Recipe Card
Look into into the Crunchy World of Pickles
You ever bite into a sandwich and just wish it had that extra zing? the kind of crunch that makes your taste buds do a happy dance? well, let me tell you homemade pickles can be that secret ingredient.
Honestly, the first time i made pickles , i didn’t realize what i was missing! i was helping my grandma in her kitchen over summer break.
She pulled out a bunch of cucumbers from her garden, and in no time, i learned how to make pickles the old-fashioned way.
From that day on, i knew i was hooked on the idea of cucumber preservation !
Every time i pull out a jar from the fridge, i can’t help but remember those sunny days filled with laughter and the smell of fresh dill wafting through the air.
Pickles aren’t just some crunchy snack; they’re a connection to tradition and a whole lot of fun in the kitchen.
Today, i’m here to spill the beans (or should i say cucumbers?) on a homemade dill pickle recipe that’s simple, quick, and oh-so-flavorful.
A Quick Overview of Pickling
So let’s get into it! this recipe comes from a long line of tradition where families preserved their garden harvest ideas, making sure they never wasted a veggie (and you know grandma hates waste!).
Although people have been pickling for centuries, today, these savory additions are more popular than ever. whether your picnic food ideas include sandwiches or charcuterie pairings, a jar of homemade pickles will always stand out.
They’re easy to whip up on a lazy sunday afternoon and yield about 4 cups of pure crunchy goodness.
Time and Cost
Let’s not beat around the bush. the effort here is minimal. you’ll spend about 15 minutes prepping, and, of course, you’ll need to let them chill for about 24 hours in the fridge.
And let’s talk dollars this whole recipe costs you maybe ten bucks, and you get a solid stash of quick fridge pickles .
The Benefits of Homemade Pickles
Now, why would you want to take on how to pickle cucumbers at home? Well, let me hit you with a few benefits.
Health Benefits: Yes, you heard me right. These babies are low-cal, packed with fiber, and can even aid digestion, thanks to the fermentation process! Hello, probiotic goodness!
Unique flavors: you can get creative! want tangy flavored pickles with a hot kick? ditch the boring store-bought ones and throw in some garlic or jalapeños.
Custom pickle flavors can be as unique as you want them to be!
Perfect for special occasions: whether it’s your fourth of july barbecue, a potluck, or just a random tuesday night, crunchy pickles make perfect vegetarian snacks that brighten any meal.
No one’s going to turn down a zesty bite that brings life to a bland dish!
Simplicity: Simple pickling instructions mean no fuss, no stress. You don’t need fancy equipment; just grab a jar and some pickling spices , and you’re good to go!
So now that we’ve covered the why, are you ready to get your pickle game on? Next up, let’s take a look at what ingredients you’ll need for the best cucumber pickling experience! Get your chopping board ready and let’s dive into the fun part making our very own crunchy, tangy masterpieces!
Essential Ingredients Guide
Oh, the world of flavor awaits! whether you're embarking on a pickling journey with homemade pickles or just looking to spice up your kitchen game, having a solid grasp of essential ingredients can make all the difference.
Let’s dive right in, shall we?
Premium Core Components
First things first let’s talk about premium core components for your pickles. when you’re whipping up something zesty, measurements can be a game changer.
I like to keep a kitchen scale handy for accuracy, so i can nail that vinegar based brine . so, to keep things simple:
- Cucumbers : Look for Kirby or Persian cucumbers —they hold up beautifully and bring that crunch! About 4 medium ones should do it.
- Vinegar : A good vinegar is crucial. Distilled white vinegar is my go-to; it’s sharp and pairs well with the spices.
- Salt & Sugar : You’ll need kosher salt and some sugar for balance, working around ¼ cup of sugar and 3 tablespoons of salt for a classic recipe.
Quality indicators are just as key. fresh cucumbers should be firm with smooth skin. if you find any soft spots, skip ‘em! and when it comes to storage, tightly sealed jars in the fridge can hold your crunchy pickles for up to two months.
Pro tip: the flavors just get better!
Signature Seasoning Blend
Now for the signature seasoning blend . Oh my gosh, the right mix can elevate your pickles from basic to extraordinary! Think about:
- Herbs : Dill is a classic, but don’t shy away from a little crushed garlic cloves or even crushed red pepper flakes if you’re feeling spicy!
- Spices : Experiment with pickling spices —mustard seeds or coriander can jazz things up. Regional varieties can also shift the flavor game. Want to go sweet? Add a little cinnamon!
- Aromatics : The scent of vinegar mixed with spices hits different; it’s like a little hug for your taste buds.
Smart Substitutions
Now, let's chat smart substitutions . Life likes to throw curveballs, right? No worries!
- Common Alternatives : Didn’t get your hands on dill? Fresh parsley can do the trick.
- Dietary Modifications : If you're cutting sugar, you can swap in honey or even skip it in some recipes pay attention to your palate, ya know?
- Emergency Replacements : If you're short on cucumbers, try green beans! Pickled green beans are totally a thing and super tasty.
- Seasonal Options : Summer squash can also dive into that pickling solution if you receive a few too many in your garden haul. Just think of it as the fermentation process getting funky!
Kitchen Equipment Essentials
Lastly, we can’t forget about those trusty kitchen equipment essentials .
- Must Have Tools : A big jar that can seal well, measuring cups, and a knife are at the top of my list. You really don't need much keeping it simple rocks!
- Alternative Equipment Options : If you don’t have a canning jar , any tightly lidded container will do for fridge pickles, like a glass bowl covered with plastic wrap.
- Preparation Tips : Ensure everything is squeaky clean; food safety comes first!
- Storage Solutions : Glass jars are great because they’re non-reactive. Just label ‘em so you know which ones are your quick fridge pickles !
So, whether you’re preparing for a big picnic or just stocking your fridge with snacks, knowing how to make pickles is a fantastic skill.
Trust me, those crunchy delights make everything tastier! i can’t wait to share the simple pickling instructions with you, step by step.
Let’s learn how to bring those cucumbers to life in the next section! 🥒
Look into Into the World of Professional Cooking: Mastering the Art of Pickling
So, you're thinking about getting serious in the kitchen? awesome! today, i want to chat about some professional cooking methods, particularly focusing on how to make pickles.
Trust me; it's simpler than you think, and you'll be dusting off the fancy jars in no time.
Essential Preparation Steps
Okay, first things first: mise en place that fancy french term just means gathering your ingredients and equipment before diving in.
For serious pickling, you’ll need fresh cucumbers, vinegar, and your favorite spices. oh! don’t forget a big ol’ jar. i mean, where else are you going to store those delicious, homemade pickles? prep time is around 15 minutes , so let’s hustle!
Then there's timing management. pickles need patience. most recipes, like our classic dill pickle recipe, require at least 24 hours in the fridge to really soak up the flavors.
So while you’re waiting, why not catch up on some binge watching?
Organization is also key! lay everything out in the order you’ll use it. trust me; you don’t want to be scrambling around for that garlic after you've cut the cucumbers.
And, don't forget about safety considerations wash your hands, tools, and the cucumbers well. no one wants a side of germs with their pickles, am i right?
Step-by-step Process
Now it’s time to get down to the nitty gritty! Here’s how you’ll go about it:
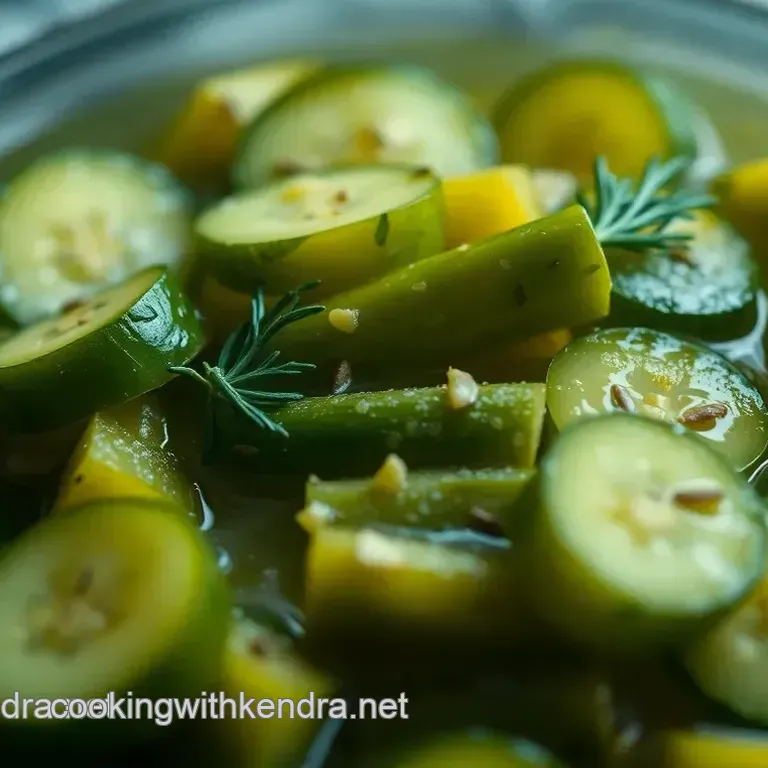
Prep the cucumbers: Wash ‘em good and slice if you prefer spears or rounds. Whole cucumbers make for a fun surprise!
Make the brine: in a bowl, mix 2 cups of distilled white vinegar , 2 cups of water , ¼ cup of granulated sugar , and 3 tablespoons of kosher salt .
Mix until dissolved this is where the magic happens, folks!
Pack your jar: Lay garlic, dill seeds, and those spices down at the bottom. Then, tightly pack the cucumbers. It’s like Tetris, but way tastier.
Add your brine: Pour that beautiful tangy pickle brine over those cucumbers until they’re fully submerged. Get them nice and cozy in there!
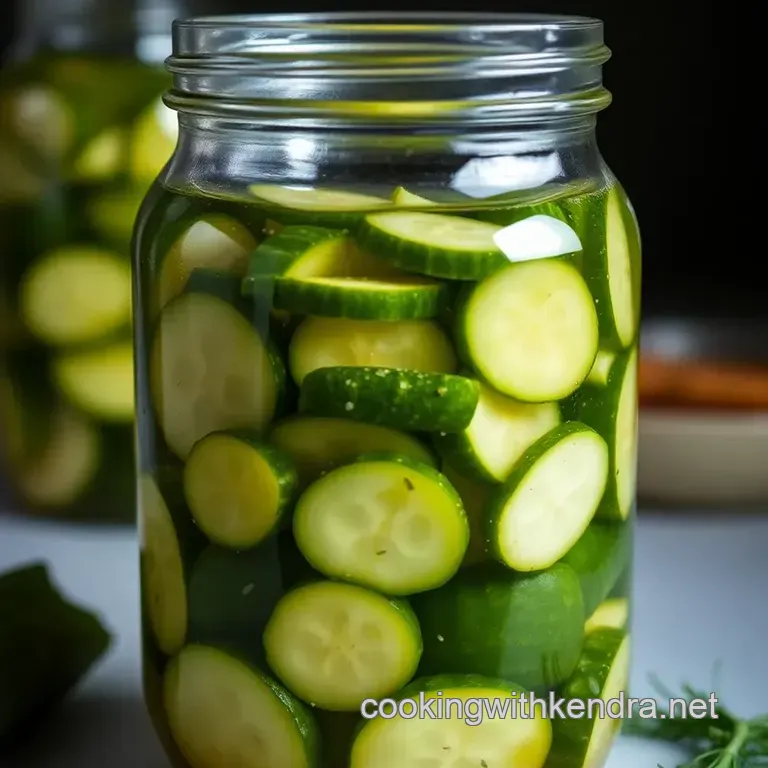
Seal and chill: screw that lid on tight and throw them in the fridge for a minimum of 24 hours .
A little more time means more flavor. ( psst! taste testing after 48 hours will blow your mind! )
Expert Techniques
Now that you’re feeling like a pro, let’s up the ante with some expert techniques. quality is crucial here. aim for the best cucumbers for pickling , like kirby or persian varieties.
They’ll give you that satisfying crunch you crave.
When it comes to timing, the longer the chill, the better. i always say, “great things take time.” if you’ve got a roommate or family nearby, use them as taste testers.
It’ll give you a good reference point for adjustments. if you want to mix it up, i recommend trying flavored pickles.
Think dill with a kick of red pepper!
Troubleshooting tip: If your pickles turn out too salty, dilute your brine with more water next time. No one wants ‘salt lick’ memories when they reach for a crunchy bite.
Success Strategies
Alright, friends, let's talk success strategies for pickling. Common mistakes? Well, not using fresh cucumbers is a biggie. If they're squishy, toss 'em! You want those crisp pickles!
When it comes to quality assurance , always taste before serving. add a little more sugar or spice if the flavor feels off.
And if you're making them ahead of time, they can last up to 2 months in the fridge.
For those of you into summer snacks or picnic food ideas, prepare quick fridge pickles for something tangy and delightful! you can even make a batch of sweet and sour pickles if that's more your vibe.
So, are you ready for that pickling adventure? Who knew that jumping into the world of homemade pickles could be so fun, right? Grab those cucumbers and let’s get to it! In our next section, we'll dive into more additional information you need, so stay tuned!
Additional Recipe Information: look into Deeper into the Pickle World!
So, you’ve decided to take the plunge into the wonderful world of homemade pickles . Isn’t it exciting? Seriously, there's something magical about transforming those fresh cucumbers into zesty, crunchy bites that add that extra zing to your meals! But hey, let’s break it down even more, shall we?
Here are some nifty tidbits and tricks I’ve picked up along the way to help you master how to make pickles and look like a superstar while doing it!
Pro Tips & Secrets
First up, the insider info : chef's personal insights . i learned pretty quickly that using the best cucumbers for pickling is key.
Trust me; fresh, firm varieties like kirby or persian are your best pals here. they stay crunchy even after a good soak in that tangy pickle brine .
Now, if you’re keen on saving time, try these time saving techniques : slice those cucumbers up while you let the brine boil (just kidding, no boiling necessary!).
This way, you multitask like a champ, and you'll have your refrigerator pickles ready in no time. and don’t forget about flavor enhancement tips a splash of apple cider vinegar or a sprinkle of your favorite pickling spices can take your pickles from “meh” to “wow!”
Perfect Presentation
Alright, once you’ve nailed the pickle game, it’s time for the fun part perfect presentation ! plating these beauties isn’t just for instagram; it makes them that much more enjoyable.
Layer those crunchy pickles on a cheese board and toss in some colorful peppers and olives. it's all about those color combinations .
A pop of red from sweet and sour pickles can really light up your spread.
You can also get creative with garnish ideas . toss on some fresh dill or even a chili pepper on top.
I mean, who doesn’t love a little flair? and don’t forget to keep everything visually appealing with those savory additions that complement your pickles perfectly.
Think crispy crackers and creamy spreads!
Storage & make-ahead
Now, let’s talk storage . after creating your favorite dill pickle recipe , it’s essential to know how to keep those babies fresh.
Store your pickles in the fridge for about 2 months . they only get better with age! for anyone wondering about the freshness duration , zip ‘em up in an airtight container to avoid any funky business.
And if you’re feeling ambitious, you can totally whip up a batch of these pickle flavored delights ahead of time. just remember those easy canning techniques if you want to preserve them longer.
But for now, our focus is on that quick fridge pickle method so chill out and let the flavors marinate!
Creative Variations
Feeling spicy? let’s get adventurous with creative variations ! change up the flavor profile to match your mood or season.
You’ve got sweet, tangy, and spicy all at your fingertips! for a summer twist, add some fresh herbs like basil or mint to your pickles.
Or, tackle that fermentation process and let your pickles sit out longer for a unique taste experience. how about a crunchy dill pickle with a fiery kick? sliced jalapeños will do the trick!
Complete Nutrition Guide
Finally, don’t overlook the nutrition of your homemade pickles. they can be a guilt free addition to your diet! did you know they contain health benefits like reducing cravings and helping digestion? just be sure to keep an eye on sodium levels if salt is a concern for you.
Portions matter, too don’t go overboard on those vinegar based snacks !
Wrapping it Up
So there you have it, folks! your roadmap to pickle perfection. whether it’s for a picnic food idea or that next charcuterie night, learning how to pickle cucumbers opens up a world of homemade condiment possibilities.
Get creative, have fun with it, and most importantly, enjoy every crunchy bite! let’s get ready to wow your friends with your new skills in the kitchen.
Cheers to more crunch and flavor in your life! happy pickling! 🥒
Frequently Asked Questions
How to make pickles that stay crispy?
To ensure your pickles stay crispy, it's crucial to start with fresh, firm cucumbers. You can also soak them in ice water for an hour before pickling. Another tip is to add grape leaves or a bit of tannin, which helps maintain that delightful crunch, just like those perfect pickles you’d find at a summer fair!
What are some creative variations when making pickles?
There are countless ways to mix things up! Try adding sliced jalapeños for a spicy kick, or switch the vinegar for apple cider vinegar for a sweeter outcome. You could even toss in some fresh mint leaves for a refreshing twist, making your pickles the talk of the picnic!
How long do homemade pickles last in the fridge?
Your homemade pickles will happily last in the fridge for up to 2 months. The flavours will develop and become even more delightful over time, so don't be shy about making a batch ahead of your next gathering!
Can I use different types of cucumbers for pickling?
Absolutely! While Kirby or Persian cucumbers are typically recommended for their crunch, you can experiment with other varieties. Just keep in mind that variations in size and water content may alter the final taste and texture slightly much like the differences in regional cheeses!
Is there a way to make sweet pickles instead of dill?
Definitely! To create sweet pickles, simply increase the sugar in the brine recipe, and consider using apple cider vinegar instead of white vinegar. This makes a lovely Bread and Butter pickle that’s perfect for a summer BBQ or to serve with your favourite cold meats!
What nutritional considerations should I keep in mind when making pickles?
Homemade pickles can be a low-calorie snack, but keep an eye on the sodium levels due to the salt in the brine. If you're watching your sodium intake, consider reducing the amount of salt used or exploring low-sodium alternatives.
They’re a fantastic source of hydration, too, just like a refreshing Pimm's in the sun!
Classic Dill Pickles Crunchy Zesty And Full Of F