Pizza Dough: the Classic High-Hydration Recipe for a Puffy Crust
- The Sunday Night Saviour: Classic High-Hydration Pizza Dough (For a Proper Puffy Crust)
- Elevating Homemade Pizza: Why High-Hydration Pizza Dough is the Only Way
- Ingredients List and Crucial Notes on Flour Types
- Step-by-Step Method: Mixing, Kneading, and the Bulk Ferment
- Expert Tips for Mastering Your High-Hydration Pizza Dough
- Storage Solutions: Prepping Your Pizza Dough Ahead
- Getting Ready to Bake: Cooking Methods for This Dough
- Recipe FAQs
- 📝 Recipe Card
The Sunday Night Saviour: Classic High Hydration Pizza Dough (For a Proper Puffy Crust)
You know that incredible aroma? The one that hits you when real wood fired pizza comes out of the oven, smelling yeasty, slightly smoky, and absolutely irresistible. That complex, bready perfume is proof that the crust the dough —is the absolute star of the show, not just a vessel for sauce and cheese.
If you’ve been relying on cardboard thin, store-bought bases, prepare yourself for a total transformation.
This high hydration pizza dough recipe is truly the only one you'll ever need. Seriously, it’s a lifesaver for busy weeknights, easy to manage, and costs pennies compared to ordering delivery.
When you master this simple technique which mainly involves patience, not effort you unlock a world of crunchy, chewy, and stunningly puffy crusts at home.
I used to be terrified of yeast, thinking dough was some kind of arcane wizardry reserved only for grandmothers and Italian nonnas. Turns out, it's just basic chemistry and some good kneading. Let’s crack on and make some truly spectacular homemade pizza dough that rivals your favourite local joint.
Elevating Homemade Pizza: Why High Hydration Pizza Dough is the Only Way
The Science of the Saviour: Developing Deep Flavor and Ideal Texture
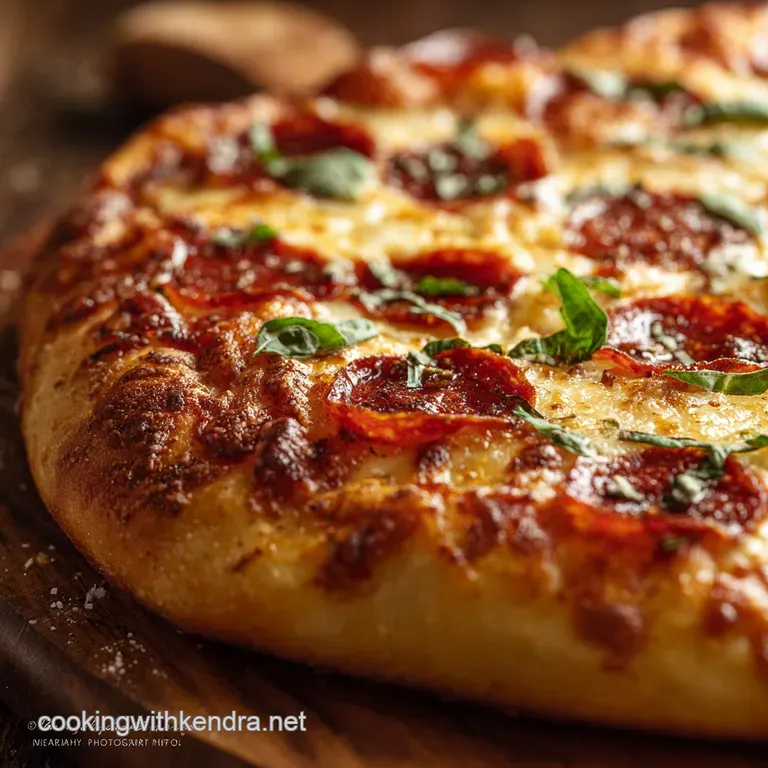
The secret weapon in achieving that perfect, airy, bubbly crust isn't a special oven; it’s patience and the correct water-to-flour ratio. This classic pizza dough recipe leans toward high hydration , meaning we use a lot more water than most recipes recommend.
This ensures the dough stays sticky and flexible, which translates into a light, open crumb structure when baked.
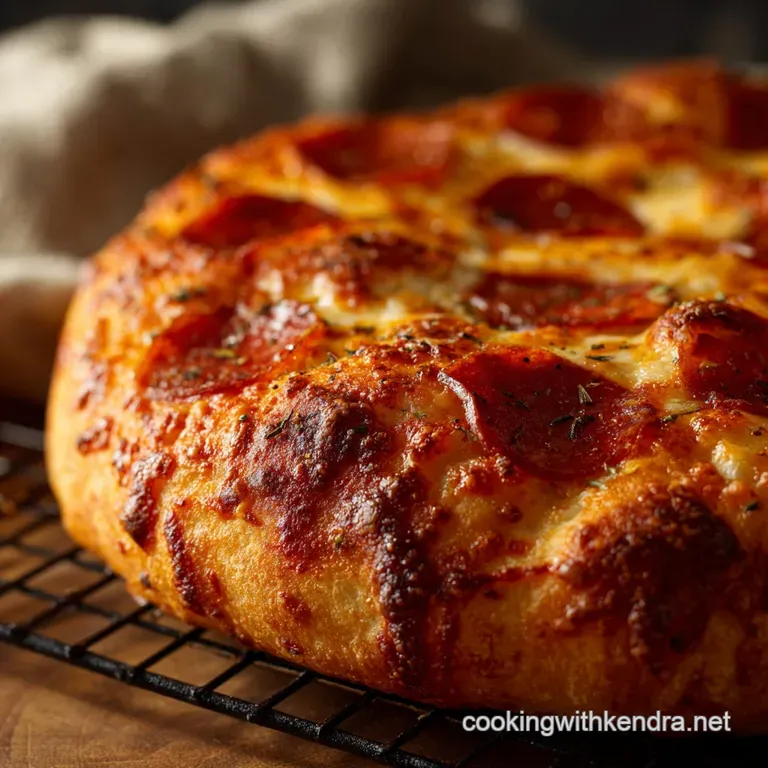
Defining the Cornicione: Achieving the Perfect Puffy Crust
When you hear people talk about "good" pizza, they are usually talking about the cornicione —that beautiful, puffy, leopard spotted edge. High hydration dough, combined with a quick, hot bake, traps steam rapidly inside the crust. That steam inflates the edges like little balloons, giving you the satisfying chewiness we all crave. It’s what separates my beloved Hawaiian BBQ Chicken Pizza Get a Crisp Crust at Home from a sad, flat slice.
Quick Look: Essential Equipment for Pizza Dough Success
You absolutely do not need a fancy mixer for this, but if you have one, use it! However, I strongly recommend getting a digital kitchen scale. Measuring flour by volume (cups) is horribly inaccurate because humidity and packing density change everything.
Chef's Note: If you only take one piece of advice today, let it be this: Precision is paramount in baking, so invest in a scale. It’s the difference between perfection and sticky misery.
The Magic of Long Fermentation: Taste vs. Time
Short cuts exist, but they sacrifice flavour. A long, slow fermentation what bakers call the bulk ferment allows the yeast to consume the starches and produce complex organic acids.
These acids are what give the dough that incredible, slightly sour, nutty depth of flavour that you can never get in a 30 minute quick rise recipe. If you have the time, let this dough rest in the fridge for 24– 48 hours; your taste buds will thank you.
Gluten Formation: The Knead/Rest Balance
We need strong, elastic gluten for the dough to hold all that air. Think of gluten as a network of tiny stretchy rubber bands. Kneading develops these bands, but the autolyse (the initial rest period after mixing the water and flour) does most of the heavy lifting for you.
This resting period allows the flour to fully absorb the liquid, making the final knead shorter and easier.
Understanding Baker's Percentage (Hydration Ratio Explained)
This recipe is roughly 65% hydration (325g water to 500g flour). That sounds technical, but just know that this percentage is the sweet spot. It provides enough elasticity for a thin stretch without being impossibly sticky like some 70%+ hydration doughs, making this a perfect simple pizza dough for beginners who still want a puffy crust.
Ingredients List and Crucial Notes on Flour Types
Flour Power: Choosing the Right Grind (00 vs. Bread Flour)
I call for high protein bread flour here because it has the necessary protein (12 14%) to build a strong gluten structure. If you can find Italian Tipo 00 flour, that is the gold standard for thin, elastic pizza.
Don't substitute all-purpose flour unless you absolutely have to; the final crust will be tougher and less chewy.
Yeast Activation: Temperature and Timing
The water temperature is key! If the water is too cold, the yeast is sluggish. If it's too hot, you kill the yeast, and your dough stays flat I made this mistake once, resulting in a dense, sad Frisbee of a crust.
Keep the water between 95°F and 105°F (35°C 40°C); it should feel warm, but not hot, to the touch. We use instant yeast here, which is super convenient as you don't need to proof it first.
Salt and Olive Oil: Their Roles in Dough Structure
Salt isn't just for flavour; it controls the yeast's activity, preventing it from running wild and collapsing the dough. The extra virgin olive oil provides richness and, crucially, adds elasticity.
It gives the dough a smoother texture and makes it much easier to stretch when you're ready to bake.
Substituting Standard vs. Instant Yeast
If you only have active dry yeast, no problem! You’ll need to increase the amount slightly and wake it up first.
| Ingredient | Standard Ingredient | Viable Substitution |
|---|---|---|
| Flour | High Protein Bread Flour (500g) | All-Purpose (Plain) Flour (use 480g) |
| Yeast | Instant Dry Yeast (1 tsp) | Active Dry Yeast (1 ¼ tsp) |
| Oil | Extra Virgin Olive Oil | Standard Vegetable or Canola Oil |
| Salt | Fine Sea Salt (10g) | Kosher Salt (use 1.5 times the volume) |
step-by-step Method: Mixing, Kneading, and the Bulk Ferment
The Initial Mix: Autolyse and Combining Wet/Dry
First, combine the lukewarm water and instant dry yeast in your mixing bowl. Let it sit for just five minutes it should look slightly milky or a little foamy if your yeast is super fresh. Then add your flour, salt, and olive oil.
Mix it all on the lowest speed (or with a wooden spoon) until you have a shaggy mass where no dry flour remains clinging to the bottom.
Short, Hot Knead: Building the Dough's Elasticity
Cover the bowl and walk away for 15 minutes. This is the autolyse stage, and it's brilliant for hydration. After the rest, knead the dough vigorously for about 8– 10 minutes using a stand mixer, or 10– 15 minutes by hand.
The dough should become noticeably smooth, elastic, and pass the 'windowpane test' when you stretch a small piece thin, you should be able to see light through it without it tearing instantly.
The First Rise (Bulk Fermentation): Observing the Volume Doubling
Lightly grease a clean bowl with oil. Plop your smooth dough ball in there, turning it to coat the whole surface. Cover the bowl tightly with plastic wrap and find a warm spot. This rise, the bulk fermentation , should take 1.5 to 2 hours, or until the dough has doubled in size .
Don't under ferment; that's when you get dense, flat crusts.
Dividing and Balling: Shaping the Dough for Perfection
Gently deflate the dough by punching it down don't be too aggressive, we want some air left. Turn it onto a lightly floured surface and divide it into four equal 200 205g portions. Now, you need to shape these into tight, smooth balls (boules).
Cup your hand over the dough piece and roll it against the counter until you feel the surface tension tighten up. This tension is key for that beautiful oven spring later.
The Final Proofing Stage (Room Temperature vs. Cold Rest)
Place your perfectly balled dough pieces on a tray that's lightly dusted with flour or cornmeal. Cover them loosely with plastic wrap. Let them rest for another 60 minutes at room temperature. They will puff up again, becoming ready for stretching.
Expert Tips for Mastering Your High Hydration Pizza Dough
Troubleshooting Sticky Dough (And Why It's Normal)
This is a sticky dough —it’s supposed to be! Don’t panic and add cups of extra flour when kneading. A slight stickiness is what gives you that high rise. If it’s truly unmanageable, add just one tablespoon of flour at a time during the final stages of kneading.
The Finger Poke Test: Determining Proofing Readiness
How do you know the final proof is done? Gently poke the dough ball with a floured finger. If the indentation springs back immediately and completely, it needs more time. If the indentation springs back slowly, leaving a slight dimple behind, it’s perfect and ready to stretch.
If the indentation stays put and the dough collapses, you’ve over proofed it (oops).
The Gentle Stretch: How to Shape Without Tearing
Avoid using a rolling pin at all costs; it crushes the air bubbles. Start by pressing the dough down flat, pushing the air from the center towards the edges (creating that puffy rim). Lift the disc and let gravity help you, rotating the dough while gently pulling the edges. If it tears, let it rest for five minutes, and then try again. The gluten needs to relax! If you’re making something dense and topped like my Chicken Alfredo Pizza Recipe: Ultra Creamy Sauce Crispy Crust , you might need a sturdier, less delicate stretch.
The Cold Ferment Advantage: Refrigerating for Maximum Flavor
This is my biggest secret for incredible flavour depth. After you’ve done the dividing and balling (Step 10), place the individual boules into lightly oiled containers, seal them tightly, and refrigerate them.
The cold ferment slows the yeast down but allows those flavour compounds to build over 24 to 72 hours. This is how you get that complex, bakery quality taste.
Storage Solutions: Prepping Your Pizza Dough Ahead
Freezing Uncooked Dough: Best Practices
Yes, you can absolutely freeze this dough! Once the dough has finished its initial bulk fermentation (Step 8), divide it, shape it into boules, and coat each ball in a bit of olive oil. Wrap them tightly in plastic wrap, then place them inside a freezer safe bag, pressing out all the air.
It will keep beautifully for up to three months.
Thawing and Bringing Dough Back to Life
When you’re ready to bake, transfer the frozen dough balls straight from the freezer to the refrigerator and let them thaw overnight. The next day, pull them out onto the counter, covered, for about 90 minutes.
They need to come to full room temperature before stretching, or they will snap back and resist shaping.
Getting Ready to Bake: Cooking Methods for This Dough
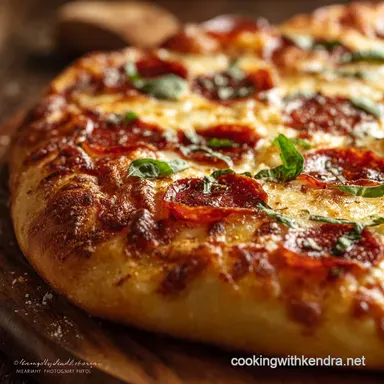
Because this is a high hydration pizza dough , you need incredibly high heat to get that satisfying pop and a crisp base. Preheat your oven with a pizza stone or baking steel inside for at least one hour at the highest temperature your oven allows (500°F/260°C is ideal).
Transfer the shaped dough carefully and cook for 8– 12 minutes. The immediate, intense heat is what guarantees a beautiful, light, puffy crust pizza dough .

Recipe FAQs
Why is my high hydration dough too sticky or soupy to handle?
High hydration dough is intentionally wetter than standard dough, but if it is excessively sticky, ensure you measured the water precisely, as slight overages can drastically alter the texture. If it's unmanageable, knead in a tiny spoonful of flour at a time until the dough just begins to clear the sides of the bowl.
Focus on developing elasticity through kneading rather than trying to achieve a completely dry dough ball.
My dough isn't rising after the first fermentation. What went wrong?
The main causes for poor rising are using old or dead yeast, or placing the dough in a space that is too cold. Ensure your water temperature when blooming the yeast is lukewarm (between 105 115°F), which is crucial for activation.
If the yeast is active but the rise is slow, place the covered bowl in a warm spot, like a turned off oven with the light bulb on.
Can I use all-purpose flour instead of 00 or strong bread flour?
While all-purpose flour will work in a pinch, it has a lower protein content than strong bread flour or specialized 00 flour, meaning the crust will be less chewy and less voluminous. For the best puffy cornicione (crust), stick to a flour labeled for bread making or high gluten use.
Using the recommended flour ensures the dough can properly support the high water content.
Why does my dough tear or snap back when I try to stretch it into a circle?
This is a sign that the gluten network has tightened up and needs to relax. If the dough resists stretching or snaps back immediately, cover it and let it rest at room temperature for an additional 15 to 20 minutes; this is called a bench rest.
Proper relaxation is key to easily stretching the base thinly without tearing.
How far in advance can I make this dough, and can I freeze it?
This dough actually benefits from a long, cold fermentation and can be stored in the refrigerator for up to three days, developing significantly deeper flavor. Yes, it freezes excellently; after the first rise, portion the dough into balls, coat lightly in oil, and store in airtight freezer bags for up to three months.
Thaw overnight in the fridge before bringing the dough to room temperature for stretching.
How can I enhance the overall flavor of the finished crust?
The most effective method for flavor development is cold fermentation; allow the dough to rise slowly in the refrigerator for 48 72 hours instead of doing a quick rise on the counter.
You can also incorporate a tablespoon of high-quality olive oil during the initial mixing stage, which tenderizes the crust and adds richness. Some chefs also mix in fine sea salt instead of standard table salt for a cleaner finish.
Can I use a stand mixer instead of kneading the dough by hand?
Yes, a stand mixer equipped with a dough hook is highly recommended and significantly reduces the active preparation time. Knead the dough on a low speed (setting 2) for 7 10 minutes, stopping when the dough clears the sides of the bowl and becomes smooth and elastic.
Be careful not to over knead, as this can make the high hydration dough tough.
Classic High Hydration Pizza Dough
Ingredients:
Instructions:
Nutrition Facts:
| Calories | 130 kcal |
|---|---|
| Protein | 4.0 g |
| Fat | 2.5 g |
| Carbs | 22.0 g |
