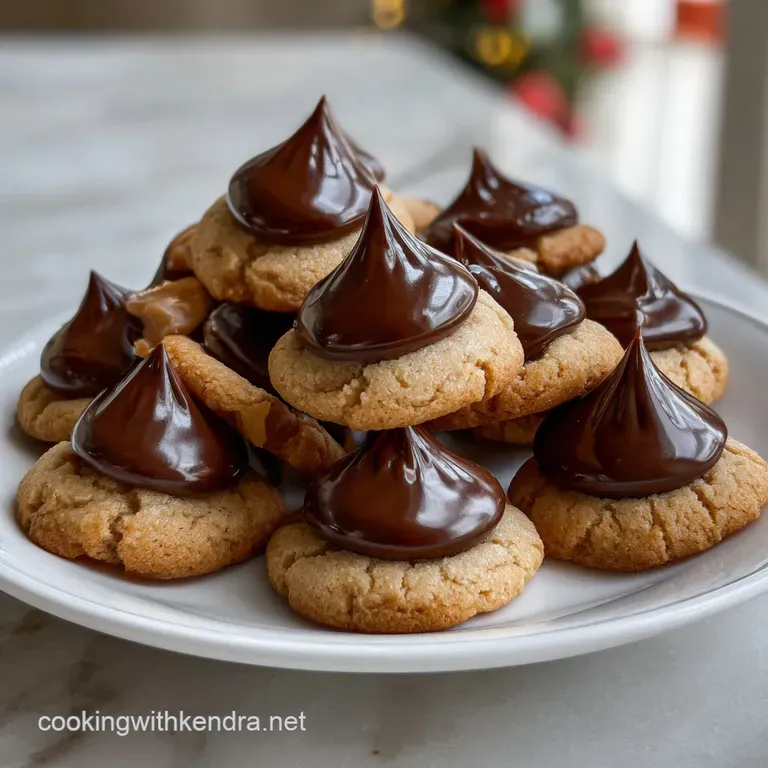
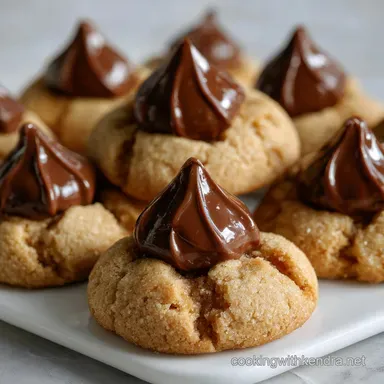
Hershey Kiss Cookies: the Chewy Classic Recipe
- Welcome to the Kitchen: Why We Love These Classic Kiss Cookies
- The Science of the Perfect Blossom: Texture and Flavor Balance
- Gathering Your Baking Essentials: Ingredients and Smart Swaps
- Baking Peanut Butter Blossoms: Step-by-Step Method
- Troubleshooting and Expert Baking Tips
- Keeping Your Cookies Fresh: Storage and Make-Ahead Guide
- The Finishing Touch: Perfect Pairings for Your Kiss Cookies
- Recipe FAQs
- 📝 Recipe Card
Welcome to the Kitchen: Why We Love These Classic Kiss Cookies
The smell of roasting peanuts mixed with melting chocolate is pure heaven. That aroma is the unmistakable signature of the perfect Hershey Kiss Cookies . These are the quintessential comfort bake, the ones that immediately transport you back to childhood holiday parties or cozy family afternoons.
They truly nail the balance of salty, sweet, and unbelievably chewy texture.
They’re fast, ridiculously comforting, and cheap to make, which makes them my go-to when the holiday panic sets in. You don't need fancy tools or obscure ingredients for these, just the classics done right.
This recipe is designed for maximum impact with minimum effort, meaning you spend less time stressing and more time eating.
We're not messing around with dry, crumbly dough today. This is the ultimate blueprint for the chewiest, most satisfying Kiss Cookies you will ever bake. I’ve learned all the tricks, including the crucial chilling step and the secret to a perfectly intact chocolate crown.
Let’s dive into making the best batch of Hershey Kiss Cookies ever.
The Science of the Perfect Blossom: Texture and Flavor Balance
This isn't just a haphazard throw together; this recipe is based on tried and true science to ensure maximum chewiness. We use both brown and white sugar in this Hershey Kiss Cookies recipe, which is the secret sauce for texture.
Granulated sugar promotes spread and crispness, while the molasses in the brown sugar retains moisture, resulting in that essential tender, chewy centre.
I once tried to rush the chilling process because I was impatient, and my cookies spread into flat, greasy discs. Never again. We follow the science for optimal structure and flavour with these classic Peanut Butter Kiss Cookies .
The density of the dough has to be right so the warmth of the oven makes them puff slightly, ready to embrace that chocolate kiss.
A Nostalgic History of the Peanut Butter Blossom
The official recipe, often called the Peanut Butter Blossom, dates back to 1957. Freda Smith, an Ohio home cook, submitted it to a national baking contest, and the rest is history. It quickly became an American holiday standard, primarily because it's so visually iconic and universally loved.
When you serve these Kiss Cookies , you're serving up tradition.
What Makes This Recipe the 'Blueprint' Cookie?
The blueprint means we stick to the basics, but we perfect the technique. We’re using the full power of processed peanut butter (like Jif or Skippy) because the oils are stabilized. Natural peanut butter, while delicious for toast, will make your cookies greasy and prone to spreading too much.
Stick to creamy, stable peanut butter for these Hershey Kiss Cookies.
Essential Equipment Checklist (Pans, Scoops, Parchment)
You don't need a lot, but what you use matters.
- A good stand mixer (or strong arm power with a hand mixer) is best for properly creaming the butter and sugar until light and fluffy.
- Parchment paper is non-negotiable; it prevents sticking and promotes even browning, ensuring your Hershey Kiss Cookies lift off the pan easily.
- Use a 1.5 inch cookie scoop. This guarantees every single cookie is uniform, meaning they all bake in exactly the same amount of time.
The Role of Creamy Peanut Butter vs. Crunchy
If you like texture, you might be tempted to use crunchy peanut butter, but I advise against it for this specific recipe. The crunchy bits disrupt the smooth, tender texture of the dough, making it crumbly and harder to roll.
Save the crunchy stuff for your [Air Fryer Peanut Butter Cookies: Perfectly Chewy, Fast Easy](https://cookingwithkendra.net/recipes/air-fryer peanut butter cookies-recipe/) where the structure is less crucial. For the Hershey Kiss Cookies , we want smooth creaminess throughout.
Achieving Softness: The Secret to Non-Dry Cookies
The key to a melt-in-your mouth cookie that isn't dry is the ratio of brown sugar to white sugar and listen up— do not overbake. Pull these Kiss Cookies from the oven when they look slightly underdone, maybe even a little pale in the middle.
They will continue to bake on the hot sheet pan, which locks in moisture and prevents them from tasting like sawdust.
Why the Sugar Roll is Non-Negotiable (Crust texture)
The granulated sugar coating serves two critical purposes for these classic Peanut Butter Kiss Cookies . First, it protects the edge of the cookie from drying out during the bake, keeping the centre soft.
Second, it adds that gorgeous, sparkly, slightly crisp crust that provides an incredible textural contrast to the soft, warm centre. Don’t skip the roll!
Gathering Your Baking Essentials: Ingredients and Smart Swaps
We need good quality ingredients to make these fantastic Hershey Kiss Cookies . Always start with room temperature butter and eggs; this allows them to emulsify properly, creating a smooth, strong dough structure.
| Ingredient | Why It's Needed | Smart Swap/Substitute |
|---|---|---|
| Creamy Peanut Butter | Structure and flavour | Sunflower seed butter (for nut-free) or high-quality soy butter. |
| All-Purpose Flour | Bulk and gluten structure | 1:1 gluten-free Blend (ensure it contains xanthan gum). |
| Unsalted Butter | Flavour and richness | Salted butter (if used, reduce recipe salt to 1/4 tsp). |
| Brown Sugar | Moisture and chew | Maple syrup (reduce other liquids slightly) or dark muscovado sugar for deeper flavour. |
Choosing the Right Hershey Kisses (and Alternatives)
I prefer the classic milk chocolate Hershey's Kiss. It melts beautifully, and its sweetness perfectly balances the salty peanut butter dough. However, there are tons of variations for your Hershey Kiss Cookies Christmas edition!
- Peppermint Kisses: Great for the holidays.
- Special Dark Kisses: For a less intensely sweet cookie.
- Rolo Candies: My personal favourite alternative. Press these in while warm for a melted caramel core!
Butter, Shortening, or Both? Understanding Fat Content
This specific recipe uses 100% butter for maximum flavour. Butter browns nicely and lends a richer, nuttier taste to the final Hershey Kiss Cookies . If you use shortening (like Crisco), your cookies will spread less and be cakier, but you sacrifice some of that rich, buttery flavour.
If you want a compromise, use half butter, half shortening.
Essential Substitutions for Allergens (Nut-Free options)
If you need hershey kiss cookies no peanut butter , you still have options! Sunflower seed butter works exceptionally well; it provides the necessary fat and density. Just be aware that sunflower butter can sometimes react with baking soda and turn the cookie centres slightly green.
It’s harmless, just a funny colour change! Soy butter is also a fantastic substitute for these Kiss Cookies .
The Necessity of Baking Powder and Baking Soda Working Together
We use baking soda in this dough because it reacts with the acid naturally present in brown sugar and peanut butter. It promotes spread and a tender texture. But a tiny bit of baking powder (if you used a different recipe version) helps give a slight upward lift.
For this recipe, the ratio is specifically designed for the baking soda to do all the heavy lifting, resulting in that classic, slightly crackled top.
Baking Peanut Butter Blossoms: step-by-step Method

Remember the key mantra: preparation is everything. The most important step when making these incredible Hershey Kiss Cookies is the chilling time; do not skip it.
Mixing the Dough: Avoiding Over Development
Cream the butter and sugars until they lighten significantly in colour and fluff up this incorporates air, which helps the rise. Once you add the flour, reduce the mixer speed to the lowest setting. You want to mix only until the flour streaks just disappear.
Overmixing develops too much gluten, which results in a tough, hockey puck cookie instead of a tender one. The dough should look slightly ragged but hold its shape well. Too much mixing ruins the texture of your ultimate Kiss Cookies .
Portioning and the Crucial Sugar Coating
Use that cookie scoop! Roll the dough into uniform balls, about 1 inch in diameter. Once rolled, drop them gently into the bowl of rolling sugar. Make sure they get a good, generous coating. This sugar coating is what creates the delicious, chewy peanut butter cookie recipe crust.
Arrange them on the baking sheet about two inches apart they will expand!
The Exact Baking Time for Chewy Centers
My oven usually takes 9 minutes exactly at 350°F (175°C). Start checking at 8 minutes. The edges should look set, maybe even lightly golden, but the centre should still look slightly soft and puffed. If they start getting deeply brown, they are overdone.
Immediately remove the pan your perfect Peanut Butter Kiss Cookies Recipe is almost complete!
When (and How) to Place the Chocolate Crown
This is the make-or-break moment. You need to be fast. As soon as the pan comes out of the oven, grab your chilled Kisses. Press one Kiss firmly and swiftly into the centre of each hot cookie. The heat of the cookie base will melt the bottom of the Kiss just enough to glue it down.
Do not press down so hard that the cookie splits in half. The cookie will crack slightly around the edges that’s exactly what you want! That little crackle is the signature look of these perfect Hershey Kiss Cookies .
Chef’s Note: Keep the Kisses chilled until the very last second. If they are warm, the chocolate will melt entirely and run down the sides, making a mess. We want structure!
Troubleshooting and Expert Baking Tips
My Cookies Are Cracking: Why and How to Fix It
A little cracking is normal and actually adds character to the Hershey Kiss Cookies shortbread like texture. However, if they are cracking excessively before the Kiss goes in, two things might be happening:
- Too Much Flour: You packed your flour too tightly. Always spoon flour into your measuring cup and level it off.
- Dough Too Cold: If you chilled the dough for too long (over an hour), it’s rock hard. Let it warm on the counter for 5– 10 minutes before rolling.
Preventing Kisses from Melting or Sliding Off
The best defense is a chilled offense! Using Kisses straight from the fridge or freezer is key. If your kitchen is very warm, the Kisses might start to soften even after you place them. After pressing the Kisses in, transfer the entire baking sheet to the fridge or a cool spot for 5 minutes.
This rapidly sets the chocolate and locks it onto the cookie base.
The Importance of Dough Chilling Time
I know, I know chilling is annoying. But the fat in the dough needs to solidify. When you chill the dough for at least 30 minutes, it prevents excessive spread during baking, ensuring your Hershey Kiss Cookies are tall, soft, and thick.
If you want even thicker cookies, chill for an hour.
Keeping Your Cookies Fresh: Storage and make-ahead Guide
Storing Baked Kiss Cookies at Room Temperature
Once fully cooled (and the chocolate is set!), store the Kiss Cookies in an airtight container at room temperature. Layer them between sheets of parchment paper if you stack them, just to protect those beautiful chocolate crowns. They will stay fresh, soft, and delicious for up to 5 days.
After that, they start to lose their perfect chewiness.
Freezing Unbaked Dough Balls for Later Use
This is my absolute favourite pro tip for quick baking later! Make the entire batch of dough, scoop the balls, roll them in the sugar, and then freeze them solid on a parchment lined sheet pan. Once frozen, transfer the sugar coated dough balls to a freezer safe zip-top bag. They keep for up to 3 months.
When you're ready to bake, just place the frozen balls directly onto a baking sheet and add 2– 4 minutes to the original baking time.
The Finishing Touch: Perfect Pairings for Your Kiss Cookies
Serving these delicious Kiss Cookies is always the best part of the day. If you love the contrast of the sweet/salty peanut base, you might also love my Chocolate Chip Cookies: The Best Chewy Brown Butter Recipe for another salty sweet masterpiece.
Beverages That Complement the Salty Sweet Profile
The richness of the peanut butter needs a strong counterpoint.
- Ice Cold Milk: The ultimate classic pairing. Dairy milk, or a rich oat milk, cuts through the fat beautifully.
- Strong Coffee: A bold Americano or espresso works wonders. The bitterness enhances the sweetness of the chocolate and the roast notes of the peanut butter.
- Mulled Cider: If you’re making these Hershey Kiss Cookies during the winter, the warm spices in cider provide a comforting, festive contrast.
Once you master this easy hershey kiss cookies recipe , you’ll realize how simple it is to achieve perfect holiday baking. These truly are the best bite sized Hershey Kiss Cookies —chewy, comforting, and absolutely iconic. Enjoy your incredible batch!

Recipe FAQs
Why are my Peanut Butter Blossoms dry or crumbly after baking?
They are likely overbaked; peanut butter cookies cook quickly and you want them barely set when they exit the oven. Remove the cookies when the edges are lightly golden, even if the centers look slightly soft, as they will continue to firm up perfectly while resting on the hot baking sheet.
When exactly should I press the Hershey Kiss into the cookie?
The Kiss must be pressed in immediately after removing the cookies from the oven while they are still piping hot. Waiting too long prevents the chocolate base from melting slightly and adhering properly to the warm cookie surface. Gently twist the Kiss as you press it down to prevent the cookie base from cracking.
Can I make these cookies without peanut butter due to allergies?
Yes, you can substitute other nut butters, such as almond or cashew butter, or use seed butter like sunflower butter, utilizing the exact same quantity. For the best dough structure, ensure the replacement butter is creamy and not the natural style separated butter that requires stirring.
How should I store leftover Kiss Cookies, and can I freeze them?
Store fully cooled cookies in an airtight container at room temperature for up to 5 days; avoid stacking them too tightly to protect the soft chocolate tops. For freezing, place the cooled cookies in a single layer on a tray until solid, then transfer them to a freezer safe bag where they will keep well for up to 3 months.
Why did my cookies spread too much and flatten while baking?
Excessive spreading usually indicates that the butter was too warm or that your flour measurements were not level, creating too much moisture. To fix this, ensure your butter is truly room temperature (not melted), and try chilling the rolled dough balls briefly (10-15 minutes) before baking to help maintain their structure.
Do I need to chill the dough before rolling it in sugar?
Chilling is not strictly necessary if you are working quickly in a cool environment, but it is highly recommended if your kitchen is warm or humid. A quick 30-minute chill helps the fat solidify, resulting in thicker, richer cookies that are less prone to spreading out during the bake cycle.
What if I don't have standard Milk Chocolate Kisses?
You can certainly substitute! Look for other chocolate items of similar size, such as unwrapped Rolo candies, mini peanut butter cups, or even other flavour variations of Hershey Kisses (like Dark Chocolate or Hugs). Just ensure whatever topping you choose is added immediately after baking.
Classic Peanut Butter Kiss Cookies
Ingredients:
Instructions:
Nutrition Facts:
| Calories | 656 kcal |
|---|---|
| Protein | 9.1 g |
| Fat | 37.9 g |
| Carbs | 69.8 g |
