The Ultimate Neverending Homemade Garlic Breadsticks
- Unlocking the Secret to Iconic Olive Garden Breadsticks at Home
- Why This Copycat Recipe Outshines Restaurant Versions
- The Essential Components for Authentic Flavour
- Assembling Your Breadstick Arsenal: Tools and Staples
- Mastering the Dough: From Mixing Bowl to Proofing
- Shaping, Baking, and Achieving Golden Perfection
- The Grand Finale: Applying the Signature Garlic Finish
- Troubleshooting and Next-Level Customization
- Recipe FAQs
- 📝 Recipe Card
Unlocking the Secret to Iconic Olive Garden Breadsticks at Home
Few things beat those wonderfully garlicky, impossibly soft breadsticks you get down at the Olive Garden they’re the definition of comfort food, aren't they? It always feels like a bit of a magic trick when you manage to replicate that texture at home, but I promise you, it’s entirely achievable.
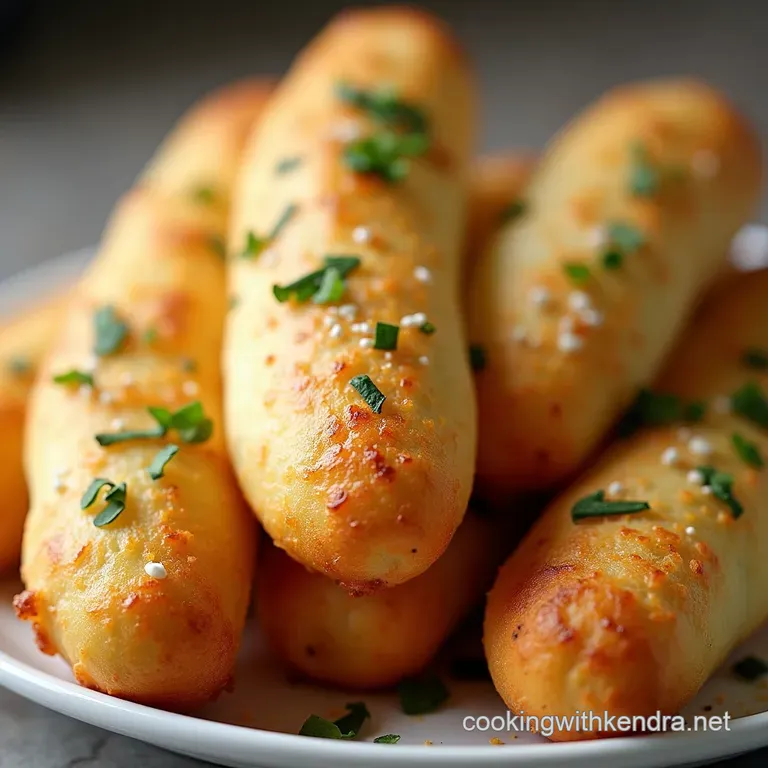
Forget queuing for a table; these breadsticks bring the famous flavour straight to your kitchen table. This recipe nails that signature pillowy interior and soft, buttery exterior, finished with a generous brushing of garlic and Parmesan.
They are dangerously addictive much like the restaurant’s famous salad dressing! A true crowd pleaser perfect for dipping or enjoying all on their own. This straightforward approach makes this Olive Garden Breadsticks recipe accessible even for novice bakers, boasting a difficulty level that is genuinely easy.
While this process requires about 1.5 to 2 hours of hands off resting time for the breadsticks dough recipe , the active preparation time is only about 30 minutes, resulting in a total time commitment of around two and a half hours.
This batch yields 16 20 soft breadsticks recipe portions, perfect for serving 6 to 8 hungry diners.
Why This Copycat Recipe Outshines Restaurant Versions
The allure of the original is undeniable, but making Homemade Olive Garden Breadsticks allows for unparalleled control over quality and flavour intensity. When you control the ingredients, you control the outcome, ensuring that every bite delivers peak freshness and that perfect balance of salt, butter, and allium notes.
The Quest for Perfect Pillowy Texture
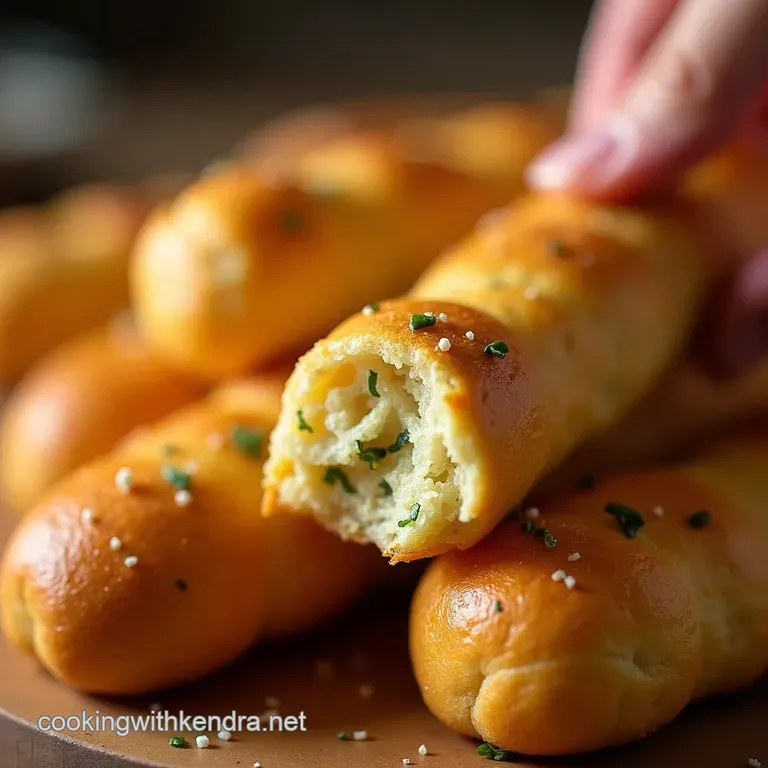
That distinct interior fluffiness is the hallmark of the Best Breadsticks recipe iteration we are crafting today. This texture is achieved not just by the yeast, but by incorporating melted butter directly into the dough mixture itself, alongside the correct ratio of flour and liquid.
This fat content ensures the gluten strands remain relaxed, leading to a crumb that yields tenderly rather than snapping crisply.
Setting the Stage: What Makes This Recipe Essential
The foundation of this excellent copycat Olive Garden breadsticks lies in respecting the yeast. We use active dry yeast proofed gently in warm water with a touch of sugar the sugar acting as a vital initial food source to ensure vigorous activation.
Getting this step right guarantees a lofty rise and the light, airy structure you expect from these famed sticks.
A Culinary Promise: Achieving Peak Garlic Infusion
The second critical element is the finish. While some recipes suggest sautéing fresh garlic, that approach often leads to scorching during the bake. For true replication of the iconic flavour profile in the Garlic Breadsticks recipe , we rely on high-quality garlic powder mixed into softened butter applied after baking.
This method ensures that deep, aromatic flavour permeates the hot surface without introducing bitter char.
The Essential Components for Authentic Flavour
To gather your supplies for this culinary adventure, we need two primary sets of Olive Garden Breadsticks ingredients : those for the foundation and those for the final, flavour drenching bath.
For the dough, you’ll require 2 1/4 teaspoons of active dry yeast (or one standard packet), 1 cup of warm water (ideally between 105° F– 115° F), and 1 tablespoon of granulated sugar to wake up that yeast.
Structurally, you need 3 1/2 cups of all-purpose flour, spooned and leveled for accuracy, along with 1 teaspoon of kosher salt. Finally, 1/4 cup of melted unsalted butter is whisked into the dough itself to ensure softness from the inside out.
The true magic resides in the topping. For the rich garlic butter finish, have on hand 1/2 cup (one full stick) of softened, unsalted butter. This should be blended thoroughly with 2 teaspoons of garlic powder a non-negotiable ingredient for this specific flavour and 1 teaspoon of dried parsley flakes for that signature visual appeal.
Finally,, prepare 1/2 cup of finely grated Parmesan cheese ready for sprinkling post bake.
Assembling Your Breadstick Arsenal: Tools and Staples
While a stand mixer with a dough hook attachment is highly recommended for ease of kneading, don't worry if you're a hand mixer; a large bowl and some good old-fashioned elbow grease will certainly suffice for this soft breadsticks recipe .
Essential equipment includes large mixing bowls, a few sturdy baking sheets, and crucially, parchment paper to line your sheets, preventing sticking without adding excess oil. A pastry brush is also necessary for the final, delightful coating application.
Mapping Out the Dough Foundation (Flour, Yeast, and Liquid)
The first step in creating superb Olive Garden Breadsticks is activating the yeast. Whisk the yeast and sugar directly into 1 cup of warm water. If you see foam or froth forming on the surface within 5 to 10 minutes, your yeast is alive and ready for action.
In your main mixing vessel, combine the measured flour and kosher salt thoroughly before introducing the wet ingredients.
The Unforgettable Butter Soak: Garlic, Herbs, and Parmesan Ratios
The garlic butter preparation should occur while the sticks are baking, ensuring maximum heat transfer for flavour absorption. The ratio is vital: a generous amount of softened butter provides the vehicle, the garlic powder provides the signature punch, and the parsley offers colour contrast.
The finely grated Parmesan should be kept ready to dust onto the hot, buttered surface immediately after they exit the oven.
Critical Measurements for Consistent Results
Accuracy in flour measurement is paramount to achieving the desirable texture. Ensure you spoon the flour into your measuring cup and then level it off; scooping directly from the bag compacts the flour, leading to a dry, tough final product rather than the wonderfully soft Homemade Olive Garden Breadsticks we aim for.
Pay close attention to the water temperature when proofing the yeast to avoid failure in this initial stage.
Related Recipes Worth Trying
- Easy Crock Pot Pasta e Fagioli Soup Recipe Olive Garden Style — Master the ultimate comfort food with this authentic Crock Pot Pasta e Fagioli Soup recipe Hearty creamy and foolproofit tastes like it simmered all day
- The Best Homemade Olive Garden Salad Dressing Recipe — Forget the bottle This Copycat Olive Garden Salad Dressing recipe delivers that iconic creamy tangy flavour in under 10 minutes Perfect that neverending...
- The Only Copycat Olive Garden Salad Dressing Recipe Youll Ever Need — Recreate that famous creamy Italian flavour at home This Homemade Olive Garden Dressing is easy to whisk up and tastes better than bottled A true weeknight hero
Mastering the Dough: From Mixing Bowl to Proofing
Once the yeast is foamy, pour the mixture and the 1/4 cup of melted butter into the dry ingredients. Using the dough hook on low speed, mix until a shaggy mass forms. Then, increase the speed slightly to medium low and knead for approximately 6 to 8 minutes.
The dough should transform from sticky and uneven to smooth, elastic, and slightly tacky, pulling cleanly away from the sides of the bowl.
After kneading, lightly oil a clean bowl. Place the dough inside, turning it once to coat. Cover this tightly with plastic wrap and find a warm, draft free spot. Allow the dough to undergo its first rise, known as bulk fermentation, for 60 to 90 minutes, or until it has visibly doubled in volume.
This slow development builds flavour and guarantees the airy crumb structure required for the Best Breadsticks recipe .
Shaping, Baking, and Achieving Golden Perfection
Once the dough has doubled, gently punch it down to release the built-up gases. Divide this mass into 16 to 20 roughly equal portions. Now, roll each piece by hand into a long rope, aiming for a uniform length of about 10 to 12 inches and a thickness of about 3/4 of an inch. Uniformity here ensures even baking times.
Arrange these shaped ropes onto parchment lined baking sheets, leaving a small gap between each stick to allow for slight expansion. Cover them loosely and let them rest for a second, shorter proofing period of about 30 minutes.
Activation Techniques for Yeast Success
While we covered proofing the yeast earlier, it’s worth noting that this second rise is critical for the final texture. It relaxes the gluten just before baking, ensuring the sticks puff up softly in the oven rather than tearing or becoming dense.
Rolling Out the Rectangles: Tips for Uniform Size
When shaping your ropes, use a light dusting of flour on your work surface if the dough is still slightly sticky, but try to handle it as little as possible after the first punch down. The goal is a cylinder shape, not a flattened rectangle, to achieve that classic, rounded exterior.
Baking Temperature Calibration for Softness
Preheat your oven quite robustly to 400° F ( 200° C). Place the trays into the hot oven and bake for 10 to 12 minutes. It is important to rotate the sheets halfway through baking to ensure even browning.
You are looking for a pale golden hue; over baking will rob these Olive Garden Breadsticks of their signature softness.
The Grand Finale: Applying the Signature Garlic Finish
The moment these perfect Garlic Breadsticks recipe creations emerge from the oven, you must act fast! While they are piping hot, the magic begins. Have your prepared garlic butter mixture ready to go.
Immediately brush every hot breadstick generously with the softened butter mixture. The residual heat instantly melts the butter, allowing the garlic powder and parsley to adhere beautifully. Once thoroughly coated, sprinkle liberally with the grated Parmesan cheese.
The heat will slightly melt the cheese onto the surface, locking in that irresistible flavour. This immediate application is what separates a good homemade version from a truly authentic copycat Olive Garden breadsticks experience.
Troubleshooting and Next Level Customization
Even with careful instruction, baking can present minor hurdles. If your sticks end up dense, it usually points back to killing the yeast with water that was too hot, or perhaps not allowing sufficient rising time.
If they brown too quickly, reduce the oven temperature slightly next time and consider tenting them loosely with foil. These insights help perfect your Olive Garden Breadsticks nutrition profile by ensuring you get the desired texture without over baking.
Answering Common Baking Queries (FAQs)
A frequent question concerns the Olive Garden Breadsticks nutrition content; remember, the high flavour comes from the fat in the butter and cheese, so moderation is key if watching intake.
Another common query is about making them vegan; while the dough itself can be adapted (using a plant based butter substitute), replicating that specific Parmesan crust without dairy can be challenging.
Creative Twists: Beyond the Classic Parmesan Dusting
If you desire variations, consider adding a pinch of crushed red pepper flakes to the butter for a subtle warmth, or mixing finely chopped fresh rosemary into the dough for an herbaceous surprise.
These small tweaks allow you to customize your Copycat Olive Garden Breadsticks while keeping the beloved base texture intact.
Reheating Strategies to Revive That Fresh Baked Softness
If you find yourself with leftovers though unlikely! reheating is simple. To restore that fresh baked softness, wrap the breadsticks loosely in foil and warm them in a 300° F ( 150° C) oven for about 8– 10 minutes.
This gentle heat warms them through without drying out the interior, making them taste almost as good as when they first came out of the oven.

Recipe FAQs
How do I get my homemade Olive Garden Breadsticks as soft and fluffy as the restaurant’s?
The secret is twofold: first, use melted butter in the dough itself, which adds richness and softness. Secondly, ensure you give the dough plenty of resting time (both rises should result in a nicely doubled size), as this develops the gluten for that signature pillowy texture.
Can I make the dough ahead of time, or freeze these breadsticks?
Absolutely! You can refrigerate the dough after the first rise for up to three days; just bring it back to room temperature before shaping. For freezing, shape the raw breadsticks, place them on a lined baking sheet, freeze until solid, then transfer them to a freezer bag.
Why do you recommend garlic powder instead of fresh minced garlic for the butter coating?
Fresh garlic contains moisture and will brown or worse, burn very quickly under the oven’s heat, resulting in a bitter taste. Garlic powder dissolves evenly into the softened butter, ensuring a consistent, aromatic flavour that mimics the restaurant's classic, gentle garlicky warmth.
My breadsticks came out a bit tough, what went wrong?
Toughness usually points to one of two culprits: either you used too much flour during kneading or shaping, or you overworked the dough after the first rise. Try to measure your flour by spooning and leveling, and be gentle when you punch down and roll out the final shapes.
What's the best way to reheat leftover breadsticks so they don't dry out?
The best trick is using a low oven or even an air fryer; wrap them loosely in foil before heating them at around 300°F (150°C) for about 5 8 minutes. This steams them gently, reviving that lovely soft interior without making them crunchy.
Copycat Garlic Breadsticks

Ingredients:
Instructions:
Nutrition Facts:
| Calories | 308 kcal |
|---|---|
| Protein | 7.1 g |
| Fat | 11.5 g |
| Carbs | 21.7 g |
| Fiber | 3.9 g |
| Sodium | 186 mg |
