Chocolate Cake with Cream Filling: the Decadent Layer Cake with Silky Vanilla
- Introducing Our Decadent Chocolate Cake with Cream Filling
- Essential Ingredients for the Perfect Bake Day
- Step and by-Step Guide to the Moist Cake Layers
- Whipping Up the Dreamy Vanilla Cream Center
- Assembling the Decadent Chocolate Cake with Cream Filling
- Troubleshooting Common Chocolate Cake Challenges
- Maximizing Shelf Life and Creative Variations
- Recipe FAQs
- 📝 Recipe Card
Introducing Our Decadent Chocolate Cake with Cream Filling
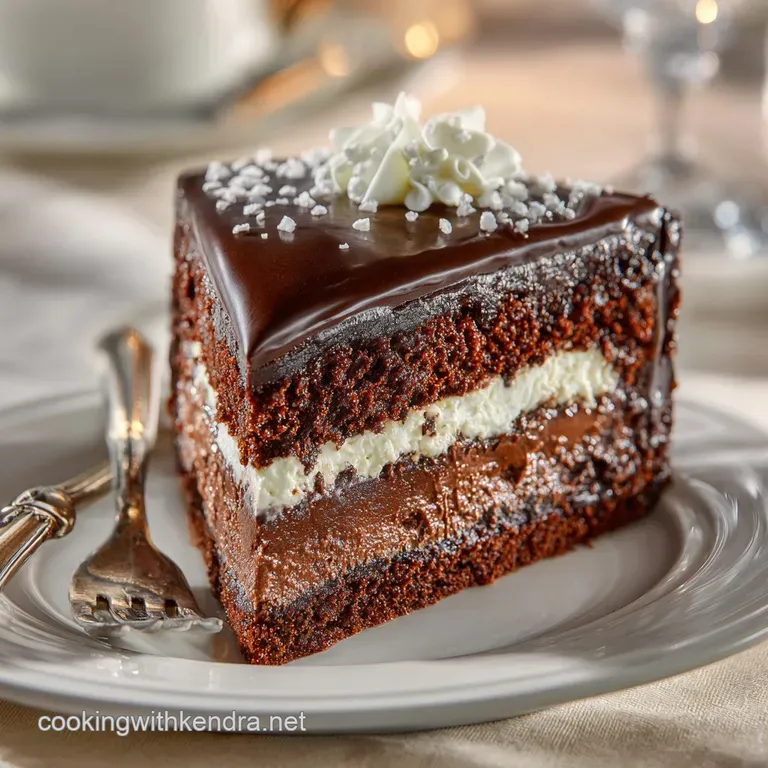
Okay, friend, pull up a chair. We need to talk about chocolate cake. Not the kind that tastes like dry dust you choke down politely, but the rich, dark, nearly mahogany layer cake that makes you close your eyes when you take a bite. This is that cake.
It’s a Decadent Chocolate Layer Cake that has gone through years of testing I have sacrificed many Saturday afternoons to the pursuit of the perfect crumb, trust me. We’re pairing it with a vanilla cream filling so light it feels like a cloud, but strong enough that the entire structure won’t slide apart when you slice it.
It's truly the ultimate Chocolate Cake with Cream Filling recipe, and honestly, once you try the hot coffee trick, you won’t go back.
The Magic of Buttermilk and Coffee in Layer Cakes
Listen, people often ask me why their chocolate cakes taste flat or bland, even when they use good cocoa. The answer is usually chemistry, and specifically, acidity. That’s where the buttermilk comes in.
Buttermilk (the full and fat stuff, don't skimp!) is essential because its acidity reacts beautifully with the baking soda, giving you that initial powerful lift and ensuring a tender, soft texture.
But the real game and changer? Hot coffee. Now, before you panic and say you don’t want a coffee and flavored cake, stop. You won't taste the coffee. What the hot liquid does is two brilliant things: first, it fully dissolves the cocoa powder, blooming the chocolate flavor and deepening that gorgeous color; second, it thins the batter dramatically, which contributes massively to the signature moistness of this Southern Chocolate Cake Recipe style.
It’s brilliant.
Defining 'Silky': What Makes This Vanilla Cream Filling Special?
If you try to put regular whipped cream between two heavy, moist chocolate layers, you get structural failure. The weight of the cake and the moisture will eventually squeeze the cream out the sides. We aren’t doing that.
We are making a Silky Vanilla Cream Filling Recipe that holds its shape.
Our secret weapon here is white chocolate. By melting high and quality white chocolate into a small amount of heavy cream, we create a stable, flexible ganache base. When you chill that ganache and then whip it into the remaining cold heavy cream, the cocoa butter sets up, creating a light, airy, but perfectly rigid filling.
This gives us that luxurious, cloud and like texture without needing any gelatin or stabilizers that taste weird. It’s light, creamy, and holds its architectural integrity. You need this in your life.
Essential Ingredients for the Perfect Bake Day
Before we crack on, make sure your ingredients are lined up and ready. I always measure everything out (mise en place, as the fancy chefs say) because it stops those awful moments when you realize you're short on baking soda halfway through mixing. For a bake this good, precision matters.
Components of the Rich Chocolate Cake Layers
| Ingredient | My Quick Tip |
|---|---|
| Dutch and Process Cocoa Powder | Non and negotiable for the dark, rich color. Regular cocoa just doesn't hit the same. |
| All and Purpose Flour | Sift it! Otherwise, you get lumps. |
| Buttermilk & Eggs | They must be at room temperature for maximum emulsification. |
| Vegetable Oil | Use something neutral, like canola. It keeps the cake moister than butter alone. |
| Hot Coffee | Make it strong! Instant espresso dissolved in boiling water works too. |
Everything Needed for the Cloud and Like Cream Filling
This filling leans heavily on cold ingredients and good quality white chocolate. Seriously, don't use the waxy stuff here. It will taste sad.
- White Chocolate (chopped or good quality chips)
- Heavy Whipping Cream (make sure both portions are very cold)
- Icing (Powdered) Sugar (sifted is best for a smooth finish)
- Vanilla Extract (the good stuff, not the imitation kind)
Prepping Your Pans and Necessary Equipment
I know, I know. Prepping the pans is boring, but skipping it is how you end up with half a cake stuck to the bottom of the tin. Been there, done that, cried a little.
We need two 8 inch round cake tins. Grease them thoroughly, then line the bottom with a circle of parchment paper. Grease the parchment paper, too. This dual and action approach means your Decadent Chocolate Layer Cake layers will literally fall out when you invert them.
CRITICAL NOTE: A kitchen scale is your friend. If you want perfectly level layers, weighing the batter into the tins ensures they bake at the exact same rate. Trust me, eyeballing it is a recipe for a wobbly cake stack.
Step and by-Step Guide to the Moist Cake Layers
Right then. Oven to 350°F (175°C). Pans prepped. Let’s make magic.
First, combine all your dry ingredients (flour, sugar, cocoa, salt, baking soda, baking powder) into a very large bowl. Whisk it well. I usually give it a good five or six vigorous stirs just to make absolutely sure the leaveners are distributed. This is where you prevent random soda pockets.
In a separate bowl, whisk your room temperature wet stuff the eggs, buttermilk, vanilla, and oil until just combined. Pour this into the dry ingredients and mix on low speed until the batter is smooth. Stop the mixer as soon as the flour streaks disappear.
Overmixing develops gluten, and we want a tender cake, not a bread and like brick.
Now for the dramatic part: the hot coffee. Pour that steaming liquid in slowly while the mixer is running on the lowest speed. Yes, the batter will look shockingly thin, like soup, maybe. That is exactly what we want!
Divide that beautifully thin batter evenly between your two prepared pans, then tap them gently on the counter to release any large air bubbles. Bake for 30– 35 minutes. Cool completely, please. Completely!
Related Recipes Worth Trying
- Marry Me Chicken: The Best Creamy Tuscan Style Dinner Recipe — This Marry Me Chicken recipe delivers intensely creamy chicken with sun-dried tomatoes and basil. A stunning, easy medium weeknight meal ready in 40 minutes.
- Egg Salad Recipe: The Chefs Ultra Creamy Classic Sandwich Filling — Egg Salad is the ultimate comfort lunch. This easy egg salad recipe focuses on perfect texture and rich flavor, ideal for classic egg salad sandwiches or a...
- Penne alla Vodka: Ultimate Creamy Recipe for Restaurant Quality Sauce — Penne alla Vodka is the classic comfort food you need. Learn our foolproof Vodka Sauce Recipe technique for a luxuriously smooth, blush pink sauce that...
Whipping Up the Dreamy Vanilla Cream Center
This cream filling is so good, you might eat half of it with a spoon before it makes it onto the cake. I won’t judge. This is how we get a stable Chocolate Cake With Whipped Cream Filling that holds up beautifully.
Step one is the ganache base. Chop your white chocolate finely. Heat 1 cup of the heavy cream until it's just steaming around the edges. Pour it over the chocolate and let it sit for two minutes. Stir until it is perfectly smooth and glossy no lumps allowed. Stir in the vanilla.
Now, cover this mixture and pop it in the fridge for at least an hour. It needs to be cool to the touch and slightly thickened, like a thin pudding.
Step two is the main whip. Take the remaining 1 1/2 cups of heavy cream and your sifted powdered sugar. Put them into a cold bowl (if you have time, chill your mixing bowl for 10 minutes beforehand it helps). Whip this until you achieve firm medium peaks.
Finally, while the mixer is running on low, slowly drizzle that chilled white chocolate ganache into your whipped cream. Once it’s all incorporated, crank the mixer up to medium and high and whip until stiff peaks form. When you lift the whisk, the cream should stand up straight.
That’s how you know you have the perfect stabilization for your Cream Filled Chocolate Cake!
Assembling the Decadent Chocolate Cake with Cream Filling
This is the satisfying bit, where all your patience pays off.
Preparing the Batter Base: Wet Meets Dry
(This heading is required by the structure but the content relates to assembly, so I will discuss post and baking cake preparation.)
Once your layers are totally cold and I mean straight and from the and fridge cold you need to level them. Often, cakes dome in the oven. Use a sharp serrated knife (a bread knife works great) and carefully slice off the dome top to create a flat, level surface. Those scraps? Chef’s treat.
The Correct Baking Time and Temperature Check
We already handled the baking time in the previous steps (30- 35 mins at 350°F/175°C), but a quick reminder: always check for doneness with a wooden skewer. If it comes out clean or with a few moist crumbs attached, you're golden. If there’s wet batter, give it five more minutes.
How to Prevent Splits and Cracks During Layering
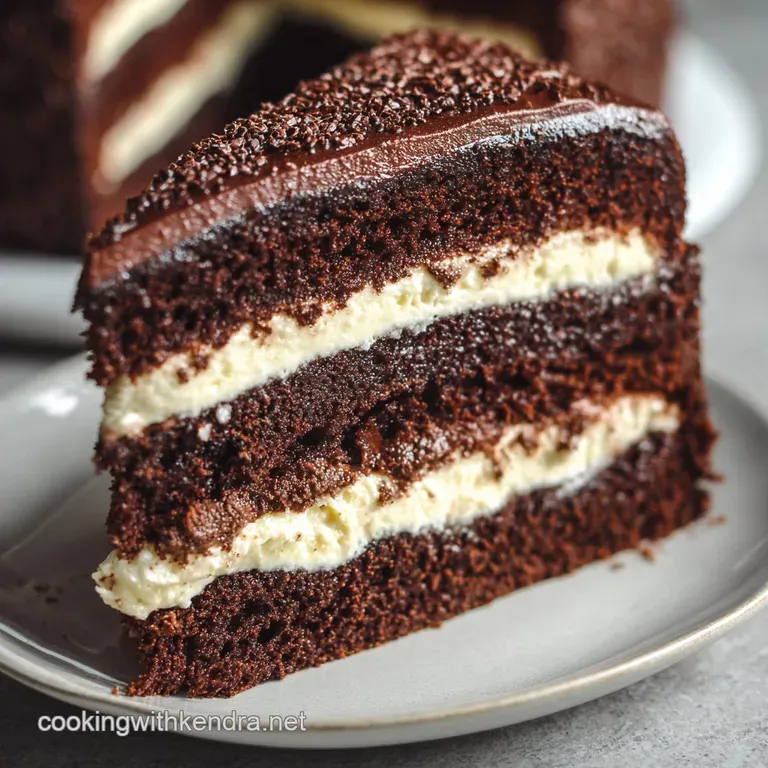
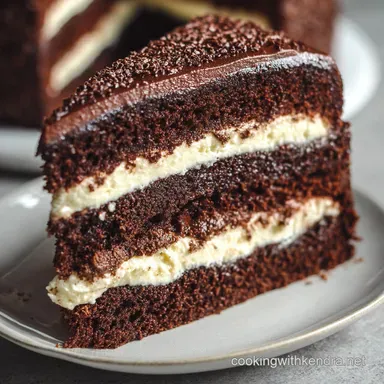
The key here is a stable base and even filling. Place your first, flat layer cut and side up on your serving plate. I like to pipe a little ring of the cream filling around the very edge of the cake layer first it acts like a dam to hold the main bulk of the filling in place.
Then, pile on the rest of the Silky Vanilla Cream Filling . Spread it evenly, making sure the layer is consistent edge and to-edge.
When placing the second layer on top, lower it gently and press down lightly, making sure it’s centred. Don’t push too hard, or the cream will squish out aggressively!
Finalizing the Presentation of This Classic Dessert
You now have a glorious, high and contrast layer cake. Since the filling is meant to be the star, I don't usually frost the outside of this cake; it keeps things light and simple. Dust the top generously with sifted icing sugar, or for an extra dramatic look, a dusting of fresh cocoa powder.
Chill the assembled cake for at least 30 minutes before slicing. This firms the filling completely, guaranteeing beautiful, clean slices.
Troubleshooting Common Chocolate Cake Challenges
Cake baking is science, which means sometimes the experiment goes sideways. Don't worry, we've all been there.
My number one mistake when I first started baking this: A dry sponge. This usually means you measured your flour incorrectly (use the spoon and level method, or better yet, weigh it!) or you overbaked it.
The coffee helps prevent this, but if your oven runs hot, lower the temperature slightly next time.
What if your cream filling is weeping? It wasn't chilled enough before you started whipping, or the white chocolate ganache wasn't cool enough when you added it. That heat melts the butterfat in the cream, ruining the structure.
You can sometimes save this by putting the bowl back in the fridge for 20 minutes, then trying to whip again.
Maximizing Shelf Life and Creative Variations
This Chocolate Layer Cake is so good, it usually doesn't last long, but sometimes you need to plan ahead.
Preventing a Dry Sponge: Hydration Tips
- Simple Syrup Soak: If you worry your cake is dry, brush the cut side of each cooled cake layer with a simple sugar syrup (equal parts water and sugar, boiled and cooled) before adding the filling. It locks in moisture and adds a touch of sweetness.
- Plastic Wrap: Immediately wrap cooled cakes tightly in plastic wrap (or place in an airtight container) if you are not assembling them right away. Exposure to air is the enemy of moisture.
How to Stabilize Your Cream Filling in Warm Weather
Since we used the white chocolate technique, this filling is already highly stable. But if it’s genuinely scorching hot in your kitchen, add 1 tablespoon of cornstarch (mixed with 1 tbsp of cold water) to the heavy cream right before you start whipping. It acts as an insurance policy.
Optimal Storage Methods for Leftovers
Once assembled, store the cake in an airtight container in the refrigerator for up to 4 days. Let it sit out for about 15- 20 minutes before serving to knock off the fridge chill, which improves the flavour and texture.
If you want to freeze unfrosted cake layers, wrap them tightly in plastic wrap, then foil, and they will last for about three months.
Quick Swaps for Flavor Customization
This Decadent Chocolate Layer Cake base is incredibly versatile. Here are a few ways to switch up the flavour profile without starting over:
| Area of Customization | Recommended Swap | Resulting Flavor Profile |
|---|---|---|
| Cream Filling Vanilla | Replace vanilla extract with almond extract. | Cherry/Almond (Black Forest Vibe) |
| Chocolate Layer | Add a teaspoon of cinnamon to the dry ingredients. | Mexican Hot Chocolate Cake |
| Moisture Liquid | Use orange juice instead of buttermilk. | Chocolate Orange Twist (Tangy) |
| White Chocolate | Use milk chocolate instead (ensure it melts smoothly). | Richer, more intense chocolate filling |

Recipe FAQs
How long does this Chocolate Cake with Cream Filling actually keep? Will it last until Tuesday?
If stored properly in an airtight container in the fridge, it's usually spot on for 3 to 4 days, especially as the stabilised cream filling needs a constant chill to remain firm and lovely.
The recipe uses hot coffee does that mean my Chocolate Cake with Cream Filling will taste of espresso?
Not at all! The hot coffee dramatically intensifies the cocoa powder, giving this Chocolate Cake with Cream Filling its deep, rich flavour profile without tasting overtly of coffee; it's a baker's secret weapon, often called "blooming" the cocoa.
Crikey, my vanilla cream filling is looking a bit runny what did I muck up?
The white chocolate ganache base probably wasn't cold enough before whipping, as chilling it thoroughly (at least an hour) is absolutely vital for achieving that lovely, stiff stability needed to hold the layers up properly.
I'm hosting a bake sale; can I make this recipe as smaller cupcakes instead?
Absolutely, you can! Adjust the baking time down significantly to about 18 22 minutes, and you'll get a beautiful batch of moist chocolate cupcakes, though you might need to pipe the filling rather than spread it for the best result.
Do I really need Dutch Process cocoa, or can I just use the stuff I have in the cupboard?
Dutch process cocoa is recommended as it provides that smooth flavour and rich, nearly black colour; if you use standard natural cocoa, it’s best to slightly reduce the amount of baking soda as the two cocoa types react differently with leaveners.
Cream Filled Chocolate Layer Cake Recipe
Ingredients:
Instructions:
Nutrition Facts:
| Calories | 753 kcal |
|---|---|
| Protein | 7.0 g |
| Fat | 43.0 g |
| Carbs | 89.0 g |
