Smashed Potatoes: Crispy and Soft
- Time: Active 15 minutes, Passive 45 minutes, Total 60 minutes
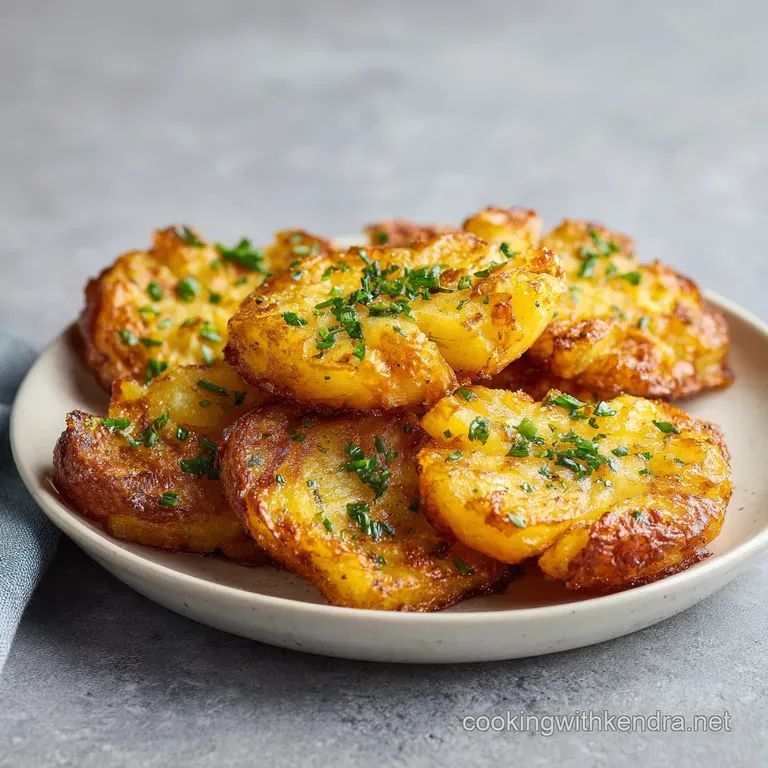
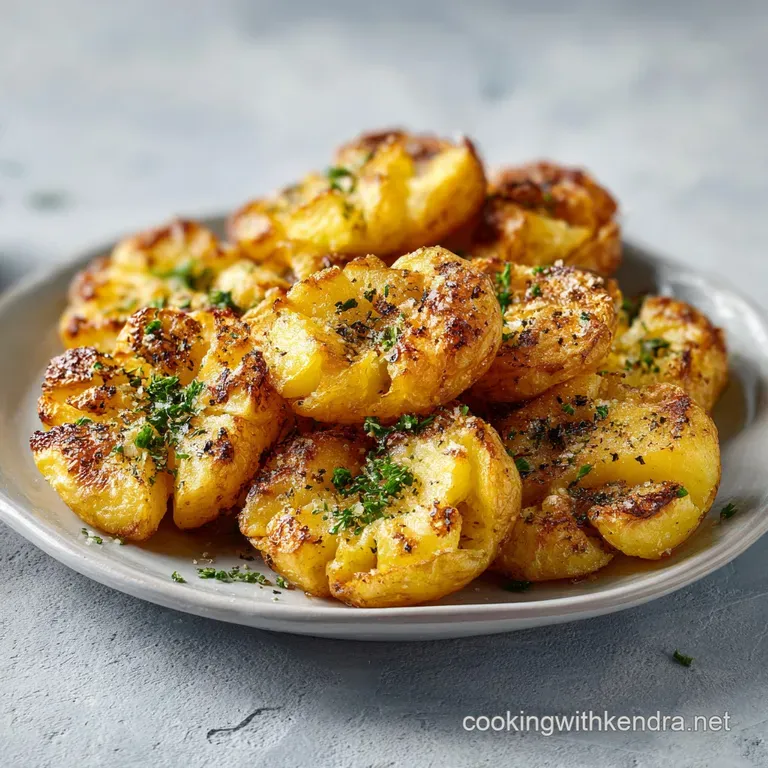
- Flavor/Texture Hook: Shatteringly crispy edges with a velvety, buttery interior
- Perfect for: Weeknight family dinners or a holiday side dish
- Essential Elements for Potato Success
- Ingredient Deep Dive Analysis
- Ingredients and Smart Substitution Options
- Kitchen Tools for Better Results
- Step-by-Step Cooking and Prep Guide
- Fixing Common Potato Texture Issues
- Creative Flavors and Recipe Variations
- Proper Storage and Reheating Tips
- Serving Ideas for Family Meals
- Recipe FAQs
- 📝 Recipe Card
The potato is a traveler. Long before it was the backbone of our weeknight dinners, it was the soul of the Andean highlands, cultivated by the Incas in a dizzying variety of colors and shapes. It represents resilience, growing in the harshest soils to provide comfort to millions.
When I think of Smashed Potatoes, I don't just see a side dish; I see a modern tribute to that rustic, earthy heritage. It takes the humble tuber and transforms it into something that feels celebratory and cozy all at once.
There is a specific sound you'll hear when you get these right. It is that distinctive "shatter" when your fork hits the jagged, golden brown edge of a Yukon Gold. That sound is followed immediately by the aroma of toasted garlic and warm thyme.
It's the kind of smell that brings the kids running to the kitchen before you've even set the table. I remember the first time I made these for a family gathering; they disappeared faster than the main roast. We’ve all had those soggy, sad roasted potatoes that just feel heavy.
This recipe is the antidote to that, focusing on texture above everything else.
The magic here lies in the contrast. You have that extreme over high heat crunch on the outside, which acts like a protective shell for the buttery, almost creamy center. It’s a texture profile that most people think you can only get at a high end steakhouse with a deep fryer.
But honestly, we’re doing it right in your home oven with a few clever tricks. We are going to treat these potatoes with a bit of "tough love" during the prep to ensure they deliver the maximum possible crunch.
Essential Elements for Potato Success
Getting that specific texture isn't an accident. It comes down to managing the starch on the surface of the potato. When we boil the potatoes with a little bit of help, we are actually changing the structure of the skin. This allows for more surface area, which eventually leads to more crispiness.
It's a simple process that makes a world of difference in the final result.
Alkaline Environment: Adding baking soda to the boiling water raises the pH, which breaks down the potato's pectin more effectively. This creates a starchy "slurry" on the surface that crisps up beautifully in the oven.
Steam Release: Letting the potatoes sit and dry after boiling is vital. If they go into the oven wet, they will steam instead of roast, leaving you with a soft, lackluster skin.
Mechanical Roughness: Shaking the potatoes in a colander creates micro tears in the surface. These jagged bits catch the oil and become the crispy, brown "frills" that everyone fights over at the dinner table.
High Heat Conductivity: Using a high oven temperature of 425°F ensures that the exterior dehydrates and browns before the interior becomes overcooked or dry.
| Method | Cook Time | Texture | Best For |
|---|---|---|---|
| oven-roasted | 25-30 mins | Ultimate crunch | Large family batches |
| Stovetop Pan Fry | 15-20 mins | Deeply caramelized | Small portions for two |
| Air Fryer | 12-15 mins | Very even browning | Quick weeknight meals |
If you are cooking for a larger crowd, the oven is your best friend. It allows you to spread out 1.5 lb of baby Yukons without overcrowding, which is the secret to getting that uniform golden color. If the potatoes are too close together, they will trap moisture and won't get that "shatter" we are looking for.
Ingredient Deep Dive Analysis
Choosing the right potato is the first step toward success. While you can use red potatoes, I find that baby Yukon Golds have the best sugar to starch ratio for this specific application. They have a natural buttery flavor that pairs perfectly with the sharp Parmesan and the earthy thyme.
| Ingredient | Science Role | Pro Secret |
|---|---|---|
| Yukon Gold Potatoes | High starch content provides a creamy interior and crisp exterior. | Pick potatoes of uniform size (about 1.5 inches) for even cooking. |
| Baking Soda | Breaks down pectin to create a starchy surface layer. | Use exactly 1/2 tsp; too much can affect the flavor profile. |
| Parmesan Cheese | Proteins and fats create a savory, lacy crust. | Grate your own from a block for better melting and flavor. |
Yukon Golds are incredibly forgiving. They hold their shape during the boil but yield easily under the pressure of a glass. Their thin skins are also perfect for roasting because they don't become leathery or tough.
Ingredients and Smart Substitution Options
For this recipe, we are using a 1.5 lb bag of Baby Yukon Gold potatoes. This size is perfect because they offer the most surface area relative to their volume once smashed. You will also need 1 tbsp of sea salt for the boiling water and 1/2 tsp of baking soda.
For the flavor infusion, grab 3 tbsp of extra virgin olive oil, 3 cloves of minced garlic, 1/2 cup of freshly grated Parmesan, 1 tsp of chopped fresh thyme, and 1/2 tsp of cracked black pepper. Finish it all off with 1/4 cup of snipped fresh chives.
- Baby Yukon Gold Potatoes: 1.5 lb. Why this? They provide a buttery texture and thin skins that crisp up perfectly.
- Substitute: Red Bliss potatoes. Same size, slightly more waxy but still very tasty.
- Extra Virgin Olive Oil: 3 tbsp. Why this? high-quality oil provides a fruity base for the garlic and herbs.
- Substitute: Avocado oil. It has a higher smoke point and a neutral flavor.
- Parmesan Cheese: 1/2 cup grated. Why this? It creates a salty, umami rich crust that binds to the potato.
- Substitute: Pecorino Romano. Note: It is saltier, so reduce added sea salt slightly.
- Fresh Thyme: 1 tsp chopped. Why this? Adds an earthy, floral note that cuts through the richness of the oil.
- Substitute: Dried thyme. Use only 1/3 tsp as dried herbs are more concentrated.
- Fresh Chives: 1/4 cup. Why this? Provides a bright, oniony finish that refreshes the palate.
- Substitute: Scallion tops. Finely sliced, they offer a similar bite and color.
If you happen to have a bag of creamer potatoes, you can certainly use those too. In fact, my garlic herb creamer potatoes follow a similar logic but focus on a slightly different flavor profile. The key is keeping the size small so the "smash" creates those wonderful jagged edges.
Kitchen Tools for Better Results
You don't need a lot of fancy equipment for Smashed Potatoes, but a few specific items will make the job much easier. A large stockpot is essential for boiling the potatoes without them crowding each other. You will also need a sturdy colander for draining and "scuffing" the potatoes.
A rimmed baking sheet is non negotiable. The rim prevents the oil from dripping into your oven, which can cause smoke. I always recommend lining it with parchment paper to prevent sticking and to make cleanup a breeze. To actually smash the potatoes, a flat bottomed glass or a heavy measuring cup works best.
You want something with a smooth surface so it doesn't tear the potato apart completely.
For the flavor mixture, a small whisk and a pastry brush are helpful. The brush allows you to get the garlic infused oil into every little nook and cranny of the smashed potato. If you don't have a brush, a spoon will work, but you'll have to be more careful to ensure even coverage.
Finally, a good chef's knife for mincing the garlic and herbs will ensure you get the best flavor release.
step-by-step Cooking and Prep Guide
1. The Par Boil and Rough Up
Place your 1.5 lb of baby Yukon Gold potatoes in a large stockpot and cover them with cold water by at least an inch. Add the 1 tbsp of sea salt and 1/2 tsp of baking soda. Bring the water to a rolling boil over high heat, then reduce to a simmer. Cook for 15-20 minutes.
Cook until the potatoes are fork tender, meaning a fork slides in and out with zero resistance.
2. The 5 Minute Dehydration Rest
Drain the potatoes into a colander. This is a crucial step: let them sit for 5 minutes. Note: This allows the internal steam to escape so the skins can dry out. After 5 minutes, give the colander a few vigorous shakes.
You want to see the skins look slightly scuffed and furry. This "fuzz" is actually starch that will turn into a crispy crust later.
3. Preheating the Roast Environment
While the potatoes are drying, preheat your oven to 425°F (220°C). Line a large, rimmed baking sheet with parchment paper. If you don't have parchment, you can use a light coating of oil, but parchment really helps with the release after roasting.
4. The Smash Technique
Arrange the dry potatoes on the baking sheet, leaving at least 2 inches of space between them. Using the flat bottom of a glass or measuring cup, gently but firmly press down on each potato. Press until they are about 1/2 inch thick. You want the edges to look jagged and frayed, not perfectly smooth.
5. Mixing the Flavor Infusion
In a small bowl, whisk together the 3 tbsp of extra virgin olive oil, 3 cloves of minced garlic, 1 tsp of fresh thyme, and 1/2 tsp of cracked black pepper. Mixing the garlic with the oil helps protect it from burning too quickly in the high heat of the oven.
6. The First Roast Phase
Using a pastry brush or a small spoon, coat the top of each potato generously with the oil mixture. Make sure to get the oil into the deep cracks. Place the sheet in the center of the oven and roast for 20 minutes. Roast until the edges begin to turn a light golden brown.
7. The Cheese Application
At the 20 minute mark, carefully remove the tray from the oven. Evenly sprinkle the 1/2 cup of freshly grated Parmesan cheese over the tops of the potatoes. The cheese will melt into the cracks and create a lacy, crispy skirt around the edges.
8. The Final over High heat Roast
Return the tray to the oven for another 5-10 minutes. Bake until the potatoes are deep golden brown and crackling. The cheese should look toasted and the edges of the potatoes should feel very firm to the touch.
9. Garnish and Serve
Once they are out of the oven, let them rest on the pan for 2 minutes to firm up. Sprinkle with the 1/4 cup of fresh chives. Transfer to a serving platter and serve immediately while they are at their maximum "shatter" point.
Fixing Common Potato Texture Issues
Potatoes Sticking to Glass
If you find that your potatoes are sticking to the bottom of the glass while smashing, it’s usually because they are still a bit too wet or the glass is too cold. A quick fix is to lightly dip the bottom of the glass in a little olive oil or use a small square of parchment paper between the glass and the potato.
Avoiding Soggy Bottoms
Soggy potatoes are the enemy of a good side dish. This usually happens when the oven isn't hot enough or the pan is overcrowded. Make sure you are at a true 425°F and that you give each potato enough "breathing room" on the tray.
If the potatoes are too close, the moisture they release will turn into steam, which softens the skin instead of crisping it.
Preventing Burnt Garlic
Garlic can go from fragrant to bitter very quickly. By mixing the minced garlic into the olive oil, you create a buffer that slows down the cooking process. If you find your garlic is still burning, try mincing it a bit more coarsely or adding it halfway through the roasting process instead of at the beginning.
| Problem | Root Cause | Solution |
|---|---|---|
| Potatoes fall apart | Overboiled or smashed too thin | Boil only until just fork tender; keep to 1/2 inch thickness. |
| Pale and soft skins | Oven temperature too low | Verify oven with a thermometer; ensure it is at 425°F. |
| Bitter flavor | Burnt garlic or herbs | Mix garlic with oil first or use larger garlic pieces. |
If you ever find yourself struggling with the texture of a boiled potato dish, it might be worth checking out a different technique. For example, my traditional mashed potato recipe explains how to get a silky texture, which is the exact opposite of what we want here, but understanding both ends of the spectrum helps you master the humble tuber.
Common Mistakes Checklist
- ✓ Don't skip the baking soda in the water; it is the secret to the crunch.
- ✓ Always start with cold water to ensure the potatoes cook evenly from the outside in.
- ✓ Let the potatoes dry for the full 5 minutes after boiling.
- ✓ Use a high smoke point oil if you are worried about the oven temp.
- ✓ Don't move the potatoes once they start roasting; let the bottom crust form undisturbed.
Creative Flavors and Recipe Variations
While the garlic and Parmesan version is a classic for a reason, you can easily adapt this recipe to fit whatever you have in the pantry. If you are looking for Air Fryer Smashed Potatoes, simply follow the boiling and smashing steps, then air fry at 400°F for 12-15 minutes, flipping halfway through.
It is a fantastic way to save oven space during the holidays.
For Loaded Smashed Potatoes, treat the roasted potatoes like miniature baked potatoes. Once they are crispy and out of the oven, top them with a dollop of sour cream, some crispy bacon bits, and a sprinkle of extra cheddar cheese.
It transforms a side dish into a substantial snack or even a light lunch.
If you are short on time, you can try Smashed Potatoes Without Boiling. This requires roasting the whole baby potatoes at 400°F for about 20 minutes first, then taking them out to smash them, and returning them to the oven for another 20 minutes.
While you lose the alkaline advantage of the boiling step, you still get a very respectable crunch with one less pot to wash.
- Spicy Cajun: Swap thyme for 1 tsp of Cajun seasoning and a pinch of cayenne.
- Lemon Herb: Use lemon zest instead of thyme and finish with a squeeze of fresh lemon juice.
- Truffle Parmesan: Drizzle with a small amount of truffle oil just before serving for a luxurious touch.
Proper Storage and Reheating Tips
Storing Smashed Potatoes is straightforward, but you have to accept that they will lose their initial "shatter" once they go into the fridge. Keep leftovers in an airtight container for up to 4 days. When you are ready to eat them again, avoid the microwave at all costs. The microwave will make them gummy and sad.
Instead, reheat them in a 400°F oven or an air fryer for 5-8 minutes until they sizzle and crisp back up.
You can also freeze these! After the smashing step but before the roasting, lay them out on a baking sheet and freeze until solid. Transfer them to a freezer bag and store for up to 3 months.
When you're ready to eat, roast them directly from frozen, adding about 10-15 minutes to the initial roasting time.
To reduce waste, don't throw away those little potato bits that break off during the smashing process. Roast them right alongside the main potatoes. They will become ultra crispy "potato croutons" that are perfect for tossing into a salad the next day or just snacking on while you finish the rest of the meal.
Serving Ideas for Family Meals
These potatoes are the ultimate team player. They pair beautifully with almost any protein, but they really shine next to something with a bit of a sauce or juice. I love serving them with a simple roast chicken or a seared steak where they can soak up some of the resting juices without losing their crunch.
For a vegetarian feast, serve them alongside a large roasted cauliflower "steak" or a bright, citrusy kale salad. The richness of the Parmesan and olive oil provides a satisfying weight to the meal that keeps everyone full.
In my house, we often serve these as part of a "tapas" night with various dips like garlicky aioli or a spicy romesco sauce.
If you are looking for a more traditional comfort meal, these are a great alternative to standard fries. They feel a bit more grown up and sophisticated, but they still have that "finger food" appeal that kids love.
No matter how you serve them, the most important thing is to get them to the table while they are still hot and crackling. That first bite, where the crispy exterior gives way to the velvety center, is what makes all the effort worth it.
Every time I see a plate of these, I'm reminded that the best food doesn't have to be complicated; it just has to be done with a little bit of care and the right technique.

Recipe FAQs
What is the best way to smash potatoes for maximum crunch?
Use a heavy, flat bottomed glass. Place the cooked, dried potato on the baking sheet and press down firmly until it reaches a 1/2 inch thickness, ensuring the edges look frayed and jagged.
What are some common smashed potato mistakes to avoid?
Skipping the baking soda and the resting time. The baking soda breaks down the potato surface for a better crust, and failing to let the potatoes steam dry for 5 minutes prevents them from getting truly crispy in the 425°F oven.
How do you make smashed potatoes using the Rachael Ray style approach?
Can you pre-cook potatoes for smashed potatoes?
Yes, you can boil them in advance. Simply boil, drain, and let the potatoes cool completely in the refrigerator before pressing and roasting them, which can actually improve the final texture.
Is it true I should use a high heat oil to prevent burning?
No, this is a common misconception. Extra virgin olive oil is perfectly stable at the 425°F required for this recipe, provided you monitor the potatoes closely during the final roasting stage.
Why is my potato skin not getting crispy?
Excess surface moisture is likely the culprit. Ensure you shake the colander vigorously after draining to scuff the skins and allow the full 5 minutes of steam drying time before adding the olive oil mixture.
How do I know when the potatoes are done roasting?
Look for a deep golden brown color. The potatoes should be roasted for 25 30 minutes total, with the Parmesan cheese added during the final 5 10 minutes to create a crispy, toasted finish.
Crispy Smashed Potatoes 2

Ingredients:
Instructions:
Nutrition Facts:
| Calories | 272 kcal |
|---|---|
| Protein | 7.9 g |
| Fat | 13.8 g |
| Carbs | 30.4 g |
| Fiber | 3.7 g |
| Sugar | 1.4 g |
| Sodium | 535 mg |
