Cuisinart Vanilla Bean Ice Cream Recipe
- Time: Active 15 minutes, Passive 4 hours 20 mins, Total 4 hours 35 mins
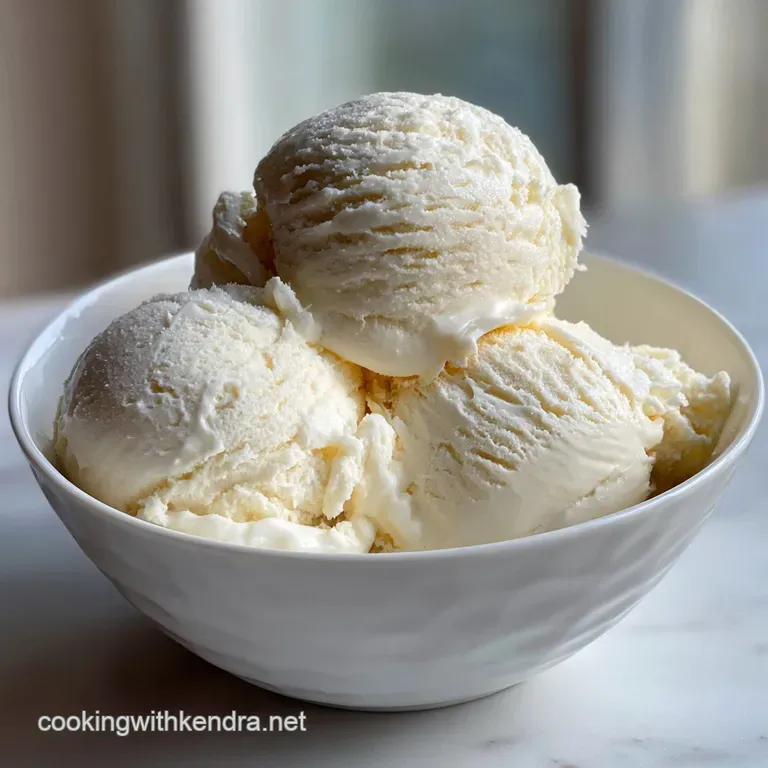
- Flavor/Texture Hook: Velvety, rich custard with a silk like mouthfeel and fragrant vanilla flecks
- Perfect for: Impressing dinner guests or elevated weekend family treats
- Creating the Perfect Cuisinart Ice Cream Maker Recipe with Vanilla Bean
- The Science of Why it Works
- Breaking Down the Component Analysis
- The Essential Elements and Substitutions
- Mastering the Custard Step by Step
- Solving Common Churning Issues and Texture Problems
- Adjusting the Batch Size for Any Occasion
- Debunking Common Kitchen Myths
- Keeping Your Batch Fresh and Zero Waste
- How to Garnish for a Restaurant Style Experience
- Recipe FAQs
- 📝 Recipe Card
Creating the Perfect Cuisinart Ice Cream Maker Recipe with Vanilla Bean
There is something hypnotic about watching the paddle of an ice cream machine slowly fold thick, yellow custard over itself. The first time I tried a Cuisinart ice cream maker recipe, I didn’t realize how much the temperature of the bowl mattered. I rushed it, and I ended up with a soupy mess that refused to set.
But when you get it right, the texture is better than anything you can buy at the store. This Cuisinart ice cream maker recipe with vanilla bean delivers a truly exceptional vanilla bean ice cream that feels like a luxury.
We’ve all had that generic tub from the grocery store that tastes more like cold sugar than actual vanilla. This version is different. It’s all about the custard. We’re talking about real heavy cream, whole milk, and the tiny black specks from a real vanilla bean.
It’s rich, it’s dense, and it has that unmistakable buttery finish that only comes from using fresh egg yolks. If you've been looking for a reliable maker recipe, this is the one that actually works every single time.
Honestly, don’t even bother with low-fat milk here. The magic happens because of the fat content in the 2 cups of heavy cream. It coats your tongue and carries the vanilla flavor in a way that skim milk just can't.
We are going to walk through how to temper the eggs without scrambling them, because that’s the part that usually scares people off. Trust me on this, once you master the custard, you'll never go back to the "dump and stir" methods.
The Science of Why it Works
Fat Polymerization: The high fat content from the 2 cups of heavy cream creates a stable network of fat globules that trap air during the churning process, resulting in a velvety texture rather than a hard block of ice.
Lecithin Emulsification: The 5 large egg yolks provide natural lecithin, which binds the water and fat molecules together, preventing the ingredients from separating and ensuring a smooth, cohesive scoop.
Chef's Tip: Freeze your granulated sugar for 15 minutes before whisking it with the egg yolks. This small temperature drop prevents the yolks from "burning" (forming tiny hard lumps) when they first hit the sugar, leading to a much smoother custard base.
| Thickness | Internal Temp | Rest Time | Visual Cue |
|---|---|---|---|
| Thin liquid | 100°F - 120°F | N/A | Steam just begins to rise from the milk |
| Nappe stage | 170°F - 175°F | 10 mins | Custard coats the back of a spoon clearly |
| Overcooked | 185°F+ | Immediate Ice Bath | Small curd like clumps of egg begin to form |
The table above is your best friend when you’re standing over the stove. Most people guess when the custard is done, but using a digital thermometer is the only way to be 100% sure you won't end up with sweet scrambled eggs. If you hit that 170°F mark, you are in the safe zone for that perfect, thick consistency. If you love experimenting with different bases, this technique is very similar to what I use in The Tangy Homemade recipe which has a similar fat profile.
Breaking Down the Component Analysis
Understanding the "why" behind your ingredients makes you a better cook. In an ice cream maker recipe with vanilla bean, every element has a structural job to do. If you change the sugar, the freezing point changes. If you skip the salt, the flavor stays flat.
It's a delicate balance of chemistry and kitchen intuition that results in that "shatter" of cold cream on your palate.
| Ingredient | Science Role | Pro Secret |
|---|---|---|
| 5 Egg Yolks | Emulsifier | Use room temp yolks to prevent the custard from "shocking" when adding warm milk. |
| Granulated Sugar | Freezing Point Depressant | Sugar keeps the ice cream soft; reducing it too much will result in a rock hard texture. |
| Whole Vanilla Bean | Flavor Infusion | Rub the seeds into the sugar before mixing to distribute them evenly and prevent clumping. |
Using a real vanilla bean is the difference between "good" and "unforgettable." The seeds provide those beautiful dark flecks, but the pod itself holds massive amounts of flavor. While the custard heats, the pod undergoes a "cold brew" style infusion that adds woody, floral notes you just can't get from a bottle.
This is the hallmark of a premium maker recipe.
The Essential Elements and Substitutions
To get the best results, start with the freshest ingredients you can find. This recipe with vanilla bean is simple, so the quality of the dairy really shines through.
- 2 cups heavy cream: Needs to be at least 36% fat.
- Sub: Heavy whipping cream. Why this? The fat provides the essential structure for aeration.
- 1 cup whole milk: Don't use 2% or skim.
- Sub: Half and half (use 3 cups total and omit the cream). Why this? Whole milk balances the richness without making it too greasy.
- 3/4 cup granulated sugar: Standard white sugar is best.
- Sub: Cane sugar. Why this? It dissolves perfectly without altering the vanilla color.
- 5 large egg yolks: Provides the richness.
- Sub: 4 yolks if using extra large eggs. Why this? Yolks are the primary thickening agent for the custard.
- 1 whole vanilla bean: The star of the show.
- Sub: 1 tbsp vanilla bean paste. Why this? Real beans offer the most complex flavor profile.
- 1/8 tsp fine sea salt: Enhances sweetness.
- Sub: Table salt. Why this? Salt balances the heavy fats and sugar.
- 1 tsp pure vanilla extract: Added at the end.
- Sub: Vanilla essence (not recommended for flavor). Why this? A final "kick" of vanilla that isn't cooked off.
| Original Ingredient | Substitute | Why It Works |
|---|---|---|
| Heavy Cream (2 cups) | Full fat Coconut Milk | Similar fat content. Note: Adds a distinct coconut flavor and slight graininess. |
| Granulated Sugar (3/4 cup) | Honey (1/2 cup) | Liquid sugar. Note: Makes the ice cream softer but adds a floral honey taste. |
| 5 Egg Yolks | 2 tbsp Cornstarch | Thickener for egg free. Note: Texture is less "custardy" and more like gelato. |
If you decide to go the dairy-free route, keep in mind that the freezing time might increase because plant milks often have higher water content. Higher water means more ice crystals, so you'll want to churn it a bit longer to keep those crystals small and manageable.
Mastering the Custard step-by-step
- Prep the bean. Split the vanilla bean lengthwise and scrape the seeds out. Note: Use the back of a knife to get every last speck.
- Heat the dairy. Combine the 1 cup whole milk, 3/4 cup sugar, salt, and the vanilla pod/seeds in a saucepan. Heat until steam rises but it doesn't boil.
- Whisk the yolks. In a separate bowl, whisk the 5 large egg yolks until they turn a pale, buttery yellow.
- Temper the eggs. Slowly drizzle half of the hot milk into the yolks while whisking constantly. Note: This prevents the eggs from scrambling.
- Cook the custard. Pour the yolk mixture back into the saucepan with the remaining milk. Cook 5-8 mins until it coats a spoon.
- Strain the base. Pour the custard through a fine mesh sieve into a clean bowl. Note: This catches the pod and any accidental egg bits.
- Add the cream. Stir in the 2 cups heavy cream and 1 tsp vanilla extract immediately. This stops the cooking process.
- The deep chill. Cover and refrigerate for at least 4 hours. The base must be cold to the touch before churning.
- The churn. Pour the cold base into your Cuisinart machine. Churn 20-25 mins until it looks like soft serve.
- The final freeze. Transfer to a container and freeze for 2 hours. This allows the ice cream to "ripen" and firm up.
Chef's Tip: Put your storage container in the freezer while the machine is churning. If you put cold ice cream into a room temperature container, the edges will melt instantly, creating a layer of ice crystals when it re freezes.
Solving Common Churning Issues and Texture Problems
Even with a reliable Cream Maker Recipe, things can go sideways. The most common heartbreak is ice cream that feels "gritty." This usually isn't dirt; it's either tiny bits of cooked egg or large ice crystals. If you find your texture isn't silky, we need to look at your cooling process and your churning speed.
Why Your Ice Cream is Gritty
If the texture feels like fine sand, your custard likely got too hot during the thickening stage, causing the proteins in the 5 large egg yolks to clump. To avoid this, always keep your heat on medium low and never let the mixture reach a rolling boil.
If it’s already happened, you can sometimes save it by running the liquid through a high speed blender before chilling.
Why the Mixture Won't Freeze
If your Cuisinart has been running for 30 minutes and it’s still liquid, the bowl wasn't cold enough. Most freezer bowls need a full 24 hours at the back of the freezer to be ready. If you can hear liquid sloshing inside the bowl when you shake it, it's not ready to churn.
| Problem | Root Cause | Solution |
|---|---|---|
| Greasy mouthfeel | Over churning | Stop the machine as soon as it reaches soft serve consistency. |
| Rock hard texture | Not enough sugar | Check measurements; sugar prevents total freezing. |
| Scrambled egg bits | Adding milk too fast | Pour the hot milk into yolks in a very slow, thin stream. |
Common Mistakes Checklist:
- ✓ Didn't freeze the bowl for a full 24 hours (most common fail).
- ✓ Forgot to strain the custard (leaves "eggy" bits in the final product).
- ✓ Churned the base while it was still slightly warm (results in icy texture).
- ✓ Overcrowded the machine (don't fill past the "max" line).
- ✓ Skipped the salt (salt is essential to make the vanilla flavor pop).
Adjusting the Batch Size for Any Occasion
If you’re cooking for a crowd or just for two, you can scale this recipe with vanilla bean quite easily. For a half batch, you’ll use 2.5 yolks just whisk 3 yolks together and measure out half by weight or volume.
You'll want to use a smaller saucepan to ensure the milk doesn't evaporate too quickly while heating.
When scaling up (2x), be careful with the Cuisinart bowl capacity. Most home machines can only handle about 1.5 to 2 quarts of liquid. A double batch of this recipe will definitely overflow. It's much better to make the custard in one big pot, but churn it in two separate batches.
Let the freezer bowl re freeze for at least 12 hours between sessions for the best results.
If you are scaling up for a party, consider making some Cream Cheese Raspberry Pinwheels recipe to serve alongside. The tartness of the raspberry and the buttery pastry are the perfect contrast to the heavy, sweet vanilla bean custard.
Debunking Common Kitchen Myths
One big myth is that you need to boil the cream to get the flavor out of the vanilla bean. In reality, boiling the 2 cups of heavy cream can actually change the flavor of the dairy, making it taste "cooked" or like canned milk. You only need to reach about 170°F to get full infusion.
Any hotter and you're just risking a skin forming on the top of your milk.
Another misconception is that "more vanilla extract equals more flavor." If you dump a quarter cup of extract into the base, the high alcohol content will actually prevent the ice cream from freezing properly. You'll end up with a slushy mess that tastes like chemicals.
Stick to the 1 tsp of pure extract and let the real bean do the heavy lifting for that authentic, deep flavor.
Keeping Your Batch Fresh and Zero Waste
Storage is where most people lose the quality of their homemade Cuisinart Ice Cream. Unlike store-bought brands, we aren't using stabilizers or gums. This means the ice cream is prone to "freezer burn" within just a few days.
To prevent this, press a piece of plastic wrap directly onto the surface of the ice cream before putting the lid on the container. This eliminates the air gap where ice crystals like to grow.
- Fridge: The custard base (un churned) lasts 3 days.
- Freezer: Churned ice cream is best within 1 week, but safe for 1 month.
- Zero Waste: Don't throw away that vanilla pod! After you strain it out of the custard, rinse it, dry it completely, and stick it into a jar of granulated sugar. In two weeks, you'll have homemade vanilla sugar for your morning coffee. You can also use leftover egg whites for a healthy omelet or a batch of meringues.
How to Garnish for a Restaurant Style Experience
The presentation of a vanilla bean ice cream is all about showcasing those beautiful black flecks. Use a warm scoop to get a perfectly round ball, which allows the light to hit the texture.
If you want to get fancy, a simple drizzle of high-quality olive oil and a tiny pinch of flaky sea salt can turn this into a gourmet experience.
For a family friendly vibe, serve it in chilled glass bowls. If you put it in a warm bowl, the bottom melts into a puddle before the kids can even grab a spoon. I also love topping this with fresh berries that have been macerated in a little bit of sugar and lemon juice.
The acidity cuts right through the 25.1 g of fat per serving, making the whole dessert feel lighter and more balanced. It's the ultimate way to finish a meal using your favorite maker recipe.

Recipe FAQs
Can I use low-fat milk instead of whole milk in this Cuisinart ice cream maker recipe?
No, stick with whole milk or half and-half. low-fat options lack the necessary fat content for a rich, creamy texture, leading to icier results.
How do I prevent my ice cream from being gritty?
Ensure your custard base is thoroughly chilled and your freezer bowl is fully frozen. Grittiness often comes from overcooked egg bits or large ice crystals, both preventable with proper cooling and churning.
My ice cream mixture is still liquid after 30 minutes of churning. What went wrong?
Your Cuisinart's freezer bowl likely wasn't frozen solid enough. These bowls require a full 24 hours in a very cold freezer to properly chill the base during churning.
How long should I freeze the custard base before churning?
Chill for at least 4 hours, but ideally overnight. The base must be thoroughly cold to the touch for optimal churning and texture development.
Can I make this recipe dairy-free?
Yes, but the texture will change. Substituting full fat coconut milk for heavy cream is possible, though it may impart a coconut flavor and a slightly grainier texture.
How long does the churned ice cream last?
Best consumed within one week for optimal quality. Without stabilizers, homemade ice cream is prone to freezer burn and developing ice crystals over time.
What's the best way to store leftover ice cream to prevent freezer burn?
Press plastic wrap directly onto the surface of the ice cream before sealing the container. This eliminates air pockets, which are the primary cause of ice crystal formation and freezer burn.
Cuisinart Vanilla Ice Cream

Ingredients:
Instructions:
Nutrition Facts:
| Calories | 326 kcal |
|---|---|
| Protein | 3.9 g |
| Fat | 25.1 g |
| Carbs | 22.2 g |
| Fiber | 0 g |
| Sugar | 20.3 g |
| Sodium | 49 mg |
