Brown Rice in Rice Cooker

- Time: Active 5 minutes, Passive 45 minutes, Total 50 minutes
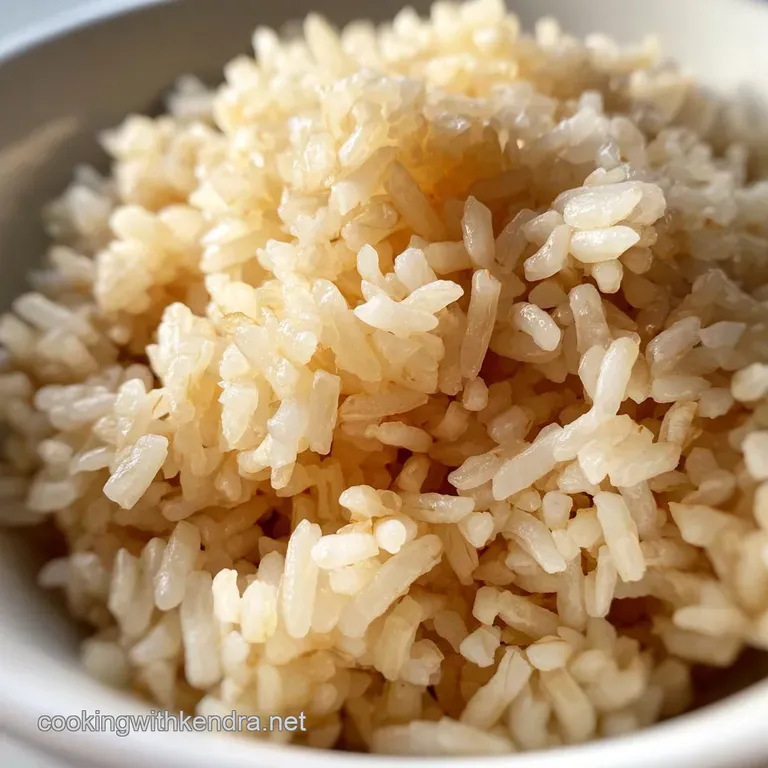
- Flavor/Texture Hook: Nutty, chewy, and plump grains
- Perfect for: Busy weeknight meal prep and family dinners
- Fluffy And Easy Brown Rice In Rice Cooker
- The Science Of Better Grains
- Component Analysis Of The Grain
- Choosing Your Pantry Staples Wisely
- Tools For The Best Results
- Clear Instructions For Grain Success
- Fixing Common Rice Cooker Mishaps
- Scaling For Large Families
- Myths About Brown Rice
- Flavor Variations For Every Meal
- Smart Storage And Reducing Waste
- Plating For A Beautiful Finish
- Recipe FAQs
- 📝 Recipe Card
Fluffy And Easy Brown Rice In Rice Cooker
I still remember the first time I tried making brown rice for my family. I followed the bag instructions to a T, but when I lifted the lid, I found a layer of scorched grains at the bottom and a middle section that felt like eating birdseed.
It was frustrating because I just wanted a simple, healthy side for our chicken, but instead, we ended up ordering pizza. I realized then that the "standard" instructions often ignore how different rice cookers actually behave.
After years of trial and error in my own messy kitchen, I finally found the sweet spot. It is all about the hydration and that tiny bit of fat. Now, the sound of my rice cooker clicking over to the "Warm" setting is the signal that dinner is halfway done.
The kitchen fills with this warm, toasted aroma that makes the whole house feel cozy. It's a small victory, but for a busy home cook, those are the ones that matter most.
We are going for a texture that has a slight bite but is fully cooked through to the center. You want grains that fall apart when you fluff them with a fork, not a solid block of starch. This recipe is your roadmap to getting it right every single time without having to hover over a boiling pot.
Let's get into the details so you can stop worrying about the "crunch" and start enjoying the flavor.
The Science Of Better Grains
Bran Hydration: Brown rice retains its fibrous outer bran layer, which acts as a waterproof shield that requires higher heat and more time to penetrate than white rice.
Starch Retrogradation: Adding a small amount of oil coats the grains, preventing them from clumping together as the starches gelatinize and then cool.
Thermal Residual Steam: The final rest period allows moisture to redistribute evenly, ensuring the top layer of rice is just as tender as the bottom.
| Method | Time | Texture | Best For |
|---|---|---|---|
| Rice Cooker (Classic) | 50 minutes | Plump and chewy | Hands off meal prep |
| Stovetop (Traditional) | 55 minutes | Slightly firmer | Small batches |
| Instant Pot (Rapid) | 35 minutes | Softer, more blown out | Last minute dinners |
If you are just starting your journey with grains, you might find my Foolproof Fluffy Rice recipe helpful for understanding the basics of white rice before tackling the more stubborn brown varieties. Both have their place in a busy kitchen, but brown rice definitely requires that extra bit of patience to soften the husk.
Component Analysis Of The Grain
| Ingredient | Science Role | Pro Secret |
|---|---|---|
| Brown Rice | Structure | Rinse until the water is clear to remove excess surface starch that causes gumminess. |
| Sea Salt | Flavor Enhancer | Seasoning the water allows the salt to penetrate the grain as it expands. |
| Olive Oil | Surface Tension | A tiny bit of fat prevents the starchy bubbles from foaming over the rice cooker lid. |
Choosing the right liquid is just as important as the rice itself. While filtered water is the standard, using a light broth can change the entire profile of your side dish. It is all about building layers of flavor from the very beginning of the process.
Choosing Your Pantry Staples Wisely
- 2 cups (370g) brown rice: Use long grain for distinct grains or short grain for a heartier, stickier texture. Why this? It provides a nutty depth and more fiber than white rice varieties.
- 2.5 cups (600ml) filtered water: This specific ratio accounts for the evaporation rate in most standard cookers. Why this? Correct hydration prevents the "birdseed" texture common in undercooked brown rice.
- 0.5 tsp fine sea salt: Use sea salt or kosher salt for a clean finish. Why this? It balances the natural earthiness of the grain without making it taste salty.
- 1 tsp extra virgin olive oil: You can also use avocado oil or butter. Why this? It lubricates the grains so they stay separate and elegant.
The Base Grains
I usually stick with long grain brown rice for our weekly taco nights or stir fries. However, if I am making a grain bowl, I love the chewiness of short grain. If you run out of brown rice, you can use white rice, but you must reduce the water to a 1:1.5 ratio and cut the cooking time by nearly half.
The Hydration Liquid
Water is the most budget friendly option, but don't be afraid to experiment. If I have an open carton of chicken or vegetable broth in the fridge, I'll swap it in. Just keep the measurements exactly the same - 600ml is the magic number for this recipe.
Tools For The Best Results
You do not need a fancy, high end Zojirushi to get great results, though they are lovely if you have the counter space. A basic "on/off" switch rice cooker works perfectly fine as long as you respect the resting time. The most important tool in this process is actually a fine mesh strainer.
Rinsing the rice is the one step I never skip.
For Clean Distinct Grains
Rinsing removes the dusty starch that rubs off the grains during shipping. If you leave that starch on, it turns into a sticky paste in the cooker. I like to use a large bowl, swirl the rice in cold water, and drain it three times. It makes a world of difference in the final texture.
For Gentle Fluffing
Once the rice is done, stay away from metal spoons. They tend to smash the grains. Use the plastic paddle that came with your cooker or a silicone spatula. We want to lift and fold the rice to let the steam escape without turning it into a mash.
Clear Instructions For Grain Success
- Rinse the rice. Place your 2 cups (370g) of brown rice in a fine mesh sieve and run cold water over it. Note: Do this until the water running out the bottom is no longer milky.
- Drain thoroughly. Shake the sieve well to remove as much excess water as possible.
- Combine ingredients. Add the rinsed rice, 2.5 cups (600ml) filtered water, 0.5 tsp fine sea salt, and 1 tsp extra virgin olive oil to the inner pot.
- Level the rice. Use your finger or a spatula to make sure the rice is in an even layer under the water.
- Set the cooker. Close the lid and select the "Brown Rice" setting. Cook until the machine clicks to the warm setting, which usually takes about 45 minutes.
- Wait patiently. Do not open the lid immediately. Note: This is the most important step for achieving a tender texture.
- Steam the grains. Let the rice sit undisturbed on the "Warm" setting for 10 minutes.
- Fluff and serve. Open the lid and gently fold the rice with a paddle until steam billows out and grains separate.
Chef's Tip: If you want an even deeper flavor, try toasting the dry rice in the olive oil in a skillet for 3 minutes before adding it to the rice cooker. It brings out a popcorn like aroma that is incredible.
This rice provides a great base for my Sticky Teriyaki Grilled recipe, especially since the nutty grains hold up well against the sweet and savory glaze.
Fixing Common Rice Cooker Mishaps
Sometimes things go sideways even with the best intentions. Maybe your rice cooker runs hotter than mine, or perhaps your rice has been sitting in the pantry for a year and has dried out. Most rice issues are actually easy to fix if you catch them before the rice cools down completely.
If The Rice Is Crunchy
If the timer goes off and the grains still feel hard in the middle, you need a bit more steam. Add two tablespoons of hot water, close the lid, and let it sit on the "Warm" setting for another 5 to 10 minutes. The residual heat will usually finish the job without making the rice mushy.
| Problem | Root Cause | Solution |
|---|---|---|
| Mushy/Sticky Grains | Too much water or no rinsing | Reduce water by 2 tbsp next time and rinse longer. |
| Burnt Bottom | Pot is too thin or sugar in liquid | Add oil to the bottom of the pot before adding rice. |
| Hard/Grit Grains | Under hydration or old rice | Soak the rice in the water for 20 mins before starting. |
Common Mistakes Checklist
- ✓ Skipping the rinse step (leads to gummy, sticky rice)
- ✓ Peeking under the lid during the cooking cycle (lets out necessary steam)
- ✓ Forgetting the 10 minute rest at the end (results in uneven texture)
- ✓ Using the wrong water ratio for the specific type of rice
- ✓ Not adding a pinch of salt (the rice will taste flat)
Scaling For Large Families
If you are cooking for a crowd, you can double this recipe easily. For 8 servings, use 4 cups of rice and 5 cups of water. You do not need to double the salt or oil exactly - 0.75 tsp of salt and 1.5 tsp of oil is usually enough.
Just ensure your rice cooker is large enough to handle the expansion; rice triples in volume as it cooks!
If you are cooking for just one or two people, you can halve the recipe. Use 1 cup of rice and 1.25 cups of water. For very small batches, keep a close eye on the cooker as they tend to finish a few minutes early and are more prone to scorching on the bottom.
| Servings | Rice Amount | Water Amount | Pot Size |
|---|---|---|---|
| 2 People | 1 cup (185g) | 1.25 cups (300ml) | 3 cup cooker |
| 4 People | 2 cups (370g) | 2.5 cups (600ml) | 6 cup cooker |
| 8 People | 4 cups (740g) | 5 cups (1.2L) | 10 cup cooker |
Myths About Brown Rice
One common misconception is that you need to soak brown rice overnight to make it edible. While soaking can shorten the cook time slightly, it's not strictly necessary for a rice cooker. The machine's consistent heat and the 10 minute rest at the end do the heavy lifting for you.
Another myth is that brown rice is "healthier" only because of the fiber. While the fiber is great, the real benefit for a cook is the flavor. White rice is a blank canvas, but brown rice has a distinct personality that stands up to bold sauces and spices.
For a flavor explosion, stir in some of My UmamiPacked XO recipe once the rice is finished. The rich, savory sauce seeps into the nutty grains for a side dish that honestly steals the show from the main course.
Flavor Variations For Every Meal
You don't have to stick to plain water. To give your grains a Mediterranean vibe, swap the water for chicken broth and add a sprig of fresh rosemary and a clove of smashed garlic to the pot.
When it is done, stir in some lemon zest and fresh parsley for a bright, herbaceous side that pairs perfectly with grilled lamb or fish.
For a savory, earthy version, try adding a tablespoon of soy sauce and a few dried shiitake mushrooms to the water. The mushrooms will rehydrate as the rice cooks, infusing every grain with a deep umami flavor. This is my favorite version for serving under a simple ginger soy salmon or tofu stir fry.
Smart Storage And Reducing Waste
Leftover brown rice is a goldmine for busy parents. It stays fresh in the fridge for up to 4 days if kept in an airtight container. Because brown rice is heartier than white rice, it doesn't get as hard and "refrigerator dry" quite as quickly.
It is also the absolute best base for fried rice because the grains stay separate and chewy.
If you have more than you can eat in a few days, freeze it! I like to portion it into one cup amounts in freezer bags. Flatten the bags so they stack easily. To reheat, you can microwave it with a damp paper towel over the top or toss it directly into a hot pan with a splash of water.
To reduce waste, don't throw away the starchy water from rinsing your rice. If you have a garden or indoor plants, let the water cool and use it to water them. It contains trace minerals and starches that act as a mild fertilizer.
Also, if you ever find yourself with a tiny bit of leftover rice that isn't enough for a meal, stir it into a soup or stew at the end to add thickness and texture.
Plating For A Beautiful Finish
We eat with our eyes first, and let's be honest, brown rice can look a little dull on its own. I love to use a small bowl or ramekin to mold the rice into a neat dome on the plate. It makes a simple weeknight dinner feel a bit more like a restaurant meal without any extra cost.
Garnish is your best friend here. A sprinkle of toasted sesame seeds, a handful of chopped scallions, or even just a crack of fresh black pepper adds visual interest and a final layer of texture.
If I am feeling fancy, I'll even add a few pomegranate seeds or some toasted slivered almonds for a pop of color and a bit of crunch that contrasts with the tender grains. This rice isn't just a side; it's the reliable foundation for whatever delicious mess you're serving for dinner tonight.

Recipe FAQs
How much water do you put in a rice cooker for brown rice?
Use a 1:1.25 ratio of rice to water. For two cups of dry brown rice, measure out 2.5 cups of water.
Can I cook brown rice the same as white rice in a rice cooker?
No, you cannot use the same settings or ratios. Brown rice requires significantly more water and a much longer cooking time due to the fibrous bran layer.
How do you cook brown rice in a rice cooker?
Rinse the rice, combine with 1:1.25 water, add a teaspoon of oil, and select the "Brown Rice" setting. Do not lift the lid during cooking, and allow the rice to rest on the "Warm" setting for a mandatory 10 minutes after the cycle finishes.
Is brown rice a 2 to 1 ratio?
No, a 2:1 ratio is too low for brown rice. That ratio is generally reserved for white rice, which cooks much faster; brown rice needs closer to 2.5 cups of liquid per 1 cup of rice.
What is the secret to preventing crunchy brown rice in the cooker?
The secret is the final rest period. After the cooker clicks off, leave the rice on the "Warm" setting for a full 10 minutes.
Should I rinse brown rice before cooking?
Yes, rinsing is highly recommended. Rinse until the water runs clear to wash away surface starch, which prevents the final product from becoming overly sticky or gummy.
Can I add seasoning directly to the rice cooker water?
Yes, adding salt and a small amount of fat is beneficial. Seasoning the water ensures the salt penetrates the grain evenly, and the oil prevents excessive foaming.
Easy Brown Rice In Rice Cooker

Ingredients:
Instructions:
Nutrition Facts:
| Calories | 350 kcal |
|---|---|
| Protein | 7 g |
| Fat | 3.8 g |
| Carbs | 70.5 g |
| Fiber | 3 g |
| Sugar | 0.7 g |
| Sodium | 288 mg |
