Death by Chocolate Icebox Cake Easy: No-Bake Mousse Perfection
- Death by Chocolate Icebox Cake Easy: The Ultimate No-Bake Mousse Dessert
- Why This No-Bake Chocolate Mousse Cake Works
- Essential Ingredients and Expert Substitutions
- Step-by-Step Guide: How to Make This Easy Chilled Dessert
- Troubleshooting, Expert Tips, and Common Mistakes to Avoid
- Storage, Preparation, and Freezing Instructions
- Nutrition Information
- Recipe FAQs
- 📝 Recipe Card
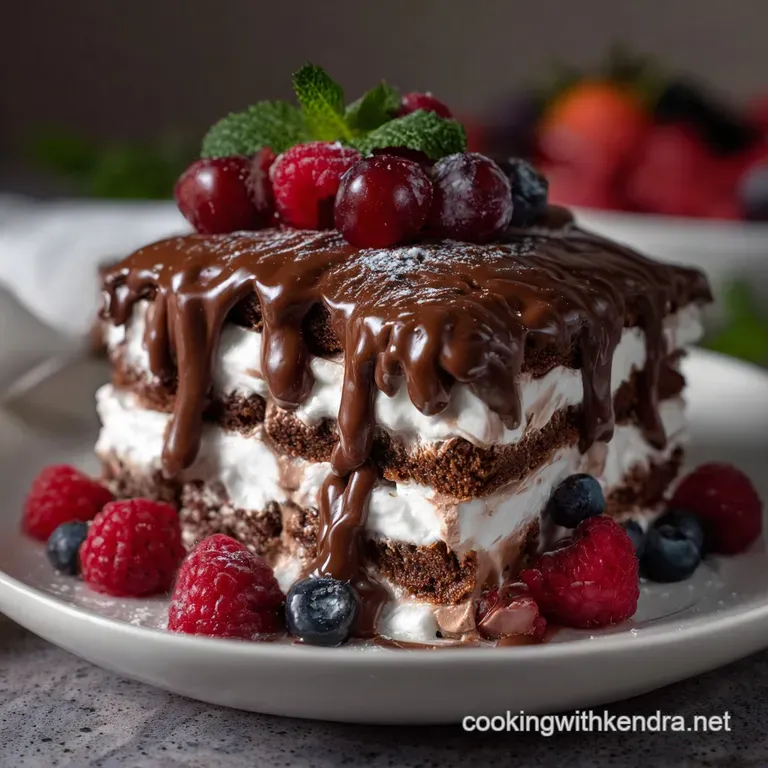
Death by Chocolate Icebox Cake Easy: The Ultimate No-Bake Mousse Dessert
If I could text you one dessert recipe that delivers maximum impact with minimum kitchen effort, it would be this Death by Chocolate Icebox Cake Easy recipe. Forget baking, ovens, and humidity checks this is pure chocolate decadence achieved entirely in the fridge.
I know, I know. You’ve seen a million no-bake recipes. But many of them turn into a mushy, slidey disaster after the first slice. This method, honed over years of disappointing summer cakes, solves that.
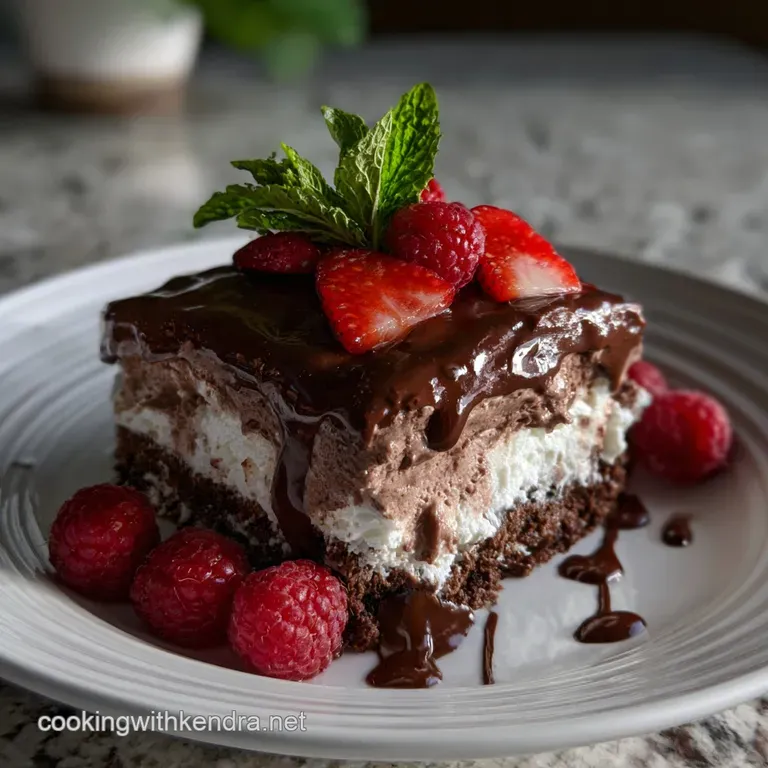
It guarantees layers that slice clean, a velvety, stable chocolate mousse, and a deeply satisfying richness that hits exactly right. This is a showstopper, and it’s so easy your dog could probably prep it.
We’re skipping the powdered pudding mix and making proper, stabilized chocolate cream that sets up firm. Trust me, the 20 minutes of active layering work is worth the wait.
Get ready to impress everyone with this killer Death by Chocolate Icebox Cake | Easy No Bake Chocolate Mousse Cake —it’s the perfect chilled dessert for hot days.
Why This No-Bake Chocolate Mousse Cake Works
Icebox Cake 101: Understanding the No-Bake Process
An icebox cake, by definition, uses the moisture from the filling and the cold temperature of the refrigerator (the “icebox”) to soften and meld cookie wafers into a cake like structure. We are essentially using science to bypass the baking step.
The secret to our specific Death by Chocolate Icebox Cake Easy recipe is the strategic use of high fat cream and melted chocolate.
The Science of Perfect Whipped Cream Stability
For a rich dessert like this, you can’t just use sweetened whipped cream. It will weep, slide, and collapse. We need stability.
This recipe uses a quick, melted chocolate ganache folded into the whipped cream. The Science: When melted chocolate cools and re-solidifies, the cocoa butter crystals create a network that physically holds the air bubbles trapped in the whipped cream.
This is why our mousse stays firm and sliceable, preventing that sad, slumped look. Think of the cocoa butter as microscopic scaffolding stabilizing your beautiful Easy No Bake Chocolate Mousse Cake .
Essential Ingredients and Expert Substitutions
To make this dessert truly stand out, you need about 15 ingredients, but the quality of your chocolate and cream really matters.
| What You Need (Original Ingredient) | The Swap (Best Substitute) | How It Changes Things (Scientific Function & Trade Off) |
|---|---|---|
| Heavy Whipping Cream (Cold) | Full Fat Canned Coconut Cream (Refrigerated) | Provides similar fat content for whipping volume. Trade Off: Adds a subtle tropical flavor; best for chocolate recipes where a hint of coconut complements the richness. |
| Powdered Sugar | Maple Syrup (Reduce liquid volume slightly) | Provides sweetness and helps dissolve quickly without gritty texture. Trade Off: Maple syrup adds moisture and a distinct flavor; the final texture may be slightly softer than with powdered sugar. |
| Chocolate Wafers (Oreo style, removed filling) | gluten-free Graham Crackers (Dipped in Milk/Coffee) | The wafer structure absorbs liquid evenly. Trade Off: Graham crackers need pre-moistening (dip quickly in coffee) and will create a firmer, crunchier bite than soft wafers. |
| Unsweetened Cocoa Powder | Dark Roast Coffee Powder (Espresso Powder) | Deepens the chocolate flavor (Maillard Reaction enhancement). Trade Off: None, if only using 1 tsp. Using more than 1 Tbsp will introduce bitterness. |
| Vanilla Extract | Almond Extract (¼ tsp max) | Enhances other flavor notes (aroma compound). Trade Off: Almond extract is potent. Use sparingly, as it drastically changes the flavor profile from classic chocolate to amaretto/marzipan. |
Choosing the Best Chocolate Wafers for Soaking
Please, for the love of neat slices, do not use flimsy vanilla wafers or standard thin chocolate chip cookies. You need something dark and sturdy, like chocolate wafers (think the kind used for classic Chocolate Icebox Cake: The Ultimate No-Bake Dessert ). We want them to soften just enough to create a cake texture, not disintegrate into sludge.
Making This Death by Chocolate Icebox Cake Easy with Premade Ingredients
While I encourage making the whipped cream fresh, using a pre-made chocolate frosting (the canned kind, whisked until light) can work in a pinch for the layering step, though the stability will be lower. If you love deep, dense chocolate flavors, you should also try my Chocolate Choux Pastry Cream Puffs The: Foolproof Recipe , which uses similar intense cocoa powder techniques!
step-by-step Guide: How to Make This Easy Chilled Dessert
Prep Time: 20 minutes Chill Time (Initial Setting): 25 minutes Total Set Time: 1 hour 15 minutes (plus minimum 4 hours rest) Yield: 12 servings
Step 1: Preparing the Stabilized Chocolate Whipped Cream
- Melt the Chocolate Base (The "Cook" Time - 10 minutes): Gently melt your bittersweet chocolate (or chips) with 2 tablespoons of heavy cream and the 1 tsp espresso powder in a microwave or double boiler. Stir until perfectly smooth and glossy. Let this sit at room temperature for about 5 minutes until it’s warm, but not hot.
- Whip the Cream: In a very cold bowl (metal is best), whip the 3 cups heavy whipping cream, 1/2 cup powdered sugar, and 1 tsp vanilla extract on medium high speed until medium soft peaks form. We need texture, not butter!
- Stabilize: Pour the slightly cooled, melted chocolate mixture into the whipped cream while the mixer is running on low. Increase speed to medium high and mix until stiff, luxurious peaks form. The resulting mousse should be thick, velvety, and intensely dark. This step creates the magic of our Death by Chocolate Icebox Cake Easy .
Step 2: Layering the Cake Structure Perfectly
- Start the Base: Line an 8x8 or 9x5 dish with parchment paper (leaving overhang helps tremendously for lifting later). Spread a thin, even layer of the chocolate mousse on the bottom. This acts as the glue.
- The First Wafer Layer: Arrange the 1 package (approx. 12 oz/350g) chocolate wafer cookies, filling removed if using sandwich cookies tightly over the mousse. Don’t overlap them too much, but ensure they cover the surface.
- The Mousse Stack: Spread about 1.5 cups of the chocolate mousse evenly over the wafers. Use an offset spatula to push the cream right to the edges.
- Repeat: Continue layering wafers and cream until all wafers are used, aiming for 4 to 5 layers total, ending with a thick layer of the chocolate mousse on top.
Step 3: The Crucial Chilling Period for Setting the Cake
- Initial Power Chill ( 25 minutes): Cover the dish tightly with plastic wrap and place it in the freezer for 25 minutes. This quick chill helps the chocolate cocoa butter lock the layers together immediately, preventing sliding when you move the cake.
- The Deep Sleep (Minimum 4 hours): Transfer the cake to the refrigerator. The wafers need time at least 4 hours, but ideally overnight to fully absorb the moisture and soften into a true cake like texture. This waiting period is critical for achieving a sliceable Death by Chocolate Icebox Cake | Easy No Bake Chocolate Mousse Cake .
Troubleshooting, Expert Tips, and Common Mistakes to Avoid
This Easy No Bake Chocolate Mousse Cake is simple, but simple recipes often have one or two critical pitfalls.
| Common Mistake | Root Cause (Why It Happens) | The Fix (Solution) |
|---|---|---|
| Soggy or Slumping Cake | Insufficient stabilization of the whipped cream OR too much liquid added (e.g., dipping wafers) | Ensure the melted chocolate is fully incorporated, creating stiff peaks. Do not dip the wafers unless using dry graham crackers; the mousse provides enough moisture. |
| Layers are Sliding/Separating | Cake was moved or sliced before sufficient chill time; insufficient "glue" layer on the bottom. | Give the cake a minimum of 4 hours in the fridge, or preferably 8 hours/overnight. Always start with a thin layer of mousse before the first layer of wafers. |
| Chocolate Mousse is Grainy | The melted chocolate base was too hot when added to the whipped cream, causing the fat to seize or melt the cream. | Always let the melted chocolate cool slightly (it should feel warm to the touch, not hot) before incorporating it into the cold whipped cream. |
Storage, Preparation, and Freezing Instructions
How Long Does Death by Chocolate Icebox Cake Last in the Fridge?
This Death by Chocolate Dessert is best eaten within 3 to 4 days. After that, the wafers can become overly saturated and lose their pleasant, cake like consistency. Store it tightly covered with plastic wrap, especially after slicing, to prevent the surface from drying out.
Can You Freeze Icebox Cake for Future Enjoyment?
Yes, absolutely! Icebox cakes freeze beautifully because they rely on saturated cookies rather than delicate crumb.
- To Freeze: Once fully set, wrap the entire cake (still in its pan) tightly in plastic wrap, then foil. Label and freeze for up to 2 months.
- To Thaw: Transfer the cake directly from the freezer to the refrigerator overnight (about 8 hours). Do not thaw on the counter, as rapid temperature changes compromise the structure of the whipped cream and lead to weeping.
Decadent Serving Suggestions and Pairings
Before serving, I highly recommend dusting the top with a layer of 1/4 cup unsweetened cocoa powder (for dusting and blending) or adding chocolate shavings right out of the freezer for a contrasting textural element.
If you’re serving this Death by Chocolate Icebox Cake Easy at a party, pair it with something light and fruity to cut the richness. A strong coffee or a vibrant, chilled smoothie, like my Easy Frozen Fruit Smoothie Thick Frozen Fruit Smoo: 5 Min Hack , works perfectly to balance the intense chocolate flavor. Enjoy the applause you earned it without turning on your oven!

Nutrition Information
| Nutrient | Amount |
|---|---|
| Calories | 496 calories |
| Protein | 4.4 g |
| Fat | 36.2 g |
| Carbs | 42.5 g |
Recipe FAQs
Faqs for death by chocolate icebox cake easy no bake
Yes, this recipe is designed specifically to be an easy, no-bake dessert that relies entirely on refrigeration to set the layers. The key is using a rich, stable chocolate mousse or whipped cream mixture that firms up beautifully without needing an oven, resulting in maximum decadence with minimum kitchen effort.
Can this be considered an old-fashioned chocolate refrigerator cake?
Yes, this recipe adheres to the spirit of an old-fashioned chocolate refrigerator cake by utilizing layers of cookies/wafers and creamed chocolate mixtures that set in the cold. While modernized for simplicity, the fundamental concept of a layered, chilled dessert is maintained, delivering that classic, deep chocolate flavor.
What is the best way to prevent the chocolate icebox cake from becoming mushy?
The best practice is to ensure your cream or mousse mixture is properly stabilized before layering, which prevents excess moisture from the cream from completely dissolving the cookies too quickly.
Allow the cake the full recommended chilling time often overnight so the cookies absorb just enough moisture to soften without turning into mush, similar to how flavors meld in our [Easy Crockpot Meat Sauce Slow Cooker Pasta Sauce G: Rich Flavor].
Is this essentially a chocolate pudding icebox cake?
No, it is significantly richer and more stable than a standard chocolate pudding icebox cake. This recipe often utilizes stabilized whipped cream or a true chocolate mousse base, which offers a lighter, airier texture than heavy pudding, ensuring the structure holds up well when slicing.
How long does the Death by Chocolate Icebox Cake need to chill before serving?
A minimum of 6 to 8 hours is required, but overnight chilling is strongly recommended for the optimal texture. This extended chill time allows the chocolate layers to firm up completely and gives the wafers enough time to soften perfectly, creating that signature melt-in-your mouth texture.
Can I make this a chocolate mousse ice box cake instead of a standard filling?
Yes, this recipe often features a mousse like consistency in the filling, distinguishing it from simpler layered desserts. If you want an even fruitier presentation alongside this rich chocolate, consider pairing it with our recipe for [Chocolate Dipped Strawberries: The Perfect Elegant Confection] for garnish.
Easy No Bake Chocolate Icebox Cake

Ingredients:
Instructions:
Nutrition Facts:
| Calories | 496 calories |
|---|---|
| Protein | 4.4 g |
| Fat | 36.2 g |
| Carbs | 42.5 g |
