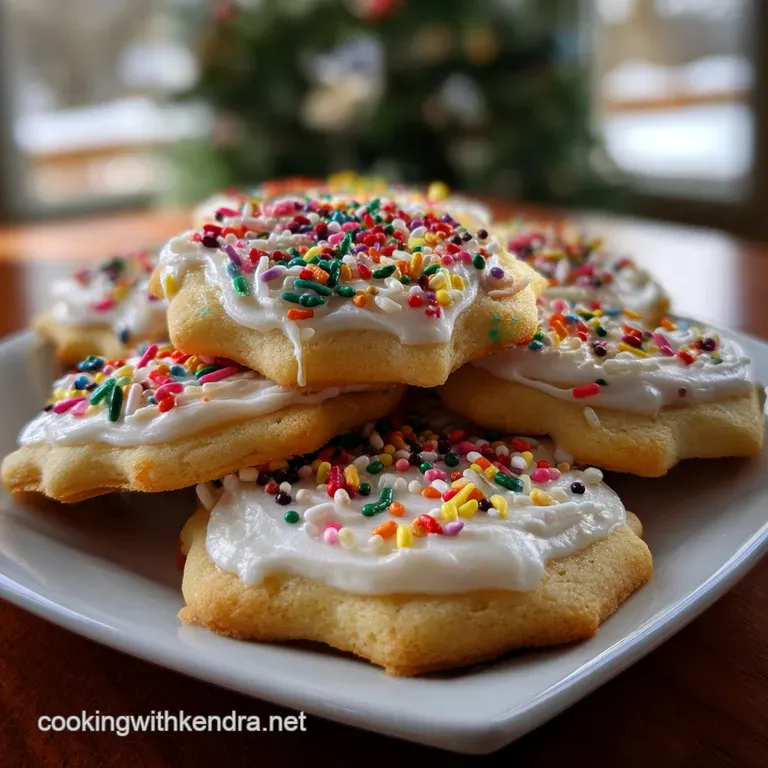
Easy Sugar Cookie Icing Recipe
- Effort/Time: 10 minutes total
- Flavor Hook: Rich vanilla with a balanced, clean sweetness
- Perfect for: Holiday cookies, bake sales, and edible gifts
- The Engineering of Gloss: Why This Formula Wins
- Yield and Velocity: The Technical Breakdown
- The Pantry Foundation: Sourcing Your Elements
- Minimalist Tool Kit: Crafting Without a Stand Mixer
- Precision Assembly Protocol: From Sifting to Setting
- Diagnostic Mastery: Fixing Flow and Finish
- ⚗️ The Scaling Lab
- Common Myths
- Flavor Architecture: Beyond the Classic Profile
- Preserving the Sheen: Shelf Life Logistics
- The Art of the Reveal: Occasion and Texture
- Recipe FAQs
- 📝 Recipe Card
There is nothing more heartbreaking than spending four hours chilling, rolling, and cutting out intricate shapes only to have your final sugar cookie icing turn into a grainy, matte disaster that never truly sets.
I remember one Christmas Eve where I spent fifty dollars on high end butter and organic flour, only to ruin the entire batch because my icing stayed tacky, causing forty beautifully decorated stars to fuse into one giant, sugary glob in the tin.
It was a sticky, expensive lesson in the physics of moisture and sugar saturation that nearly put me off holiday baking for good. Achieving this flawless sugar cookie icing demands precision.
I’ve been the cook who tried to "eyeball" the milk, thinking a little extra wouldn't hurt, only to watch my designs slide right off the edges of the cookies like melting snow.
I once destroyed three batches of frosting by whisking too vigorously, incorporating so much air that the dried surface looked like the surface of the moon pockmarked with tiny, unsightly craters.
It took a deep dive into the chemistry of inverted sugars and a lot of humble trial and error to realize that the most beautiful, "shatter proof" finish doesn't come from fancy equipment, but from a precise balance of liquids, which is the foundation of perfect sugar cookie icing.
The secret to that professional, mirror like sheen isn't found in a specialty shop; it's the specific interaction between the corn syrup and the powdered sugar. By using corn syrup an inverted sugar we prevent the sucrose molecules from recrystallizing into a grainy mess, resulting in a finish that is both flexible and firm. This sugar cookie icing provides that signature "snap" when you bite into it, yielding to a velvety interior that complements a buttery, Classic Peanut Butter recipe or a traditional vanilla base with soulful warmth. This version of sugar cookie icing sets up beautifully every time.
The Engineering of Gloss: Why This Formula Wins
- Inverted Sugar Stabilization: The corn syrup interferes with sucrose crystallization, ensuring the icing dries with a smooth, glass like reflection rather than a dull, sandy texture.
- Controlled Evaporation: The ratio of milk to sugar allows for a slow, even evaporation process that hardens the surface while keeping the bottom layer soft enough to bond with the cookie. A well engineered sugar cookie icing depends on this evaporation curve.
- Viscosity Control: The heavy weight of the powdered sugar provides structural integrity, allowing the icing to hold its shape for "flooding" without the need for egg whites or meringue powder in this classic sugar cookie icing.
Yield and Velocity: The Technical Breakdown
| Metric | Value | Technical Note |
|---|---|---|
| Total Prep Time | 10 minutes | Requires no cooking or heating; strictly mechanical emulsification. |
| Recipe Yield | 30 servings | Sufficient for approximately 2 to 3 dozen standard 3 inch cookies. |
| Setting Time | 4 to 6 hours | Atmospheric humidity significantly impacts the "hard dry" state of the sugar cookie icing. |
| Viscosity Level | 10 15 second count | The time it takes for a ribbon of icing to disappear back into the bowl. |
The Pantry Foundation: Sourcing Your Elements
Ingredient Chemistry Breakdown
| Ingredient | Chemical/Physical Role (Science) | The Pro Secret (Why This Matters) |
|---|---|---|
| C&H Powdered Sugar | Fine milled sucrose provides the structural bulk and immediate solubility. | Sifting is non-negotiable to prevent undissolved "islands" of sugar in your sugar cookie icing. |
| Karo Light Corn Syrup | Acts as an interferant to prevent large crystal formation. | This provides the "stretch" and professional high gloss sheen. |
| Whole Milk | Acts as the primary solvent to hydrate the sugar molecules. | Fat content in whole milk adds a subtle richness and smoother flow. |
- 4 cups (480g) C&H Powdered Sugar, sifted: Why this? Provides the essential structural lattice for a firm set.
- Substitute: Organic powdered sugar (note: usually contains tapioca starch which can be slightly grittier).
- 3 tablespoons (45ml) Whole Milk: Why this? Lower water content than skim milk prevents premature sugar dissolution.
- Substitute: Heavy cream for a thicker, more opaque finish (disclose: will take longer to dry).
- 3 tablespoons (45ml) Karo Light Corn Syrup: Why this? Critical for the "liquid glass" look and flexibility.
- Substitute: Brown rice syrup (note: will add a distinct amber tint to the icing).
- 1 teaspoon (5ml) Clear Vanilla Extract: Why this? Ensures a pure, snowy white base for color mixing.
- Substitute: Almond extract for a traditional wedding cake flavor profile.
- 1/8 teaspoon (0.75g) Diamond Crystal Fine Sea Salt: Why this? Suppresses the "sharp" edge of the sugar for a more complex flavor.
- Substitute: Table salt (use half the amount due to smaller grain size).
Minimalist Tool Kit: Crafting Without a Stand Mixer
You don't need a heavy KitchenAid Stand Mixer to achieve a masterclass finish; in fact, doing this by hand gives you better control over the aeration of your sugar cookie icing.
A simple Pyrex Glass Mixing Bowl is ideal because it allows you to see if any sugar pockets are hiding at the bottom.
- Fine Mesh Sieve: Essential for aerating the sugar and removing clumps that would clog a piping tip.
- Silicone Spatula: Best for "folding" in the liquid to keep air bubbles to a minimum.
- Whisk: Use only for the initial stage to break up the milk into the sugar.
- Piping Bags or Squeeze Bottles: For those who want precision without the mess of a spoon.
Chef's Tip: To get the most velvety texture, let the finished icing sit for 15 minutes before using. This allows any air bubbles trapped during mixing to rise to the surface and pop, ensuring your cookies don't have "sugar chicken pox" once they dry.
This resting period is crucial for perfect sugar cookie icing.
Precision Assembly Protocol: From Sifting to Setting
- Sift the 4 cups of powdered sugar into a large bowl. Note: Removes clumps that cause "blowouts" in piping bags.
- Add the 3 tablespoons of milk and 3 tablespoons of corn syrup. Note: Initiates the hydration of the sucrose crystals.
- Incorporate the 1 teaspoon vanilla and 1/8 teaspoon salt. Note: Salt breaks the surface tension of the sweetness.
- Stir slowly with a spatula until the mixture is thick and opaque, resembling heavy Elmer’s glue.
- Lift the spatula; the icing should fall in a thick ribbon until the trail disappears after 10 12 seconds.
- Thin the mixture with milk (1/2 teaspoon at a time) until it reaches the consistency of warm honey for flooding.
- Thicken with more sugar (1 tablespoon at a time) until it holds a stiff peak for detail piping.
- Divide into smaller bowls until you are ready to add gel food coloring.
- Pipe the borders first until the edges are set and slightly matte.
- Flood the centers until the surface is level and mirror smooth.
Diagnostic Mastery: Fixing Flow and Finish

Why Your Icing "Floods" Over the Edges
When the icing runs right off the cookie, it’s usually due to a breakdown in surface tension. This happens when the liquid-to-sugar ratio is too high, meaning there isn't enough of a sugar "lattice" to hold the milk in place. This is why a Peanut Butter Cookie Recipe requires a slightly thicker border to contain the glaze. If this happens, add a tablespoon of sifted sugar to save your batch of sugar cookie icing.
| Problem | Root Cause | The Fix | Pro Protocol |
|---|---|---|---|
| Dull/Matte Finish | Lack of corn syrup | Add 1 tsp corn syrup | Do not over mix, as air dulls the sheen. |
| Tiny Air Bubbles | Excessive whisking | Tap bowl on counter | Use a toothpick to pop bubbles while wet. |
| Icing Won't Dry | High humidity | Use a desk fan | Move cookies to a room with a dehumidifier. |
⚗️ The Scaling Lab
Scaling sugar cookie icing requires attention to fluid dynamics. When you double this recipe, do not automatically double the milk.
- The Evaporation Paradox: In a larger bowl, there is less surface area relative to the volume of sugar. Reduce the milk by 1/2 tablespoon initially. You can always add more, but sugar is harder to incorporate once the mass is large.
- Flavor Saturation: Scale the salt to 1.5x (not 2x). In large batches, the mineral bite of the salt becomes more pronounced against the neutral sugar.
- Thermodynamics of Mixing: Larger batches generate friction heat. If the icing feels warm, it will be runnier than it actually is. Let it sit for 5 minutes to reach room temperature before testing the 10 second count for optimal sugar cookie icing.
Common Myths
- Myth: You must use meringue powder for the icing to harden.
Truth: Corn syrup and powdered sugar will dry quite hard through simple evaporation, though they remain slightly more "flexible" than royal icing, making them less prone to cracking. This stability is a key feature of this sugar cookie icing.
Myth: You can't use this icing for detail work.
- Truth: By increasing the sugar content, this sugar cookie icing becomes a stiff piping medium that can hold intricate lines and dots perfectly.
Flavor Architecture: Beyond the Classic Profile
While the standard vanilla is a soulful classic, you can easily adapt this base to match the flavor profile of your bake. If you are making an Applesauce Cake Moist recipe, you might want a spicier kick.
- Citrus Zest Burst: Replace the vanilla with fresh lemon or orange juice. The acid cuts the sugar perfectly.
- Spiced Winter: Add a pinch of nutmeg or cardamom to the dry sugar for a home style warmth.
- Mocha Sheen: Swap the milk for a very strong, cooled espresso. This creates a mahogany colored glaze that is stunning on chocolate cookies.
| Original Ingredient | Substitute | Why It Works |
|---|---|---|
| Whole Milk (3 tbsp) | Lemon Juice (3 tbsp) | The acid provides a "short" set and bright flavor profile. |
| Light Corn Syrup | Agave Nectar | Provides gloss but is thinner; reduce milk by 1 tsp. |
| Clear Vanilla | Peppermint Extract | Stronger flavor; use only 1/4 tsp to avoid overpowering. |
Preserving the Sheen: Shelf Life Logistics
Storage: This icing can be stored in an airtight container at room temperature for up to 3 days. However, the corn syrup may begin to separate slightly. A quick 30 second stir with a spatula will restore the emulsion of your sugar cookie icing.
Freezing: You can freeze the icing in heavy duty freezer bags for up to 3 months. To use, thaw in the fridge overnight and massage the bag thoroughly to recombine the ingredients. Never microwave the icing, as the sugar will melt and lose its structural integrity.
💡 ZERO WASTE: Don't discard leftover icing scraps. Transform: Drizzle them over a gluten-free Peanut recipe or store-bought graham crackers. Science: The sugar acts as a preservative, and the hardened "shatter" texture provides a great contrast to crunchy snacks.
The Art of the Reveal: Occasion and Texture
To get that "Masterclass" look, the timing of your application is everything. If you want a "marble" effect, work with two colors of sugar cookie icing while they are both wet. This allows the colors to swirl without creating a ridge.
Decision Shortcut: If you want a Shattering Finish, use slightly less corn syrup and let dry for a full 24 hours. If you want a Soft Bite Glaze, increase the milk by 1 teaspoon and apply a thinner layer.
If you want Precision Piping, add an extra 1/2 cup of powdered sugar to the base recipe to achieve the necessary firmness for your sugar cookie icing.
The final texture should be a beautiful contradiction: a surface that feels like a crisp shell when touched, but melts into a velvety, soulful creaminess the moment it hits your tongue.
Whether you're decorating with the kids or prepping for a high end holiday party, this sugar cookie icing is the reliable, minimalist tool every home cook needs in their repertoire.

Recipe FAQs
What is the ideal drying time for this icing?
Four to six hours at room temperature. Atmospheric humidity significantly impacts the "hard dry" state of the sugar cookie icing, so drier conditions speed this process up.
Can I substitute the corn syrup with simple syrup?
No. Corn syrup provides necessary crystal interference. Simple syrup is just dissolved sugar and will result in a grainy, dull finish as the sucrose recrystallizes upon drying.
How do I fix icing that is too thin and runs off the cookie?
Add sifted powdered sugar gradually until 10-second count is achieved. The liquid-to-sugar ratio is too high, meaning the lattice structure lacks the necessary tensile strength to hold its shape on a flat surface. If you enjoyed controlling cookie spread here, the same fat ratio logic applies to our Classic Chocolate Chip Cookie Recipe My GoTo.
What is the difference between this icing and royal icing?
Royal icing uses egg whites for structural rigidity. This corn syrup version yields a softer, more toothsome bite while still setting hard enough for stacking, which is better for a chewy cookie base.
Should I use salted or unsalted butter in the cookies this tops?
Unsalted butter for precision control. Salted brands vary widely in sodium content, making exact flavor balancing difficult when working with a sweet topping like this. Unsalted butter lets you adjust salt based on the recipe's specific needs.
Myth: Must I use a stand mixer for the smoothest result?
Myth: You must use a stand mixer for the smoothest result. Reality: Hand mixing with a spatula minimizes air incorporation, which is crucial because trapped air creates pockmarks when the icing dries.
Myth: Should I add the liquid ingredients all at once?
Myth: You should add the liquid ingredients all at once. Reality: Incorporate liquids slowly to prevent "sugar shocks," which cause the powdered sugar to seize and create hard, unmixable clumps in the final product.
Easy Sugar Cookie Icing Recipe
Ingredients:
Instructions:
Nutrition Facts:
| Calories | 69 kcal |
|---|---|
| Protein | 0.1 g |
| Fat | 0.1 g |
| Carbs | 17.6 g |
| Sugar | 17.5 g |
| Sodium | 10 mg |
