Brown Rice: Fluffy Perfection Every Time
- The Definitive Brown Rice: Fluffy Perfection, Every Time
- Achieving The Definitive Fluffy Brown Rice Texture
- Essential Components for the Perfect Pot
- The Science of Perfect Grains: Why Rinsing and Steaming Are Essential
- Step-by-Step: The Professional Kitchen Method
- Troubleshooting and Expert Advice for Grain Perfection
- Storage Secrets: Making Brown Rice Ahead of Time
- Complementing the Nutty Flavor: Versatile Serving Ideas
- Recipe FAQs
- 📝 Recipe Card
The Definitive Brown Rice: Fluffy Perfection, Every Time
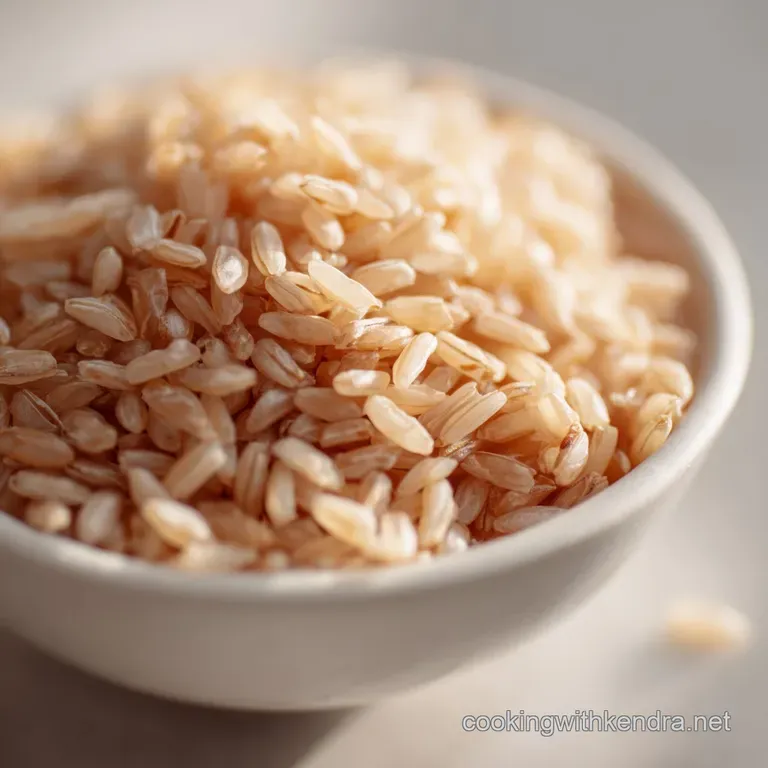
That perfectly cooked grain, slightly chewy, intensely nutty, and incredibly aromatic that's the magic we are chasing. When done right, homemade Brown Rice is magnificent and complements practically everything you serve it with. Forget that mushy, sticky mess you made in college.
Honestly, cooking Brown Rice is one of the cheapest, healthiest things you can do for meal prep, but it’s also one of the most misunderstood kitchen tasks.
If you’ve been eating bland, waterlogged grains, or worse, rice that’s crunchy in the middle, we need to fix that culinary crime immediately.
This specific, professional grade technique for cooking fluffy Brown Rice is a total game changer; it guarantees perfectly light, separate, and tender kernels every single time. The secret isn't soaking or wishing really hard; it’s a precise ratio and a non-negotiable rest period.
Let's crack on with the definitive recipe that makes this staple shine.
Achieving The Definitive Fluffy Brown Rice Texture
The Difference Between Mushy and Masterful
The reason most home cooks fail at Brown Rice comes down to impatience and the ratio. Unlike white rice, which gives up its starch easily and cooks relatively fast, brown rice has that tough outer bran layer, which requires both more time and significantly more focused steam to penetrate and soften.
You need enough liquid to start the cooking, but you need the steam trapped in the final 20 minutes to truly finish the hydration process.
If you lift the lid even once during cooking, you release the heat and drop the internal temperature of the pot by about 15 degrees, instantly throwing off the chemistry. That single mistake results in tough, slightly undercooked kernels that never quite recover.
Trust me, I learned this the hard way after ruining enough pots of otherwise beautiful Brown Rice .
Nutritional Powerhouse: Why Whole Grains Matter
We choose Brown Rice because it’s a whole grain, meaning the bran, germ, and endosperm are still intact. That’s where all the good stuff lives: fiber, B vitamins, and essential minerals that you miss out on when you eat refined grains.
It gives you sustained energy and adds that satisfying, chewy texture that white rice just can’t replicate.
Making a big batch of this easy-to-digest, high fiber Brown Rice is the absolute foundation for quality meal preparation. It’s what you need to feel good about the carbs you’re eating.
Timing Expectations and Recipe Difficulty
You need to know upfront: Brown Rice takes time. There’s no cheating the 40 minute cook time or the crucial 20 minute rest. While the total time is over an hour, your active input is only about five minutes, max.
This recipe is simple, but it demands patience and adherence to strict timing. Think of it as controlled simmering. The technique is very similar to my method for [White Rice: Master the Fluffy Perfection Absorption Method], but adjusted significantly to account for that sturdy outer shell of the brown grain.
Essential Components for the Perfect Pot
Selecting Your Preferred Brown Rice Variety (Short vs. Long Grain)
For this recipe, I highly recommend using long grain Brown Rice . It tends to cook up fluffier and the grains stay separate, which is exactly what we want here.
Short grain brown rice contains more starch and is generally better suited if you want a slightly sticker, denser final product maybe for a rice pudding or a dish where the kernels need to bind a bit more.
If you choose short grain, you will need to increase the water slightly (by about 1/4 cup) to ensure full hydration. Both varieties offer that characteristic nutty flavor of quality Brown Rice .
Why Salt Is Crucial for Flavor
I am passionate about salting your cooking liquid! Bland rice is a crime against humanity, and that’s what happens when you skip the salt in the water.
You need to season the water aggressively before you simmer, because the salt penetrates the grains as they absorb the liquid. Adjusting salt later after cooking just seasons the outside of the grain, leaving the interior flavorless.
Don’t be shy here; you’re seasoning an entire pot of water, not just a pinch.
Adjusting Liquid Ratios for Altitude and Cookware
My standard ratio of 2 ¼ cups of liquid to 1 cup of Brown Rice works perfectly for most home kitchens and sea level conditions. However, if you live at a high altitude (above 5,000 feet), you may need to increase the liquid by 1/4 cup because water evaporates faster at higher elevations.
Also, always use a heavy bottomed pan with a tight fitting lid. If your lid is loose, steam escapes, and you’ll need to add a small piece of aluminum foil over the pot before securing the lid to create a proper seal. This is non-negotiable for fluffy Brown Rice .
The Science of Perfect Grains: Why Rinsing and Steaming Are Essential
Rinsing the kernels, even for Brown Rice , is important for two reasons. First, it washes away any dust or stray starch, which helps the grains separate instead of clumping. Second, and maybe more importantly, it kickstarts the hydration process just slightly before they hit the heat.
But the real magic is the steaming, and this is where most people get their technique wrong. The initial 40 minutes of simmering gets the water absorbed, but it doesn’t completely soften the core of the grain.
The final 20 minutes, when the heat is off and the lid stays put, uses the residual trapped heat and steam to gently cook and fluff the remainder of the grain. If you skip this, the Brown Rice will be hard and brittle.
step-by-step: The Professional Kitchen Method
Mastering the Precise Water-to-Rice Ratio
Use a measured cup and stick to the 2 ¼ to 1 ratio. I prefer low-sodium vegetable or chicken stock over plain water for an exponentially flavor upgrade to my Brown Rice . Stock makes everything better.
| Quantity (US Customary) | Ingredient | Substitute Suggestion |
|---|---|---|
| 1 cup | Long Grain Brown Rice | Substitute Short Grain, but add 1/4 cup more liquid. |
| 2 1/4 cups | Cold Water or Low-Sodium Stock | Try Dashi or Mushroom Broth for deep umami flavor. |
| 1 tsp | Fine Sea Salt | If using highly salted stock, reduce to 1/2 tsp. |
| 1 Tbsp | Unsalted Butter or Olive Oil | Coconut oil adds richness; avocado oil works for neutral flavor. |
Prep Step: Thoroughly Rinsing the Kernels
Place the dry Brown Rice in a fine mesh sieve or colander. Run cold water over it for a solid 30 seconds until the water running through the bottom is mostly clear, not cloudy. Drain it thoroughly, making sure there's no excess water clinging to the grains before moving to the pot.
Next, transfer the rinsed grains, the precisely measured liquid, the salt, and the fat (butter or oil) into your heavy bottomed saucepan.
The Gentle Simmer and Absolute Timer Rule
Place the pan over medium high heat until it reaches a rapid, rolling boil. You’ll see large, active bubbles breaking the surface; this usually takes about 5– 7 minutes. Stir it once or twice only, just to ensure the salt and fat are dispersed.
Immediately reduce the heat to the absolute lowest setting your burner offers a bare, gentle simmer is all you need. Place the lid on tightly and set a timer for exactly 40 minutes. Do not lift the lid.
This is the difference between failure and the perfect pot of fluffy Brown Rice .
The Critical Role of the Non-Negotiable Rest Period
Once the 40 minutes is up, turn off the heat completely. Do not move the lid. Move the entire pot off the burner, and let it rest undisturbed for a minimum of 20 minutes. I usually aim for 25 minutes if I have the time.
Chef’s Note: This resting period is mandatory for transforming the hard, chewy kernels into soft, fully cooked Brown Rice . The trapped steam finishes the cooking process gently and evenly from top to bottom. If you skip the rest, you get hard centers.
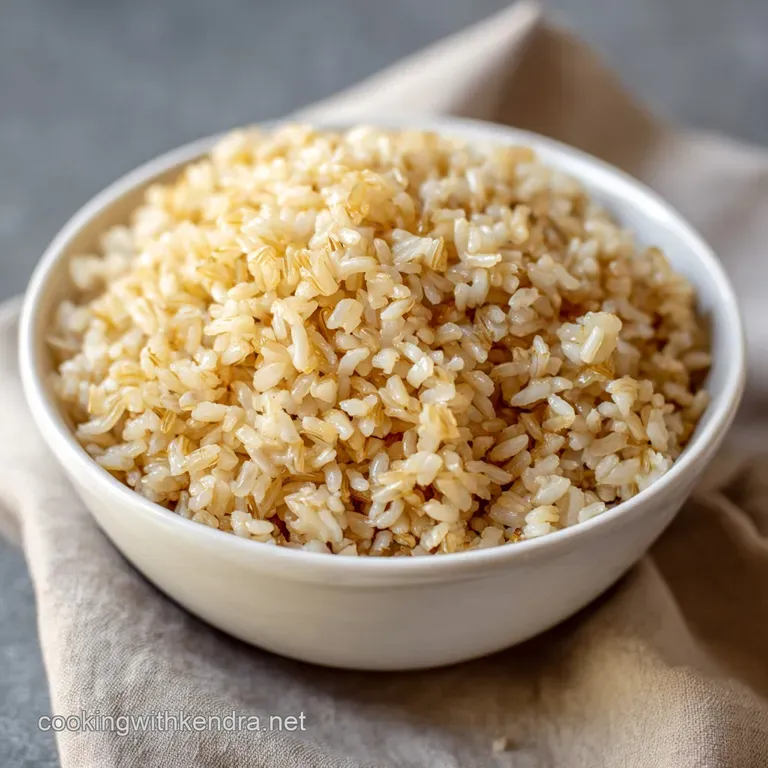
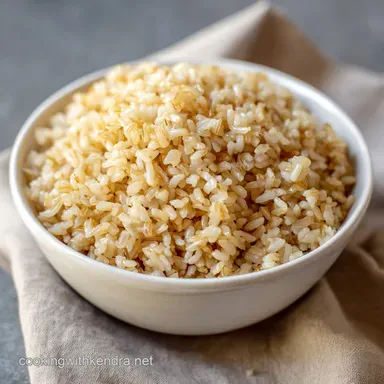
Finally, lift the lid. If you measured correctly, all the liquid should be absorbed. Use a fork to gently fluff the rice, separating the glorious, perfectly tender grains.
Troubleshooting and Expert Advice for Grain Perfection
Avoiding the Temptation to Lift the Lid
I mentioned this before, but it bears repeating: lifting the lid is the number one cause of crunchy, undercooked Brown Rice . Every time you check, you release the heat required for the steam to do its job. Set your timer and walk away.
Go fold laundry or check TikTok, just don’t touch that lid!
Fixing Watery Bottoms: Removing Excess Moisture
If, after the full 40 minute simmer and 20 minute rest, you still have standing liquid at the bottom of the pot, it usually means your heat wasn't low enough during the simmer, or you didn't have a tight seal on the lid. Don’t panic. Gently tilt the pot and carefully pour off the excess liquid.
Then, return the pot (uncovered) to low heat for 2– 3 minutes to evaporate the remaining moisture before fluffing. Next time, double check that lid seal.
Flavor Boosts: Infusing with Lemon Zest or Bay Leaf
A fantastic tip for making delicious Brown Rice is adding aromatics right at the start. Throw in two whole bay leaves or a handful of smashed garlic cloves with the liquid before simmering. The fragrance will infuse the rice as it cooks.
Once the rice is rested and fluffed, stir in some fresh lemon zest and maybe a handful of chopped dill or parsley. It completely elevates the simple nutty flavor of the Brown Rice .
Storage Secrets: Making Brown Rice Ahead of Time
How to Freeze Individual Portions for Meal Prep
This is my absolute favorite meal prep secret for perfect Brown Rice . Once the rice is fully cooked and fluffed, spread it out on a baking sheet to cool completely this stops the cooking process and prevents clumping.
Once cool, transfer the portions into freezer safe bags or small meal prep containers. Flatten the bags for easier stacking. Frozen Brown Rice is good for up to three months and thaws beautifully, staying fluffy and separate.
Having pre-portioned bags of high-quality Brown Rice on hand is perfect for throwing together a quick [Cajun Shrimp and Rice: Authentic, Quick Skillet Dinner in 45 Mins].
Reheating for Optimum Texture (Stovetop vs. Microwave)
To reheat frozen or refrigerated Brown Rice without it drying out, you need to re-introduce moisture.
- Stovetop (Best Method): Place the rice in a heavy bottomed pan, add 1 tablespoon of water or stock per cup of rice, cover tightly, and warm over low heat for 5– 7 minutes, stirring occasionally. The steam will soften the grains perfectly.
- Microwave (Fastest Method): Put the rice in a microwave safe bowl, sprinkle with 1 teaspoon of water or stock, cover the bowl loosely with a damp paper towel, and heat for 60 90 seconds per serving. The damp towel traps the steam.
Complementing the Nutty Flavor: Versatile Serving Ideas
Enhancing Simple Bowls with high-quality Olive Oil and Herbs
Sometimes, the simplest approach is the best. If you’ve followed this recipe, your Brown Rice should already be slightly nutty and perfectly seasoned.
Toss a serving gently with a high-quality extra virgin olive oil, a quick hit of white wine vinegar, or maybe a dash of soy sauce if you’re leaning Asian. Fresh chives, parsley, or cilantro are mandatory additions.
This perfectly cooked Brown Rice serves as the ideal foundation for any of your favorite dinner dishes. It's fantastic paired with roasted Cooked Turnips: Silky Brown Butter Thyme Mashed Recipe , or simply tossed into a veggie bowl with crumbled feta and sun-dried tomatoes.
You cannot go wrong with this foolproof method for making the best Brown Rice of your life.

Recipe FAQs
Why is my brown rice still crunchy or dry after the prescribed cooking time?
Crunchy brown rice is often due to insufficient steaming time or a low boil that didn't generate enough vapor pressure. Ensure the rice rests, undisturbed and tightly covered, for the full 10-15 minutes after turning off the heat; this rest period is non-negotiable for tender results.
If you notice it is still too firm, add 1-2 tablespoons of boiling water back into the pot, replace the lid, and steam for an additional five minutes.
My brown rice turned out sticky or mushy. What went wrong?
Mushy brown rice is typically a result of using too much water or lifting the lid during the crucial cooking phase, which releases necessary steam. To prevent this, measure your liquid precisely using measuring cups designed for liquids, and avoid stirring the rice once it is simmering, as agitation releases starch.
Always cook the rice at the lowest heat setting after the initial boil to maintain a gentle cooking environment.
Can I use chicken or vegetable stock instead of water to cook the brown rice?
Absolutely; substituting water with chicken, beef, or vegetable stock is an excellent method for layering a deeper, savory flavor into the rice. Swap the stock one-for-one with the water specified in the recipe instructions, but be sure to use low-sodium stock if possible to prevent the final product from becoming overly salty.
The required cooking time and technique for the rice remain exactly the same, regardless of the liquid base.
Is it necessary to rinse brown rice before cooking, and why?
While brown rice does not release as much starch as white rice, rinsing is highly recommended for proper cooking and cleanliness. Rinsing removes any potential dust or debris, and more importantly, it hydrates the tough outer bran layer of the kernel.
This pre-hydration helps ensure the grain cooks more uniformly, leading to a better, fluffier final texture.
What is the optimal water-to-rice ratio for stovetop brown rice?
For most conventional stovetop methods, the ideal ratio is 2 parts water (or stock) to 1 part brown rice, which is slightly more generous than the ratio used for white rice. This higher liquid content is needed to penetrate the tough, fibrous bran layer surrounding the kernel during the extended cooking process.
Always confirm this ratio against specific recipes, as some methods that involve heavy pre-soaking may require less liquid.
Can I freeze leftover cooked brown rice, and how should I reheat it?
Cooked brown rice freezes exceptionally well and is perfect for batch cooking and meal preparation. Allow the rice to cool completely, then store it in airtight freezer bags or containers, squeezing out excess air; it will keep for up to three months.
To reheat, sprinkle a few drops of water onto the frozen rice, cover loosely, and microwave or sauté quickly to restore moisture and texture.
Can this brown rice recipe be successfully adapted for an electric rice cooker or Instant Pot?
Yes, both appliances are excellent for cooking brown rice due to their ability to maintain consistent heat and pressure. When using a rice cooker, select the designated 'Brown Rice' setting, which automatically adjusts the cooking duration to account for the harder grain.
For the Instant Pot, use a ratio closer to 1.25 parts water to 1 part rice and cook on high pressure for about 15 minutes, followed by a full natural pressure release.
Fluffy Brown Rice Perfection
Ingredients:
Instructions:
Nutrition Facts:
| Calories | 258 kcal |
|---|---|
| Protein | 5.3 g |
| Fat | 5.1 g |
| Carbs | 46.1 g |
