Gluten Free Peanut Butter Blossom Cookies: Soft, Chewy, and Simply Perfect
- The Ultimate Gluten and Free Peanut Butter Blossom Cookies Experience
- Essential Components for Flawless Peanut Butter Blossom Baking
- Step and by-Step Guide to Baking Gluten Free Peanut Butter Blossom Cookies
- Troubleshooting and Pro Tips for Peanut Butter Perfection
- Scaling Up: Batch Sizing for Holiday Baking Trays
- Recipe FAQs
- 📝 Recipe Card
The Ultimate Gluten and Free Peanut Butter Blossom Cookies Experience
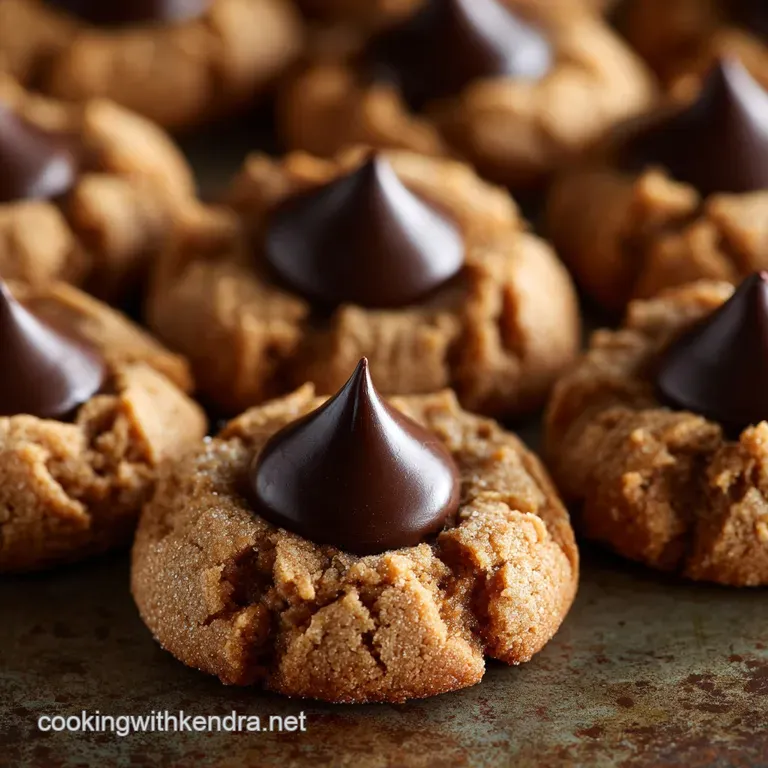
Right, let’s talk cookies. Specifically, those perfect little mounds of peanut butter heaven topped with a melting milk chocolate peak. You know the ones. For years, I avoided making the classic Peanut Butter Blossom because adapting it to be gluten and free felt like navigating a minefield.
Would it spread too much? Would it taste like dry sand? I’ve been there, friends. I’ve ended up with flat, greasy disks and cookies so crumbly they disintegrated when you picked them up.
But after enough kitchen failures (and a few emergency peanut butter toast dinners), I finally cracked the code for the best gluten-free peanut butter blossom cookies . This recipe is sturdy, chewy, rich, and ridiculously easy, provided you follow my critical chilling step.
Rediscovering Nostalgia: Why We Love the Iconic Blossom Cookie
Is there a cookie more wholesome or nostalgic? I swear, just smelling the dough takes me straight back to my grandmother’s kitchen, even though she definitely wasn't dealing with gluten and free flour back then.
The beauty of the classic blossom cookie lies in its simplicity: a soft, salty and sweet base that provides the perfect foil for that creamy, slightly bitter milk chocolate finish. It’s comforting. It’s familiar. And honestly, it’s just the best type of lazy baking.
When you need a guaranteed win for a holiday tray or a Tuesday afternoon sugar fix, this is your recipe. We're not just baking cookies; we're resurrecting childhood memories, just without the gluten drama.
The Secret to Perfectly Chewy Gluten and Free Texture
If you bake gluten and free often, you know the main enemies: dryness and crumbliness. The key to getting that perfect soft and slightly chewy interior, especially in a dense cookie like this, is twofold. First, brown sugar .
We use equal parts brown and white sugar because the molasses in the brown sugar adds moisture and keeps the structure soft. Second, the type of peanut butter matters immensely . Don't even look at the "natural" jar that has separated oil on top.
You need the processed, stabilized stuff (think Jif or Skippy) because it has specific emulsifiers that help bind the dough and prevent that sad, sandy texture we’re trying to avoid. Trust me, this is where we cheat for the greater good of texture.
Quick Overview: What Makes This Recipe Cracking Good?
This isn’t just another gluten-free peanut butter blossom recipe floating around the internet. This one is reliable because it embraces the needs of GF flour while simplifying the technique.
Crucial Warning: We use a full stick of softened butter, but we absolutely force the dough to chill for 30 minutes. This is non and negotiable.
It allows the gluten and free starches to properly hydrate and ensures the cookies bake up thick instead of spreading into puddles. Ignore the chill, and your results will be heartbreakingly flat.
- Reliable Structure: Uses a 1 to-1 GF blend (with xanthan gum already included).
- Optimal Flavor: High ratio of peanut butter and salt to balance the sweetness.
- Speedy Prep: You can have the dough made in under 15 minutes if you’re quick.
- Perfect Timing: We nail the moment to press in the chocolate kiss so it adheres beautifully without melting into a brown puddle.
Essential Components for Flawless Peanut Butter Blossom Baking
Baking is chemistry, and when you take gluten out of the equation, you have to be extra precise about the substitutes you bring in. Let’s look at the ingredients that make or break these gluten-free peanut butter kiss cookies.
Decoding the Flour Blend: Which GF Mix is Best?
I have experimented wildly. I’ve tried rice flour, almond flour, and weird proprietary blends. For this recipe, the simplest answer is the best answer: use a reputable, measure and for-measure 1 to-1 gluten and free flour blend. I am partial to King Arthur or Bob’s Red Mill blue bag. Why?
They already contain xanthan gum, which is the magic ingredient that mimics gluten’s stickiness. If your blend doesn't have xanthan gum, you need to add half a teaspoon to your dry ingredients. Otherwise, your dough will be too fragile and your cookies will crumble the second you touch them.
Choosing Your Peanut Butter: Creamy vs. Crunchy and Natural Alternatives
This is where I get seriously opinionated. You need creamy , standard and issue peanut butter for these. If you use crunchy, you risk the dough balls failing to hold their shape perfectly when you roll them in the sugar. And again, ditch the natural stuff!
The oil separation in natural peanut butter throws off the fat and to-dry ratio, leading to excessively greasy and flat cookies. We need the stabilizers in Skippy or Jif to create that dense, pliable dough structure required for soft peanut butter cookies.
If you must go the natural route for dietary reasons, make sure it’s a jar that hasn’t separated and add an extra tablespoon of GF flour to account for the oiliness.
Tools of the Trade: Equipment for Perfect Uniformity
You can make these cookies with just a bowl and a wooden spoon, but if you want that perfect, professional look, grab a cookie scoop. A standard 1 ½ tablespoon scoop (the smallish one) is ideal. Using a scoop ensures every cookie is the same size, which means they all bake evenly.
No one wants half a batch burnt and the other half raw, right? Also, please, please use parchment paper or silicone mats. Peanut butter cookies stick like crazy, and peeling them off a bare sheet pan is an exercise in frustration.
Related Recipes Worth Trying
- Skillet Chicken with Garlic Herb Butter Sauce: Easy 30-Minute Recipe — Skillet Chicken with Garlic Herb Butter Sauce is the ultimate weeknight winner. This easy skillet chicken recipe delivers restaurant quality flavor in just...
- Carrot Cake Bars with Browned Butter Cream Cheese Frosting Recipe — Carrot Cake Bars with Browned Butter Cream Cheese are the best dessert bars youll ever taste This easy dessert bar recipe uses nutty brown butter frosting...
- Chocolate Cake Recipe Ultimate Moist Fudge Layer Cake with Buttercream — This ultimate Chocolate Cake recipe delivers an intensely moist dark and rich layer cake guaranteed to be a showstopper Learn the secret hot coffee trick...
Step and by-Step Guide to Baking gluten-free Peanut Butter Blossom Cookies
Let's crack on with the method. Focus on the timing; it's everything here.
Phase One: Mastering the Cookie Dough Creaming Process
The creaming process is simple, but we don't want to overdo it. Start with room temperature butter (it should be easily dented with a finger, not melted). Beat the butter and both sugars (brown and white) until the mixture looks pale yellow and fluffy.
This takes about 2 to 3 minutes in a stand mixer. This aeration is what helps the cookies lift slightly without gluten. Once fluffy, add the peanut butter and mix until just combined don't keep mixing once it looks uniform. Then, the egg and vanilla go in.
Stop mixing the second the egg yolk is broken and incorporated. Overmixing gluten and free dough encourages toughness and dryness.
Precision Rolling: Achieving the Ideal Cookie Dough Ball Size
Once the dough is mixed, it should be slightly stiff thanks to the peanut butter. If you skipped the chilling step (shame on you!), the dough might be too soft to handle. Assuming you chilled it properly, use your scoop to form uniform balls, then give them a quick roll between your palms.
They should be perfectly round. Roll the entire surface of the dough ball in the shallow dish of granulated sugar. This isn't just for looks; the sugar crust prevents the outside of the cookie from spreading too quickly, giving it a better shape.
The Critical Chill: Preventing Excess Spreading During Baking
I know waiting is painful, but you must chill this dough. Thirty minutes is the minimum. If you’re busy, you can chill it for a few hours, or even overnight! If chilling overnight, let the dough sit out for about 10 minutes before rolling, as it might become too hard.
The temperature of the fat the butter and the peanut butter needs to drop significantly. This slower melt in the oven is crucial to producing thick, chewy gluten-free peanut butter kiss cookies.
The Hershey Kiss Moment: Timing the Chocolate Addition for Best Results
This is the most critical 60 seconds of the entire bake. When the cookies come out of the 375°F oven, they will look slightly puffy and a little under and baked in the very centre that’s exactly right.
Immediately, swiftly, but gently, press one unwrapped chocolate kiss deep into the centre of each cookie. You need to apply enough pressure for the cookie to crack slightly around the edges (that famous blossom look), but not so much that the cookie collapses entirely. If the chocolate cracks a little, brilliant.
Now, leave them on the hot sheet pan for five minutes before moving them. This sets the chocolate enough so it won’t melt everywhere when you handle it.
Troubleshooting and Pro Tips for Peanut Butter Perfection
Here are the hard and won lessons from my own kitchen disasters.
| Problem | Likely Cause | Quick Fix/Prevention |
|---|---|---|
| Spreading too much (flat cookies) | Dough too warm or not enough GF flour/xanthan gum. | Ensure 30 minute chill; use stabilized PB. |
| Crumbly or Dry Texture | Over and baking or wrong PB used (natural). | Pull them at 10 minutes! Use processed peanut butter. |
| Kisses Won't Stick | Waited too long after removing from oven. | Unwrap kisses before baking, and press them immediately. |
Scaling Up: Batch Sizing for Holiday Baking Trays
If you’re doing a massive holiday bake and these are perfect for a classic tray you absolutely can double or triple the recipe. I recommend mixing the large batch of dough, scooping all the balls, and then chilling them on sheet trays (or in sealed containers, if you’re batching).
Keep the unbaked dough balls refrigerated and only roll them in sugar and bake them in smaller batches as needed. Don’t roll all 100 cookies in sugar and then refrigerate them, or the sugar will dissolve and get sticky.
Why Are My Cookies Crumbly? Solving Common Dough Issues
Crumbly dough usually boils down to two things: too much dry ingredient or the wrong kind of fat. Since we’re using GF flour, the lack of elasticity makes crumbliness a higher risk. If your dough feels too dry when mixing, stop adding the flour and add just half a teaspoon of milk or water to bring it together.
More often than not, though, crumbliness is caused by using natural peanut butter, which adds too much oil and not enough binding agents, essentially deep and frying the crumb structure instead of holding it together. Stick to the creamy, standard stuff.
Long and Term Freshness: Effective Storage and Freezing Techniques
These freeze beautifully!
- Freezing Dough: Roll the dough balls, skip the sugar coating, and freeze them solid on a sheet tray. Once frozen, transfer them to a freezer bag. When you’re ready to bake, roll them in sugar and bake from frozen, adding 2– 3 minutes to the total bake time.
- Storing Baked Cookies: Store them in an airtight container at room temperature for up to 5 days. Layer them with parchment paper to protect the delicate chocolate kiss topping.
- Freezing Baked Cookies: Flash freeze the fully baked and cooled cookies on a tray, then place them in an airtight container. Thaw them in the container at room temperature. Can you freeze peanut butter blossom cookies? Yes, and they taste just as good!
Adaptations: Dairy and Free, Nut and Free, and Vegan Swaps
These are already gluten and free, so crossing into other dietary restrictions is quite easy.
- Dairy and Free: Use a high and quality vegan butter stick instead of dairy butter (Miyoko's works wonders). Ensure the chocolate kisses you use are dairy and free (many dark chocolate chips are naturally DF, or use a brand like Enjoy Life).
- Vegan/Egg and Free: Combine the dairy and free butter swap with a flax egg (1 tablespoon ground flaxseed + 3 tablespoons water, rested 5 minutes).
- Nut and Free: Swap the peanut butter for SunButter (sunflower seed butter). The texture is very similar, and it bakes up beautifully in this recipe.
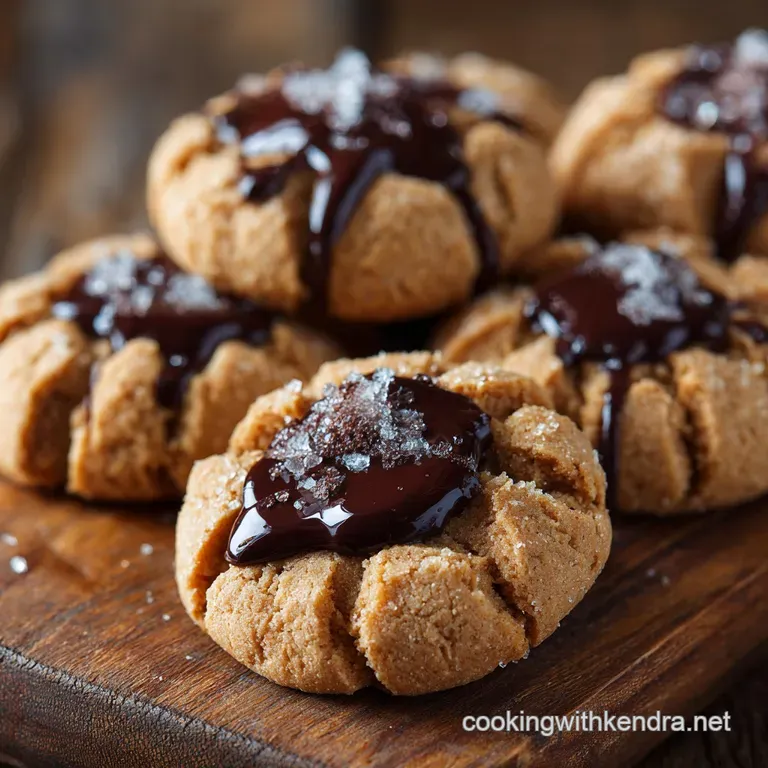
Flavor Innovations: Unique Toppings Beyond the Standard Kiss
I adore the classic milk chocolate kiss, but sometimes you want a little flair, especially for a special occasion.
- Pretzel Crunch: Instead of a kiss, press a tiny pretzel knot into the centre after baking for a salty crunch element.
- Caramel Drizzle: Use a Rolo candy in the centre, pressing it in after baking. The caramel gets deliciously soft.
- White Chocolate Dreams: Swap the milk chocolate kiss for a white chocolate candy melt or a block of white chocolate cut into a pyramid shape.
- Sprinkle Bomb: Instead of rolling the whole cookie in sugar, roll it in holiday sprinkles for a seriously festive look.

Recipe FAQs
My gluten-free bakes often spread terribly; is there a trick to keeping these lovely and plump?
Absolutely. The essential trick is the 30-minute chill time outlined in Step 3; it allows the starches in the GF flour to fully hydrate, ensuring your cookies hold their shape perfectly and don't end up looking like sad puddles!
Can I use natural peanut butter, or does it have to be the standard sort for these biscuits?
Best to stick to the traditional, processed, non-separating peanut butter (like Skippy or Jif). Natural peanut butter usually has too much oil, which destabilises the dough structure and can make the baked cookies greasy or too crumbly.
Since these are The Cracking Good gluten-free Peanut Butter Blossom Cookies, are they suitable for those with strict coeliac needs, and what are the nutritional considerations?
Provided you use certified gluten-free flour and ensure all your ingredients are cross contamination free, they are spot on for coeliac diets. Just remember these are a proper treat, rich in sugar and fat, so enjoy them in moderation with a nice cup of tea!
I haven't got any chocolate kisses knocking about what other centres work well?
Not a problem! A small milk chocolate truffle, a square of dark chocolate, or even pressing a shelled pecan or walnut half into the centre works a treat for a bit of variation and crunch.
How long will these keep fresh, and what’s the best way to store them once baked?
They keep famously well! Store them in an airtight container at room temperature for up to five days, or for longer storage, you can freeze the fully cooled cookies for up to three months.
Gf Peanut Butter Blossom Cookies

Ingredients:
Instructions:
Nutrition Facts:
| Calories | 84 kcal |
|---|---|
| Protein | 1.0 g |
| Fat | 5.0 g |
| Carbs | 10.0 g |
