Homemade Dinner Rolls: Soft and Fluffy

- Time: Active 145 minutes, Passive 18 minutes, Total 163 minutes
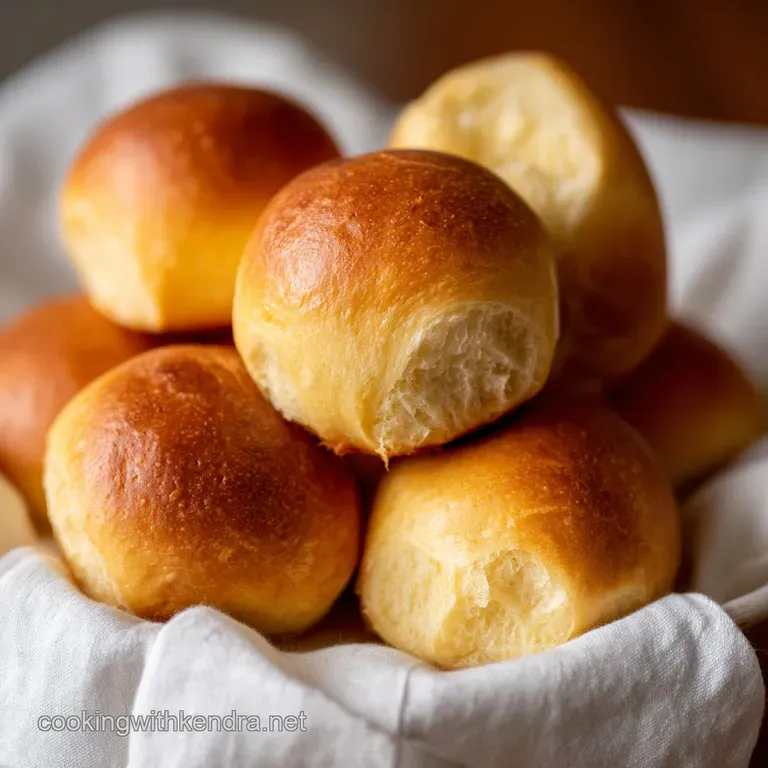
- Flavor/Texture Hook: Cloud like crumb with a salty, buttery finish
- Perfect for: Holiday feasts or cozy Sunday family suppers
- The Secrets Behind Fluffy and Buttery Dinner Rolls
- The Science That Makes This Bread So Special
- Component Deep Dive For Perfect Results
- Selecting The Best Elements For Your Bread Basket
- Tools Required For A Smooth Baking Experience
- A Detailed Walkthrough Of The Baking Steps
- Professional Strategies To Keep Your Dough On Track
- Creative Ways To Customize Your Bread Creations
- Adjusting The Batch Size
- Effective Methods For Keeping Your Leftovers Fresh
- The Best Ways To Present Your Warm Rolls
- Recipe FAQs
- 📝 Recipe Card
The Secrets Behind Fluffy and Buttery Dinner Rolls
Have you ever walked into a bakery and felt like the air itself was giving you a warm, yeasty hug? That specific, intoxicating scent of browning flour and sweet butter is something I spent years trying to replicate in my own kitchen.
I used to think that "bakery style" meant you needed professional steam ovens or some secret chemical dough conditioner, but then I stumbled upon a technique that changed everything.
It turns out, the most pillowy, melt in-your mouth texture doesn't come from a fancy machine, but from a small pot on your stove where you cook a bit of flour and milk together first.
This isn't just about making bread; it's about creating that centerpiece that people fight over at the dinner table. We’ve all had those rolls that look beautiful but turn into dry, crumbly hockey pucks the second they cool down. I promise you, these are different.
These stay velvety and supple even after they’ve sat out for the entire meal. When you pull these apart, you get those long, gossamer thin strands of gluten that just scream "homemade with love."
We're going to use a mixture of tradition and a few clever additions like honey and Greek yogurt to ensure every bite is rich without being heavy. Whether you're a seasoned bread baker or someone who’s a bit intimidated by the thought of working with yeast, I've got your back.
We're going to walk through the sensory cues together, from the moment the yeast starts to bubble to that final, glorious aroma of salt and melted butter hitting a hot crust.
The Science That Makes This Bread So Special
- Pre Gelatinized Starch: Cooking a portion of the flour and milk creates a paste that traps moisture, allowing the dough to hold more liquid without becoming sticky.
- Acidic Tenderizer: Greek yogurt introduces a slight acidity that weakens gluten just enough to ensure the crumb is tender rather than chewy.
- Enzymatic Activity: Honey provides immediate food for the yeast while also acting as a humectant to keep the rolls from drying out on the counter.
- Fat Incorporation: Adding softened butter gradually at the end of kneading coats the gluten strands, leading to a much finer, silkier interior texture.
| Method Type | Total Time | Texture Result | Shelf Life |
|---|---|---|---|
| Tangzhong (This Recipe) | 163 minutes | Exceptionally soft, pull apart layers | 3-4 days at room temp |
| Traditional Yeast Roll | 120 minutes | Slightly firmer, classic bread crumb | 1-2 days before drying |
| Quick 1 Hour Roll | 60 minutes | Denser, more "yeasty" flavor | Best eaten within 4 hours |
The biggest difference you'll notice with this method is the hydration. Because we cook that "starter paste" first, we can sneak more milk into the dough than we ever could with a standard recipe. This extra moisture is exactly what prevents the bread from going stale by the next morning.
It’s a total game changer for holiday prep when you want to bake things ahead of time.
Component Deep Dive For Perfect Results
| Ingredient | Science Role | Pro Secret |
|---|---|---|
| Bread Flour | Provides high protein content for a strong, airy structure. | Always weigh your flour in grams to avoid a dry, heavy roll. |
| Instant Yeast | Responsible for the rapid production of CO2 gas. | Ensure your milk is "bathwater warm" (around 105°F) so you don't kill the culture. |
| Greek Yogurt | Adds fat and moisture while improving the dough's elasticity. | Use full fat plain yogurt for the most luxurious, velvety crumb. |
While many recipes rely solely on heavy cream or excessive butter for flavor, the yogurt in this recipe provides a subtle tang that balances the sweetness of the honey. It's a trick I learned while experimenting with different Christmas Dinner Sides where I needed a roll that could stand up to rich gravies and savory roasts.
Selecting The Best Elements For Your Bread Basket
To make these Dinner Rolls, you'll want to gather your ingredients before you start. Having everything at room temperature especially that egg and the yogurt makes the mixing process much smoother.
- Bread Flour (30g for starter, 450g for dough): You really want bread flour here rather than all purpose. Why this? The higher protein creates those beautiful, long stretched gluten strands we want.
- Whole Milk (120ml for starter, 120ml for dough): Use full fat milk for the richest flavor. Why this? Fat interferes with gluten just enough to keep things tender.
- Instant Yeast (7g): No need to bloom this in water first, but we will foam it in milk for safety. Why this? It's more reliable and works faster than active dry yeast.
- Fine Sea Salt (6g): Don't skip this; it controls the yeast and boosts the flavor.
- Honey (60g): This provides a soft sweetness that isn't overwhelming.
- Greek Yogurt (80g): Plain and full fat is the way to go.
- Large Egg (1): This adds structure and a golden hue to the dough.
- Unsalted Butter (42g softened, 14g melted): Softened butter for the dough, melted for the finish. Why this? Adding it late in the kneading process creates a silkier dough.
- Flaky Sea Salt (1g): For that "wow factor" crunch on top.
| Original Ingredient | Substitute | Why It Works |
|---|---|---|
| Honey | Maple Syrup | Same sugar content. Note: Adds a slight woody/caramel flavor to the rolls. |
| Greek Yogurt | Sour Cream | Similar fat and acidity level. Note: Makes the rolls slightly richer but equally soft. |
| Bread Flour | All Purpose Flour | Lower protein. Note: The rolls will be slightly less tall and a bit more crumbly. |
Tools Required For A Smooth Baking Experience
You don't need a professional bakery to pull this off, but a few specific tools make the job much easier. I always recommend a stand mixer (like a KitchenAid) for this recipe because the dough is quite tacky, and hand kneading can be a bit of a workout.
You'll also want a small saucepan for the Tangzhong paste and a 9x13 inch baking pan for the rolls themselves.
A digital scale is my biggest "must have." When you're working with flour, measuring by the cup can vary by up to 20 grams depending on how packed the flour is. Weighing out 15 portions of dough at 65-70g each ensures that every single roll finishes baking at the exact same time.
There’s nothing worse than having half your rolls burnt while the middle ones are still doughy.
A Detailed Walkthrough Of The Baking Steps
- Prepare the Tangzhong. Whisk 30g bread flour and 120ml milk in a small saucepan over medium heat. Cook until it becomes a thick, translucent paste that leaves tracks in the pan. Note: This gelatinizes the starch so it can hold onto moisture.
- Bloom the yeast. In your mixer bowl, whisk the 120ml warm milk, honey, and 7g instant yeast. Wait 2 minutes until you see tiny bubbles or foam forming on the surface.
- Combine the wet base. Add the Greek yogurt, the egg, and your cooled Tangzhong paste along with half of the bread flour. Whisk on low until it looks like a thick, shaggy porridge.
- Knead the main dough. Add the rest of the bread flour and the sea salt. Knead on medium low for 5 minutes using the dough hook until the mixture clears the sides of the bowl.
- Incorporate the butter. Add the 42g of softened butter one tablespoon at a time. Continue kneading until the dough is smooth, shiny, and elastic, which should take about 3-4 more minutes.
- Perform the bulk rise. Move the dough to a greased bowl and cover it. Let it sit in a warm spot for 90 minutes or until it has clearly doubled in size and feels airy to the touch.
- Shape the rolls. Punch the air out and divide the dough into 15 equal pieces (about 65-70g each). Roll them into tight, smooth balls and place them in your greased 9x13 pan in a 3x5 grid.
- The final proof. Cover and let the shaped rolls rise for 30-45 minutes. They should look puffy and be touching each other in the pan.
- Bake to perfection. Preheat your oven to 350°F (175°C). Bake for 18 minutes until the tops are a deep golden brown and the house smells like a dream.
- Apply the finish. Brush immediately with 14g melted butter and a sprinkle of flaky salt. The butter will sizzle slightly as it hits the hot crust, soaking in for extra flavor.
Professional Strategies To Keep Your Dough On Track
One of the most common hiccups with Dinner Rolls happens during the rise. If your kitchen is cold, that dough is going to sit there like a lump of clay. I like to put my rising bowl inside the oven (turned off!) with a pan of boiling water on the rack below it.
This creates a makeshift proofing box that’s warm and humid, which yeast absolutely loves.
Another thing to watch for is the "over proof." If you let the rolls rise for too long in the pan before putting them in the oven, they might actually collapse once they hit the heat. You want them to look "puffy" and soft, like a marshmallow, but they should still have enough structure to hold their shape.
If you poke one gently with your finger, the indentation should spring back slowly. If it stays sunken, get those rolls in the oven immediately!
To Fix Dense Or Heavy Rolls
If your rolls come out feeling like stones, it's usually because the dough didn't rise enough or the flour was packed too tightly. Make sure your yeast is fresh and that you aren't adding extra flour during the kneading process. The dough should be slightly tacky!
| Problem | Root Cause | Solution |
|---|---|---|
| Rolls didn't rise | Dead yeast or cold room | Check yeast date; use a warm, draft free spot (80°F-85°F). |
| Tough, chewy crust | Over kneading or no butter wash | Knead only until smooth; brush with butter while hot. |
| Dry, crumbly interior | Too much flour added | Weigh ingredients; ensure the Tangzhong paste is thick. |
Common Mistakes Checklist:
- ✓ Never use cold ingredients; let the yogurt and egg sit out for 30 minutes before starting.
- ✓ Don't skip the Tangzhong cooling step; hot paste can kill your yeast instantly.
- ✓ Avoid adding more flour if the dough feels sticky; use a bench scraper instead.
- ✓ Preheat your oven for at least 20 minutes to ensure a steady, even temperature.
- ✓ Let the rolls cool for at least 10 minutes before eating to let the internal structure set.
Creative Ways To Customize Your Bread Creations
If you're serving these alongside a hearty meal like Traditional Halupki, you might want to lean into more savory flavors. You can easily adapt this base recipe to fit whatever you're cooking.
- Savory Garlic Herb: Mix 1 teaspoon of garlic powder and 1 tablespoon of chopped fresh rosemary into the dough with the salt.
- Cheese Stuffed: Place a small cube of sharp cheddar or mozzarella in the center of each dough ball before shaping.
- Everything Bagel Style: Brush with an egg wash instead of butter and sprinkle generously with everything bagel seasoning before baking.
If you want a different experience, here is a quick decision guide: If you want maximum sweetness, increase honey to 80g and add 1/2 tsp of cinnamon. If you want extra crispy bottoms, bake in a well seasoned cast iron skillet instead of a 9x13 pan.
If you want taller, thinner rolls, use a smaller 8x11 pan to force them to grow upward.
Adjusting The Batch Size
Reducing this recipe is fairly straightforward. If you only need about 7-8 rolls, you can cut all the ingredients exactly in half. For the egg, just whisk it in a small bowl and use half of it by weight (about 25-28g).
Use a standard 8 inch square brownie pan for the second rise and bake for the same 18 minutes.
Scaling up for a massive crowd requires a bit more care. If you double the recipe to make 30 rolls, don't just double the spices. I find that doubling the salt and yeast works fine, but you might only need 1.5 times the honey to keep the flavor balanced.
You'll likely need to work in two separate batches in your stand mixer unless you have a professional sized 7 quart bowl. When baking two pans at once, rotate them halfway through the 18 minutes to ensure even browning.
Effective Methods For Keeping Your Leftovers Fresh
Storing Dinner Rolls correctly is the difference between a great snack tomorrow and something you throw to the birds. Once they are completely cool, place them in a heavy duty freezer bag or an airtight container. They will stay fresh on the counter for about 3-4 days.
Whatever you do, don't put them in the fridge! The refrigerator actually speeds up the crystallization of starch, which makes bread go stale faster.
For longer storage, these rolls freeze beautifully. I often make a double batch and freeze half. Just wrap them individually in plastic wrap, then put them all in a freezer bag. They’ll stay perfect for up to 3 months.
When you're ready to eat, let them thaw at room temperature for an hour, then wrap them in foil and pop them in a 350°F oven for 5-8 minutes. They’ll taste like they were just baked.
If you do happen to have rolls that have gone a bit dry, don't toss them! They make the most incredible base for a savory bread pudding or can be sliced thin and toasted for homemade crostini. You can even pulse them in a food processor for fresh breadcrumbs to use in a Broccoli Casserole recipe.
The Best Ways To Present Your Warm Rolls
There is something so rustic and beautiful about bringing the entire pan of rolls to the table while they are still touching. I like to serve them in a basket lined with a clean linen cloth to keep the heat trapped inside.
If you're feeling fancy, whip up some honey cinnamon butter or a roasted garlic compound butter to serve on the side.
These rolls are the ultimate "slider" buns, too. Because they are so soft but have a sturdy enough structure, they are perfect for little ham and cheese melts or leftover turkey sandwiches the day after a big holiday.
Just slice them in half, add your fillings, and pop the whole tray back in the oven for a few minutes until the cheese is bubbly. No matter how you serve them, just make sure there’s plenty of butter nearby! Bread this good deserves to be celebrated.

Recipe FAQs
What is a dinner roll?
A dinner roll is a small, individual sized yeast bread served as a side. It is designed to be soft and fluffy, acting as a neutral, buttery vessel for meals, contrasting with larger loaves meant for slicing.
What are the different types of dinner rolls?
There are many, including brioche, parker house, and tangzhong styles. These variations usually differ in their fat, sugar, or hydration levels, though all aim for a tender crumb that pairs well with hearty mains like this creamy casserole.
What is the difference between bread and dinner rolls?
Dinner rolls are enriched, smaller, and intended for single servings. Unlike standard crusty loaves, these use ingredients like milk, honey, and butter to create a tight, soft crumb structure.
What is the secret to perfect dinner rolls?
The secret is the Tangzhong method. By pre-cooking a portion of your flour and milk into a paste, you lock in moisture, ensuring the crumb remains soft for days.
How to ensure the dough rises properly?
Place the covered dough in a warm, draft free spot. Consistent heat is vital, as it allows the yeast to ferment and build the gas structure needed for that cloud like interior.
How to achieve a golden brown crust?
Bake at 350°F (175°C) for exactly 18 minutes. Monitoring the color closely ensures you reach that deep golden hue while keeping the inside tender and moist.
Is it true that I should add more flour if the dough feels sticky?
No, this is a common misconception. A slightly tacky dough is necessary for a soft, elastic texture; adding too much flour will result in dense, heavy rolls instead of airy ones.
Homemade Soft Dinner Rolls

Ingredients:
Instructions:
Nutrition Facts:
| Calories | 173 kcal |
|---|---|
| Protein | 5.4 g |
| Fat | 4.3 g |
| Carbs | 28.4 g |
| Fiber | 0.9 g |
| Sugar | 4.8 g |
| Sodium | 158 mg |
