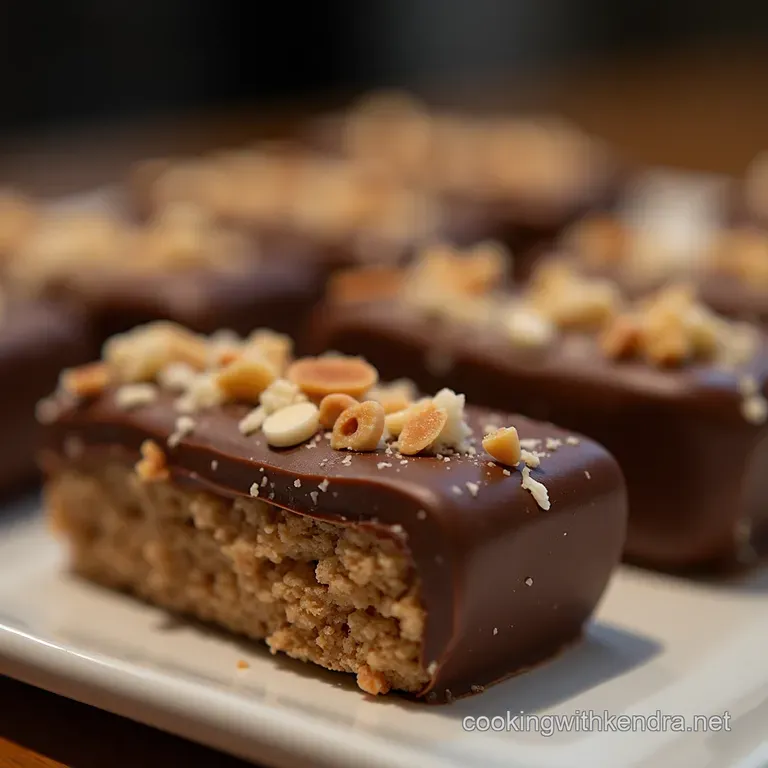
The Proper Crunch Homemade Wafer Bars Dipped in Silky Milk Chocolate
- Why Our Homemade Kit Kat Bars Outshine the Original
- The Secret to Achieving That Signature Snappable Texture
- Assembling Your Arsenal: Essential Components for Ultimate Crunch
- The Chocolate Concoction: Selecting the Perfect Coating
- Phase One: Constructing the Crispy Wafer Core
- The Critical Layering Process for Authentic Homemade Kit Kat Bars
- Mastering the Final Chocolate Enrobing Technique
- Troubleshooting Common Pitfalls in Bar Construction
- Elevating Your Creation: Flavor Variations and Enhancements
- Recipe FAQs
- 📝 Recipe Card
Why Our Homemade Kit Kat Bars Outshine the Original
There’s a certain magic that happens when you take a familiar, beloved treat and recreate it in your own kitchen. Our Homemade Kit Kat Bars aren't just a facsimile; they are an elevation. The factory version relies on efficiency, which often means sacrificing texture for speed.
Here, we focus on the deliberate, slow process that allows the wafer layers to bake to a delicate crispness and the chocolate coating to set with a satisfying, audible snap .
When you bite into one of these, you’ll notice the difference immediately: the wafer is lighter, the filling creamier, and the outer chocolate shell possesses a richer depth of flavor than anything pre-packaged.
This journey into Candy Recipes Homemade is about achieving peak crunch and superior melt-in-your mouth quality.
The Secret to Achieving That Signature Snappable Texture
The hallmark of any great wafer bar is the texture that precise moment of resistance followed by a cascade of crispy layers. Achieving this requires understanding that the biscuit part of the equation is far more important than the chocolate coating itself.
We need thinness, uniformity, and the correct level of bake dryness.
Ditching the Factory Floor for Kitchen Counter Perfection
In a large commercial operation, wafers are often extruded and baked in massive continuous sheets. In our Homemade Kit Kat Bars Recipe , we work in smaller batches, which allows us unparalleled control over the thickness and moisture content of our layers.
We roll the dough thin impossibly thin, almost translucent and monitor the oven temperature meticulously. This careful handling ensures they dry out just enough to fracture beautifully when chewed, avoiding any rubberiness that can plague under baked homemade wafers.
A Deeper Dive into the Iconic Layered Chocolate Experience
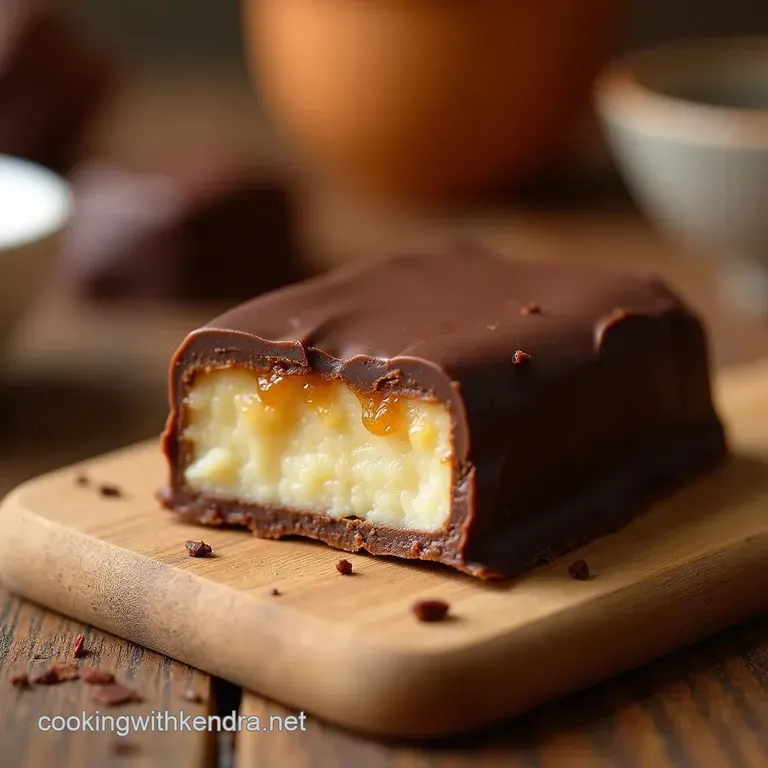
The iconic experience isn't just the crunch; it's the interplay between the four crispy layers and the two thin layers of sweet, meltable filling. Our recipe calls for a light, fluffy filling made with high-quality softened butter and sifted powdered sugar, enriched with real melted milk chocolate.
This filling provides just enough adhesion without weighing down the structure. It’s this deliberate lightness that defines these Dessert Bars and makes them dangerously addictive.
What Makes This Specific Recipe Worth Your Time Investment
While making Homemade Kit Kat Bars From Scratch sounds daunting, the payoff justifies the effort. This process transforms simple pantry staples flour, butter, sugar into complex, satisfying Yummy Sweets .
The time invested in chilling and precise cutting ultimately yields a superior product that serves as a show stopping centerpiece for any gathering or a personal reward for a long week. These aren't just quick Sweets Treats ; they are confectionery artistry made accessible.
Assembling Your Arsenal: Essential Components for Ultimate Crunch
Success in this venture hinges on the quality and preparation of your foundational elements. We must focus on creating robust wafers, selecting the perfect chocolate medium, and having the right tools ready to ensure seamless assembly.
The Chocolate Concoction: Selecting the Perfect Coating
The outer layer is the first thing you taste, and it needs to shine literally. The chocolate must melt smoothly, coat evenly, and set hard with a glossy finish.
Sourcing Premium Wafers for Superior Snap
When we talk about "wafers," we are referring to the baked biscuit layers. For the dough, standard all-purpose flour works perfectly, but the key is integrating the cold butter properly to create those flaky structures before baking.
We are aiming for a fragile biscuit that holds its shape when stacked but shatters easily when bitten.
Binding Agents and Flavor Boosters You Must Have Ready
The filling requires the right balance of fat and sugar to become airy yet firm. We utilize finely chopped or chipped milk chocolate mixed with heavy cream as a crucial component. This addition enhances the overall chocolate profile of the bar and stabilizes the buttercream base, ensuring it doesn't ooze out prematurely when slicing or coating.
Tool Checklist: Beyond the Basics for Perfect Presentation
While you might manage with standard kitchen implements, certain tools elevate the outcome. A rolling pin capable of producing extremely thin, even sheets is vital. On top of that,, having a quality wire cooling rack set over parchment paper is non-negotiable for draining excess coating chocolate cleanly, guaranteeing a professional looking finish on your Homemade Candies .
Related Recipes Worth Trying
- Best Homemade Double Crumb Cake Recipe Twice the Streusel — Master this Double Crumb Cake recipe for a moist base and two layers of irresistible buttery streusel Its the perfect coffee cake for Sunday mornings Get...
- The Best Homemade Swedish Meatballs with Creamy Gravy — Forget the flatpack stuff Our classic Swedish Meatballs recipe delivers tender juicy Köttbullar swimming in a velvety cream gravy A foolproof guide to the...
- The Best Homemade Almond Joy Cake Recipe From Scratch — Bake the ultimate Chocolate Coconut Cake This Homemade Almond Joy Cake features a moist chocolate cake and creamy filling Get the recipe now
Phase One: Constructing the Crispy Wafer Core
This phase is the backbone of the entire operation. We begin by crafting a lean dough that relies on minimal liquid content to ensure maximum crispness upon baking.
The Critical Layering Process for Authentic Homemade Kit Kat Bars
Once the four wafer sheets are baked, cooled, and precisely trimmed to uniform dimensions using a ruler and sharp knife, the layering commences. The application of the chocolate cream filling must be thin and even; a heavy hand here leads to spreading and bulging.
Each subsequent wafer layer is pressed down gently but firmly to eliminate air pockets, creating a single, solid block destined for the refrigerator. This chilling period (minimum two hours) is crucial; it firms up the filling so that when you slice the block, the layers remain perfectly stacked, setting you up for successful Easy Homemade Kit Kat Bars .
Mastering the Final Chocolate Enrobing Technique
Dipping is where many homemade candy projects falter. The goal is complete coverage without creating thick, messy edges or exposing the filling layer.
Baking and Cooling the Wafer Substrate
The baking time of 12– 15 minutes at 350° F ( 175° C) is calibrated to dry the wafers without browning them excessively. We want pale, crispy layers.
Once they emerge, they must cool fully on the counter before trimming, as trimming warm wafers will cause them to break apart unevenly.
Creating the Delicious Filling That Holds It All Together
The process of making the filling involves creaming the softened butter until it’s light, then gradually incorporating the sifted powdered sugar. Separately melting the milk chocolate with heavy cream creates a ganache like addition that is beaten into the base.
This mixture should be whipped until it’s light and airy, replicating the subtle, creamy texture that binds the crisp layers in the original.
Precision Cutting: Ensuring Uniform Bar Dimensions
After the stacked wafer block is thoroughly chilled and firm, it is sliced into individual bars. Using a long, sharp knife and applying firm, downward pressure rather than a sawing motion prevents smearing the filling or cracking the delicate wafer structure.
This precision ensures every bar is aesthetically pleasing.
Temperature Control: The Key to a Glossy, Unblemished Finish
The coating chocolate must be handled correctly. Whether you are briefly tempering or simply using a stabilizing agent like coconut oil, the chocolate should be melted until smooth, then allowed to cool slightly before dipping commences.
If the chocolate is too hot, it will melt the chilled filling, causing the bar to deform. A coating that is warm to the touch, but not hot, ensures a glossy, unblemished exterior when it sets.
Troubleshooting Common Pitfalls in Bar Construction
If your bars turn out too thick, you likely didn’t roll your dough thin enough during the initial baking stage. If the chocolate coating cracks upon setting, it often means the chocolate was either too hot when dipping or the bars were placed immediately into a very cold refrigerator, shocking the chocolate.
Allow them to set at cool room temperature first. For those seeking gluten-free Kit Kat Bars , remember that GF flour blends can absorb liquid differently, so monitor your wafer dough closely; you may need an extra splash of milk.
Elevating Your Creation: Flavor Variations and Enhancements
Once you’ve mastered the classic milk chocolate version, the door opens to exciting experimentation. These Homemade Candies are perfect canvases for creativity.
Fixing Chocolate Bloom and Cracking Issues
Chocolate bloom that dull, grayish film is caused by inconsistent temperature. To prevent this, always ensure your cooling rack rests on parchment paper to catch drips, and let the bars set slowly. Never freeze them; rapid temperature drops cause both bloom and cracking.
Ideas for Infusing Your Next Batch of Homemade Kit Kat Bars
Consider adding freeze dried raspberry powder to the wafer dough for a tart, fruity dimension. Alternatively, use white chocolate for the coating and dust lightly with matcha powder for an earthy, sophisticated twist on these Sweets Treats .
Shelf Life Expectations for Homemade Confections
Because we use real butter and fresh ingredients in the filling, these Homemade Kit Kat Bars are best enjoyed within one week when stored in an airtight container at cool room temperature.
Refrigeration can sometimes cause the wafer layers to absorb moisture and lose their desirable crunch, so keeping them slightly cool, but not cold, is ideal.
Serving Suggestions to Impress Your Guests
These bars are spectacular served alongside espresso martinis, as their rich crunch contrasts beautifully with the strong coffee flavor. For a family movie night, serve them slightly chilled, accompanied by a bowl of fresh berries to cut through the sweetness.
They truly are next level Yummy Sweets that guests will rave about.

Recipe FAQs
How thin do the wafer layers for the Homemade Kit Kat Bars really need to be?
This is where the magic happens! You need to roll them incredibly thin think 1/16th of an inch, or about the thickness of a playing card. If they are too thick, you'll end up with a dense biscuit rather than that signature delicate crunch. Don't be afraid to use elbow grease with the rolling pin!
Can I skip chilling the assembled wafer stack? I’m desperate to try my Homemade Kit Kat Bars!
Honestly, don't skip it, or you’ll regret it later! Chilling (for at least 2 hours) is essential because it firms up that creamy filling completely. If you try to slice a warm stack, the filling will ooze everywhere, and your bars will look less like treats and more like abstract art.
A firm centre ensures neat, professional looking slices.
My chocolate coating is grainy/thick after melting. What’s the trick to getting a smooth dip?
That’s often down to either overheating the chocolate or not using enough fat. Make sure you melt it gently over a double boiler, ensuring no steam hits the chocolate. Adding that tablespoon of vegetable shortening or coconut oil (as listed in the recipe) helps thin it out beautifully, ensuring a silky smooth coating that sets with a lovely shine.
How should I store these homemade treats to keep the wafers crispy?
Treat them like you would a high-quality biscuit keep them in an airtight container at cool room temperature, much like you’d store Hobnobs. Avoid the fridge if possible, as moisture can seep in and soften the chocolate coating over time.
They should keep brilliantly for about a week, provided you don't scoff the lot straight away!
I’m not keen on milk chocolate; can I use dark or white chocolate for the coating?
Absolutely, go wild! Dark chocolate offers a lovely bittersweet counterpoint to the sweet filling, which many adults prefer. If you use white chocolate, be extra cautious when melting, as it burns much more easily.
Remember, you might need to adjust the amount of added shortening if the chocolate consistency seems vastly different from milk chocolate.
Homemade Wafer Chocolate Bars

Ingredients:
Instructions:
Nutrition Facts:
| Calories | 307 kcal |
|---|---|
| Protein | 3.4 g |
| Fat | 11.3 g |
| Carbs | 25.3 g |
| Fiber | 0.5 g |
| Sodium | 50 mg |
