Lunch Lady Peanut Butter Bars: Authentic No-Bake School Dessert
- Nostalgic No-Bake Lunch Lady Peanut Butter Bars (The Proper School Tuck Shop Treat)
- The Science of No-Bake Decadence: Why This Recipe Never Fails
- Essential Ingredients and Smart Substitutions for the Perfect Batch of Lunch Lady Peanut Butter Bars
- Step-by-Step Guide: How to Assemble the Ultimate Lunch Lady Peanut Butter Bars
- Pro Tips and Troubleshooting: Ensuring Flawless No-Bake Bars
- Extending the Shelf Life: Storage and Freezing Guidance
- Serving Suggestions: Elevating Your Nostalgic Treat
- Recipe FAQs
- 📝 Recipe Card
Nostalgic No-Bake Lunch Lady Peanut Butter Bars (The Proper School Tuck Shop Treat)
Capturing Nostalgia: The Origin of the School Tuck Shop Treat
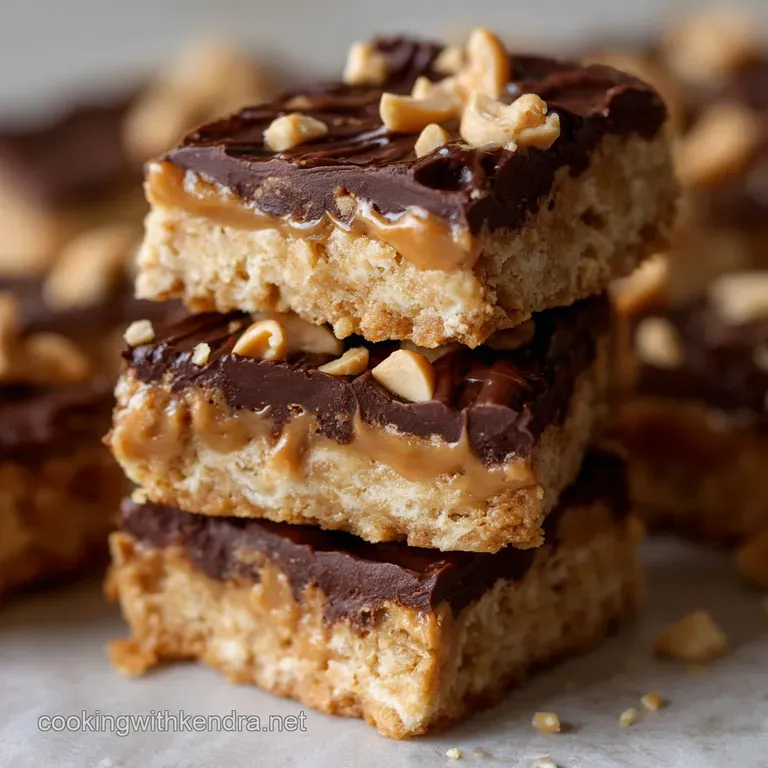
The second you slice into these bars, that distinct, heady aroma of roasted peanuts, sweet butter, and dark chocolate hits you straight in the nostalgia center. It’s rich, intensely satisfying, and utterly simple.
Forget fancy French patisserie; this is pure American school cafeteria bliss, cut into thick, satisfying squares. You might even hear the echoes of the lunch bell ringing in your memory.
This recipe is genuinely a lifesaver for busy weeks because it’s 100% no-bake, ultra cheap, and ridiculously fast to assemble. Seriously, you can be done with the active mixing phase in less than fifteen minutes. It requires zero fuss, zero skill, and only uses basic pantry staples.
I keep the ingredients for these always stocked because they vanish faster than you can say “recess.”
We are going deep today to perfect this childhood favorite, making sure the texture is dense, fudgy, and absolutely uniform, just like the legendary slabs the lunch ladies used to serve.
I’m sharing all the little tricks, from using the right kind of peanut butter to achieving that perfect, mirror gloss chocolate topping. Get ready for an easy, high reward dessert.
The Science of No-Bake Decadence: Why This Recipe Never Fails
Why These No-Bake Bars Define Cafeteria Comfort
The reason these bars feel so comforting is their simplicity and density. We aren't chasing air or fluffiness here; we are aiming for something substantial. This is a very dense, high fat recipe that relies on chilling, not chemical leaveners, for its structure.
Setting Expectations: Texture and Flavor Profile
When you bite into these bars, the bottom layer should be firm, rich, and slightly gritty from the sugar, offering a beautiful contrast to the snappy, smooth chocolate layer on top.
The flavor is a precise balance: the salty hit from the peanut butter and added salt cuts through the sweetness of the sugar and chocolate. If you nail the salt level, they stop tasting sickly sweet and start tasting addictive.
The Key Difference Between a Fudge Base and a Crumb Base
Forget those recipes that use a weird flour paste; they never set right or taste authentic. We are channeling pure, high density peanut butter fudge here, which means our binder is mostly butter, peanut butter, and powdered sugar, bulked up by graham crackers.
This technique ensures the bars stay beautifully solid once chilled.
Achieving the Perfect Salty Sweet Equilibrium
Do not skip the half teaspoon of salt in the base mixture. Peanut butter desserts absolutely demand that extra burst of salinity to balance the sugar. Without it, the flavor falls flat and quickly becomes cloying; trust me on this essential flavor element.
The Role of Confectioners' Sugar in Texture Stability
Icing sugar (confectioners’ sugar) is mandatory here because it contains cornstarch, which is crucial for absorbing moisture and preventing crystallization. This absorption gives the bars that signature tight, fudgy consistency that holds up when sliced.
Mastering the Chocolate-to-Peanut Butter Ratio
The traditional lunch lady bar usually has a thinner chocolate topping, maybe 1/4 inch high, which provides just the right counterpoint to the thick peanut butter base. We want enough chocolate to give a clean snap when cold, but not so much that it overwhelms the peanut flavor.
The ratio in the recipe hits this sweet spot perfectly.
Essential Ingredients and Smart Substitutions for the Perfect Batch of Lunch Lady Peanut Butter Bars
Always use high-quality ingredients, even though this is a simple recipe; you really taste the difference when only a few things are involved. I made the mistake once of using cheap chocolate chips, and the topping ended up waxy and dull. Learn from my errors!
| Ingredient | Why It Matters | Viable Substitute |
|---|---|---|
| Creamy Peanut Butter | Provides the structure and fat content necessary for the fudge. | Almond butter or sunflower seed butter (Note: These may require slightly less butter due to different oil content). |
| Graham Cracker Crumbs | Adds bulk, texture, and prevents the base from becoming too dense or chewy. | Crushed Digestive Biscuits, Vanilla Wafers, or finely ground plain oat flour. |
| Unsalted Butter | The essential binder; melted butter integrates perfectly with the sugar and peanut butter. | Block Margarine (do not use tubs) or high-quality vegan butter sticks. |
| Icing Sugar | Creates the dense, smooth structure of the fudge base. | Cannot be swapped easily; necessary for texture stability. |
| Semi Sweet Chocolate Chips | For the rich, snappy topping. | Melting wafers (couverture chocolate) or milk chocolate chips (adjust sweetness tolerance). |
Deep Dive: Choosing the Right Peanut Butter (Creamy vs. Crunchy)
Stick with creamy peanut butter for the base, please. If you use crunchy, the base tends to fracture when you press it, making it difficult to get that smooth, firm surface. Crucially, use conventional, processed peanut butter (like Jif or Skippy); natural peanut butter will separate and weep oil, leading to a greasy mess.
Crumb Considerations: Graham Cracker vs. Alternative Biscuits
Graham crackers are traditional and offer a slightly honeyed flavor. If you're using alternative biscuits like shortbread or vanilla wafers, measure by weight if possible, or visually check to ensure the base mixture has the correct thick, moldable texture.
Dairy Choices: Butter, Margarine, or Plant Based Fats?
I always recommend butter for the flavor, but if you need to be dairy-free, a high-quality, block style vegetable shortening or vegan butter works well. Just avoid soft, spreadable fats, as they contain too much water and will make your bars too soft.
Troubleshooting the Chocolate Glaze Components
For the glaze, we melt butter directly into the chocolate chips; this makes the glaze ultra smooth, shiny, and prevents it from being brittle when sliced. Do not add any liquid like milk or cream unless you are specifically aiming for a softer ganache, which tends to run and weep over time.
step-by-step Guide: How to Assemble the Ultimate Lunch Lady Peanut Butter Bars
Phase 1: Preparing the Crust Base (Mixing and Pressing)
First, line your 9x13 pan with parchment paper, leaving a long overhang. This is the secret weapon for lifting out the slab later. Next, melt the butter gently in a large saucepan over low heat; you don't want it bubbling fiercely. Once melted, stir in the peanut butter until the mix is completely smooth and glossy.
In a separate large bowl, whisk together the sifted icing sugar, graham cracker crumbs, and salt. Then, pour the warm peanut butter mixture over the dry ingredients. Mix until everything is incorporated into a thick, moldable "dough." Transfer the dough to the prepared pan and press it down hard and evenly.
I use the flat bottom of a metal measuring cup to really pack the mixture down into the corners.
Phase 2: Achieving the Smooth Chocolate Topping Consistency
Combine your chocolate chips and the remaining butter in a bowl. You can melt this in the microwave in 30 second bursts, stirring vigorously each time, or use a double boiler method for ultimate smoothness. Stir in the vanilla once melted. The final texture should be a pourable, dark, and perfectly glossy liquid.
The Critical Chilling Time Explained for Optimal Setting
Pour the warm chocolate swiftly over the chilled base and spread it quickly with an offset spatula. Now comes the hard part: waiting. You absolutely must chill the bars for at least 90 minutes, but two hours is perfect.
If you rush this step, the chocolate will crack when you slice it, and the base will crumble. Patience truly is a virtue here.
Chef's Note: If your kitchen is very warm, you might want to chill the base for an hour instead of 30 minutes before applying the chocolate. A colder base sets the chocolate topping faster, minimizing separation or settling.
Pro Tips and Troubleshooting: Ensuring Flawless No-Bake Bars
How to Prevent a Greasy Base Layer
The primary cause of a greasy base is using natural peanut butter, or using too much melted butter. If your mixture feels excessively oily before adding the crumbs and sugar, you might need to add an extra quarter cup of crumbs to balance the fats.
Cutting Secrets: Achieving Clean, Straight Edges
You must let the entire slab sit at room temperature for 5 to 10 minutes after its final chill before cutting. This slight tempering prevents the chilled chocolate from shattering under your knife.
Always use a sharp knife heated under hot water and wiped completely dry before each and every cut. This slight warmth allows the knife to melt through the chocolate cleanly.
Correcting a Broken or Seized Chocolate Topping
If your chocolate mixture gets lumpy or seizes during melting (usually from a drop of water getting in), don't panic. Take it off the heat and add one teaspoon of neutral oil (like canola or vegetable oil), stirring rapidly. This usually loosens the seized molecules and brings back the smoothness.
Extending the Shelf Life: Storage and Freezing Guidance
Short Term Storage: Refrigeration Best Practices
These bars are best served chilled. Store them in an airtight container in the refrigerator. They will maintain their perfect texture and flavor for 5 to 7 days. If you keep them at room temperature, they will become noticeably softer and greasier.
Long Term Freezing for make-ahead Treats
Yes, these freeze brilliantly! Once the bars are fully set and sliced, place them on a parchment lined tray in the freezer until solid (about 2 hours). Transfer the solid bars to a heavy duty freezer bag or container, separating layers with parchment paper.
They will keep well for up to 3 months.
Thawing Safely and Maintaining Base Texture
To thaw, simply move the container from the freezer to the refrigerator overnight. Alternatively, you can pull individual bars out 30 minutes before serving.
Do not thaw them directly at room temperature in a humid environment ; this can cause condensation on the chocolate, leading to a dull or spotted finish.
Serving Suggestions: Elevating Your Nostalgic Treat
While they are absolute perfection on their own, served straight from the fridge with a cold glass of milk, you can definitely dress them up.
Try crumbling one over vanilla ice cream for a decadent, super rich sundae topping. Or, if you’re hosting a casual, nostalgic party, serve them alongside other comfort food classics. They pair wonderfully with other indulgent, buttery recipes, perhaps as a follow-up to rich appetizers like my Hot Italian Sub Sliders: Cheesy, Buttery, Easy Game Day Bake or even some salty, garlicky goodness like my Garlic knots recipe: Pillowy, Buttery Pizzeria Style Comfort Food . The saltiness of those savory dishes actually prepares your palate perfectly for this sweetness.
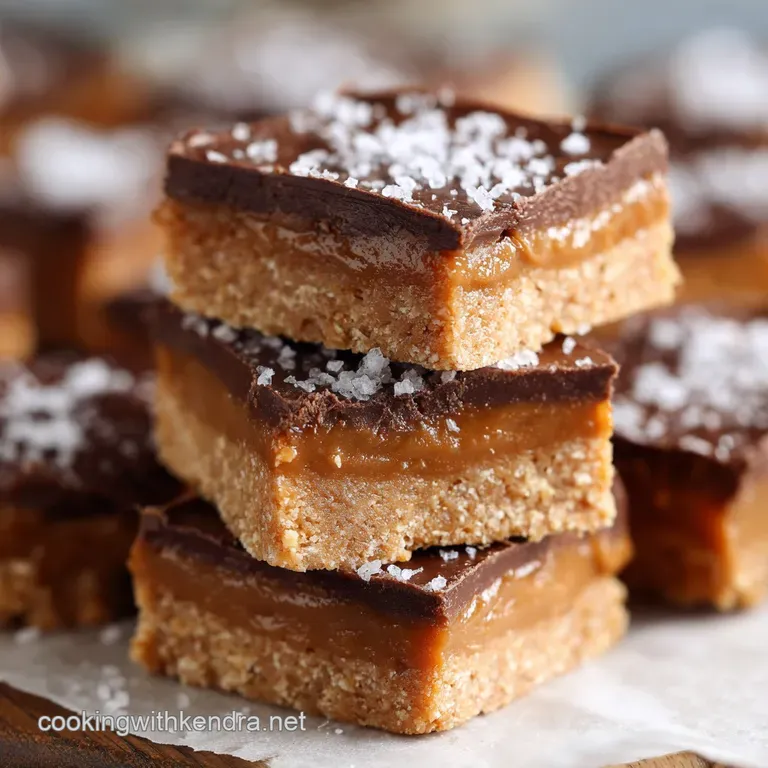
If you are feeling extra fancy, a slight dusting of flaky sea salt on the chocolate topping just before it sets is a sophisticated touch. It truly takes the classic salty sweet dynamic up a notch.

Recipe FAQs
Why is my peanut butter base too crumbly or dry?
The base is often too dry if the powdered sugar to liquid fat ratio is inaccurate. Ensure your butter is fully melted and thoroughly mixed with the peanut butter before incorporating the sugar, as this binds the dry ingredients effectively.
If the mixture looks like wet sand, incorporate melted butter one teaspoon at a time until it holds together when pressed firmly.
My chocolate topping cracked after I chilled the bars. How can I prevent this?
The primary reason the chocolate topping cracks is temperature shock caused by chilling too quickly. Do not place the bars directly into a deep freezer immediately after pouring the warm chocolate.
Allow the bars to set at room temperature for 30 minutes before transferring them to the refrigerator for the final slow chill.
Can I use natural peanut butter instead of the commercial variety?
While you can use natural peanut butter, you must account for its higher oil content and runnier consistency. Natural varieties may require an additional 1/4 to 1/2 cup of powdered sugar to reach the necessary firm, fudge like density required for this no-bake recipe.
Be sure to mix the oils in completely before measuring.
What is the best way to get clean, even squares when cutting the bars?
For the cleanest cuts, ensure the bars are fully chilled, ideally for at least two hours, so the base is very firm. Dip a sharp, long chef’s knife into a glass of very hot water, quickly wipe it dry, and slice straight down.
Repeat the heating and wiping process before each cut to prevent the melted chocolate from dragging.
How long will these Lunch Lady bars last, and can I freeze them?
Stored in an airtight container, these bars will stay wonderfully fresh in the refrigerator for up to two weeks. For longer storage, flash freeze the fully cut bars individually on a tray until solid, then transfer them to a heavy duty freezer bag where they will keep well for up to three months.
Thaw overnight in the refrigerator.
Can I make these peanut butter bars vegan or gluten-free?
Since this is a flourless recipe, the bars are inherently gluten-free, provided your chocolate is certified. To make them vegan, substitute the dairy butter with a solid plant based butter stick or equivalent margarine, and ensure your chocolate topping is certified dairy-free or use a good quality dark chocolate.
Can I use granulated sugar instead of powdered (confectioners') sugar?
No, substituting granulated sugar for powdered sugar will fundamentally alter the texture of the bars and should be avoided. Powdered sugar is essential because its ultra fine texture dissolves easily into the fat mixture, creating the necessary dense, firm, fudge like structure that holds the no-bake bar together.
Granulated sugar would result in a gritty, loose mixture.
Lunch Lady Peanut Butter Bars No Bake

Ingredients:
Instructions:
Nutrition Facts:
| Calories | 459 kcal |
|---|---|
| Protein | 10.0 g |
| Fat | 26.0 g |
| Carbs | 51.0 g |
