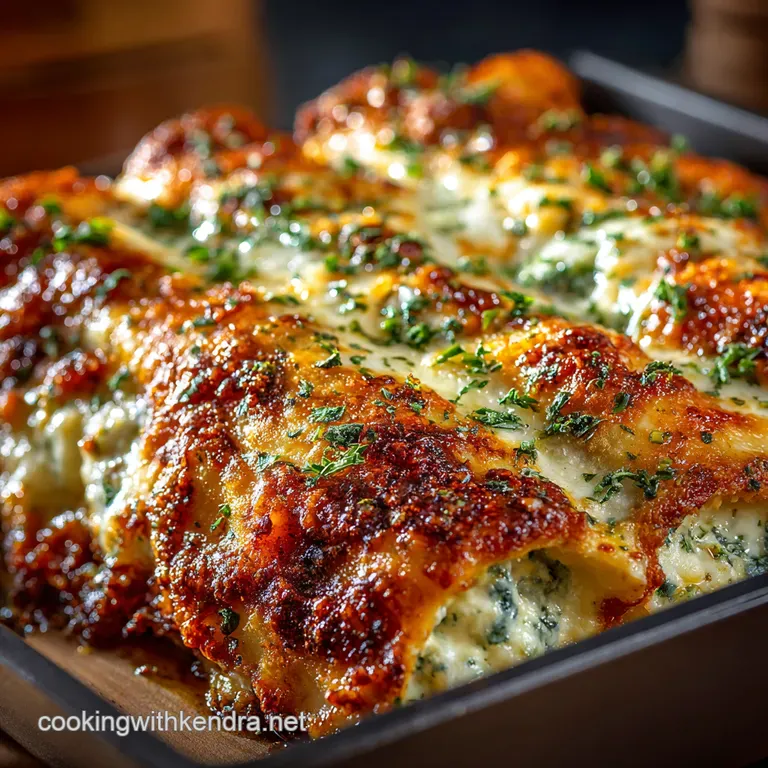
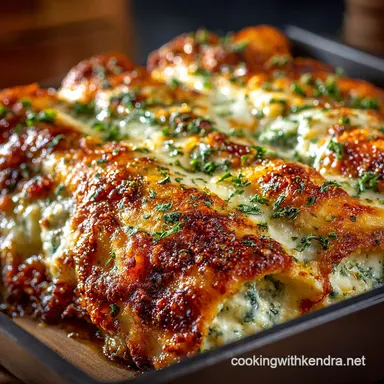
Mama Mia Cheesy Baked Manicotti the Real Deal

Recipe Introduction: Mama Mia! That's Some Manicotti!
Ever find yourself craving something seriously comforting? Oh my gosh, that's how I felt last Sunday and I was like: manicotti it is! Think of it: big pasta tubes filled with cheese, smothered in sauce, baked until bubbly.
Are you drooling yet?
This isn't that sad frozen stuff. We're talking proper Italian comfort food recipes , a baked masterpiece. This manicotti recipe is all about a creamy ricotta cheese filling for pasta , wrapped in perfectly cooked pasta, and swimming in homemade tomato goodness.
Quick Hook: Cheesy Bliss
This easy cheesy manicotti is all about that warm, comforting flavour. Ricotta and parmesan sing in harmony. It's a hug in a pasta shell, basically.
Brief Overview: From Italy With Love
Manicotti is Italian American, a spin on the Italian cannelloni. It's medium difficulty, needs around 1 hour 30 minutes overall, and feeds 6-8 hungry souls. This is a baked manicotti with ricotta recipe.
Main Benefits: Comfort Food at Its Finest
Beyond deliciousness, ricotta offers a protein boost. The make-ahead Manicotti Recipe is perfect for feeding the whole family. This is the dish that'll make everyone ask for seconds, trust me.
"Cooking is like love. It should be entered into with abandon or not at all." - Harriet Van Horne
Now, let's get down to the ingredients needed to How to fill manicotti so well.
Alright, let's get this show on the road! Manicotti , eh? Classic Italian American comfort food. Think cheesy, saucy, baked pasta tubes of happiness.
I've got just the recipe outline to make you a domestic goddess (or god!) worthy of a standing ovation. Let's get cracking! I've been making this manicotti recipe for years, and honestly, it's always a crowd pleaser.
Ingredients & Equipment
So, before we dive in headfirst, let's gather our troops, shall we? We're making "Mama Mia! Cheesy Baked Manicotti (The Real Deal)". This easy cheesy manicotti is all about fresh ingredients.
Main Ingredients
- Manicotti Tubes: 12-14 dried tubes (about 250g / 9 oz ). Seriously, check them for cracks! Nobody wants broken manicotti .
- Olive Oil: 1 tablespoon. For that classic Italian flavour.
- Ricotta Cheese: 700g / 25 oz whole milk ricotta. Drain it for at least 15 minutes . Use a cheesecloth and sieve! We don't want soggy baked manicotti with ricotta .
- Egg: 1 large, lightly beaten. It binds everything together, like glue!
- Parmesan Cheese: 115g / 4 oz grated, plus more for topping. Freshly grated is always better.
- Fresh Parsley: 1/4 cup , chopped. Adds a touch of freshness.
- Ground Nutmeg: 1/4 teaspoon . Sounds weird, but trust me. It adds warmth.
- Garlic Powder: 1/4 teaspoon . For that extra garlicky kick.
- Salt and Black Pepper: To taste. Season generously!
- Onion: 1 medium yellow, finely chopped (about 1 cup ).
- Garlic: 2 cloves, minced. Because garlic is life.
- Crushed Tomatoes: 794g / 28 oz . San Marzano if you can find them!
- Tomato Sauce: 397g / 14 oz . This helps to enrich the homemade tomato sauce for manicotti .
- Dried Oregano: 1 teaspoon . Essential spice combination .
- Dried Basil: 1/2 teaspoon . Another essential spice combination .
- Sugar: 1/4 teaspoon . Balances the acidity of the tomatoes.
- Mozzarella Cheese: 115g / 4oz shredded.
Seasoning Notes
Honestly, the oregano and basil are key here. Don't skimp! A pinch of red pepper flakes in the sauce? Go for it if you like a little heat.
You know, my Nonna always said nutmeg was her secret ingredient. She made the best Italian comfort food recipes , seriously.
Equipment Needed
Okay, so you'll need a large pot for the manicotti , a big skillet for the sauce, and a 9x13 inch baking dish.
A mixing bowl is a must, of course. A spoon to stuff the how to fill manicotti . You can bake make-ahead manicotti recipe in same bake wares.
Don't forget the cheesecloth to drain the ricotta. I've used paper towels in a pinch, you know, but cheesecloth is best.
And there you have it! The ingredient lowdown. Now get ready to make some seriously good cheese manicotti . The recommended manicotti bake time is about 35- 45 minutes in 375° F ( 190° C) , or until golden brown.
Let's Make Some Manicotti, Shall We?
Oh my gosh, you guys! Let's dive into some proper Italian comfort food recipes ! We're talking about manicotti , those beautiful pasta tubes just begging to be filled with cheesy goodness.
I'm gonna let you in on how to get it done right. I swear. Forget the frozen stuff. This manicotti recipe will have you saying "Mamma Mia!" in no time.
Prep Like a Pro: Setting the Stage for Manicotti Magic
First things first, mise en place , darlings. Get your ingredients prepped. Chop that onion, measure out your spices, and most importantly, drain that ricotta! Honestly, this is key to avoid soggy cheese manicotti .
I let my ricotta drain for 15 minutes while I prep everything else. This is just a must, you know?
Time Saving Tip: Make the tomato sauce ahead of time! It actually tastes better the next day. You can even make the whole dish a day in advance; that is a winning make-ahead manicotti recipe .
More on that later.
Manicotti step-by-step: Let's Get Filling!
Right then, here’s the lowdown on assembling the best easy cheesy manicotti :
- Simmer your homemade tomato sauce for manicotti for at least 30 minutes . The longer it simmers, the richer the flavour.
- Mix your drained ricotta with egg, Parmesan, parsley, nutmeg, garlic powder, salt, and pepper. This is the cheesy heart of our baked manicotti with ricotta .
- Cook your manicotti tubes al dente . Trust me, mushy pasta is a tragedy. Drizzle with olive oil so they don't stick together.
- Preheat that oven to 375° F ( 190° C) .
- Now for the fun part! Grab your piping bag (or a spoon if you're feeling old-school) and how to fill manicotti . I find a piping bag to be less messy, FYI.
- Spread a thin layer of sauce in your baking dish. Arrange the filled tubes in a single layer.
- Smother those babies in more sauce and sprinkle with mozzarella and Parmesan.
- Bake for 35- 45 minutes , until bubbly and golden. That's the perfect manicotti bake time .
Pro Tips for the Perfect Manicotti
Okay, listen up! Here are my secret weapons for manicotti success.
- Don't overfill the tubes. You want them snugly packed, but not bursting at the seams.
- If you're making this ahead, assemble everything, but don't bake it until you're ready to eat. Store in the fridge, then add 15 minutes to the baking time.
- Avoid using too much mozzarella. You want a nice cheesy crust, but too much can make it greasy.
And there you have it! Manicotti that will make you feel like you're sitting at Nonna's table. Get ready for some serious Italian comfort! Buon appetito!
Recipe Notes for Your Manicotti Masterpiece
Alright, before you dive into making this Easy Cheesy Manicotti , let's chat about a few things. I've made this manicotti recipe countless times, and these are the tips that have saved my bacon (or, you know, my pasta ).
Think of these as the cheat codes to Italian comfort food recipes success!
Serving Suggestions: Make it a Feast!
Okay, picture this: golden brown baked manicotti with ricotta , steaming on a plate. Pure perfection! For plating, I like to sprinkle a little extra Parmesan and some fresh basil leaves on top.
Makes it look fancy, you know? As for sides, garlic bread is a no-brainer. A simple green salad with a light vinaigrette is fab too.
To drink? A glass of Chianti is always a winner!
Storage Tips: Saving Some for Later
Oh my gosh, leftovers are the best ! But listen up, ricotta cheese filling for pasta can be a bit delicate.
For refrigeration, let the cheese manicotti cool completely. Then, store it in an airtight container for up to three days.
If you want to freeze it, wrap each manicotti individually in plastic wrap, then put them in a freezer bag.
They'll keep for up to two months. Reheating is easy just pop them in the oven at 350° F ( 175° C) until heated through, maybe 20- 25 minutes .
Variations: Make It Your Own!
Honestly, this manicotti recipe is pretty flexible. For a gluten-free version, just use gluten-free manicotti shells. You know? If you're going veggie, throw in some sauteed spinach or mushrooms with the ricotta.
Adds a nice little something. For a make-ahead manicotti recipe, make the ricotta and freeze it!.
Nutrition Basics: The Good Stuff
Let's be real, this Easy Cheesy Manicotti isn't exactly a health food. But it's got protein from the ricotta and Parmesan.
And tomatoes are packed with antioxidants. Listen, everything in moderation, right? Just enjoy it!
So there you have it! My homemade tomato sauce for manicotti and all my top tips! I always check the manicotti bake time .
This How to fill manicotti recipe is now your secret weapon for becoming a pasta pro. Now go forth and create some deliciousness!

Frequently Asked Questions
Why did my manicotti end up watery? Is there a secret to keeping it from being soggy?
Ah, the dreaded watery manicotti! The culprit is almost always excess moisture in the ricotta cheese. Be sure to drain your ricotta really well like, give it the full cheesecloth treatment in a sieve for at least 15 minutes.
This will prevent a soggy bottom situation, and ensure your manicotti filling is creamy, not gloopy.
Can I make manicotti ahead of time? I'm planning a dinner party, you see.
Absolutely! Making manicotti ahead is a great idea for stress free entertaining. Assemble the manicotti in the baking dish, cover tightly with foil, and refrigerate for up to 24 hours.
When you're ready to bake, simply pop it in the oven (you might need to add a few extra minutes to the baking time if it's fridge cold). It's like having your own little Italian sous chef!
I'm a vegetarian. Are there any good veggie filling options for manicotti?
You bet your sweet bippy there are! Vegetarian manicotti can be just as satisfying. Try adding sauteed spinach, mushrooms, zucchini, or roasted vegetables like bell peppers and eggplant to your ricotta filling. You could even get fancy with some artichoke hearts!
The possibilities are endless, so get creative and make it your own veggie masterpiece.
Help! I can't find manicotti tubes at my local shop. Is there an alternative I can use?
Don't you fret! If you can't find the tubes, jumbo pasta shells (conchiglie) are a very good substitute for manicotti. You fill them in the same way, nestle them in the sauce, and bake them until golden and bubbly. It's the same comforting flavors, just in a slightly different, equally charming package.
My family loves meat! Can I add meat to the manicotti recipe, and if so, how?
Of course! Adding meat is a fantastic way to up the ante on your manicotti. Brown some ground beef or Italian sausage, drain off the excess grease, and mix it into the ricotta filling before stuffing the tubes.
Alternatively, you can create a ragu sauce with meat and use it as an additional layer in the dish think of it like a meaty lasagna's fancier cousin.
How long does cooked manicotti last in the fridge, and is it okay to freeze it?
Cooked manicotti will happily keep in the fridge for 3-4 days. Make sure to store it in an airtight container to prevent it from drying out. For longer storage, freezing is your friend! Wrap the manicotti tightly in plastic wrap, then foil, or place it in a freezer safe container. It'll last for up to 2-3 months.
When you're ready to enjoy, thaw it overnight in the fridge and bake until heated through.
Mama Mia Cheesy Baked Manicotti The Real Deal
Ingredients:
Instructions:
Nutrition Facts:
| Calories | 550-650 |
|---|---|
| Fat | 30-40g |
| Fiber | 3-5g |
