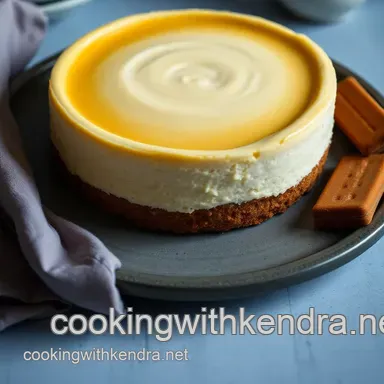
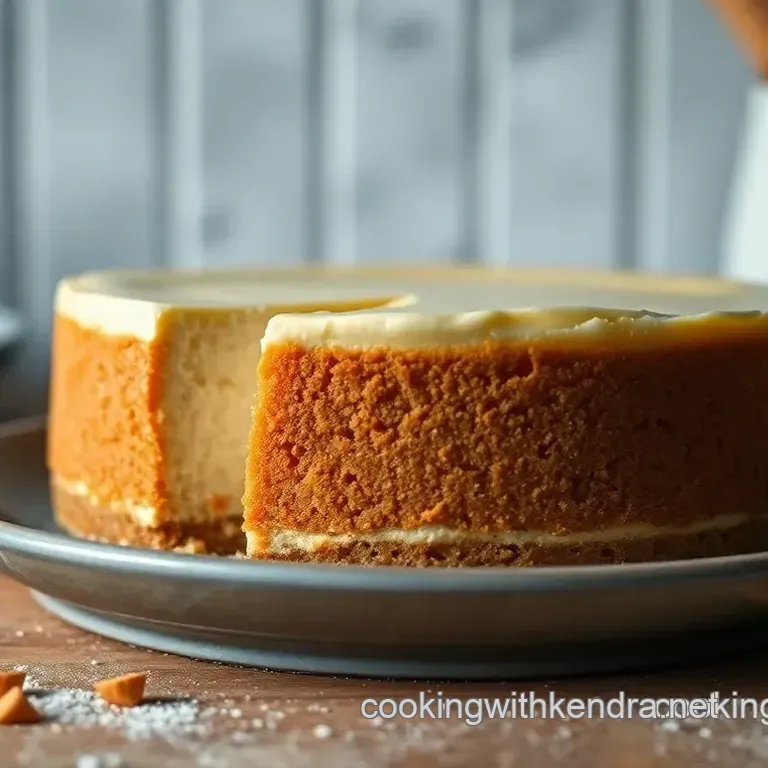
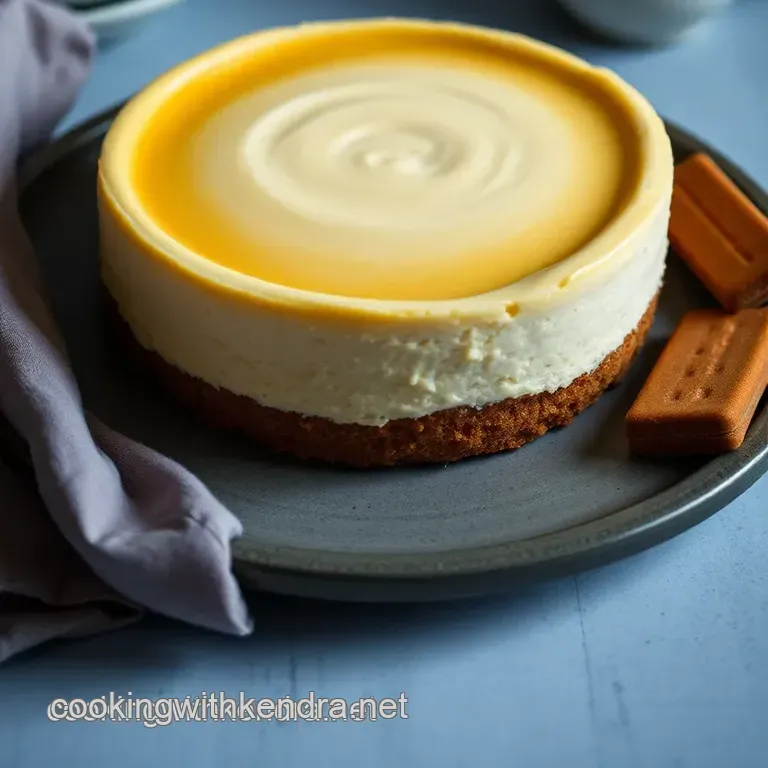
Milkybar Cheesecake: a Creamy No-Bake Delight
A Sweet Introduction to Milkybar Cheesecake
Oh my gosh, let me tell you about the first time i made milkybar cheesecake . it was one of those hot summer days, and i wanted something cool and sweet to whip up for a gathering with my friends.
You know that feeling when you just need a dessert not just any dessert, but a magic bite of creamy sweetness that transports you back to simpler times? that’s exactly what this cheesecake did for me! the creamy texture and delightful taste of milkybar chocolate really hit the spot.
Seriously, it’s the kind of treat that makes you feel like a kid again.
Now, have you ever found yourself standing in the kitchen, looking through endless recipes, unsure of what to make? sometimes all you want is a no-bake cheesecake recipe that’s not just easy but also a total crowd pleaser.
Well, you're in for a treat! let’s dig into the world of this milkybar cheesecake .
Recipe Overview
A little bit of history before we dive in: cheesecakes have been around for centuries! they originated in ancient greece, but the modern british cheesecake, with its fruity toppings and creamy whispers, is where this no-bake version took off.
We’re talking about a dessert that has evolved into a beloved treat all over the world. and what’s more cool? this recipe is super relevant today, especially for chocolate lovers (like me!) who want something quick and tasty.
Now, about the time: this beauty requires only 15 minutes of active prep and about 4 hours to chill.
Yep, that’s right no baking involved! the hardest part is that dreaded waiting. as for the cost, you can expect to spend around $15 for servin’ 8 lucky folks .
It’s a perfect dessert for any occasion, from casual get-togethers to fancy dinners.
Key Benefits of Milkybar Cheesecake
So, what’s in it for you? first off, let’s talk about those health benefits. while cheesecake isn’t exactly a health food, there are some positives.
We use cream cheese , which contains protein and calcium. plus, it’s an indulgent chocolate treat that can satisfy your sweet tooth in moderation.
What makes this cheesecake stand out? it’s a no-brainer! the unique taste of milkybar chocolate sets this dessert apart from the rest.
Imagine that smooth, milky flavor melting in your mouth. divine! plus, it's super versatile. want to dress it up with some delicious cheesecake toppings or mix in some fresh berries? go for it!
This delightful no-bake dessert is perfect for impressing guests at family gatherings, birthday parties, or just a cozy movie night at home.
It really caters to all types of sweet dessert ideas , whether you’re serving it on a special occasion or just craving something naughty on a tuesday night.
Another fantastic thing? The cheesecake comes out with that perfect cheesecake texture — creamy, dreamy, and oh-so-smooth. Trust me; your friends will be begging for the recipe!
Transition to Ingredients
So you’re probably itching to get your hands on this amazing milkybar cheesecake recipe, right? before we jump into the instructions, let’s go over the simple ingredients you’ll need to create this masterpiece.
Get ready to impress your taste testers with a homemade cheesecake they won’t forget!
Stay tuned for the full list of ingredients and let’s make this delicious piece of heaven together!
Your Go-To Guide for Essential Ingredients
Alright, so let’s get into the nitty gritty of baking with this essential ingredients guide . whether you're whipping up a no-bake cheesecake or diving into more complex desserts, knowing your ingredients can make or break your dish.
So, let’s break it down step by step!
Premium Core Components
First up, premium core components ! these are the backbone of any great dessert. you wanna be precise, so here are some detailed measurements you’ll need, both in us & metric .
For example, in our milkybar cheesecake recipe, we use 300g of cream cheese. that’s about 10.5 oz to us non-metric folks!
Now, how do you know if your ingredients are top notch? look for quality indicators. freshness is key, especially for the cream cheese and heavy cream.
You want them smooth and creamy. storage guidelines matter, too. keep your dairy products chilled and check those expiration dates.
Typically, cream cheese can last about 2-3 weeks in the fridge once opened.
And here’s a quick freshness tip : when shopping, always choose ingredients with the farthest expiration date. Trust me, it’ll save you from an "uh-oh" moment later on!
Signature Seasoning Blend
Now, onto spices. if you wanna step up your cheesecake game, a signature seasoning blend can really change the game.
Think of pairing spices like cinnamon or nutmeg with your cream cheese. it’s the secret sauce to adding warmth and depth!
Herb selections might seem odd for a cheesecake, but a tiny hint of fresh mint can refresh that creamy richness.
And don't forget about flavor enhancers : vanilla is a classic. i love adding zest from a lemon for a bit of zing in my cheesecakes!
What’s cool is exploring regional variations . Check out some British cheesecake recipes you’ll find delightful combinations. You can even swap out spices based on what’s locally available.
Smart Substitutions
Now, this is where it gets fun smart substitutions ! if you find yourself out of an ingredient, no worries! for instance, you can use mascarpone cheese instead of cream cheese in your milkybar cheesecake for a richer texture.
How about if you’re dairy-free? try a coconut whipped cream instead. it still gives you that delicious coolness without the cream!
Then there are those emergency replacements. out of powdered sugar? blend granulated sugar until it’s fine that’ll work in a pinch! seasonal options can also spice things up.
Got some fresh berries in the fridge? toss ‘em on top of your cheesecake when it’s ready. hello, gorgeous dessert!
Kitchen Equipment Essentials
Let’s talk equipment. you don’t need the fanciest kitchen tools, but some must have tools make life easier. a good electric mixer ? yes, please! it’s gonna save you a ton of elbow grease.
But even a good old whisk will do the trick if you’re feeling adventurous.
Now, you can find alternative equipment options around your kitchen. no springform pan? use a regular round cake pan with parchment paper instead! and cleaning makes my heart ache, so invest in good storage solutions .
Pro tip: Keep your kitchen organized. It’ll keep you from losing your mind when the timer's buzzing and you can’t find the spatula!
Time to Get Cooking
Alright, my friends, you’re all set with the essentials. whether you're venturing into the world of milkybar cheesecake or experimenting with other chilled cheesecake recipes , having quality ingredients and the right tools is essential for great results.
Get ready to create your favorite creamy cheesecake ideas with confidence!
Next up, let’s dive into the step-by-step instructions for making that decadent Milkybar cheesecake. Trust me, it's gonna be a game changer for your dessert game! So, grab your ingredients, and let's get cooking!
Elevate Your Dessert Game: Mastering the Professional Cooking Method
Alright, dessert lovers! if you're anything like me, you live for that moment when a sweet treat graces your table.
And today, i’m diving into some pro cooking methods that can take your desserts, like a milkybar cheesecake , from good to absolutely drool worthy.
Let’s explore these essential steps together and whip up something spectacular!
Essential Preparation Steps
First things first, mise en place is your cooking mantra. it literally means "everything in its place." gather all your ingredients before you even think about mixing them.
For our milkybar cheesecake, you’ll need digestive biscuits , cream cheese , and a whole lot of milkybar chocolate . this little principle is key for smooth sailing in the kitchen.
Okay, now for some time management tips: have you ever found yourself frantically searching for that one ingredient in the midst of cooking? yeah, not fun! take a few minutes to organize your space and gather all your materials.
Trust me, it’ll save you from chaos (and maybe some kitchen burns!).
Safety comes next. use oven mitts when melting that chocolate, and be sure to keep the kitchen tidy to avoid any accidents.
A clean workspace not only enhances focus but also keeps any tiny disasters at bay.
Step-by-step Process
Let’s break it down step-by-step. Ready? Here we go:
Prepare the crust: mix 200g of crushed digestive biscuits with 100g of melted butter . press it firmly into your springform pan and chill.
This ain’t just for aesthetics; it’s science, baby! chilling keeps it firm.
Melt the chocolate: melt 200g of milkybar chocolate over a double boiler or microwave. but hey, remember don’t overheat it! control the temperature at around 30- 40° c (86- 104° f) and let it cool slightly afterward.
Whip it good: grab your cream cheese 300g should do and mix in 100g of icing sugar and a tsp of vanilla extract until smooth.
Whip the 250ml of heavy cream to soft peaks, and then gently fold it into the cream cheese mix. you want it fluffy!
Combine and Chill: Pour that luscious filling over your crust and smooth it out. Cover and let it chill for at least 4 hours . Honestly, waiting is the hardest part!
Timing is crucial for cheesecakes. Always keep an eye on the clock; it could make a difference in that creamy texture.
Expert Techniques
Now, it’s time to bring out the big guns with a few expert techniques! keep an eye on those quality checkpoints.
After chilling, make sure your cheesecake is firm to the touch but has that delightful wobble when you wiggle it a bit!
Troubleshooting tip? If it cracks, don't sweat it it happens to the best of us. Just cover it up with some whipped cream or toppings, and no one will be the wiser!
Success Strategies
Alright, let’s talk about common mistakes. You do NOT want to skip letting your ingredients reach room temperature; it can lead to lumpy cheesecake.
For quality assurance, taste as you go. Adjust sweetness on the fly if you need to; remember, you’re in charge!
Thinking ahead? Make your cheesecake a day early. It’s a fabulous make-ahead option that saves stress on the big day.
And there ya have it: the secret sauce to whipping up a gorgeous milkybar cheesecake that’ll wow any crowd. with its rich, creamy mouthfeel and that lovely white chocolate flavor, it’s bound to become your go-to dessert.
So whether you're bringing it to a family gathering or just treating yourself, this cheesecake screams "winner."
Now, you’ve got the tools and the recipe to craft an impressive dish, but what if you're still watching your diet or need a quick fix? Stay tuned to explore some additional information on cheesecake variations and other delicious dessert tips! Happy cooking!
Secrets to Crafting the Perfect Milkybar Cheesecake
Let me tell you, if you’re looking to whip up a milkybar cheesecake , you’ve just stumbled onto a gold mine of creamy deliciousness! this no-bake wonder captures the essence of that dreamy white chocolate flavor while being super easy to throw together.
And trust me, everyone will rave about it! here’s a breakdown of some extra info that’ll help you nail this recipe like a pro.
Pro Tips & Secrets
So, a quick nugget of wisdom: room temperature ingredients are key! seriously, letting your cream cheese chill out before you mix works wonders.
It gets all smooth and creamy, making your filling super luscious.
And let's talk about time saving techniques. when melting your milkybar chocolate, use the microwave! just do it in short bursts, so you don’t end up with a burned chocolate mess.
No one wants that kind of heartbreak.
For flavor enhancement , think about adding a squeeze of lemon juice or lemon zest to your filling. it really brightens the flavor and balances the sweetness.
Plus, don’t hold back on that whipped cream folding it into the mixture rather than just slapping it on top? game changer!
Perfect Presentation
Now, let’s move to the fun part making it look good! plating techniques can elevate your dessert from good to wow.
Once you’ve set the cheesecake, run a knife around the edge of the pan before removing the sides. this creates a smooth finish.
For garnish, consider slicing up some fresh strawberries or drizzling chocolate sauce over the top. a sprinkle of milkybar chocolate shavings takes it to the next level.
Color combinations are everything! a white cheesecake with the ruby red of berries? it’s an instagram worthy shot right there!
Storage & make-ahead
Thinking about making this ahead of time? you’re in luck! this cheesecake can easily be made 1-2 days in advance .
Just keep it covered in the fridge. when it comes to storage, you’ll want to keep this baby chilled, preferably in an airtight container.
It’ll last about a week in the fridge, but let’s be real i doubt it’ll last that long!
For reheating, you really don’t need to bother. Just slice it and serve directly from the fridge. Freshness duration is vital to keeping that creamy texture intact!
Creative Variations
Don’t be afraid to mix things up! the beauty of this recipe is its flexibility. got seasonal fruits? throw in some juicy mangoes or berries to add a refreshing twist.
You could even swap the milkybar for something like dark chocolate if you're feeling adventurous yup, a total game changer!
If someone in your crew is dairy-free, no worries! you can use coconut cream to substitute the heavy cream, making it a fun dairy-free cheesecake option that still tastes fabulous.
Variations like these just keep the excitement flowing!
Complete Nutrition Guide
Let’s dive into the nitty gritty of what you’re eating! this milkybar cheesecake packs about 340 calories per slice , but hey, it’s a treat! the blend of cream cheese and chocolate provides some protein and heaps of flavor.
Just remember to watch your portions. you want a slice that satisfies but doesn’t make you feel sluggish afterward.
Expert FAQ Solutions
Got questions? i’ve been through it all. a common one is, “what if my cheesecake won't set?” make sure to chill it long enough! four hours is a must.
If you want to whip out that cool desserts for summer technique, add frozen fruit to the top when serving for an icy touch!
For those pondering success tips just keep it simple. if something goes wrong, just remember: it likely still tastes amazing. and if you mess up a variation, just call it “experimental” and laugh it off.
Life’s too short for ugly cheesecake!
Conclusion: look into In!
Now, you’re armed with all the insider secrets to create an epic milkybar cheesecake ! whether you’re surprising your family or impressing friends at a gathering, this cake is bound to become a hit.
Remember, the best part about baking is enjoying it with others, so dive in, have fun, and don't stress too much.
You got this! happy cheesecake making, my friend!
Milkybar Cheesecake A Creamy No Bake Delight