No Bake Peanut Butter Pie: Rich and Creamy
- Time: Active 20 minutes, Passive 4 hours, Total 4 hours 20 mins
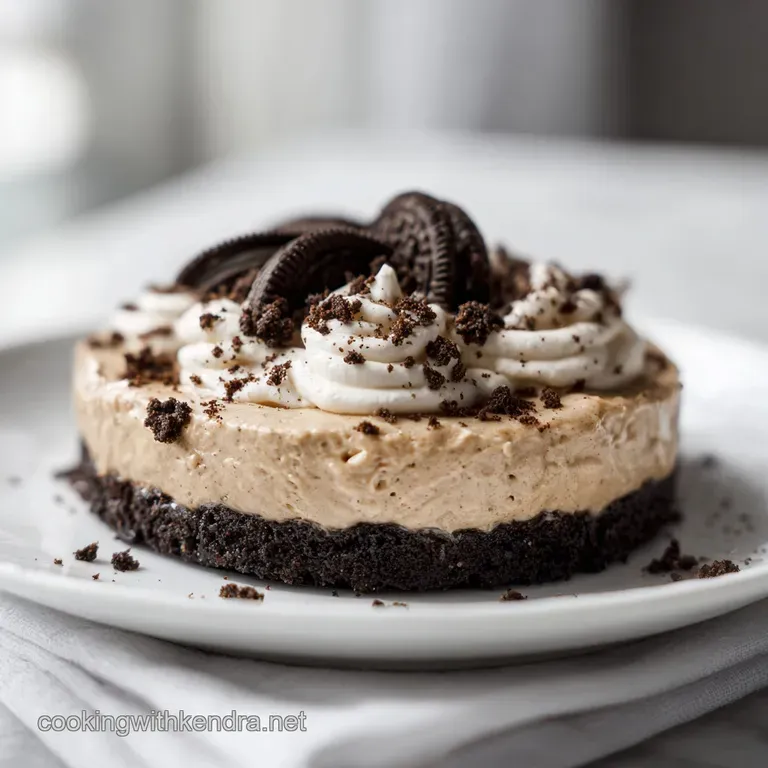
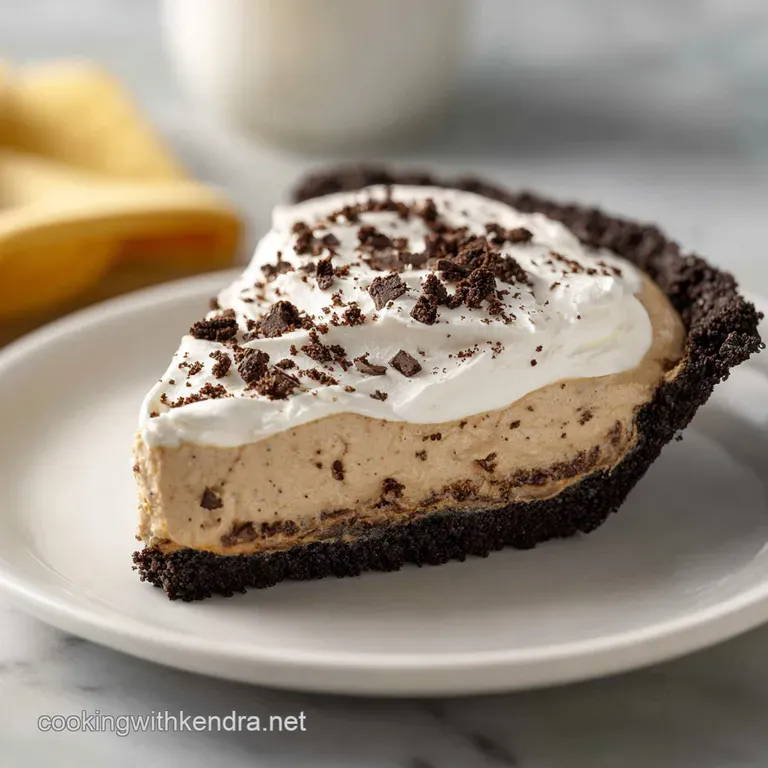
- Flavor/Texture Hook: Velvety peanut butter cloud atop a shattering dark chocolate crust
- Perfect for: Summer cookouts, potlucks, or when you need a high impact dessert with zero baking
- Master This Easy No Bake Peanut Butter Pie Recipe
- Why This Filling Stays Lush
- Choosing Your Ideal Serving Size
- Component Analysis and Selection
- Gathering Your Essentials
- Equipment Needed
- Step-by-Step Pie Construction
- Troubleshooting Common Issues
- Scaling and Substitutions
- Debunking Common Kitchen Myths
- Storage and Zero Waste
- Perfect Beverage Complements
- Recipe FAQs
- 📝 Recipe Card
Master This Easy No Bake Peanut Butter Pie Recipe
There is a specific sound that happens when a cold fork hits a properly chilled Oreo crust. It is a sharp, satisfying snap that promises something special is hidden underneath. I remember the first time I brought this to a family reunion in the middle of a sweltering July.
While everyone else was fussing over melting buttercream and fruit pies that had turned into soggy puddles, this pie stood tall, looking cool and collected. The look on my aunt’s face when she realized I hadn't spent a single second preheating the oven was worth more than the blue ribbon I eventually took home.
You might think that a pie this rich needs a complicated custard base or a temperamental gelatin setup. Honestly, forget everything you know about traditional pastry for a moment. We are leaning into the beautiful chemistry of fat and air to do all the heavy lifting.
The secret isn't in a secret ingredient, it is in how we treat the ones we have. We aren't just mixing things in a bowl, we are building a structure that feels like silk but cuts like a dream.
The contrast here is what really sings. You have that dark, slightly bitter chocolate base that is almost savory in its depth, layered with a filling that tastes like the inside of a high end peanut butter cup, only much lighter.
It is indulgent without being cloying, and because it stays in the fridge until the very last second, it provides a refreshing finish to a heavy meal. Let's get into how we make this happen without breaking a sweat.
Why This Filling Stays Lush
- Fat Stabilization: Using full fat cream cheese provides a dense, lactic acid backbone that prevents the peanut butter from feeling greasy on the tongue.
- Cold Bonding: The 4 hours of chilling allows the saturated fats in the peanut butter and cream cheese to re solidify into a network that traps air bubbles.
- Aeration Maintenance: By folding the whipped topping rather than stirring, we preserve the nitrogen bubbles that give the filling its characteristic lift.
- Sugar Moisture Control: Sifted powdered sugar contains a tiny amount of cornstarch, which helps absorb excess moisture from the cream cheese, ensuring the pie doesn't "weep" as it sits.
Choosing Your Ideal Serving Size
| Servings | Ingredient Adjustments | Pan Size | Chill Time |
|---|---|---|---|
| 5 people | Cut recipe in half | 6 inch springform | 3 hours |
| 10 people | Standard recipe | 9 inch deep dish | 4 hours |
| 20 people | Double the recipe | Two 9 inch pans | 5 hours |
When you are planning your get together, keep in mind that this pie is incredibly rich. While the recipe says it serves 10, I have seen people easily stretch a single pie to 12 servings if they are serving it alongside other treats.
However, if you are feeding a hungry crowd of teenage boys, you might want to stick to the 10 serving estimation. The structural integrity of the pie remains the same whether you scale up or down, but the chilling time is non negotiable.
A smaller pie might feel set sooner, but that deep dish 9 inch version really needs the full 4 hours to make sure the center doesn't slump when you pull the first wedge out.
Component Analysis and Selection
| Ingredient | Science Role | Pro Secret |
|---|---|---|
| Creamy Peanut Butter | Primary structural fat | Use a processed brand like Jif or Skippy, not natural oil separating types. |
| Full Fat Cream Cheese | Emulsifying agent | Must be completely soft to avoid "pebble" textures in your silk filling. |
| Whipped Topping | Aeration source | Thaw it in the fridge overnight so it stays cold but workable. |
| Oreo Cookies | Foundation starch | Keep the cream filling inside the cookies, it acts as a secondary binder for the crust. |
Gathering Your Essentials
- 24 whole Oreo cookies: These provide the dark, cocoa heavy base. Why this? The high cocoa to fat ratio in the cookie wafer creates a sturdy, snappy crust.
- Substitute: Chocolate graham crackers (use about 1.5 cups of crumbs).
- 5 tbsp unsalted butter, melted and slightly cooled: This is the "glue" for your crust. Why this? Using unsalted allows you to control the seasoning with the sea salt later.
- Substitute: Salted butter (just omit the extra sea salt).
- 1/4 tsp sea salt: To balance the sugar. Why this? Flaky sea salt cuts through the richness of the peanut butter.
- Substitute: Standard table salt (use slightly less).
- 1 cup creamy peanut butter: The star of the show. Why this? Provides the classic, nostalgic flavor profile and necessary stabilizers.
- Substitute: Almond butter (must be the thick, no stir variety).
- 8 oz full fat cream cheese, softened: For tang and body. Why this? The fat content is essential for a clean slice that doesn't collapse.
- Substitute: Mascarpone cheese for a milder, creamier finish.
- 1 cup powdered sugar, sifted: For sweetness and stability. Why this? Powdered sugar dissolves instantly, keeping the texture velvety.
- Substitute: Granulated sugar (not recommended, it will be gritty).
- 8 oz thawed whipped topping: For lightness. Why this? It is more stable than fresh whipped cream for long term chilling.
- Substitute: 1.5 cups heavy cream whipped to stiff peaks with 1/4 cup sugar.
- 1 tsp pure vanilla extract: To enhance the chocolate and nut notes. Why this? It bridges the gap between the salty and sweet elements.
- Substitute: Almond extract (use only 1/4 tsp).
- 1/4 cup semi sweet chocolate chips, melted: For the finishing drizzle. Why this? Adds a professional look and a hit of dark chocolate.
- Substitute: Chocolate syrup or ganache.
- 2 tbsp roasted peanuts, roughly chopped: For crunch. Why this? Contrast is key, and the texture of real nuts breaks up the creaminess.
- Substitute: Crushed pretzels or extra Oreo bits.
- 0.5 cup additional whipped topping: For the border. Why this? Defines the edges and makes the pie look like it came from a bakery.
Equipment Needed
To get that professional, bakery style finish, I highly recommend using a food processor for the crust. If you don't have one, you can crush the cookies in a heavy duty zip top bag with a rolling pin, but you really want that fine, sandy texture for the best snap. A 9 inch deep dish pie plate is essential here.
If you use a standard pie plate, you will likely have extra filling left over, which isn't the worst problem to have, but it won't look as impressive.
An electric hand mixer or a stand mixer is your best friend for the filling. You want to beat that cream cheese and peanut butter until they are truly aerated. If you try to do this by hand with a whisk, you might end up with little white flecks of cream cheese throughout your pie. Finally, an offset spatula is the secret tool for that perfectly smooth top. If you love this flavor profile, you might find yourself reaching for these tools again to make my Peanut Butter Cup Cookies which use a similar flavor logic.
step-by-step Pie Construction
- Process the cookies. Pulse the 24 Oreo cookies in a food processor until they resemble fine, damp sand. Note: Don't remove the white cream centers, they help the crust hold together.
- Bind the crust. Pour in the 5 tbsp of melted butter and 1/4 tsp salt, pulsing until the mixture clumps together like wet potting soil.
- Form the base. Press the mixture firmly into the bottom and up the sides of a 9 inch deep dish pie plate using the bottom of a measuring cup. Note: High pressure here prevents a crumbly crust later.
- Flash freeze. Place the crust in the freezer for 10 minutes until it feels solid to the touch.
- Cream the fats. In a large bowl, beat the 8 oz softened cream cheese and 1 cup peanut butter together on medium high speed until the mixture is pale and light.
- Incorporate the sugar. Gradually add the 1 cup sifted powdered sugar and 1 tsp vanilla, beating on low speed first, then increasing speed for 1 minute to ensure a velvety texture.
- Fold the topping. Gently fold in the 8 oz of thawed whipped topping using a large rubber spatula until no white streaks remain.
- Fill and smooth. Pour the filling into the Oreo crust and smooth the top with an offset spatula until perfectly level.
- The long chill. Refrigerate for at least 4 hours until the center is firm and no longer jiggles.
- Decorate. Drizzle with 1/4 cup melted chocolate, sprinkle with 2 tbsp chopped peanuts, and pipe the extra 0.5 cup whipped topping until it looks like a masterpiece.
Troubleshooting Common Issues
Why Your Pie Filling Is Runny
If your pie doesn't set up, the most likely culprit is the temperature of your ingredients. If the cream cheese was too warm or the whipped topping was over folded, the air bubbles collapse.
Also, using "natural" peanut butter that separates can introduce too much oil, which prevents the cream cheese from forming a solid structure.
| Problem | Root Cause | Solution |
|---|---|---|
| Grainy filling | Cold cream cheese | Ensure cheese is room temp before beating. |
| Crumbly crust | Not enough pressure | Use a flat bottomed cup to pack the crumbs tightly. |
| Filling is too soft | Over mixed topping | Fold by hand, never use the electric mixer for the final step. |
Why The Crust Sticks To The Pan
Sometimes that first slice is a nightmare because the butter has glued the Oreo crumbs to the ceramic. To avoid this, make sure your butter is "slightly cooled" when you mix it with the crumbs. If it's piping hot, it can soak into the crumbs too much and create a cement like bond.
- ✓ Always sift your powdered sugar to avoid tiny white lumps in the dark filling.
- ✓ Wipe your knife with a warm, damp cloth between every single slice for clean edges.
- ✓ Don't skip the freezer step for the crust, it "sets" the butter before the filling hits it.
- ✓ Use a deep dish plate to ensure you can fit every last drop of that fluffy filling.
- ✓ If using fresh whipped cream instead of topping, add a stabilizer like "Whip It" or a bit of gelatin.
Scaling and Substitutions
When you need to feed a smaller crowd, you can cut this recipe exactly in half. For a 5 person serving, a 6 inch springform pan works beautifully. Just keep in mind that the depth will be different, so your "cook" time (chilling) might be reduced by about an hour. If you are going big and doubling the recipe for a party, don't try to fit it into one giant pan. Make two separate 9 inch pies. This ensures the center chills evenly. If you have extra ingredients, you can even experiment with making Pistachio Butter for a completely different flavor profile in a future bake.
| Premium | Budget | Flavor Impact | Savings |
|---|---|---|---|
| Ghirardelli Chips | Store Brand Chips | Minimal in a drizzle | Save $2.00 |
| Name Brand Oreos | Store Brand Cookies | Slightly less cocoa depth | Save $1.50 |
| Pure Vanilla Bean | Vanilla Extract | Noticeable but extract is fine | Save $5.00 |
Debunking Common Kitchen Myths
One of the biggest myths I hear is that you must use "natural" peanut butter for a "purer" taste. In the world of no bake pies, that is a recipe for disaster. The oils in natural peanut butter are unstable at room temperature and will often separate from the cream cheese, leaving you with a greasy mess.
Stick to the classic, stabilized creamy brands for this specific dessert.
Another myth is that you need to bake an Oreo crust to make it stay together. While baking can add a toasted flavor, the high sugar and cream content in the Oreos, combined with melted butter, creates a very effective "cold set" glue.
Freezing the crust for those 10 minutes is actually more effective for a no bake application than 10 minutes in a hot oven.
Storage and Zero Waste
This pie is a storage dream. It will stay fresh and velvety in the refrigerator for up to 4 days, provided you cover it loosely with plastic wrap or a pie dome. If you find yourself with leftovers that you can't finish, this pie freezes incredibly well.
Wrap individual slices in parchment paper and then foil; they will keep for up to 2 months. You can even eat them straight from the freezer for a texture that resembles a high end ice cream bar.
For a zero waste approach, don't toss any leftover Oreo crumbs or broken peanuts. I like to keep a small jar of "pie dust" in the freezer. You can sprinkle these over morning yogurt, stir them into a batch of brownies, or use them as a topping for vanilla ice cream.
If you have a tablespoon of peanut butter left in the jar, toss in some warm oatmeal and stir it around it's the perfect cook's treat while the pie is chilling.
Perfect Beverage Complements
Because this pie is so rich and salty sweet, you want a drink that offers some acidity or bitterness to cleanse the palate. A dark roast coffee, served black, is the traditional and perhaps most effective pairing. The tannins in the coffee cut right through the fat of the cream cheese.
If you are serving this in the evening, a glass of cold milk is the nostalgic choice, but a small pour of a nutty tawny port can turn this simple no bake dessert into a very sophisticated finale. The caramel notes in the port play beautifully with the roasted peanuts and vanilla.

Recipe FAQs
What ingredients are in peanut butter pie?
The essential components are Oreos, butter, sea salt, creamy peanut butter, cream cheese, powdered sugar, whipped topping, and vanilla. These ingredients combine to create the signature crust and velvety filling.
What is Dolly Parton's peanut butter pie?
It refers to the iconic Southern style dessert featuring a chocolate cookie crust and a light, airy peanut butter mousse. This recipe follows that traditional profile by using whipped topping to achieve a signature cloud like texture.
What are the three core steps to achieving the perfect crust?
Pulse the cookies until fine, bind with melted butter until clumpy, and press firmly into the dish. If you enjoyed mastering this firm dough handling, you will find similar success applying these pressure based techniques to other crust heavy dessert recipes.
How to ensure the filling stays smooth and aerated?
Beat the cream cheese and peanut butter on medium high speed until fully aerated before adding other ingredients. Gently folding in the whipped topping with a rubber spatula prevents deflating the mixture and maintains a velvety consistency.
How to store leftover pie?
Cover the pie loosely with plastic wrap or a pie dome and refrigerate for up to 4 days. For longer storage, wrap individual slices in parchment and foil to freeze them for up to 2 months.
Is it true the pie must be baked?
No, this is a common misconception. This is a no-bake dessert that relies on the freezer to set the crust and the refrigerator to stabilize the emulsion of the filling.
How to fix a crust that is too crumbly?
Press the crumb mixture firmly into the pie plate using the flat bottom of a measuring cup. Applying high, even pressure is the key to creating a stable base that holds together when sliced.
No Bake Peanut Butter Pie

Ingredients:
Instructions:
Nutrition Facts:
| Calories | 562 kcal |
|---|---|
| Protein | 10.4 g |
| Fat | 39.2 g |
| Carbs | 46.5 g |
| Fiber | 2.8 g |
| Sugar | 32.1 g |
| Sodium | 378 mg |
