No Knead Gluten Free Bread: the Rustic Dutch Oven Cracking Loaf

- The Cracking Loaf: Mastering the Ultimate No-Knead Gluten Free Bread
- The Science of the Crumb: Achieving Structure Without Gluten
- Key Ingredients for Your Rustic No Knead Gluten Free Bread Recipe
- Adapting the Recipe: Flour and Binder Alternatives
- The Hands-Off Method: Step-by-Step Instructions for the Perfect Loaf
- Troubleshooting Your Artisan No-Knead Loaf
- Extending Freshness: Storage and Freezing Guide
- Pairing Your Homemade No Knead Gluten Free Bread
- Recipe FAQs
- 📝 Recipe Card
The Cracking Loaf: Mastering the Ultimate No-Knead gluten-free Bread
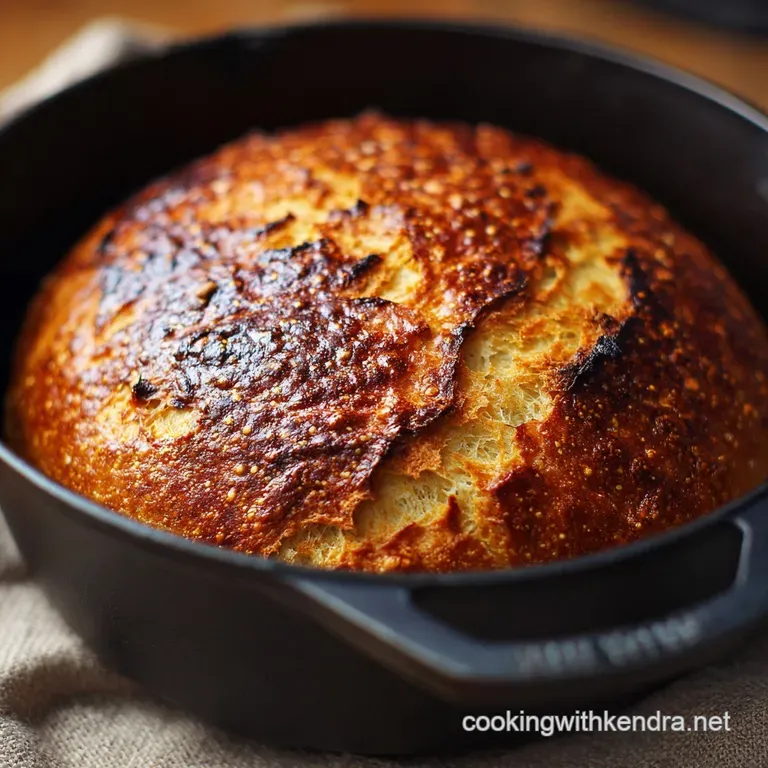
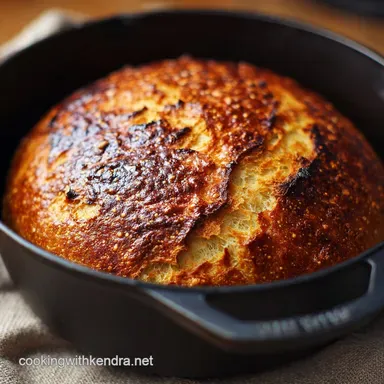
You know that sound? That glorious, hollow CRACK when you tap a perfectly baked crust. I live for that sound. Achieving it with a gluten-free loaf used to feel like pure witchcraft, but trust me, this no-knead method delivers that rustic, bakery level texture every single time.
The aroma alone mildly tangy yeast mixed with warm, nutty rice flour is enough to make you forget every sad, dry GF sandwich you’ve ever eaten.
We are skipping the painful, sticky kneading process entirely, which is truly glorious. This recipe is a massive lifesaver because your hands barely touch the dough, making the active prep incredibly fast and the results almost impossible to mess up.
All this recipe demands is a little patience and a Dutch Oven, which, let's be honest, is already sitting in your cabinet ready for its moment of glory.
I spent years making sad, crumbly GF bricks. Seriously, my first few attempts were terrible and tasted like cardboard! Now, I finally cracked the code and it’s all about swapping gluten for a bit of baking science (hello, psyllium husk).
Let's dive into exactly how we get that gorgeous, holey crumb without breaking a sweat.
The Science of the Crumb: Achieving Structure Without Gluten
The gluten-free Baking Revolution: Why No-Knead Works
This whole technique hinges entirely on time, not muscle. In regular bread, kneading develops the gluten network, creating strength. Since we don't have that network, we rely on super high hydration and a slow, cold ferment.
By letting the dough hydrate slowly over 12 or more hours, the various gluten-free flours fully absorb the massive amount of water and naturally start developing complex flavors and a rudimentary strength.
From Zero Effort to Artisan Result: Texture Expectations
Forget about dense, spongy commercial GF loaves. When done right, you should expect a dramatically crisp, almost burnished crust that stays crunchy long after cooling. Inside, the crumb will be incredibly moist, slightly chewy, and beautifully irregular, mimicking that fantastic hole structure of a proper artisan loaf.
If you nail the cooling time, the texture is sublime.
Tools for Success: Essential Equipment Checklist
Honestly, you don't need much, which is part of the appeal.
- A large mixing bowl with a tight fitting lid (or heavy plastic wrap).
- A reliable kitchen scale, seriously. Measuring GF flours by volume is a recipe for a dense disaster.
- The MVP: A 5- to 6 Quart Enameled Cast Iron Dutch Oven. This is non-negotiable for that crackling crust.
Psyllium Husk Powder: The Secret Binder
This is where the magic happens, guys. Psyllium husk powder (not whole husks) is our structural engineer. When mixed with liquid, it creates a gel that perfectly mimics the elasticity and binding power that gluten typically provides.
Without it, you are just mixing wet flour, and you will end up with a pile of grainy dust. Do not skip this ingredient.
Hydration and High Heat: Developing the Rustic Crust
The high hydration in this dough is what creates internal steam during the initial bake inside the Dutch Oven. By preheating the Dutch Oven to a screaming 475°F (245°C), we trap all that steam when the lid is on.
This super steamy environment gives us maximum "oven spring" and, most importantly, keeps the surface moist until the crust sets, leading to that incredible, professional crackle.
Overnight Proofing: Enhancing the Mildly Tangy Flavor
The slow, overnight fermentation process isn't just about structure; it’s about flavor development. That long rest allows the yeast to produce byproducts that give the bread a subtle, pleasant tang, similar to a sourdough, but without the hassle of a starter.
It’s what makes the flavor so much deeper than standard, fast rising bread.
Key Ingredients for Your Rustic No Knead gluten-free Bread Recipe
I use a combination of pre-blended GF flour and brown rice flour for the perfect balance of rise and texture. Remember, weigh your ingredients!
| Ingredient | Role | Viable Substitution |
|---|---|---|
| GF All-Purpose Flour Blend (Must contain xanthan gum) | Structure, bulk | Ensure your separate blend includes 1 tsp pure xanthan gum. |
| Brown Rice Flour | Nutty flavor, slight grit | White rice flour, though the flavor is lighter. |
| Psyllium Husk Powder | Binder, elasticity | None —this is essential for binding this high hydration dough. |
| Apple Cider Vinegar | Acidity, tenderizer | White vinegar or fresh lemon juice (same amount). |
Adapting the Recipe: Flour and Binder Alternatives
Sourcing the Right GF Flour Blend (Xanthan Gum Included or Separate?)
Most major commercial blends (like King Arthur or Bob's Red Mill) now include xanthan gum right in the mix. If your bag says "contains xanthan gum," do not add more! If you are using a custom blend that omits it, you must add 1 teaspoon (4 grams) of xanthan gum to your dry ingredients alongside the psyllium husk.
Water Temperature and Yeast Activation
This is where I learned this the hard way. I used to mix my dough with boiling hot tap water thinking it would speed things up, only to realize I had completely murdered my precious yeast culture. Oops! The water should be lukewarm, around 105°F (40°C) think warm bathwater.
This activates the yeast without killing it, getting the party started slowly and correctly.
Salt’s Role: Flavor vs. Proofing Control
Salt is crucial for flavor, obviously, but it also slows down the yeast. We want a long, slow proof here, so 1 ½ teaspoons is the sweet spot. It ensures the rise is controlled and doesn't overshoot its peak too quickly.
Psyllium Husk Swaps (Avoid the Gummy Result)
There is no perfect substitute for psyllium husk powder in this specific recipe. Other binders like flaxseed meal or chia seeds absorb water differently and often leave you with a dense, gummy, or overly sticky texture that just doesn't mimic gluten properly.
Stick to the psyllium husk powder for the true artisan result.
Replacing Specific Flours in the Blend
If brown rice flour isn't available, you can use white rice flour or a similar fine grain like sorghum or millet. For a deeper, nuttier flavor and a structure boost, sometimes I substitute a little of the blend with buckwheat flour, but stick to small amounts (no more than 50g) to maintain the rise.
Adjusting Liquid Ratios for High Altitude Baking
If you live way up high, you might find the dough is too wet and sticky after the long rest. Try holding back 1 2 tablespoons (15 30ml) of water initially. High altitude often means quicker evaporation, so you need less moisture in the dough itself.
The Hands Off Method: step-by-step Instructions for the Perfect Loaf
Initial Mixing: Creating the Shaggy, High Hydration Dough
First, whisk all your dry ingredients flours, yeast, salt, and psyllium husk powder until they are impossibly well combined. Next, combine the lukewarm water and vinegar in a jug.
Pour the wet into the dry and mix quickly with a wooden spoon or spatula until a shaggy mass forms; it will look sloppy, wet, and slightly slimy from the psyllium husk. Stop mixing as soon as everything is hydrated.
The Long Ferment: Overnight Rest and Timing
Cover that bowl tightly we need a humid environment. Now, walk away for 12 to 18 hours. I usually mix it before bed and check it the next morning. The dough should have doubled in size, showing lots of beautiful bubbles on the surface and smelling subtly acidic and yeasty.
Crucial Chef’s Note: Dough temperature is key. If your kitchen is super warm (over 75°F/24°C), stick to 12 hours. If it's a cold winter day, you might need closer to 18 hours. Don't rush the flavor development!
Final Shaping: The Simple Fold and Transfer
About an hour before baking, preheat your oven and the Dutch Oven to a scorching 475°F (245°C). While the oven preheats, lay out parchment paper and dust it liberally with rice flour. Scoop the sticky, wet dough onto the center of the paper.
Using slightly wet hands or a spatula, quickly tuck the edges of the dough underneath 4 or 5 times to form a loose, round ball. Don't over handle it, please! This minor shaping gives the loaf just enough surface tension.
Baking in the Dutch Oven: Steam Creation and Crust Development
Carefully remove the piping hot Dutch Oven and lower the dough (still on the parchment sling) into the pot. Lid on! Bake covered for exactly 30 minutes to capture all that crucial steam.
Then, remove the lid, reduce the oven temperature to 425°F (220°C), and bake for another 15 to 25 minutes until the crust is a gorgeous deep mahogany color.
Troubleshooting Your Artisan No-Knead Loaf
Fixing a Gummy or Dense Crumb (Temperature and Time Issues)
A gummy crumb is almost always caused by two things: under baking or slicing before it cools. Ensure the internal temperature hits 205°F (96° C) . More importantly, you MUST let this bread cool completely —at least two full hours before slicing.
The internal structure is still setting as it cools, and slicing early releases steam that turns the center to mush.
Preventing the Dough from Sticking to the Proofing Basket
We use parchment paper because this dough is so high hydration it will stick to everything. If you insist on using a traditional banneton basket, line it heavily with a cloth dusted with rice flour, or simply use the parchment paper sling and skip the basket entirely.
Getting the Deep Brown, Cracking Crust
If your crust is pale, you likely didn't bake long enough, especially after removing the lid. That last 15– 25 minutes at 425°F is when the Maillard reaction really kicks in. Don’t be afraid of the color! A darker crust means better flavor and maximum crispness.
Extending Freshness: Storage and Freezing Guide
Best Practices for Countertop Storage
Once completely cool, store the loaf cut-side down on a cutting board or wrap it loosely in a clean linen tea towel. Avoid plastic bags at room temperature for the first few days, as they trap moisture and soften the crust immediately. It stays beautifully fresh this way for 2 to 3 days.
Slicing and Freezing for Long Term Preservation
Does it freeze well? You bet. Slice the fully cooled loaf completely, then stack the slices and wrap them tightly in plastic wrap before placing them in a heavy duty freezer bag. Frozen this way, the bread lasts easily for three months.
To enjoy, just pop a slice directly into the toaster from frozen it’s amazing.
Pairing Your Homemade No Knead gluten-free Bread
Optimal Uses: Sandwiches, Toasting, and Croutons
This rustic loaf is spectacular for simple tasks. Slice it thick for the best toast of your life, slathered with salted butter and maybe a little jam. It holds up beautifully for a hearty sandwich too, maybe loaded with roasted veggies and sharp cheddar.
If you happen to have any stale bits left (unlikely!), chop them up, toss them with olive oil and Italian herbs, and bake them into the crunchiest gluten-free croutons imaginable.
If you’re craving something sweet after that hearty sandwich, you might check out my gluten-free Peanut Butter Blossom Cookies: The Best Classic Recipe recipe they are always a huge hit. And if you want a softer, slightly sweeter baking project, my Moist Pumpkin Bread with Brown Sugar Glaze The Ultimate Autumn Quick Bread is a guaranteed winner, too. Enjoy!

Recipe FAQs
Why is psyllium husk powder a necessary ingredient in this gluten-free recipe?
Psyllium husk powder is critical because it acts as the primary structural binder, effectively replacing the elasticity and network that gluten normally provides. It absorbs significant moisture, forming a gel that traps the gas produced by the yeast, preventing the loaf from collapsing during proofing and baking.
My dough is extremely sticky/wet after the initial mix. Is this correct?
A wet, sticky, shaggy dough is expected, as this is a high hydration bread designed for superior crumb texture. However, if the dough is runny or soup like, your flour blend may be less absorbent; try adding a tablespoon of flour blend or half a teaspoon of extra psyllium husk powder.
Do I absolutely need a Dutch oven to bake this loaf successfully?
While the Dutch oven is highly recommended for achieving the signature thick, crispy crust and maximum oven spring, it is not strictly mandatory. You can use a heavy baking stone or pizza steel, but you must compensate by adding a tray of boiling water beneath the stone to generate the necessary steam.
My crust came out soft instead of crispy. What did I do wrong?
A soft crust usually indicates insufficient heat or steam during the critical first phase of baking. Ensure your oven and Dutch oven are fully preheated to the specified temperature before loading the dough, and avoid removing the lid prematurely to retain the essential steam.
How should I store this no-knead gluten-free bread, and can I freeze it?
Once the loaf is completely cooled, store it cut-side down on the counter wrapped loosely in a clean paper bag for up to two days to preserve the crust. For longer storage, slice the loaf entirely and freeze the slices in a heavy duty, airtight freezer bag, toasting them directly from frozen when needed.
Can I substitute a different gluten-free flour blend than the one specified?
You can substitute the blend, but be aware that every commercial gluten-free blend absorbs moisture differently. Always weigh your ingredients rather than measuring by volume for accuracy, and be prepared to slightly adjust the water or flour to achieve the desired shaggy consistency.
What are the signs of over proofing this specific gluten-free dough?
Unlike wheat bread, GF doughs don't necessarily double in size, but they can still over proof, resulting in a dense, gummy loaf. If the dough smells strongly acidic or completely collapses when gently touched, it has likely proofed too long and the structure will be compromised.
No Knead gluten-free Bread Loaf
Ingredients:
Instructions:
Nutrition Facts:
| Calories | 401 kcal |
|---|---|
| Protein | 10.4 g |
| Fat | 1.3 g |
| Carbs | 87.5 g |
