Peppermint Mini Cheesecakes
- Time: Active 20 minutes, Passive 2 hours 18 mins, Total 2 hours 38 mins
- Flavor/Texture Hook: Silky white chocolate filling against a shattering chocolate wafer crust.
- Perfect for: Holiday parties, neighbor gifts, or a festive weeknight treat.
- Baking the Coolest Peppermint Mini Cheesecakes for Holiday Joy
- Understanding the Key Techniques for Creamy Festive Treats
- Quick Reference Recipe Specs for Stress Free Baking
- Gathering Your Essentials for a Minty White Chocolate Batch
- Essential Kitchen Equipment Needed for Individual Cheesecake Portions
- Step by Step Cooking Process for Velvety Peppermint Bites
- Navigating Common Mistakes and Troubleshooting for Flawless Results
- Creative Flavor Variations to Try for Every Special Occasion
- Smart Make Ahead and Leftover Tips for Busy Hosts
- Festive Serving Suggestions to Impress Your Dinner Party Guests
- Frequently Asked Questions for Your Peppermint Mini Cheesecakes
- Recipe FAQs
- 📝 Recipe Card
Baking the Coolest Peppermint Mini Cheesecakes for Holiday Joy
Have you ever walked into a kitchen and just smelled Christmas? That is exactly what happens the second you crack open a bottle of peppermint extract. It is sharp, clean, and honestly, a little bit nostalgic.
I remember the first time I tried making individual desserts for a church social, I made a huge mess with a giant springform pan that leaked everywhere. These peppermint mini cheesecakes are my "lesson learned" version, because using a muffin tin is just so much more sensible for a busy host.
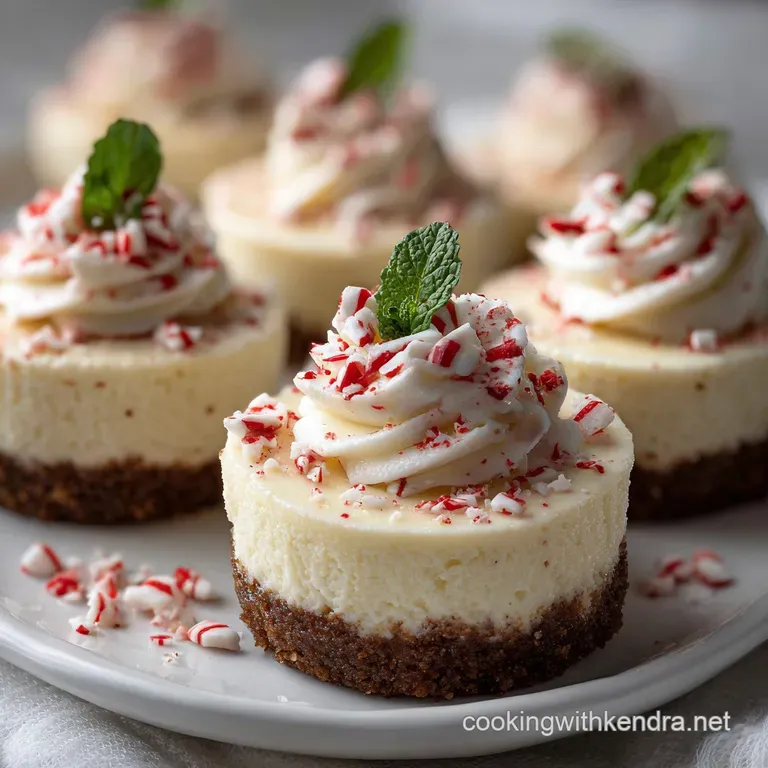
We are aiming for a texture that is dense but not heavy, like a cloud that decided to get serious about being a dessert. The white chocolate adds this buttery richness that rounds out the bite of the mint, while the chocolate wafer base provides that necessary bitter contrast.
You get that snap from the crust, the creaminess from the center, and the crunch of candy canes on top. It is a whole lot of personality packed into a tiny liner.
The best part about these is how forgiving they are. Unlike a giant cheesecake that can crack and break your heart, these little guys are manageable and quick. We are going to walk through how to keep that batter smooth and how to get that signature "jiggle" just right.
Trust me, once you see these lined up on a platter with their little candy cane crowns, you are going to be the hero of the holiday season.
Understanding the Key Techniques for Creamy Festive Treats
Emulsification Control: Mixing at room temperature allows fats and liquids to bond into a smooth, stable suspension.
Gentle Aeration: Beating eggs slowly prevents excess air bubbles, which keeps the cheesecake from puffing and then collapsing.
Residual Heat Baking: Pulling the cakes while the centers are still slightly wobbly allows the carryover heat to finish the cooking without drying out the proteins.
Fat Saturation: The combination of full fat cream cheese and sour cream creates a higher fat to moisture ratio, resulting in a richer mouthfeel.
The Science of Why it Works
The structure relies on protein denaturation, where the egg proteins uncoil and bond together to trap the fats and sugars into a solid gel. Meanwhile, the lactic acid in the sour cream weakens the milk proteins just enough to keep the texture supple rather than rubbery.
Chef's Tip: Freeze your candy canes for 10 minutes before crushing them in a bag. It prevents the sugar from getting sticky and keeps the pieces sharp and distinct instead of turning into minty dust.
Quick Reference Recipe Specs for Stress Free Baking
When you are in the middle of a baking whirlwind, you need the hard facts fast. I have learned the hard way that guessing with cheesecake is a recipe for disaster. These numbers are your guardrails to ensure every single bite is as velvety as the last one.
| Checkpoint | Metric | Why It Matters |
|---|---|---|
| Cream Cheese Temp | 65-70°F | Prevents lumps in the final batter |
| Bake Time | 18 minutes | Stops the center from becoming grainy |
| Crumb Weight | 150g | Ensures a sturdy, non crumbly base |
Stovetop vs Oven Method
| Feature | Oven Baked (This Recipe) | Stovetop (Water Bath) |
|---|---|---|
| Texture | Dense and classic | Silky, custard like |
| Effort | Low, set and forget | High, requires foil wrapping |
| Top Finish | Slightly matte | Shiny and moist |
Gathering Your Essentials for a Minty White Chocolate Batch
Choosing your ingredients is where the soul of the dish starts. I always reach for Philadelphia Cream Cheese because the moisture content is consistent every single time. For the chocolate base, Nabisco Famous Chocolate Wafers give that dark, sophisticated crunch that isn't too sweet. If you are looking for a different vibe after this, you might love the way flavors marry in a Chill Peanut Butter Brownies recipe, but today, we are all about the mint.
Component Analysis
| Ingredient | Science Role | Pro Secret |
|---|---|---|
| 16 oz Cream Cheese | Structural Base | Use blocks, never the whipped tub version |
| 2 Large Eggs | Binding Agent | Add one at a time to maintain emulsion |
| 0.5 cup Sour Cream | Moisture & Tang | Full fat adds the best "melt in-mouth" feel |
| 0.5 cup White Chocolate | Flavor & Fat | Melt gently to avoid seizing the cocoa butter |
The Ingredient List
- 1.5 cups (150g) Chocolate wafer crumbs: Why this? Provides a dark, bitter contrast to the sweet mint.
- Substitute: Graham cracker crumbs with 2 tbsp cocoa powder.
- 3 tbsp (42g) Unsalted butter, melted: Why this? Acts as the glue for the crust.
- Substitute: Salted butter (just omit the extra sea salt).
- 1 tbsp (12g) Granulated sugar: Why this? Helps the crust caramelize slightly.
- Substitute: Brown sugar for a deeper molasses note.
- 0.125 tsp Fine sea salt: Why this? Sharpens the chocolate flavor.
- Substitute: Standard table salt (use a tiny pinch).
- 16 oz (450g) Full fat cream cheese, room temperature: Why this? The essential body of the cheesecake.
- Substitute: Mascarpone for a lighter, more buttery flavor.
- 0.5 cup (100g) Granulated sugar: Why this? Sweetens without adding extra moisture.
- Substitute: Caster sugar for faster dissolving.
- 2 Large eggs, room temperature: Why this? Sets the custard structure.
- Substitute: None (eggs are vital here).
- 0.5 cup (120g) Sour cream, room temperature: Why this? Softens the texture.
- Substitute: Full fat Greek yogurt for a sharper tang.
- 1 tsp (5ml) Pure peppermint extract: Why this? The primary holiday flavor profile.
- Substitute: Peppermint oil (use only 1/4 tsp as it is potent).
- 1 tsp (5ml) Pure vanilla extract: Why this? Depth of flavor and warmth.
- Substitute: Vanilla bean paste for pretty black specks.
- 0.5 cup (80g) White chocolate chips, melted and cooled: Why this? Adds creamy fat and sweetness.
- Substitute: White chocolate baking bar, finely chopped.
Essential Kitchen Equipment Needed for Individual Cheesecake Portions
You don't need a professional bakery setup, but a few specific tools make this much easier. I swear by my KitchenAid Stand Mixer for getting the cream cheese perfectly smooth, but a hand mixer works just fine if you have the patience.
For the crust, a Lodge Cast Iron Skillet or even just a flat bottomed measuring cup is the best tool for pressing the crumbs into the liners.
- Standard 12 cup muffin tin: This holds your liners and keeps the cheesecakes uniform.
- Paper or foil liners: Foil liners release more easily from the sticky cheesecake.
- Mixing bowls: You will need a large one for the batter and a small, microwave safe one for the butter and white chocolate.
- Offset spatula: Essential for swirling or smoothing the tops before baking.
step-by-step Cooking Process for Velvety Peppermint Bites

1. Preparing the Chocolate Base
Preheat your oven to 325°F. Mix 1.5 cups (150g) chocolate wafer crumbs, 3 tbsp (42g) melted butter, 1 tbsp (12g) sugar, and 0.125 tsp salt until it looks like wet sand. Press a tablespoon of the mix into each lined muffin cup. Bake 5 minutes until set and fragrant.
Note: This prevents the crust from getting soggy once we add the filling.
2. Mixing the Creamy Filling
Beat 16 oz (450g) cream cheese and 0.5 cup (100g) granulated sugar in a large bowl. Mix on medium speed until no lumps remain and it looks like silk.Note: Scraping the bowl is the secret to a professional finish.
3. Adding the Liquids
Incorporate 0.5 cup (120g) sour cream, 1 tsp (5ml) peppermint extract, and 1 tsp (5ml) vanilla extract. Stir in 0.5 cup (80g) melted and cooled white chocolate chips. Mix only until combined to avoid adding too much air.
4. Integrating the Eggs
Add 2 large eggs one at a time, mixing on the lowest speed. Mix until the yellow streaks just disappear.Note: Over beating here is why cheesecakes puff up and crack.
5. Baking for the Perfect Jiggle
Divide the batter among the 12 cups, filling them nearly to the top. Bake 18 minutes until the edges are set but the center still wobbles. Note: The "jiggle" is a sign they won't be overbaked and dry.
6. Cooling and Setting
Turn off the oven and crack the door for 10 minutes before removing the tin. Cool to room temperature, then refrigerate for at least 2 hours. Note: This slow cooling prevents the centers from sinking too much.
7. Preparing the Topping
Beat 0.5 cup (120ml) cold heavy whipping cream and 1 tbsp (8g) powdered sugar. Whisk until stiff peaks form.
8. Garnishing with Peppermint Bark
Pipe a swirl of cream onto each chilled cheesecake. Sprinkle with 0.25 cup (40g) crushed candy canes right before serving. Note: If you add the candy canes too early, they will start to melt into the cream.
Chef's Tip: To get a perfectly flat crust, use the bottom of a shot glass or a spice jar to press the crumbs down. It applies even pressure that your fingers just can't match.
Navigating Common Mistakes and Troubleshooting for Flawless Results
We have all been there, peering through the oven glass wondering why things don't look right. Cheesecake is a bit of a diva, but she is predictable if you know the signs. If you find yourself enjoying the creamy texture of these, you should definitely try my Peanut Butter Cup recipe for a completely different flavor profile.
Why Your Cheesecake Sinks
If your centers look like little craters, it's usually because too much air was whipped into the eggs. That air expands in the heat and then collapses as it cools. Another culprit is a sudden temperature change. Don't go from a hot oven to a cold countertop immediately.
Troubleshooting Table
| Problem | Root Cause | Solution | Pro Tip |
|---|---|---|---|
| Lumpy Batter | Cold cream cheese | Microwave cheese for 15 seconds | Use a paddle attachment, not a whisk |
| Cracked Tops | Overbaking | Pull when the center still wiggles | Place a pan of water on the rack below |
| Sticky Liners | Underbaked base | Pre bake the crust for 5 minutes | Use foil liners for a cleaner release |
Creative Flavor Variations to Try for Every Special Occasion
- Peppermint Bark Style: Fold in mini semi sweet chocolate chips into the batter before baking for that classic bark texture.
- Grasshopper Bites: Swap the peppermint extract for crème de menthe and add a drop of green food coloring for a vintage look.
- Double Chocolate Mint: Use a chocolate cheesecake base by adding 2 tbsp of cocoa powder to the cream cheese mixture.
Smart make-ahead and Leftover Tips for Busy Hosts
Storage: These keep beautifully in the fridge for up to 5 days. Just keep them in an airtight container so they don't pick up any "fridge smells" like onions or leftovers.
Freezing: You can freeze the baked and cooled cheesecakes (without the whipped cream) for up to 2 months. Thaw them overnight in the fridge.
Zero Waste: If you have leftover chocolate wafer crumbs, save them in a jar! They are incredible sprinkled over vanilla ice cream or used as a "dirt" topping for a chocolate pudding. Leftover crushed candy canes can be stirred into hot cocoa for a minty boost.
Festive Serving Suggestions to Impress Your Dinner Party Guests
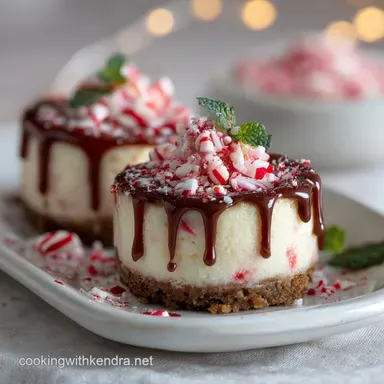
Presentation is everything with a mini dessert. I love serving these on a slate board or a silver platter to make the white chocolate pop. If you want to go the extra mile, place a whole mini candy cane sticking out of the whipped cream at a jaunty angle.
If you are hosting a large crowd, you can scale this recipe up easily. To Double (24 cheesecakes): Use two 12 cup tins. Keep the spices and extracts at 1.5x the original amount to avoid overwhelming the palate. To Half (6 cheesecakes): Use a 6 cup tin.
For the eggs, beat one egg in a bowl and use half of it to ensure the ratio remains correct.
Frequently Asked Questions for Your Peppermint Mini Cheesecakes
Why did my cheesecakes sink?
Air is the enemy of a flat cheesecake. When you beat the eggs too fast, you incorporate bubbles. Those bubbles act like little balloons that pop during cooling, leaving a hole. Mix on low and only until the eggs are just incorporated.
Can I use peppermint oil?
Yes, but be very careful. Peppermint oil is much more concentrated than extract. Generally, 1/4 teaspoon of oil replaces 1 teaspoon of extract. If you use too much, it will taste like you are eating toothpaste!
My candy canes melted!
Candy canes are mostly sugar, which is hygroscopic, meaning it pulls moisture from the air and the whipped cream. Only garnish your peppermint mini cheesecakes right before you set them on the table to keep that crunch.
Can I skip the white chocolate?
You can, but the texture will be slightly different. The white chocolate acts as a stabilizer. If you omit it, add an extra tablespoon of sugar and maybe a teaspoon of flour to help the batter set firmly.
How do I get them out?
Wait until they are completely cold. If they are even slightly warm, the structure isn't set, and they will fall apart. Once cold, use a thin knife to gently nudge the liner away from the edge of the tin.

Recipe FAQs
How do I make sure the peppermint flavor is strong but not overpowering?
Use pure peppermint extract sparingly. Start with 1 teaspoon for the recipe amount; if you want a stronger note, add 1/4 teaspoon more after tasting the batter before adding eggs. Overdoing the extract results in an artificial, toothpaste like flavor profile.
What is the best way to prevent the mini cheesecakes from cracking?
Bake low and slow, and avoid sudden temperature changes. They are done when the edges are just set but the centers still have a slight jiggle; the residual oven heat finishes the cooking process.
If you mastered the sensory doneness cues here, apply them to our [Classic Whoopie Cookies Pennsylvania Dutch Delight] for perfect results.
Can I substitute the chocolate wafer crust with graham crackers?
Yes, but add cocoa powder for balance. Graham crackers are much sweeter than chocolate wafers, so incorporate 2 tablespoons of unsweetened cocoa powder into your crust mix. This will mimic the bitterness needed to contrast the rich mint filling.
Do these need a water bath when baking in mini tins?
No, a water bath is generally unnecessary for mini cheesecakes. Because they are small and bake quickly, they are less prone to drying out and cracking than a full sized cheesecake. The short bake time keeps the internal moisture content high enough without the extra hassle.
What makes the filling so creamy instead of tough?
It relies on temperature and gentle mixing for smooth emulsification. All dairy products (cream cheese, sour cream) must be fully at room temperature so they incorporate without lumps.
If you enjoyed controlling the fat ratio here, see how the same principle applies to achieving luscious texture in our [Minty Bliss: Easy Homemade Creme de Menthe Fudge Recipe].
How far in advance can I prepare the peppermint mini cheesecakes?
Bake and chill them up to two days ahead of time. They taste best when they have at least 12 hours to fully set in the refrigerator. Wait to add the whipped cream topping and crushed candy canes until the day you plan to serve them.
My mini cheesecakes are sticking to the liners, what went wrong?
You may have skipped pre-baking the crust, or used cheap liners. Baking the crust for 5 minutes first helps it firm up and adhere properly. Using foil liners instead of thin paper liners can also improve release.
Peppermint Mini Cheesecakes
Ingredients:
Instructions:
Nutrition Facts:
| Calories | 365 kcal |
|---|---|
| Protein | 4.1 g |
| Fat | 26.6 g |
| Carbs | 27.8 g |
| Fiber | 0.6 g |
| Sugar | 21.2 g |
| Sodium | 215 mg |
