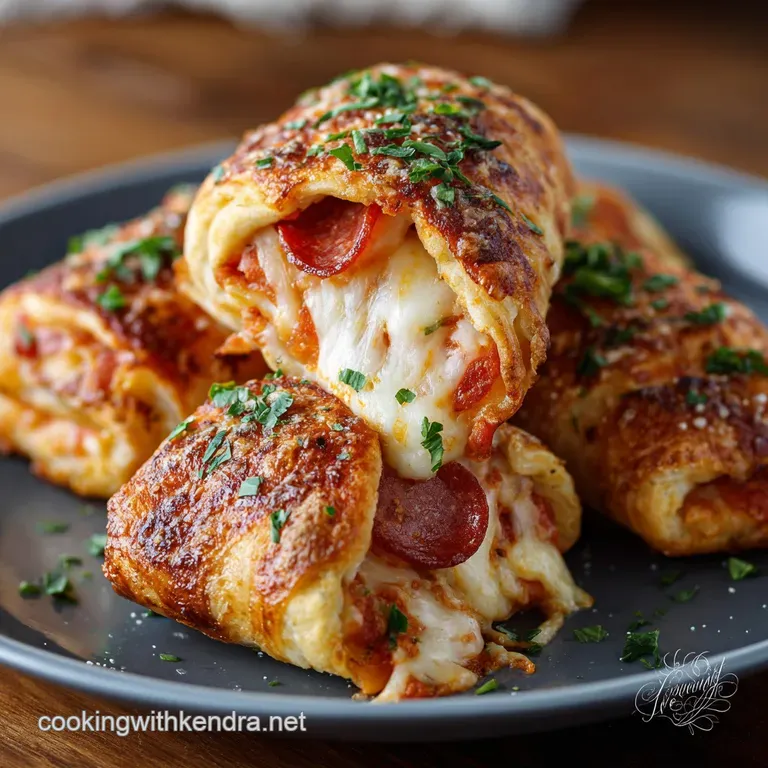
Properly Cheesy Pepperoni Rollups Game Day Guardians of Greatness
- Elevating the Classic: Why This Dough Makes the Best Pepperoni RollUps
- Essential Components for Perfectly Cheesy Pepperoni RollUps
- The Foundation: Mixing and Proofing the Enriched Dough
- Rolling to Perfection and Achieving the Golden Crust
- Expert Troubleshooting and Serving Suggestions
- Recipe FAQs
- 📝 Recipe Card
Elevating the Classic: Why This Dough Makes the Best Pepperoni RollUps
West Virginia's Culinary Treasure: Understanding the Origin Story
The classic Pepperoni RollUps originated as a vital, high calorie meal for coal miners in West Virginia during the early 20th century. These portable, savory pastries provided the necessary energy without needing refrigeration, making them the ultimate working man's food.
This unique culinary history elevates the simple Pepperoni and Cheese Roll Ups beyond a mere snack into a true American regional staple.
Not Just a Snack: The Game Day Greatness Guarantee
These substantial parcels guarantee success at any gathering, whether you are hosting a casual afternoon get-together or a major game day viewing party. Because this Pepperoni Roll Ups Recipe uses a rich, homemade yeast dough, they remain soft and appealing long after they come out of the oven, unlike drier alternatives.
They are the perfect finger food hearty enough to satisfy without requiring cutlery or excessive fuss.
Mastering the Medium: What Makes This Recipe Challenging (and Worth It)
While the concept of wrapping meat and cheese in dough is simple, the medium difficulty comes from managing the enriched yeast dough itself. Achieving the perfect elasticity requires careful kneading, and patience is essential for the two separate proofing stages.
This attention to detail is crucial because it delivers the superior soft texture that store-bought dough simply cannot match for authentic Pepperoni Roll Ups .
Essential Components for Perfectly Cheesy Pepperoni RollUps
Choosing the Right Pepperoni: Fat Content is Flavor King
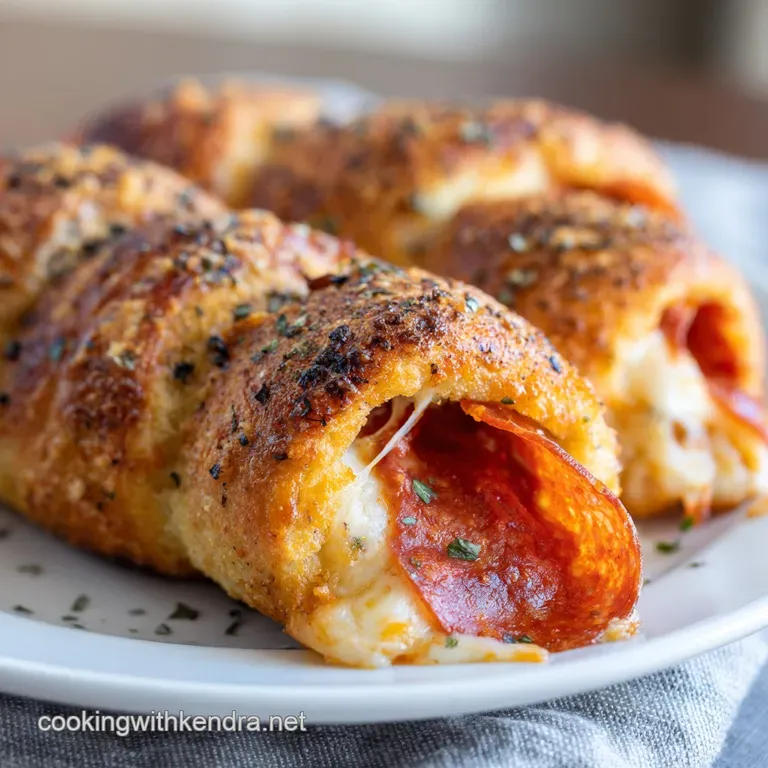
The success of true Pepperoni Roll Ups hinges on the quality of the cured meat used in the filling. Look for thinly sliced, high-quality deli pepperoni that boasts a robust, spicy flavor profile.
The fat content is crucial here; as the rolls bake, this rendered, delicious oil saturates the surrounding dough, effectively 'frying' the bread from the inside out and boosting the overall flavor.
| Pepperoni Type | Characteristics | Use Case |
|---|---|---|
| Deli Sliced | Thin, rich, high oil rendering | Superior texture, ideal for this recipe |
| Pre-Packaged | Thicker, often drier | Suitable if blotted extensively; less flavor impact |
Flour Power: Selecting the Best Bread Base
We opt for standard all-purpose flour in this recipe because it provides the right balance of gluten structure and tenderness. Using a high protein bread flour might create a crust that is too chewy and dense for these soft, roll-up snacks.
AP flour allows for a tender crumb while still being sturdy enough to tightly encapsulate the cheese and pepperoni filling without tearing.
Dough Necessities: Dry Yeast vs. Fresh Yeast Debate Settled
For consistency and accessibility, Active Dry Yeast is the ideal choice for this Pepperoni Roll Ups Recipe . It is shelf stable and easily activated, guaranteeing reliable performance across various kitchen environments.
While fresh yeast is often preferred by professional bakers, active dry yeast is superior for home use, provided the water temperature is correctly maintained during the blooming process.
Necessary Gear: Tools for the Yeast Dough Process
Managing the yeast dough is made significantly easier with the right tools, particularly a heavy duty stand mixer equipped with a dough hook. This drastically cuts down on the demanding kneading time required to develop proper gluten structure.
You will also require accurate measuring tools or a kitchen scale, as precise ingredient ratios are vital for successful yeast baking.
-
Essential Equipment:
- Stand mixer or large bowl for mixing
- Pastry brush for applying the egg wash
- Parchment paper for lining the baking sheets
Related Recipes Worth Trying
- Pepperoni Pizza Pasta Salad Our Easy Cold Recipe for Picnics — The ultimate cold pasta salad with pepperoni This easy Pepperoni Pizza Pasta Salad uses a tangy
- The Ultimate Cheesy Pepperoni Pizza Puffs Ready in 35 Minutes — These glorious Pepperoni Pizza Puffs are quickmix magic Fluffy inside with a crisp cheesy crust they are the perfect Super Bowl food or weekend nibble
- Proper Comfort The Ultimate Sausage and Pepperoni Pizza Pasta Bake — This Pizza Pasta Bake is proper comfort food A hearty cheesy casserole loaded with smoky sausage and pepperoni buried under bubbling mozzarella Pure soul...
The Foundation: Mixing and Proofing the Enriched Dough
The initial step involves reliably activating the yeast, a process known as blooming, by combining it with warm water and a touch of sugar for fuel. This mixture should sit until a thick, frothy layer forms on the surface, indicating the yeast is healthy and ready to leaven the dough.
Once fully bloomed, this liquid gold is combined with the dry ingredients and olive oil to begin forming the soft, slightly enriched dough base.
Kneading is the critical phase where the dough transitions from shaggy mess to smooth, elastic perfection. Whether achieved through vigorous hand kneading or utilizing a stand mixer, the goal is to develop enough gluten to trap the gases released during proofing.
The process is complete when the dough feels tacky, smooth, and passes the famous windowpane test, indicating optimal elasticity.
The first proof, or bulk fermentation, is essential for flavor development and texture. Place the well oiled dough ball in a warm, draft free location and allow it to double in size, typically taking 60 to 90 minutes depending on your kitchen temperature.
This extended, slow rise contributes immense depth of flavor to the final baked Pepperoni RollUps .
Rolling to Perfection and Achieving the Golden Crust
Activating the Yeast: Proofing for Maximum Puff
The initial proofing period allows the yeast to generate carbon dioxide, which is what creates the lightness in the finished rolls. When the dough doubles in size, it confirms that the gluten network has successfully trapped the gas, leading to a beautifully airy interior structure.
A fully proofed dough, gently punched down, is pliable and easy to handle for the subsequent shaping stage.
Achieving the Windowpane: Kneading Techniques Explained
The windowpane test is the benchmark for proper gluten development achieved during the kneading phase. To perform this, stretch a small piece of dough carefully between your fingers; if you can stretch it thin enough to see light through it without tearing, the dough is perfectly kneaded.
This elasticity is what prevents the rolled-up dough from tearing when it expands around the oily filling during the bake.
Shaping the Logs: Tips for Tight, Uniform Rolls
When shaping the dough into 6x4 inch rectangles, aim for uniformity to ensure even baking across the entire batch of Pepperoni Pizza Roll Ups . Apply a slight downward pressure while rolling to maintain the structure.
The critical step is rolling the rectangle tightly from the long edge, ensuring the filling is snug inside, much like rolling a tight cigar to prevent air pockets.
Crucial Sealing Tip: After rolling the logs, you must firmly pinch the seams and ends closed. Any weak point will allow the molten cheese and rendered pepperoni fat to leak out, leading to burnt filling on the tray and dry rolls.
The Second Rise: Preparing Rolls for the Oven
The relatively short second proofing, or bench rest, allows the shaped dough to relax after the tension of rolling and filling. This 30-minute rest ensures the rolls spring up beautifully in the oven without becoming tough or dense.
Covering them lightly prevents the surfaces from drying out, which would inhibit a smooth, even expansion.
The Bake: Time and Temperature for Optimal Oil Saturation
Baking at 375°F (190°C) is key to achieving a deep golden crust while providing enough time for the pepperoni oils to slowly render out and saturate the dough underneath. This medium temperature ensures the center cooks through before the exterior burns, resulting in the rich flavor signature of classic Pepperoni Roll Ups .
The egg wash applied beforehand maximizes the shine and provides that desirable deep color.
Expert Troubleshooting and Serving Suggestions
Handling Sticky Dough: Quick Fixes for Over Hydration
If your dough feels excessively sticky after kneading, resist the urge to add large amounts of flour, as this will result in a tough final product. Instead, lightly oil your hands and the kneading surface to finish the process, or let the dough rest, covered, for ten minutes.
This resting period, called autolyse, allows the flour to fully absorb the moisture, making the dough easier to manage.
Freezing and Reheating: Making Ahead for Party Success
Pepperoni Roll Ups freeze exceptionally well, making them ideal for large scale entertaining. To freeze, let the baked rolls cool completely, then wrap them individually in plastic wrap followed by aluminum foil and store them for up to three months.
To reheat, remove the wrapping and bake them directly from frozen in a 350°F (175°C) oven for about 15 to 20 minutes until heated through.
Beyond the Classic: Delicious Roll-Up Variation Ideas
If you are short on time, adapting this recipe using high-quality store-bought dough yields quick, satisfying results, creating rapid Pepperoni Pizza Crescent Roll Ups .
For an exciting texture, try finishing the cooked Pepperoni Roll Ups in Air Fryer for a few minutes at 350°F (175°C) to enhance the exterior crunch. Plus,, incorporating diced ham and using cheddar cheese transforms them into savory ham and How To Make Pepperoni Cheese Stick Roll Ups .
-
Quick Swap Bases:
- Using Pepperoni Roll Ups with Pizza Dough drastically reduces prep time.
- Pepperoni Roll Ups Crescent Rolls offer a flaky, buttery texture twist.
- Use puff pastry for an incredibly decadent and flaky result.
Nutritional Snapshot: Understanding Serving Size and Macros
Given the generous size and enriched dough, each serving of these Pepperoni Roll Ups provides substantial calories and a good balance of protein and carbohydrates. This density confirms their original purpose as a filling meal replacement rather than a light appetizer.
Being mindful of the high sodium content from the cured meat is helpful, especially when incorporating these into your daily meal planning.

Recipe FAQs
I’m making these for a match day party. Can I prep the Pepperoni RollUps ahead of time?
Absolutely! You can manage the dough through a long, cold proof; complete the first proof (bulk fermentation) in the refrigerator overnight, then let the dough warm up for an hour before shaping and continuing with the recipe.
My filling always seems to leak out and burn on the baking sheet what am I doing wrong?
Leaky fillings are usually caused by either too much grease or a weak seal; ensure you blot the pepperoni thoroughly before filling, and pinch the seams and ends of the rolls with serious intent to lock in the molten goodness.
I need a lighter option how can I make these less of a heavyweight on the nutritional front?
You can significantly cut down on the fat and sodium by swapping traditional pepperoni for quality turkey pepperoni, and replacing half the mozzarella with low-fat ricotta or cottage cheese for moisture.
Can I freeze these rolls, and should I freeze them baked or unbaked?
Freezing unbaked is the way to go for the best texture; freeze the shaped rolls solid on a tray after the second proof, then transfer them to a freezer bag and bake straight from frozen, adding about 5 10 minutes to the cook time.
I don't fancy pepperoni. Are there any vegetarian fillings that would work with this dough recipe?
Certainly, the dough is incredibly versatile; try substituting the pepperoni for a mixture of sun-dried tomatoes, roasted red peppers, and sautéed mushrooms, perhaps with a sprinkle of smoked provolone for depth.
Proper Cheesy Pepperoni Rollups
Ingredients:
Instructions:
Nutrition Facts:
| Calories | 657 kcal |
|---|---|
| Protein | 7.2 g |
| Fat | 2.8 g |
| Carbs | 26.5 g |
| Fiber | 0.3 g |
| Sugar | 0.4 g |
| Sodium | 89 mg |
