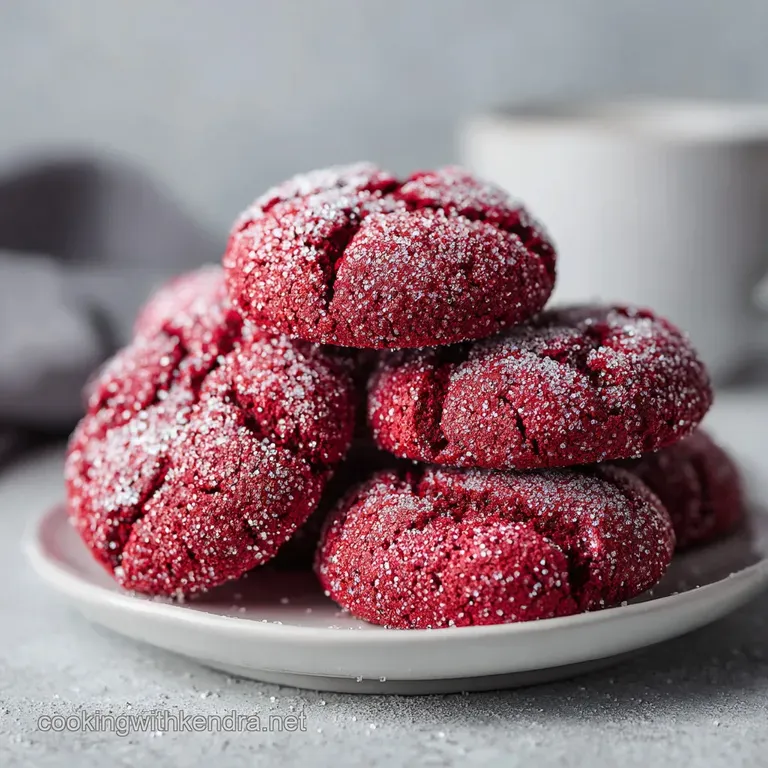
Sparkly Red Velvet Cookies: Creamy and Decadent
- Time: Active 30 minutes, Passive 72 minutes, Total 102 minutes
- Flavor/Texture Hook: Crunchy sugar crust with a velvety crumb and silky filling
- Perfect for: Holiday gift boxes, Valentine's Day, or impressive dinner party desserts
- Why This Works
- Precision Timing for the Best Velvet Results
- Selecting the Best Components for Crimson Perfection
- The Essential Tools for a Successful Bake
- Step by Step to a Sparkling Finish
- Fixing Common Stuffed Cookie Baking Hurdles
- Creative Twists on the Classic Red Velvet
- Maintaining the Soft Texture and Shimmer
- Making Your Holiday Platters Truly Shine
- Kitchen Myths About Red Velvet
- Recipe FAQs
- 📝 Recipe Card
Why This Works
The brilliance of this particular bake lies in the interplay between acidity and color, as well as the thermal management of the filling. We aren't just adding red dye for the sake of it; we are using a specific chemical reaction to create that signature "velvet" texture that differentiates this from a standard chocolate cookie.
- Acid Activation: The white vinegar reacts with the baking soda and the natural anthocyanins in cocoa to create a light, tender crumb while preserving the bright red hue.
- Thermal Buffering: Freezing the cream cheese "pucks" before stuffing ensures they don't liquefy and burst through the dough during the short 12 minutes of baking.
- Sugar Stratification: Rolling in granulated sugar first creates a moisture barrier, allowing the larger sanding sugar crystals to stay dry and provide that iconic sparkle.
- Fat Emulsification: Using room temperature eggs and butter allows the fats to bond properly, preventing the dough from becoming greasy or spreading too thin.
| Method | Time | Texture | Best For |
|---|---|---|---|
| Standard Oven | 12 minutes | Soft center, crisp edges | Traditional cookie shape and classic sparkle |
| Cast Iron Skillet | 18 minutes | Fudgy, deep dish style | Sharing as a warm, spoonable dessert |
| Toaster Oven | 10 minutes | Very crispy exterior | Small batches or quick late night cravings |
Using the oven is the gold standard here because the circulating dry heat is what creates that "shatter" effect on the sugar crust. If you try to do these in a skillet, you’ll get a wonderful "pizookie" vibe, but you lose the individual sparkle of each cookie.
The oven allows the dough to set quickly enough to trap the cream cheese before it has a chance to migrate.
Precision Timing for the Best Velvet Results
When we talk about the "science" of a cookie, we’re really talking about how we manage the moisture. Red velvet is notoriously tricky because if you add too much liquid (like food coloring), you ruin the gluten structure. If you don't add enough, the cocoa makes the dough dry and crumbly.
These cookies find the middle ground by using light brown sugar for moisture and Dutch process cocoa for a smoother, less acidic chocolate base that won't fight with the vinegar.
| Ingredient | Science Role | Pro Secret |
|---|---|---|
| Dutch Cocoa | Provides earthy base | Sift it with the flour to avoid bitter "cocoa bombs" in the dough |
| White Vinegar | Tenderizes the gluten | Mix it directly into the wet ingredients to activate the baking soda instantly |
| Cream Cheese | Adds tangy fat | Use full fat blocks only; tub spreads contain too much water and will leak |
| Gel Food Color | Concentrated pigment | Gel provides vibrant color without thinning the dough like liquid drops do |
The interaction between the vinegar and the baking soda creates tiny carbon dioxide bubbles. This is what gives the "velvet" its name it’s a crumb that feels almost aerated and soft on the tongue, much like my favorite chewy whoopie cookies that rely on a similar balance of acid and base.
Selecting the Best Components for Crimson Perfection
To get that deep, professional look, you have to be picky about your supplies. Don't just grab whatever is in the pantry; the quality of your cocoa and the type of sugar you use for the coating will make or break the "sparkle" factor.
- 8 oz cream cheese: Full fat, softened. Why this? Lower fat versions have higher water content, causing the filling to steam and explode.
- Substitute: Mascarpone for an even richer, buttery flavor profile.
- 1/2 cup powdered sugar: Sifted. Why this? Ensures the filling is silky smooth without any gritty lumps.
- Substitute: Fine caster sugar if powdered is unavailable, though it may be slightly grainier.
- 1 tsp vanilla extract: Pure. Why this? Enhances the chocolate notes and rounds out the tangy cream cheese.
- Substitute: Vanilla bean paste for those beautiful black flecks in the center.
- 2 1/4 cups all purpose flour: Spooned and leveled. Why this? Provides the structural framework to hold the heavy filling.
- Substitute: A 1 to-1 gluten-free flour blend (ensure it contains xanthan gum).
- 1/4 cup Dutch process cocoa: Unsweetened. Why this? It has a neutral pH and a darker color than natural cocoa.
- Substitute: Natural cocoa powder, but the cookies will be slightly lighter and more acidic.
- 1 tsp baking soda: Fresh. Why this? The primary leavening agent that reacts with the vinegar for lift.
- Substitute: 3 tsp baking powder (but you will lose some of the signature tang).
- 3/4 cup unsalted butter: Softened. Why this? Controlling salt allows the flavors of the cocoa and vanilla to shine.
- Substitute: Salted butter (just omit the 1/2 tsp salt from the recipe).
- 3/4 cup light brown sugar: Packed. Why this? Adds molasses for moisture and a soft, chewy texture.
- Substitute: Dark brown sugar for a deeper, more caramel like flavor.
- 1 tsp red gel food coloring: Professional grade. Why this? High concentration means you use less, preserving the dough's consistency.
- Substitute: 1 tbsp beet powder for a natural (though more muted) earthy red.
- 1/2 cup red or white sanding sugar: Large crystal. Why this? These crystals don't melt in the oven, providing the "sparkle."
- Substitute: Raw turbinado sugar for crunch, though it won't have the same shimmer.
| Original Ingredient | Substitute | Why It Works |
|---|---|---|
| White Vinegar (1 tsp) | Lemon Juice (1 tsp) | Provides the necessary acidity to react with the baking soda. |
| Light Brown Sugar | Coconut Sugar | Offers a similar moisture profile but with a more toasted, nutty finish. |
| Dutch Process Cocoa | Black Cocoa | Creates a much darker, Oreo like dough with a very intense chocolate aroma. |
If you find yourself out of white vinegar, don't panic. The goal is simply to provide an acid to wake up that baking soda. I’ve even used apple cider vinegar in a pinch; while it adds a tiny fruity note, the cocoa usually masks it. Just avoid balsamic that’s a flavor experiment for a different day!
The Essential Tools for a Successful Bake
You don't need a kitchen full of gadgets, but a few specific items make the "stuffing" process much less messy. If you've ever tried to roll dough with warm hands in a hot kitchen, you know it can turn into a sticky disaster quickly.
- Stand Mixer: Such as a KitchenAid, fitted with the paddle attachment. This is vital for creaming the butter and sugar until truly "pale and fluffy," which incorporates the air needed for a soft cookie.
- Small Cookie Scoop: (1 tablespoon size). This is the secret to getting perfectly uniform cream cheese pucks. If the centers aren't the same size, your cookies will bake unevenly.
- Large Cookie Scoop: (3 tablespoon size). For the dough. Consistency is king here.
- Parchment Paper: Do not use wax paper! Parchment provides a non stick surface that helps the bottoms of the cookies brown evenly without sticking.
- Fine Mesh Sieve: For sifting the cocoa powder. Cocoa is notorious for having small, hard lumps that won't break down during mixing.
- Cooling Rack: This allows air to circulate under the cookies so the bottoms don't get soggy from trapped steam.
Chef's Tip: If your kitchen is warm, pop your metal mixing bowl and paddle attachment in the fridge for 10 minutes before creaming the butter. This prevents the butter from melting too quickly, ensuring the air bubbles you're creating actually stay trapped in the fat.
step-by-step to a Sparkling Finish
This process is all about the "chill." We are managing three different temperatures: the frozen filling, the cool dough, and the hot oven. If any of these are off, the "velvet" texture disappears.
1. Prepare Tangy Core
In a medium bowl, mix the 8 oz softened cream cheese, 1/2 cup powdered sugar, and 1 tsp vanilla until smooth. Use your small cookie scoop to drop 1 tablespoon dollops onto a parchment lined plate.
Note: This creates the "heart" of the cookie.Freeze for 30–45 minutes until firm and easy to handle.
2. Construct Mahogany Dough
Whisk together the 2 1/4 cups all purpose flour, 1/4 cup cocoa powder, 1 tsp baking soda, and 1/2 tsp salt in a separate bowl. In your stand mixer, cream the 3/4 cup softened butter, 3/4 cup light brown sugar, and 1/2 cup granulated sugar until the mixture looks pale and doubles in volume. Add the egg, 1 tsp white vinegar, and 1 tsp red gel food coloring.
Beat until the color is a vibrant, uniform crimson.
3. Assembly and Sparkle
Gradually add the dry ingredients to the wet ingredients, mixing on low speed until no streaks of flour remain. Chill the dough for 30 minutes. Preheat your oven to 350°F (175°C).
Scoop 3 tablespoons of dough, flatten it into a disc in your palm, and place one frozen cream cheese puck in the center. Seal the dough carefully around the filling, ensuring there are no cracks.
4. The Precision Bake
Roll each dough ball first in the 1/4 cup white granulated sugar, then immediately in the 1/2 cup sanding sugar. Note: The granulated sugar acts as a primer for the sparkle. Place them 3 inches apart on your baking sheets.
Bake for 10–12 minutes until the edges are set but the center still looks slightly soft. Allow them to cool completely on the sheet; the residual heat finishes the center without overcooking the edges.
If you love the thrill of a surprise center, my homemade Twix treats are another favorite that uses a similar "stuffing" technique, though they lean more into the world of caramel and shortbread.
Fixing Common Stuffed Cookie Baking Hurdles
Even the most experienced bakers run into trouble with stuffed cookies. The most common heartbreak is "The Leak," where the white filling escapes and browns on the tray. This is almost always caused by a gap in the dough or the filling being too warm when it hits the oven.
Filling Leakage Fix
If your filling is escaping, it’s usually because the dough was too thin in one spot. When you're wrapping the dough ball, make sure you "pinch and roll." If you see white peeking through, add a tiny scrap of extra dough to patch it.
Also, check your oven temperature; if it's too low, the dough spreads before it sets, causing the filling to run.
Color Fading Issue
Sometimes red velvet comes out looking more brown than red. This is often due to using natural cocoa powder instead of Dutch process, or simply not using enough gel. Remember, the color will darken slightly as it bakes.
If you want that "stoplight red," don't be afraid to add a few extra drops of gel during the mixing phase.
Loss of Sparkle
If your cookies look dull, the sugar might have melted into the dough. This happens if the dough is too warm when you roll it in the sugar. The "double coat" method (granulated then sanding) is designed to prevent this. The fine granulated sugar creates a dry surface so the decorative crystals stay on top.
| Problem | Root Cause | Solution |
|---|---|---|
| Flat Cookies | Butter was too melted | Chill the dough balls for 15 mins before baking. |
| Gritty Filling | Un sifted powdered sugar | Always sift your sugar and cream the filling for at least 3 mins. |
| Cracked Exterior | Oven temperature too high | Use an oven thermometer to verify 350°F; reduce temp by 15°F if needed. |
Common Mistakes Checklist:
- ✓ Never skip the freezing step for the filling (prevents "the leak").
- ✓ Use gel color, not liquid (liquid alters the dough hydration).
- ✓ Avoid over mixing once the flour is added (prevents a tough, bread like texture).
- ✓ Space cookies at least 3 inches apart (they need room to breathe and set).
- ✓ Let them cool on the pan for at least 10 minutes (sets the cheesecake center).
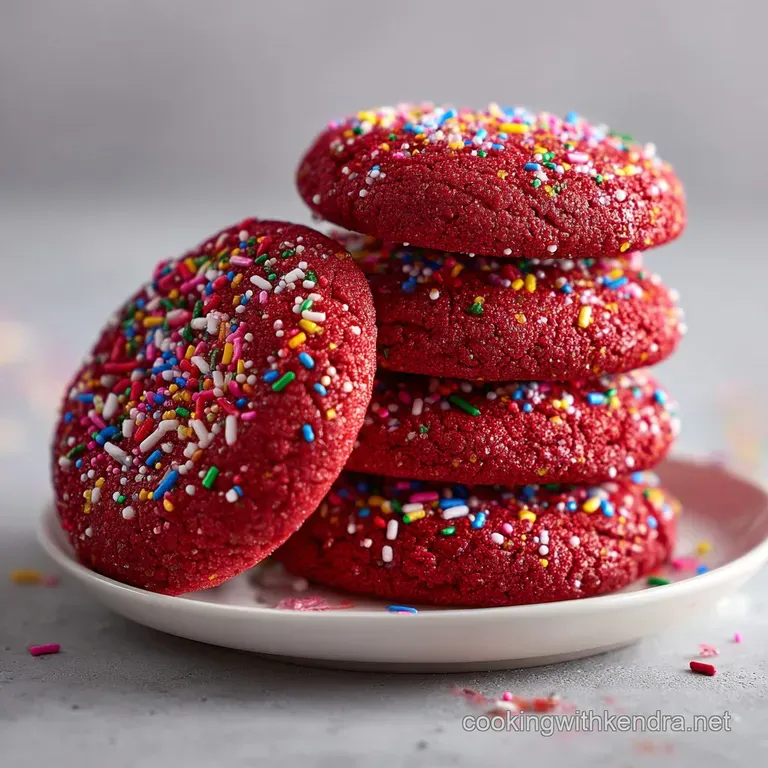
Creative Twists on the Classic Red Velvet
While the classic sparkly red velvet cookies are a dream on their own, there are plenty of ways to mix things up. I've found that adding a bit of texture to the dough itself can elevate the experience.
- Pecan Crunch: Fold 1/2 cup of finely chopped toasted pecans into the dough for a nutty, Southern flair.
- White Chocolate Chip: Add 1/2 cup of white chocolate chips to the dough. The sweetness of the chips plays beautifully against the tangy center.
- The "Short Cut" Version: If you're in a massive rush, you can use a boxed red velvet cake mix as the base, adding 1/2 cup flour and 2 eggs to make it a "cookie" consistency. It won't have the same "velvet" crumb, but it works in a pinch!
- Red Velvet Kiss Cookies: Instead of stuffing them, roll the plain dough in sanding sugar, bake, and press a chocolate kiss into the center immediately after removing them from the oven.
For a completely different holiday vibe, you might want to try my No Spread Sugar Cookies which are perfect if you want to use festive cookie cutters instead of the "stuffed ball" method.
When scaling this recipe, remember that the cream cheese filling is the most sensitive part. If you are doubling the batch (to 36 servings), do not double the vinegar exactly increase it to 1.5 teaspoons to avoid an overly metallic taste.
Work in batches to keep the dough and filling cold; never have more than one tray's worth of dough balls out on the counter at a time.
Maintaining the Soft Texture and Shimmer
Because these have a cream cheese center, they cannot sit on the counter indefinitely. The moisture from the filling will eventually start to soften the sugar crust, so how you store them is vital for maintaining that "shatter."
Storage: Store these in an airtight container in the refrigerator for up to 5 days. To serve, let them sit at room temperature for 15 minutes to take the chill off the dough, which brings back that soft, velvety feel.
If you leave them out at room temperature for more than 2 hours, the cream cheese becomes a food safety concern.
Freezing: These cookies freeze beautifully! You can freeze the baked cookies for up to 3 months. Thaw them in the fridge overnight. To crisp up the sugar crust after freezing, you can pop them into a 300°F oven for just 2-3 minutes.
Zero Waste Tip: If you have leftover cream cheese filling, don't throw it out! It makes a fantastic spread for morning bagels or can be dolloped onto pancakes. Leftover sanding sugar can be saved in a small jar for your next batch of sugar cookies or even to rim the glass of a festive cocktail.
Making Your Holiday Platters Truly Shine
Presentation is where the "sparkly" part of these cookies really gets to work. When arranging them, I like to use a dark platter either wood or slate to make the red and the white sugar pop. Don't crowd the plate; let each cookie have its own space so the light can hit those sanding sugar crystals.
The Contrast Plate
If you're serving these at a party, try alternating them with something white, like a powdered sugar coated lemon crinkle or a white chocolate macadamia nut cookie. The visual contrast between the deep red and the bright white is incredibly striking.
The "Reveal" Cut
For a dessert board, I always cut one or two cookies in half. Seeing that bright white, creamy center tucked inside the red dough is a total "wow" moment for guests. Use a very sharp, non serrated knife to get a clean cut without squishing the filling.
Gift Boxes
If you're gifting these, place each cookie in a cupcake liner. This keeps the sanding sugar from rubbing off on other cookies and makes them feel like individual little treasures. They look stunning in a windowed bakery box tied with a simple gold ribbon.
Kitchen Myths About Red Velvet
There are so many misconceptions about what "red velvet" actually is. Some people think it's just chocolate cake with red dye, but that’s not the whole story. Historically, the red color came from a reaction between non alkalized cocoa and acid (like buttermilk or vinegar).
Myth 1: You can use any cocoa powder. Actually, the type of cocoa matters immensely. Natural cocoa is acidic and will react more strongly with the baking soda, while Dutch process is neutral and provides a smoother flavor.
For this recipe, Dutch process gives us that sophisticated chocolate depth that balances the sugar.
Myth 2: Red velvet is just "light" chocolate. While it has cocoa, red velvet is its own flavor profile defined by the tang of acid and the richness of the crumb. It’s more about the texture (the velvet!) than it is about a heavy chocolate punch.
That's why the vinegar and cream cheese are so essential they provide the "brightness" that standard chocolate cookies lack.
Myth 3: The red dye is purely for looks. In modern baking, yes, we use gel to get that vibrant color. But the process of making it red adding the acid is what creates the tender texture.
You could leave the dye out entirely, and you'd have a "brown velvet" cookie that tastes exactly the same, but you’d lose the festive visual appeal!

Recipe FAQs
Why do my red velvet cookies spread too much in the oven?
You skipped the essential chilling phase for the dough. Ensuring the butter is cold before baking is critical, much like how we prioritize texture management in our chewy peanut butter cookies to prevent unwanted flattening.
How to ensure the cream cheese filling does not leak out?
Freeze your cream cheese dollops for the full 45 minutes until completely solid. Wrapping the dough tightly around a frozen puck creates a thermal barrier that prevents the center from melting faster than the cookie exterior.
Is it true that cocoa powder makes red velvet cookies brown instead of red?
No, this is a common misconception. Using a small amount of Dutch process cocoa powder provides the signature flavor without overpowering the vibrant red hue achieved by the gel food coloring.
How to achieve the perfect crackly, sparkly finish on the cookie surface?
Roll the dough balls in granulated sugar before coating them in the sanding sugar. This double coating technique creates the distinct sparkly aesthetic while helping the dough maintain its shape during the 12-minute bake time.
What is the most common mistake when mixing the red velvet dough?
Over mixing the flour into the butter and egg base. Mixing on low speed only until the dry ingredients are just combined preserves the light, velvet like texture of the crumb.
Can I bake the cookies immediately after assembling them?
No, the dough must be chilled if it becomes too soft to handle. Working with room temperature dough causes the fat to soften prematurely, which leads to greasy cookies that lose their structure in the 350°F oven.
How to tell when these cookies are finished baking?
Remove them from the oven at the 12-minute mark even if they appear slightly soft. Letting them cool completely on the baking sheet allows the center to set properly without overcooking the delicate cream cheese core.
Sparkly Red Velvet Cookies

Ingredients:
Instructions:
Nutrition Facts:
| Calories | 274 kcal |
|---|---|
| Protein | 3.1 g |
| Fat | 12.5 g |
| Carbs | 38.6 g |
| Fiber | 0.6 g |
| Sugar | 25.6 g |
| Sodium | 131 mg |
