Spicy Gol Gappa Recipe
- Look into into Deliciousness: The Story of Gol Gappa
- All About Gol Gappa: A Flavorful Overview
- Why You’ll Fall in Love with Gol Gappa
- Getting Ready for the Magic: Ingredients
- Essential Ingredients Guide: Unlocking the Magic of Your Kitchen
- Mastering the Art of Professional Cooking
- Additional Recipe Information
- 📝 Recipe Card
Look into into Deliciousness: The Story of Gol Gappa
Let me take you back to one of my favorite food memories. it was a hot summer day, and my friends and i were wandering through the vibrant streets of an indian market.
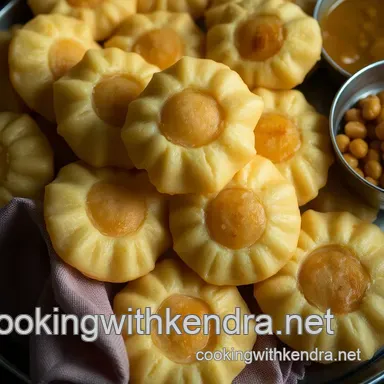
The air was buzzing, and the mouth watering scents of indian street food wafted around us. suddenly, we spotted a vendor expertly crafting gol guppa that crispy, hollow puri filled with a mix of spicy and tangy water.
I just had to try it. with one bite, i was transported to flavor paradise. that explosion of taste made my taste buds dance! if you've ever sunk your teeth into these delightful bites, you know exactly what i'm talking about.
All About Gol Gappa: A Flavorful Overview
Gol gappa , also known as pani puri , is more than just street food; it’s a cultural experience. this dish has roots deep in indian history and has evolved into a beloved snack.
Traditionally believed to hail from the indian subcontinent, pani puri has taken on a life of its own, gracing festive gatherings and casual hangouts alike.
Making gol guppa is a bit of an adventure! not too tricky, but you’ll definitely need some patience. you'll want to get those crispy puris just right and master that perfect balance in your tangy water.
The whole process generally takes about 45 minutes from start to finish 30 minutes for prep (including your puris) and an extra 15 minutes for frying.
The best part? it serves up about 20 gol guppas perfect for sharing with family and friends!
Now, let’s talk money. this colorful little snack won't break the bank. roughly, it costs just a few bucks, especially since many ingredients like chickpeas and spices are kitchen staples.
Plus, the joy of creating this dish at home? priceless!
Why You’ll Fall in Love with Gol Gappa

Not only is gol guppa a fun treat, but it’s also got some health perks! the main filling includes chickpeas, which are an excellent source of protein and fiber talk about a hearty snack !
Whether you’re on a gluten-free journey or just trying out new vegetarian snacks, this dish can easily adapt to all sorts of dietary needs.
The unique selling point of pani puri lies in its versatility. there are countless gol guppa variations you can try like adding fruits for a pop of sweetness or switching out the chickpeas for sprouted lentils.
Plus, they make fantastic holiday party snacks ! want your guests to remember your gathering? serve these colorful, crunchy delights.
And the best part is, you can serve them at any corner of your home. perfect for a quick appetizer before dinner or as an afternoon nibble while binge watching your favorite show.
Just remember to keep that spicy gol gappa water chilled! it'll give you that refreshing kick, no matter the occasion.
Getting Ready for the Magic: Ingredients
Alright, are you ready to dive into making your very own homemade pani puri ? i promise, there’s nothing quite like biting into a street style gol gappa filled with that flavorful spicy water.
Here’s to the journey ahead in crafting this little piece of india right in your kitchen!
Now grab your ingredients, roll up those sleeves, and let’s get ready to create a snack that’s going to make your taste buds sing !
Essential Ingredients Guide: Unlocking the Magic of Your Kitchen
Cooking is like an adventure, isn’t it? you gather your supplies, set the stage, and before you know it, you’re whipping up something delicious.
Today, let’s dive into the essential ingredients guide to create that iconic spicy gol gappa , also known as pani puri .
If you want to impress your friends or just get that authentic indian street food pulse going at home, this guide is your new best friend!
Premium Core Components: The Building Blocks
Let’s break things down. Here’s what you'll need to keep your kitchen stocked:
Detailed Measurements:
- For the puris: 1 cup (150g) semolina and 2 tablespoons (15g) all-purpose flour .
- A baking soda pinch just 1/4 teaspoon will do.
- Salt? We’re using 1/2 teaspoon for that perfect flavor punch.
Quality Indicators:
- Look for fresh, fine semolina that feels slightly gritty.
- Check that your all-purpose flour is free from lumps; fresh is key for those crispy puris!
Storage Guidelines:
- Keep that semolina in a cool, dry place for up to 6 months .
- Flour? Same deal airtight will keep it fresh.
Freshness Tips:
- Always smell the spices! If they smell stale or off, toss em. Fresh spices mean max flavor , baby!
Signature Seasoning Blend: Crafting the Perfect Spice Mix
Now, let’s talk flavor! Here’s how you can layer that flavor explosion into your gol guppa :
- Essential Spice Combinations: Think cumin powder and black salt . Those are our flavor knights!
- Herb Selections: Fresh mint and coriander —they complement each other like peanut butter and jelly.
- Flavor Enhancers: Don’t underestimate tamarind paste . It adds that tangy twist we all crave.
- Regional Variations: Tweak your water with local ingredients. Maybe a splash of coconut water for a twist?
Smart Substitutions: Because Life Happens
Okay, let’s get real. Things don’t always go as planned in the kitchen so it’s good to have options!
- Common Alternatives: No tamarind? No problem! Lemon juice can totally fill that role in a pinch.
- Dietary Modifications: Keep it vegetarian or go gluten-free! Use chickpeas or sprouted beans for that filling.
- Emergency Replacements: Out of all-purpose flour? Mix semolina with a little corn flour instead!
- Seasonal Options: Fresh herbs change with the seasons. Use what's available to you!
Kitchen Equipment Essentials: Tools of the Trade
Every kitchen should feel like a cozy workshop. Here are the must haves for that perfect Pani Puri recipe :
- Mixing Bowls: Have a few in different sizes for mixing and resting.
- Deep Frying Pan: You need something wide and deep for those glorious puris!
- Blender: A must for whipping up that fresh, tangy water.
- Slotted Spoon: Trust me, your puris are gonna need this for that slick oil drain.
- Rolling Pin: Get ready to roll literally for those crispy discs!
Let's Get Cooking!
So there you have it your essential toolkit for mastering the art of spicy gol gappa . master these ingredients, and you’re halfway to blowing your guests' minds (and their taste buds!).
Now that you're equipped with the right components, let’s head straight into instructions for making the perfect pani puri . don’t let that excitement fade roll up your sleeves and let’s start cooking!
Mastering the Art of Professional Cooking
When you dive into the world of professional cooking, it’s like stepping onto a stage where every ingredient has a role to play.
You want everything perfect, from prep to plate. if you’re trying your hand at something like spicy gol gappa (or pani puri if you’re feeling fancy), having a solid game plan is key.
Let’s break this down together!
Essential Preparation Steps
First up, mise en place . i can’t stress enough how important it is. this fancy french term simply means “everything in its place.
” before you start, gather all your ingredients. measure them out. trust me, this will save you so many frantic moments later on.
Next, let's chat about time management . cooking isn’t just about knowing what to do; it's knowing when to do it.
For our gol gappa, you’ll want to start with the puris, as they take time to fry and cool. aim for 30 minutes prep time that gives you a comfy buffer before diving into frying at the 350° f ( 175° c) sweet spot.
Organization strategies come next. keep your workstation clean. i like to use small bowls for ingredients as i prepare them.
And don't forget safety ! hot oil is no joke, so watch out! keep a fire extinguisher nearby (just in case) and use a splatter guard.
Step-by-step Process
Alright, here’s where we really get into the nitty gritty of making those crispy puris and zingy water.
Prepare the Puri Dough : Mix semolina, all-purpose flour, baking soda, and salt. Gradually add water and knead. Let it rest for 15 minutes .
Make the Filling : Combine boiled chickpeas, mashed potatoes, onions, and spices in a bowl, mix them well, and set aside.
Blend the spicy water : this is where the magic happens! in a blender, whip up mint leaves, coriander, tamarind, green chilies, cumin, and black salt with 2 cups of water until smooth.
Adjust mightily it should be zip, zap, zesty!
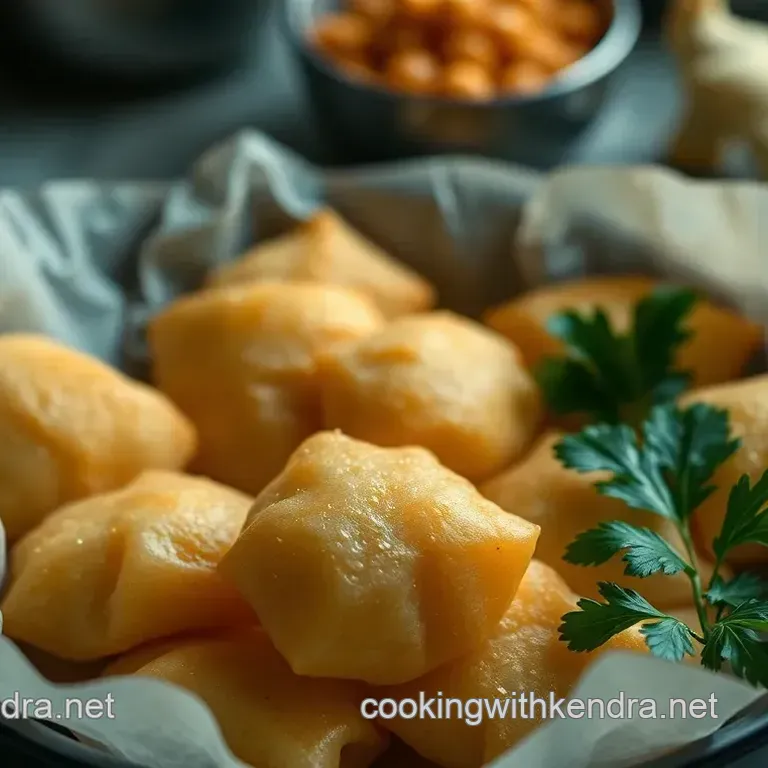
Fry the puris : heat oil to 350° f ( 175° c) . roll out your dough, fry till golden brown and crisp around 30 seconds per puri.
They should puff up like tiny, crunchy little balloons.
Assemble : Crack open each puri, stuff it with the chickpea mixture, and dip it into that tangy spicy water. Boom! You’re ready to impress!
Expert Techniques
Now let’s get pro-level.
Ensure the oil temperature is right. If it’s too low, your puris will turn out greasy. If it’s too high, they’ll burn faster than a marshmallow on a campfire!
The timing ? Try for around 30 seconds for perfect puffiness. Keep an eye on the color; a glorious golden brown is what you’re after.
Quality checkpoints are crucial. Is your spicy water bright and inviting? Does each gol gappa burst with flavors?
And if something goes awry? Don’t sweat it. If your puris aren’t puffing up, there’s a good chance your dough is too dry or your oil isn't hot enough.
Success Strategies
Let’s talk about the classic mistakes. Over stuffing your puris leads to soggy sadness. And timing? Oh boy, don’t fill them too early! They lose that nice crunch.
For
quality assurance
, always taste as you go. You’re seeking that perfect harmony of
spicy
and
tangy
in your water.
As for make-ahead options , you can prepare your spicy water a day ahead and store it in the fridge. It gets even better as the flavors meld overnight!
Now that your kitchen is set to conquer the world of Indian cuisine with delicious gol gappa, get ready for some serious compliments!
Additional Information...
Think of this as your ticket to mastering not just gol gappa but a whole array of vibrant, flavorful snacks that make indian street food so beloved.
Honestly, once you nail this, you’ll want to whip it out for every holiday party or just to curb those cravings.
Plus, with gluten-free options and so many creative variations on the horizon, the culinary world is your oyster! happy cooking, and enjoy every tangy bite of those crispy puris!
Additional Recipe Information
Pro Tips & Secrets
Oh my gosh, if there’s one thing i’ve learned about making spicy gol gappa , it’s that a little insider knowledge goes a long way.
Here are some of my all-time favorite pro tips that’ll have you whipping up the perfect pani puri recipe like a street side pro!
First up: check your oil temperature ! you want that oil sizzling at around 350° f ( 175° c) . this magic number ensures your crispy puris puff up beautifully nobody wants flat ones.
For a time saving technique, make your filling and spicy water in advance. just keep them fab in the fridge until you’re ready to assemble your flavorful snack .
Then there’s the flavor enhancer. adding a splash of fresh lemon juice into your spicy water gives it that extra zing, perfect for balancing out the rich chickpea filling .
And don’t forget to serve with a hint of tangy tamarind on the side your taste buds will thank you!
Perfect Presentation
Ahh, let’s talk about how to make your gol guppa presentation pop! plating can be fun and creative. start with a large, flat dish to arrange your puris in a circle.
This gives it a lovely visual appeal that screams i’m fancy!
Now, for garnishing fresh coriander leaves are a classic go-to. you can even sprinkle some chili powder on top for a spicy kick.
Color combinations matter too. pair the golden puris with vibrant green mint chutney and maybe a splash of red from some non-spicy papaya salad.
A feast for the eyes as much as for the stomach!
Storage & make-ahead
Now, no one wants sogged out puris! to keep things fresh, here’s what i suggest. store your crispy puris in an airtight container at room temperature for up to 2 days.
If you think ahead, you can make the spicy water in batches and store it separate from the puris. this helps them stay crunch tastic!
If you’re making everything ahead of time, eat those gol guppas within 24 hours for the best taste . just remember to reheat any leftovers gently you don’t want them to lose their lovely texture.
Creative Variations
The best part? gol gappa variations! if you want to change up the flavors, go wild! how about swapping out chickpeas for spiced potatoes or even a colorful veggie mix? for a seasonal twist, try adding some diced mango in the filling for a sweet touch.
You can also cater to dietary preferences. Swap all-purpose flour for gluten-free options and make it enjoyable for everyone! Boy, those Indian food lovers will be singing your praises.
Complete Nutrition Guide
It's not just about deliciousness; let's not forget nutrition! the nutritional breakdown for a serving (around 5-6 gol guppas ) packs a punch: about 200 calories , 6g of protein, with healthy fats and carbs that keep you energized.
Plus, the ingredients provide loads of health benefits. chickpeas are fantastic for proteins, while mint is known for boosting digestion.
It’s classic healthy street food at its finest perfect for those holiday party snacks or even as quick appetizers!
Expert FAQ Solutions
Got questions? You bet! Let’s tackle some common concerns. If your pani isn't spicy enough, add a hint more chili powder or green chilies to the mix don’t be shy!
Troubling with puris not puffing? check that hot oil; if it’s too cool, they’ll quickly turn into sad little discs instead of crunchy delights.
And if your spicy water tastes too tangy, a dash of sugar can balance that flavor trust me!
Encouraging Conclusion
Whether you’re a newbie or an experienced kitchen wizard, making gol guppa is all about having fun! picture yourself at an indian street bazaar, feeling those delicious bursts of flavors with every bite.
This recipe is not just food; it’s a little touch of joy and a whole lot of flavor in your life.
So grab those ingredients, gather your friends, and let’s create something truly special together. happy cooking, folks!
Spicy Gol Gappa Recipe