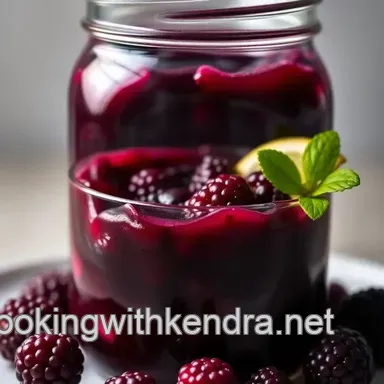
Sweet & Tart Mulberry Preserves: a Taste of Summer in a Jar

- Get Ready for Mulberry Goodness!
- Your Ultimate Essential Ingredients Guide: Unlocking Flavor in Every Bite
- Mastering Mulberry Preserves: A Professional Cooking Method
- Pro Tips & Secrets for Perfect Mulberry Preserves
- Perfect Presentation
- Storage & Make-Ahead
- Creative Variations
- Complete Nutrition Guide
- Frequently Asked Questions
- 📝 Recipe Card
Get Ready for Mulberry Goodness!
Remember that time you stumbled upon the biggest mulberry tree at the park? The way those little, dark berries just hung there, begging to be picked? Oh my gosh, I can still taste that sweet and tart delight! Now, imagine capturing that summer vibe in a jar yes , that’s where mulberry preserves come in!
Making mulberry preserves is like taking a sweet little trip down memory lane. they’re simple to whip up, even if you’re a kitchen newbie.
Just think of it as a fun diy project mixed with some nostalgia. honestly, who wouldn’t want to relive those summer days through a spoonful of this fruity goodness? you got your breakfast, snacks, and desserts covered all in one jar!
The Story Behind Mulberry Preserves
So, what's the deal with mulberry preserves? these beauties date back to ancient times, beloved for their flavor and versatility.
Mulberries thrive in warmer climates and became a popular fruit across various cultures. nowadays, they’re making a comeback among farmers’ markets and garden ensoiasts.
Seriously, have you seen those local stands? they have everything fresh, including our star of the show.
When you decide to make mulberry preserves, you're not just creating a tasty treat. you’re tapping into a rich culinary tradition, all while keeping up with the modern wave of sustainable eating.
And let's talk about the time investment here. prep takes about 15 minutes , cooking around 30 minutes , and voila! you’ve got yourself roughly 4 half pint jars of deliciousness in just a bit over an hour.
How easy is that? plus, mulberries are usually pretty budget friendly talk about a win-win!
Why You Need Mulberry Preserves in Your Life
Okay, let’s dish on some key benefits. first off, mulberry benefits are real! they’re packed with vitamins, minerals, and antioxidants, making them a healthy addition to your diet.
Just picture spreading this fruity delight on a piece of toast breakfast heaven, right? you can even use it in a fruit leather recipe or toss it into ice pops for a refreshing summer snack.
Hello, healthy ice pops , anyone?
Apart from their taste and nutrition, mulberry preserves have that special occasion flair too. fancy brunch? check. holiday gatherings? you bet.
And, they beat ready-made jams by a long shot, trust me! nothing says “i care” like a homemade gift. serious bonus: while you’re getting all crafty with your jars, you’re diving into the world of canning for beginners , which feels like a pro chef move.
The Sweet Transition
So, you’re all ready to dive into mulberry preserves, right? grab your gear and let’s get to those ingredients! with just a few simple staples, you'll be on your way to making a treasure that captures the sheer joy of summer.
Get your fresh mulberries , granulated sugar, freshly squeezed lemon juice, and some pectin. before you know it, that familiar sweet and-tart flavor will remind you of sunny afternoons spent picking fruits and playing outside.
Go on, let’s preserve those memories!
Your Ultimate Essential Ingredients Guide: Unlocking Flavor in Every Bite
If you're like me, there's something magical about wandering through a bustling market or standing in your kitchen, ready to whip up a delicious meal.
But to get there, we need the right ingredients. and trust me, knowing your way around them can elevate your cooking game like you wouldn't believe.
So let's dive in!
Premium Core Components That Pack a Punch
First off, let’s get serious about measurements . whether you're a stickler for precision in grams or just winging it with cups, having clear measurements helps.
For instance, you’ll need 4 cups of fresh mulberries for that sweet and tart mulberry preserves you’ve been thinking about.
That’s 600 grams if you're weighing it out like a pro.
When choosing your ingredients, look for quality indicators . freshness can make all the difference! for example, ripe mulberries should appear plump and dark, and they should smell sweet, hinting at their flavor potential.
Storing ingredients properly is also a game changer. keep those mulberries in the fridge and they’ll last about 3-5 days , while a good jar of homemade mulberry jam can sit in your pantry for up to a year if it’s sealed well.
Shake It Up with Signature Seasoning Blends
Spices are like the life of the party in your pantry. creating an essential spice combination is key. think about adding a pinch of salt to your preserves to balance the sweetness, or spices like cinnamon for that cozy, autumnal twist.
Herbs, on the other hand, can brighten up any dish. pairing basil with strawberries or mint with blueberries might sound out there, but it’s a game changer! it’s fun to play around with different combinations (and a good excuse to use your overflowing herb garden).
Smart Substitutions: Your Flavor Lifesaver
We’ve all been there you’re mid-prep and realize you’re missing something. but don’t sweat it! there are plenty of common alternatives you can use.
No mulberries? swap in blackberries or blueberries for a similar flavor profile. looking for a healthier twist? a sugar substitute in your mulberry jam can help keep it lower cal, without sacrificing taste.
Got a strict diet? no problem! there are dietary modifications that allow you to enjoy all the goodies while keeping within your constraints.
You can even get creative with emergency replacements . like using applesauce in baked goods or honey instead of sugar trust me, i've been there too!
Kitchen Equipment Essentials: Let’s Get Cooking
Your tools make all the difference! a large pot is essential for jams and jellies, like your new favorite mulberry preserves .
While a dutch oven works great, any large pot will do the trick.
If you’re a minimalist, there’s no need to splurge on fancy gadgets. a wooden spoon is all you need to get that perfect stir going, though a canning funnel can save you from messy spills when filling your jars.
Now that we've covered the essentials, those delicious mulberry preserves are just waiting to be made!
Wrapping It Up
All of this boils down to one thing: being adventurous in the kitchen. from freezing recipes to transforming mulberries into fruit leather or healthy ice pops , the possibilities are truly endless.
And remember, cooking is all about experimenting finding out what works for you, what flavors you love, and what little tweaks can make a recipe uniquely yours.
So, grab those mulberries and let’s jump into the make-it-happen bit! Onward to crafting the sweet and tart mulberry preserves that'll become the star of your breakfast spread. You’ve got this!
Mastering Mulberry Preserves: A Professional Cooking Method
So, you’ve got your hands on some fresh mulberries, huh? seriously, these little gems are not only delicious but also packed with benefits - think vitamins and antioxidants galore! making mulberry preserves is a fun and simple way to capture that sweet and tart flavor in a jar.
Let’s dive into how to whip up this treat like a pro, shall we?
Essential Preparation Steps
Mise en place is a fancy term, but don’t let it scare you! it just means "everything in its place.
" set out all your ingredients: 4 cups of fresh mulberries , 2 cups of sugar , 1/4 cup of lemon juice , and 1 teaspoon of pectin .
This speeds up your cooking, trust me.
Time management is your friend here. you’ll need about 15 minutes for prep, 30 minutes for chilling, and around 30 minutes of cook time.
Keep a timer handy, so you don’t lose track.
Organization strategies are crucial too clean your workspace, and have a large pot or dutch oven ready. it’s also super critical to keep safety in mind.
Use mitts when handling hot jars and boiling mixtures. always better to be safe than sorry!
Step-by-step Process
Prepare Your Jars:
- Clean your jars in boiling water for 10 minutes . Sterilization is key to avoiding any nasty surprises. Set 'em aside to cool down after.
Get Those Mulberries Ready:
- Rinse them under cool water and remove any stems or leaves. A little crushing gets the juices going!
Cook it Up:
- Toss your mulberries , sugar , and lemon juice into that big pot. Let it hang out for about 10 minutes to let the sugar dissolve and the juices flow.
Boil, Baby, Boil:
- Add the pectin and crank up the heat! Boil this mix for 10- 15 minutes . The texture should thicken. Try the cold plate test: drop a spoonful on a chilled plate if it holds its shape, you’re golden!
Jar it Up:
- Use a canning funnel (if you’ve got one) to fill up your sterilized jars. Leave 1/4 inch of headspace . Wipe off any messy rims, seal with lids, and tighten them like you mean it!
Cool and Store:
- Let those jars cool down on the counter. After they're cooled, check the seal by pressing the lid; if it doesn’t pop back, you did it right! Store them in a cool, dark spot and refrigerate after opening.
Expert Techniques
If you wanna be a kitchen superstar, there are a few critical steps to keep in mind. first, boost that flavor with a little brown sugar .
Or, add a dash of vanilla or even some spices like cinnamon. those little twists make a huge difference!
Use quality checkpoints to ensure everything’s coming together as it should. watch that bubbling action; it should calm down as it thickens.
If in doubt, you can always troubleshoot too runny? boil it a bit longer!
Success Strategies
Let’s avoid common mistakes, yeah? don’t skip the sterilization ; it’s vital for good canning. and if your preserves don’t set, just return them to the pot and boil a bit longer.
Finally, when in doubt, label your jars. you’ll thank yourself later when pulling out some homemade goodness in the dead of winter.
Make-ahead options are a great chance for creativity too! You can whip up these mulberry preserves in advance and use them in a ton of other dishes, like on pancakes, or as a filling in healthy ice pops or even your own homemade fruit leather !
There you go, folks! if you follow these steps and infuse your own flair, you’ll end up with some kick butt mulberry preserves, and trust me, your summer cravings will thank you all year long.
Stay tuned for more tips and tricks in the upcoming additional information section!
Pro Tips & Secrets for Perfect Mulberry Preserves
When it comes to making mulberry preserves , a few insider tricks can really elevate your game. i still remember my first time canning in my tiny kitchen.
I was a hot mess sugar everywhere and a few little fruit explosions. oh my gosh, it was chaotic! but trust me, these tips will save you a lot of time and prevent future kitchen disasters.
Chef's Personal Insights
First off, always taste your mulberries before you start cooking. some can be sweeter than others, so adjust your sugar based on that.
If they're a bit sour, a cup of sugar might not cut it go with your gut and sweeten to taste!
Time Saving Techniques
Here’s a time saver: while your mulberries are releasing juices, prep your jars. clean them ahead of time, and set them aside.
It makes your life so much easier when you're ready to bottle those delicious preserves. plus, you won't be scrambling to find a clean jar.
Flavor Enhancements
Wanna mix things up a bit? try adding a splash of vanilla extract or a pinch of cinnamon for an aromatic twist.
Honestly, just adding spices can totally transform your mulberry game. you could even stir in some lemon zest for an extra zing!
Presentation Advice
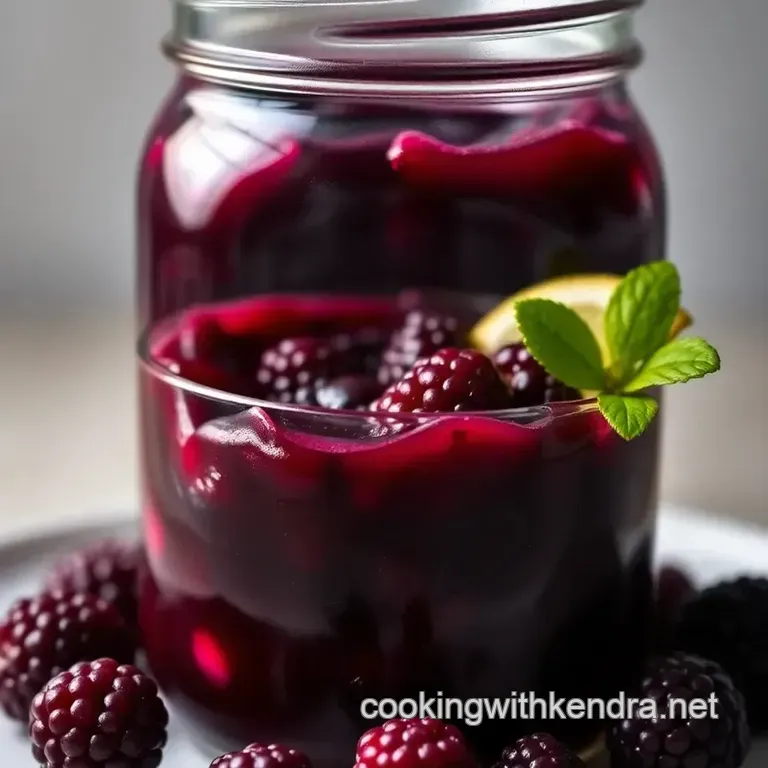
Now, about that presentation... when you pour your preserves into jars, take care. let’s keep it neat! give yourself about 1/4 inch of headspace.
Oh, and if you're feeling fancy, top with a sprig of mint for color. not only will it pop visually, but it’ll impress your friends too!
Perfect Presentation
Speaking of impressing friends, let's talk plating techniques. you can use those gorgeous jars of mulberry preserves as centerpieces. layer them on a wooden board, and pair them with cheeses, fresh bread, or even some healthy ice pops for your kids.
Trust me, it looks like you went all out!
Garnish Ideas
For some simple garnish ideas, how about using zesty lemon slices or sprigs of rosemary? mulberry jam looks stunning in a clear jar with those bright colors.
It gives that homemade vibe without the fuss!
Color Combinations
Keep in mind, contrasting colors make a dish more appealing. pair the deep purples of mulberry preserves with lighter colored foods.
Think yogurt or cream cheese spread on a bagel. doesn’t that sound delicious?
Storage & make-ahead
Storage Guidelines
Okay, I can hear you now "How do I store these preserves?" You want to keep them in a cool, dark place, ideally in your pantry. They’ll be good for about a year!
Preservation Methods
Make sure your lids are tight! i learned the hard way that a loose lid will ruin all that hard work.
And if you’re into canning for beginners , remember: sterilizing your jars isn’t just a suggestion; it’s a must!
Reheating Instructions
When you're ready to enjoy, just scoop out what you need. You can warm it up by placing the jar in a bowl of hot water.
Freshness Duration
Once you open a jar, keep it in the fridge. It should last about three weeks. Longer, if you're using it sparingly.
Creative Variations
Flavor Adaptations
Love experimenting? Go wild by adding some food mushrooms (like chanterelles) for something savory or maybe blend in some apples for a sweet twist. Play around there are no rules here!
Dietary Modifications
For those watching their sugar intake, swap out regular sugar for coconut sugar or a sugar substitute. This will make your preserves healthier without sacrificing flavor.
Seasonal Twists
Depending on what fruits are in season, feel free to try new mulberry recipes . Combine mulberries with peaches in the summer or apples in the fall for amazing new flavors.
Complete Nutrition Guide
So, what's the scoop on nutrition? Mulberries are jam-packed with mulberry benefits . High in vitamins C and K, they’re immune boosting AND delicious!
Health Benefits
Not to mention they’re full of antioxidants! They can help regulate blood sugar levels too. Gotta love multitasking fruits!
Dietary Considerations
For those on specific diets, you can still enjoy your preserves. Just keep an eye on your sugar levels and portions. A little goes a long way, especially with this flavor bomb.
Portion Guidance
Normally, a tablespoon is a standard serving size, and let’s be real, you can pile it on a piece of toast without guilt. Enjoy!
Remember, the kitchen isn’t about perfection; it’s about passion and delicious creations. so whip up that mulberry preserves, and trust me once you taste that summer goodness, you’ll keep coming back for more.
Happy cooking!
Frequently Asked Questions
What is the best way to store mulberry preserves?
Once you've made your mulberry preserves, store them in a cool, dark place. If you seal the jars properly, they can last up to a year. Once opened, keep them refrigerated and aim to use them within a few weeks though with all that deliciousness, they might not last that long!
Can I use frozen mulberries to make preserves?
Absolutely! Frozen mulberries work just as well as fresh ones. Just be sure to thaw them completely and drain any excess liquid before cooking them down into preserves. This allows you to enjoy the lovely taste of mulberries even when they're off-season!
How long do homemade mulberry preserves last?
Homemade mulberry preserves can last around a year if sealed properly and stored in a cool, dark place. Once opened, keep them in the fridge and try to consume them within 4 to 6 weeks. But let’s be real; if they’re that delicious, they’ll probably disappear much faster!
Can I make low-sugar mulberry preserves?
Yes, you can! Using a low-sugar pectin or a sugar substitute will help you create a version of mulberry preserves with less sugar. Just keep in mind that the texture and taste might vary slightly, but they will still be tasty and delightful!
What can I serve mulberry preserves with?
Mulberry preserves are quite versatile! You can spread them on scones, use them as a topping on yogurt or ice cream, or even pair them with cheeses for a lovely charcuterie board. They add a wonderful burst of flavor wherever you use them perfect for elevating your breakfast or dessert game!
How can I enhance the flavor of my mulberry preserves?
Don’t shy away from experimenting! You can infuse extra flavors by adding a sprig of fresh mint, a splash of vanilla extract, or a hint of warmth with spices like cinnamon or cardamom. These additions can elevate your mulberry preserves to new delicious heights!
Sweet Tart Mulberry Preserves A Taste Of Summer