Sweet Tocanita De Post
- The Ultimate Guide to Mastering Sweet Tocanita
- What Makes This Recipe Special
- Health and Nutrition Highlights
- Recipe at a Glance
- Master Ingredient List
- Kitchen Equipment Essentials
- Foolproof Cooking Steps for Sweet Tocanita
- Professional Secrets
- Perfect Presentation
- Storage and Make-Ahead
- Creative Variations
- Complete Nutrition Guide
- Expert FAQ Solutions
- 📝 Recipe Card
Hey there, friend! have you ever thought about how a dessert can transport you to a sun-soaked beach, even if you're just sitting at your kitchen table? well, let me introduce you to sweet tocanita , a glorious coconut delight that’ll have you dreaming of palm trees and tropical breezes.
Seriously, if you’ve been stuck in the rut of boring desserts, this one’s a game changer. it’s medium in difficulty as it requires a bit of finesse, but don’t fret! it meshes beautifully with your basic cooking skills.
With just about an hour and a half required (that includes a little chilling time), you’ll soon be indulging in a dish that's utterly divine.
Diving into the history of tocanita de post, we’re wrestling with roots that stretch deep into the vibrant culinary traditions of latin america.
This dessert tells a story of shared tables and joyous celebrations. the regions of latin america pride themselves on their unique sweets, and each family may have their own twist on recipes that have been passed down through generations.
Think about holiday gatherings with a tocanita gracing the table there’s something truly magical about the way food brings us together.
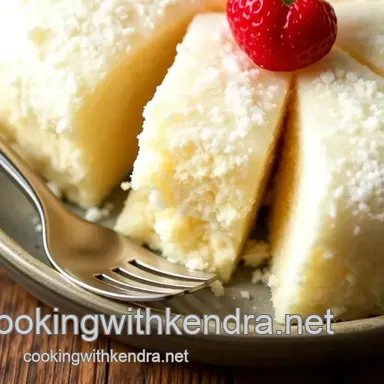
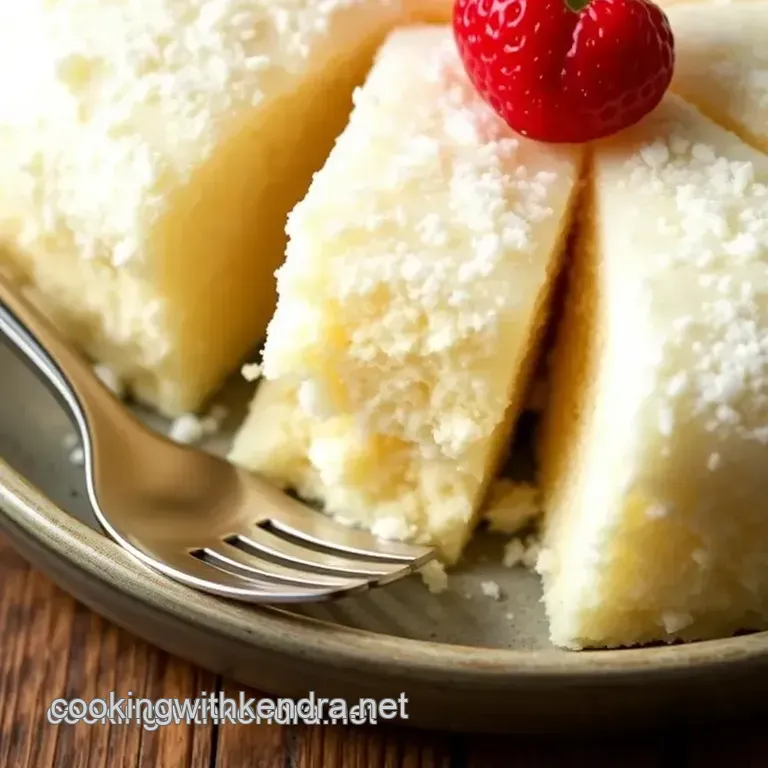
What makes this recipe a must try is the richly layered experience it provides. you’ve got that buttery crust melting on your tongue paired with a luscious coconut filling honestly, it's like a fraction of paradise on a plate!
Plus, it’s a fantastic festive option, easily doubling as a crowd pleaser at gatherings or a cozy sweet treat just for you.
The Ultimate Guide to Mastering Sweet Tocanita
This dessert has an incredibly rich culinary heritage, tracing back through families that tapped into baking traditions long before instagram made it trendy.
Picture a bustling kitchen filled with the laughter of children stealing bites of fresh coconut while elders skillfully whip up the next dessert masterpiece.
That’s the essence of tocanita.
There's a certain cultural significance to making this dessert; over time, it evolved, reflecting the tropical fruits available and how local customs find their way into culinary creations.
As for modern day popularity? oh, it’s a hit! you’ll find versions of this dessert popping up everywhere from trendy cafes to grandma’s dinner table, bringing it back to its roots no matter where it's served.
What Makes This Recipe Special
What makes sweet tocanita truly shine, though, is its unique flavor combinations . the pairing of sweetened coconut with a touch of cinnamon creates a delightful dance of taste that'll have your tastebuds cheering! and don’t worry, it's tough to mess it up!
With a few foolproof techniques up your sleeve, you'll master this decadent dessert like a pro.
Pro tip: the dough can be a bit temperamental, so keeping it chilled is essential. plus, i’ve got some time saving tips tucked away like a bonus level in a video game.
You can make the dough ahead of time or use it for other sweet pastry creations!
Health and Nutrition Highlights
Before you dive in, let's talk about the nutritional benefits . coconut is a powerhouse of healthy fats, and sweetened condensed milk? well, okay, it’s a treat, but it does add a lovely richness.
If you’re tracking your diet, knowing the balance here can really enhance your dessert game. the serving size makes it a nice indulgence without toppling you over in calories.
This recipe is adaptable too! You can go for a dairy-free version by swapping in coconut cream alternatives —the world is your oyster…or coconut, if you will!
Recipe at a Glance
- Total Preparation Time: 1 hour 25 minutes
- Skill Level Required: Medium
- Serving Size: Yields 12 wonderfully generous servings
- Cost Efficiency: Quite budget friendly, especially if you buy components in bulk.
And there you have it! now that we're all warmed up, let’s move to the most exciting part the ingredients section .
Get ready to gather your coconut and let’s create a little tropical paradise right in your kitchen. this will be where the real magic happens!
Master Ingredient List
When it comes to cooking up something as delightful as tocanita de post , having the right ingredients is key.
You know, nothing ruins a baking spree more than standing in the kitchen, flustered because you’re missing an essential item! so, let’s dive into our master ingredient list that’ll keep your kitchen stocked and your baking smooth.
Premium Core Ingredients
First up, let’s talk about the premium core ingredients . For our sweet treat, we’ll need these items:
- All-purpose flour: 2 cups (240 g). Look for a brand that feels soft and doesn't have a gritty texture.
- Unsalted butter: 1/2 cup (113 g). Always choose a good quality butter, like one that has a high fat content trust me, it makes all the difference!
- Granulated sugar: 1/3 cup (67 g). White sugar is what we want here, as it dissolves perfectly.
- Egg: 1 large (50 g). Try to grab farm fresh ones if possible the flavor is unbeatable!
- Salt: just a pinch makes everything better, right? We’re talking about 1/4 teaspoon (1.5 g).
- Cold water: just a couple tablespoons (30 mL) to bind it all together.
For storage, keep your flour in a cool, dry place and use the butter before its expiry date for peak freshness.
If you don’t have unsalted butter, you can always use salted just adjust the salt content slightly.
Signature Seasoning Blend
Now let’s spice things up! A signature seasoning blend adds that wow-factor :
- Cinnamon: 1/4 teaspoon (1.5 g). Oh my gosh, the warmth it brings!
- Vanilla extract: You know, it elevates the dish to another level. Just a splash will do 1/4 teaspoon (1 mL).
These spices blend perfectly together with the coconut filling, lending a distinct Latin American character to this dessert.
Smart Substitutions
Don’t worry if you don’t have everything on hand; we’ve got some smart substitutions ready!
- For shredded coconut: If you can’t find any, finely chopped almonds can work, though you’ll lose that coconutty essence. You can also explore coconut cream alternatives if you need a dairy-free option!
- Condensed milk: Honestly, swapping this out with coconut cream or yogurt can yield interesting results maybe even a refreshing twist!
Think about the seasons too! In summer, why not pair it with tropical fruits, like mango or pineapple, for a divine flavor combination?
Kitchen Equipment Essentials
Alright, let’s gear up! Having decent kitchen equipment essentials makes culinary life so much easier.
- Mixing bowls: You’ll use them more than you think. Get a sturdy one; trust me, you’ll thank me later.
- Rolling pin: A good one is crucial for getting that dough to the right thickness. Invest a few bucks; it’s worth it.
- Tart pan: Aim for a 9 inch (23 cm) round pan; this is where the magic happens!
- Whisk: Perfect for blending your filling.
- Plastic wrap: Seriously, this saves time and makes chilling dough a breeze!
- Oven: Make sure it’s preheated to 350°F (175°C) no one likes undeveloped dessert dough!
Pro Ingredient Tips
And if we’re talking pro ingredient tips , I’ve got your back!
- Choose fresh ingredients when possible. Quality markers make all the difference trust me, it shows in the taste.
- Store your butter well; keeping it cold ensures it doesn’t get funky.
- For coconut, I highly recommend looking for unsweetened shredded coconut; it allows for more flavor control.
- Finally, consider buying in bulk. Sometimes, splurging on ingredients saves money in the long run.
So, now that we've covered the basics and made sure you're ready to bake, let's dive into the next important bit: instructions .
Follow along, and i promise you'll whip up a delicious tocanita de post that’s sure to wow your friends and family! get ready for some baking tips for pastries because things are about to get delicious!
Foolproof Cooking Steps for Sweet Tocanita
Oh my gosh, let me tell you about one of my absolute favorite desserts tocanita de post. if you’ve never tried it, oh boy, you’re missing out! it’s this rich, creamy coconut delight that’s perfect for those cozy gatherings.
Honestly, the combination of a buttery crust with the luscious coconut filling? it’s like a tropical paradise on your plate.
Let’s break down how to whip this up, step by step, so you can impress your friends and family without losing your cool in the kitchen.
Essential Preparation Steps
Before anything else, we gotta talk about mise en place . this french term means "everything in its place," and it’s a game changer.
Gather all your ingredients first flour, sugar, butter, shredded coconut, and all that good stuff. measure them out and have them ready.
It'll make the cooking flow feel so smooth.
Next, let’s chat about some prep techniques . for the dough, you’re essentially creating a simple pastry. cut the butter into the flour and sugar until it resembles crumbs.
Then throw in an egg and a splash of cold water if it’s looking dry. it’s all about making that dough just right without overworking it.
Now, time management is key, especially with the chilling of the dough for 30 minutes. While that's happening, you can whip up the filling.
Organization tips ? keep your station tidy! i often use a little bowl for scraps, and it helps keep my head clear.
Less mess means you’ll be in and out of the kitchen quicker.
Professional Cooking Method
Now onto the step-by-step process !
Prepare the dough : start by mixing flour, softened butter, and sugar in a bowl. once crumbly, add in the egg and a pinch of salt.
Mix until it forms a soft dough.
Chill the Dough : Wrap it up and chill for 30 minutes this makes it easier to roll out.
Make the Filling : Combine shredded coconut, sweetened condensed milk, vanilla, and cinnamon in a bowl. Mix till it’s all cozy together.
Preheat the Oven : So important! Set that baby to 350°F (175°C) while you’re rolling out the dough.
Roll Out the Dough : Flour your surface and roll that dough into a lovely 1/4 inch thick circle.
Add the Filling : Pour the creamy coconut mixture into your prepared crust.
Bake : Pop it in the oven for 25 minutes. Trust your nose! When it starts smelling heavenly and turns golden brown, it’s done.
Cool and Serve : Let it cool for a bit patience is a virtue here. Then dig in!
Expert Techniques
Okay, so here’s where we really elevate our game. Professional methods include chilling that dough properly. It prevents shrinking while baking, which can be a real headache!
Watch the timing precision , especially during baking keep an eye on that lovely golden top. If it’s getting too brown too quickly, you can cover it loosely with aluminum foil.
Success indicators ? When the filling is lightly browned and set, you’re golden. Give it a gentle shake; if it wiggles just a little without jiggling, you’re on the right track!
Success Strategies
You know, things don’t always go according to plan in the kitchen, and that’s okay. Here are some troubleshooting tips :
- Dough too sticky? Add a tad more flour.
- Filling too runny? A tiny pinch more shredded coconut can help firm it up.
- If it’s too sweet , a sprinkle of salt can balance it out nicely.
For quality assurance , taste the filling before baking. You can always adjust sweetness or spice.
And remember, for perfect results , watch for that gorgeous golden color when baking. Piping hot, creamy coconut delights are just waiting for you!
I hope this little guide gears you up for a fun baking adventure! with the right prep and a few culinary tricks up your sleeve, you’ll whip up the ultimate tocanita de post that’ll have everyone asking for seconds.
Now, if you’re ready to dive deeper into tropical desserts, we’ll explore some delightful variations and serving suggestions in the next section!
Professional Secrets
Oh my gosh! if you’ve ever dreamed of whipping up a tacanita de post , like the dreamy coconut dessert it is, you’re in for a treat! you know, true pros will tell you that there are a few nuggets of wisdom that'll elevate your dessert game before you even step into the kitchen.
First, let's talk expert techniques . with sweet dough recipes like this, proper baking tips for pastries are a must. make sure your butter is softened but not melted; that’s golden when it comes to texture.
Here’s some kitchen wisdom i've learned over the years: chill your dough! it prevents shrinkage during baking. trust me, your crust will be so much more enjoyable when it keeps its shape and cradles that creamy coconut filling perfectly.
The secret to success? consistency in your mixing. you want that buttery crust to meld just right but don’t go overboard.
A few bumps are what makes it rustic and comforting.
Perfect Presentation
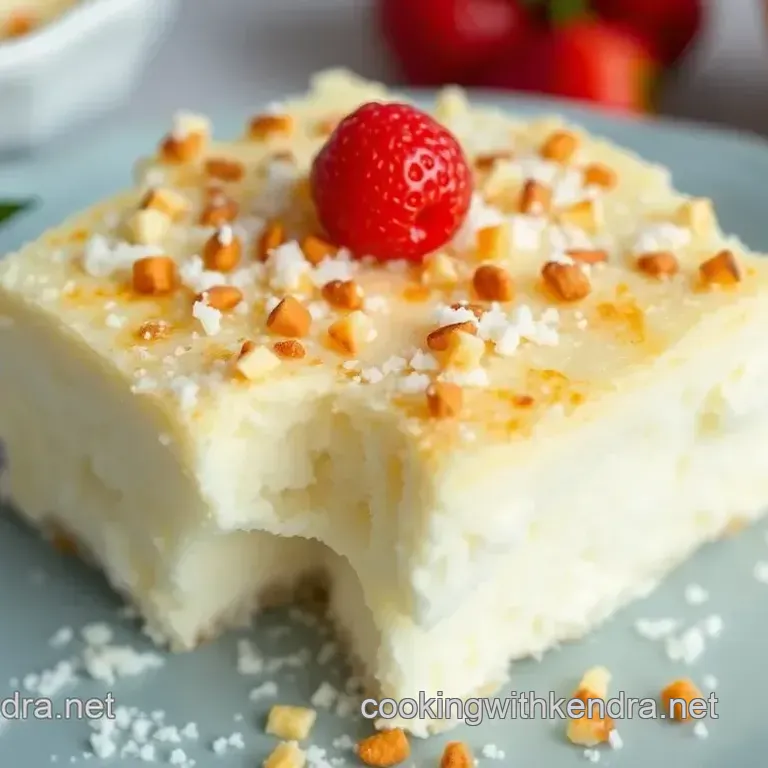
Now, let’s chat plating techniques because let’s face it; we eat with our eyes first! once your tropical dessert cools, it’s time to shine.
Slice it into perfectly even pieces, and don’t be shy with the garnish. a simple shredded coconut sprinkle or fresh mint leaves can really make it pop.
You could even serve it on a bed of fresh tropical fruit think mango or pineapple. hello, summer vibes! when it comes to visual appeal tips , colorful plates or bamboo serving dishes can transform your confection into a feast for the senses.
Storage and make-ahead
So, maybe you're planning a gathering. the great thing about this dessert is how well it keeps. for storage guidelines , keep it in an airtight container in the fridge.
It’ll stay fresh for up to five days, although it might get gobbled up much sooner than that!
Reheating instructions are simple too. if you like it warm, just pop the slices in the microwave for about 15 seconds or so.
The cooling time for pastries is essential, as it allows the filling to set perfectly. while it’s tempting to dive in right away, waiting ensures those flavors mingle just right.
Creative Variations
Let’s not box ourselves in with just one recipe. i love making flavor adaptations ! sometimes i add a splash of almond extract for a nutty twist.
Feel free to mix it up depending on the season. during the holiday season, a sprinkle of spiced cinnamon or nutmeg gives it that festive flair.
For those who are vegan or dairy-free, there are coconut cream alternatives that work beautifully in place of condensed milk.
And consider mixing in some chocolate variations for desserts . dark chocolate shavings on top? total game changer!
Complete Nutrition Guide
Now, i’m no nutritionist, but let's take a quick gander at a detailed breakdown of this dreamy dessert. a piece of our sweet tocanita packs about 200 calories , which is surprisingly reasonable.
The health benefits of using shredded coconut can’t be overlooked, either loaded with fiber and healthy fats, it’s a treat you can feel good about indulging in once in a while.
Just remember that portion guidance is key; while it’s tempting to have seconds (or thirds), moderation is the name of the game!
Expert FAQ Solutions
When diving into this delightful dish, it’s common to have questions. a frequently asked one is, “what do i do if my filling leaks out?” this can happen if it’s overcooked.
Just keep an eye on it cook time for desserts is crucial here! if all else fails, don’t stress. your culinary adventure is all about learning and your guests will love whatever you serve with a smile.
Another tip: troubleshooting your dough may require you to adjust water levels. sometimes flour absorbs differently due to humidity levels.
If it's crumbly, you can add a little more cold water to bind it.
Wrapping things up, baking the sweet tocanita isn’t just about filling your tummy; it’s about creating memories whether you’re sharing stories over slices of dessert or taking a moment to breathe in that heavenly coconut aroma wafting through your kitchen.
Try it out, savor each step and, most importantly, enjoy every luscious bite! your friends will be begging you for the recipe for generations!
Sweet Tocanita De Post