The Whopper Cake Ultimate Moist Malted Chocolate Layer Cake

- The Delicious Misunderstanding: Defining the Whopper Cake
- Elevating the Classics: Why This Malted Marvel Stands Out
- The Anatomy of Flavor: Building the Whopper Cake Components
- Required Equipment and Preparation Checklist
- Mastering the Technique: From Batter to Baked Layers
- The Construction Phase: Achieving a Professional Finish
- Extending the Experience: Customization and Care
- Frequently Asked Questions and Expert Baking Tips
- Recipe FAQs
- 📝 Recipe Card
The Delicious Misunderstanding: Defining the Whopper Cake
When this incredible creation first hits the dessert table, there’s often a delightful moment of confusion. Is it a burger? No, thankfully, we are far more interested in confectionery perfection.
The Whopper Cake is the ultimate layered tribute to those delightful, crunchy, malted milk balls we grew up loving. This is not just any Malted Milk Ball Cake Recipe ; it is a celebration of texture and deep, sophisticated flavor, pairing intensely rich dark chocolate with the distinct, slightly earthy notes of malt.
It’s rich, moist, and possesses a comforting nostalgia that elevates it above standard sheet cakes. We use the highest quality ingredients and meticulous layering techniques to create a showstopper that guarantees "oohs" and "aahs" long before the first slice is served.
Elevating the Classics: Why This Malted Marvel Stands Out
This isn't merely a Chocolate Malted Milk Ball Cake —it is engineered for optimal flavor. While many standard chocolate cakes can be dry or lack depth, our method ensures a supremely moist crumb, thanks to the addition of hot liquid and buttermilk.
The complexity lies in achieving a perfect balance: ensuring the robust cocoa flavor doesn't completely overwhelm the delicate, nutty essence of the malt.
A Deep Dive into Malted Perfection
The secret ingredient here is malted milk powder, an ingredient that works wonders in both the cake and the frosting. When paired with high-quality, Dutch processed cocoa powder, the malt imparts a subtly savory note that prevents the overall experience from becoming overly sweet.
This careful flavor architecture is what transforms a simple Milk Chocolate Cake into a gourmet experience.
Setting Expectations: Layers, Frosting, and Crunch
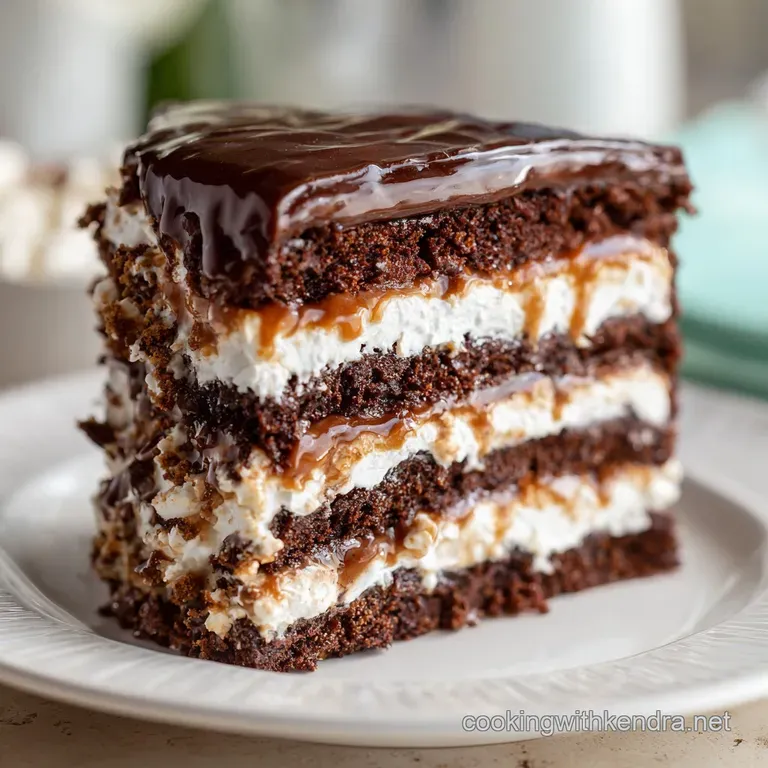
A truly great layer cake must deliver on all fronts. This structure relies on two perfectly baked eight inch layers, stacked high and held together by an extraordinarily smooth, intensely malted buttercream.
The final flourish, of course, is the signature textural component: a generous blanket of crushed malted milk candies, providing that signature crunch that defines the Whopper candy cake .
The Nostalgia Factor in Every Slice
This cake is the embodiment of joyful memories. Whether you’re planning a celebratory event or need a spectacular centerpiece, this Whopper birthday cake serves up a generous slice of childhood comfort, wrapped in an elegant presentation.
It’s familiar enough to be universally loved, yet refined enough to impress even the most discerning dessert critic.
The Essential Structure of the Whopper Cake
The foundation is built on a specialized dark chocolate sponge, designed to stay wonderfully moist. It uses a combination of baking soda and baking powder to ensure a good rise and features buttermilk for tenderness.
The total production time is just under three and a half hours, accounting for essential cooling and chilling phases necessary for impeccable assembly.
The Anatomy of Flavor: Building the Whopper Cake Components
Creating this masterpiece requires three distinct components, each playing a vital role in the final flavor profile. For the sponge, we incorporate two full cups (400g) of granulated sugar and two cups (250g) of sifted all-purpose flour, balanced by the 75g of rich, unsweetened cocoa.
The richness and moisture are secured by using a neutral oil alongside a cup (240ml) of full fat buttermilk, which reacts beautifully with the leavening agents. Crucially, the liquid component finishes with a cup of hot black coffee, which is essential for "blooming" the cocoa and intensifying the chocolate flavor.
The Malted Chocolate Buttercream requires 225g of very soft butter and a substantial 480g of sifted icing sugar. The malt flavor is driven home by a generous half cup (60g) of malted milk powder, combined with a quarter cup (25g) of cocoa for colour and depth.
A touch of whole milk ensures the frosting is silky and perfectly spreadable. Finally, the garnish involves 170g of crushed malted milk candies for that satisfying textural contrast.
Required Equipment and Preparation Checklist
To properly execute this stunning Malted Milk Chocolate Cake , preparation is key. We designate the difficulty as medium, primarily due to the precision required in measurement and assembly.
You will need a stand mixer (fitted with a paddle attachment) or a reliable electric hand mixer, two 8 inch round cake tins, parchment paper for lining, and an offset spatula, which is non-negotiable for achieving a smooth frosting finish.
Malt Magic: Choosing the Right Powder
When selecting your malted milk powder, aim for a fine, standard variety. While some brands are pre-sweetened, the key is the particle size; extra fine powder incorporates best into the buttercream without leaving a gritty texture.
The Deep Chocolate Base: Achieving Richness with Cocoa
For the cake layers, using a high-quality Dutch processed cocoa powder is an expert tip often overlooked. Dutch processing neutralizes some of the acidity found in natural cocoa, resulting in a darker, richer color and a smoother, more intense chocolate flavor that pairs impeccably with the malt.
Troubleshooting Temperature: Why Room Temp Ingredients Matter
As part of the process of How To Make Malt Ball Cake , ensuring your eggs, buttermilk, and especially the butter for the frosting are at true room temperature is vital. In the cake batter, room temperature buttermilk emulsifies easily with the oil and eggs, leading to a homogenous batter.
In the frosting, soft butter whips up light and airy, avoiding a grainy, separated texture.
Essential Tools for Layering and Decoration
Beyond the mixing implements, a wire cooling rack is essential for allowing air circulation during the cooling process, preventing the dreaded soggy bottom. A serrated knife will be needed to level the cake tops, preparing them for the crisp assembly phase.
Related Recipes Worth Trying
- Zesty Lemon Raspberry Swirl The Ultimate Homemade Swirled Easter Cake — Serve this stunning Swirled Easter Cake Our easy raspberrylemon ripple creates beautiful pastel colours in a moist almond sponge A proper yummy Easter dessert
- The Ultimate Fluffy Pancake Puppies Recipe Crisp Golden — Recreate the iconic diner treat These homemade Pancake Puppies are golden crisp fried pancake bites incredibly fluffy inside and covered in cinnamon sugar...
- Decadent Salted Caramel Cheesecake Cupcakes with Homemade Sauce — These Salted Caramel Cheesecake Cupcakes are pure indulgence Get the secret to perfectly smooth creamy individual treats topped with liquid gold homemade...
Mastering the Technique: From Batter to Baked Layers
The baking phase of this recipe is surprisingly straightforward, classifying it as an Easy Chocolate Cake in terms of mixing, but demanding precision in baking time.
The oven should be preheated accurately to 350°F (175°C) and the tins diligently prepped with grease, flour, and parchment circles to guarantee easy release.
Mixing the Batter: The Secret to a Tender Crumb
We begin by combining the dry ingredients flour, sugar, leaveners, salt, and cocoa in the mixer bowl. Once these are unified, we introduce the room temperature wet ingredients: eggs, buttermilk, oil, and vanilla. Mix only on low speed until just combined.
The critical final step is incorporating the hot coffee. Pouring this hot liquid into the thin batter "blooms" the cocoa, resulting in maximum flavour extraction and providing the crucial moisture needed for the cake’s renowned tenderness. The final batter will be very thin, which is exactly right.
The Malted Buttercream Method
The quality of the frosting determines the cake’s success. Start by beating the soft butter until it is noticeably lighter in color and texture (about three minutes). Then, gradually introduce the sifted icing sugar, malt powder, and cocoa. Sifting is crucial here to prevent lumps.
After incorporating the bulk of the dry ingredients, beat the mixture on medium high speed for a final minute, adding the vanilla and milk (starting with three tablespoons) until the buttercream is light, fluffy, and holds a beautiful peak.
The Construction Phase: Achieving a Professional Finish
Once your delicious layers are baked (30– 35 minutes) and completely cooled which takes around 90 minutes after baking the real artistry begins. Patience during the cooling stage prevents the frosting from melting or sliding off.
Leveling and Crumb Coating: Preparing for Adornment
The first step in construction is leveling the cakes using a serrated knife to remove any domes, ensuring a perfectly stable stack. Place the first layer on the serving plate and apply a thin, even layer of the malted buttercream.
Stack the second layer and apply a very thin layer of frosting all around the cake this is the crumb coat. Its purpose is to trap any loose crumbs against the cake surface.
Chilling the cake for 20 minutes with this initial coat is mandatory; it solidifies the base, preparing it for a smooth, flawless final application.
The Grand Finale: Stacking and Decorating the Cake
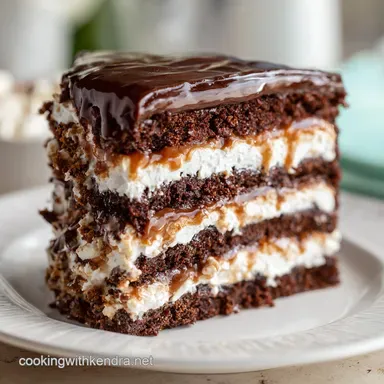
Once the crumb coat is firm, apply the remaining buttercream in a thick, even layer. Use your offset spatula to smooth the sides and top for that professional bakery look. Finally, the fun part: gently press the roughly crushed malted milk candies (the namesake Whoppers) around the sides, paying special attention to the base, and sprinkle the remaining pieces liberally over the top.
The visual appeal of this Whopper candy cake is instantly striking. Allow the completed cake to sit at room temperature for about 30 minutes before serving to ensure the buttercream is perfectly softened and at peak texture.
Extending the Experience: Customization and Care
This recipe provides a fantastic foundation, but there are always ways to adapt it to taste or dietary needs. For a richer, more complex flavor profile, consider adding two tablespoons of coffee liqueur, such as Kahlúa, to the buttermilk mixture for the cake batter.
Alternatively, replace some of the buttercream decoration with a simple malted milk chocolate ganache for a luxurious, glossy drip effect down the sides. For those seeking a deeper chocolate hit, a dark chocolate chip inclusion (half a cup) in the batter adds a melt-in-your mouth surprise.
Frequently Asked Questions and Expert Baking Tips
Achieving success with a layer cake often comes down to mastering a few key details. Here are answers to common questions and essential baking advice for your Malted Milk Chocolate Cake .
Keeping it Fresh: Storage and Freezing Advice
The cake, once frosted, should be stored in an airtight container at room temperature for up to three days, though the quality is best within 48 hours. If you need to store it longer, it can be refrigerated for up to five days.
Crucially, always bring the refrigerated cake back to room temperature (about one hour) before serving for the best flavor and texture. Unfrosted cake layers freeze exceptionally well for up to three months when wrapped tightly in plastic wrap and foil.
dairy-free and gluten-free Alternatives
This recipe can be adapted for dietary needs. For a gluten-free version, substitute the all-purpose flour with a high-quality 1:1 gluten-free baking blend that already contains xanthan gum.
If you need to make the cake dairy-free, use a non-dairy substitute for buttermilk (such as almond milk mixed with vinegar) and a quality plant based butter substitute in the frosting.
Baking Troubleshooting: Common Mistakes and Fixes
If your cake layers stick to the pan, the most common culprit is skipping the parchment paper or not properly greasing and flouring the edges. If your buttercream is grainy, the butter likely wasn't soft enough, or the sugar wasn't sifted.
You can often fix grainy frosting by adding an extra teaspoon of warm milk and beating rapidly for 30 seconds to dissolve any residual sugar granules. Remember that the thinness of the initial batter is correct don't be tempted to add extra flour, as this will result in a dense cake.
Serving Suggestions and Complementary Pairings
Because this is a very rich and decadent Milk Chocolate Cake , a complementary pairing should offer contrast. A slightly tart raspberry coulis or a simple scattering of fresh berries provides acidity that cuts through the richness beautifully.
Alternatively, serve slices alongside a strong cup of fresh black coffee or, for an extra treat, a scoop of salted caramel ice cream to deepen the luxurious experience.

Recipe FAQs
Crikey, what exactly is a Whopper Cake? Is it a giant burger made of sponge?
Good heavens, no! While the name might raise an eyebrow, this isn't a savoury cake disaster. The Whopper Cake is named after the malted milk ball candies, meaning this layer cake is intensely rich with chocolate and infused with those classic, comforting malt notes it’s basically nostalgia in cake form.
It’s designed to be a magnificent showstopper, perfect for a proper afternoon tea spread or a special celebration.
Help! My Whopper Cake batter is really liquidy; have I gone wrong somewhere?
Panic not, mate! That very thin consistency is spot on and actually the secret to a beautifully moist cake. The recipe calls for hot liquid (coffee or water), which helps "bloom" the cocoa powder, releasing maximum flavour while ensuring the final crumb isn't dry or dense.
Just pour it carefully into your prepared tins and trust the process it works a treat!
I can't find specific malt powder can I use Horlicks or Ovaltine in the buttercream instead?
Yes, absolutely! Horlicks is spot on for that authentic, classic malt flavour, especially if you’re aiming for the most robust taste profile. If you opt for Ovaltine, which often contains added cocoa and sugar, you might want to slightly reduce the amount of cocoa powder or icing sugar in the frosting to ensure the sweetness doesn't become overwhelming.
Either way, the malt flavour will shine through!
I’ve got a bit left over, how long will this magnificent malt cake keep fresh?
If kept covered in an airtight container, this cake will be lovely for up to three days at cool room temperature; malted cakes tend to stay moist quite well due to the oil and buttermilk content.
If you need it to last longer, you can store it in the fridge for up to a week, but remember to bring it back to room temperature before serving for the best texture nobody wants a cold, firm slice of cake!
Any expert tips for making sure my cake layers bake up nice and flat?
A few tricks of the trade here! To avoid a massive dome, wrap wet baking strips (easily found online) around the outside of your tins; they insulate the edges and force the cake to rise evenly.
Alternatively, ensure your oven temperature is stable, or simply wait until the layers are completely cool and use a long serrated knife to carefully slice off the tops. It’s not cheating, it’s cake engineering!
The Ultimate Whopper Cake Recipe
Ingredients:
Instructions:
Nutrition Facts:
| Calories | 402 kcal |
|---|---|
| Protein | 6.2 g |
| Fat | 17.7 g |
| Carbs | 39.2 g |
| Fiber | 6.2 g |
| Sodium | 4381 mg |
