Turkey Cooking Basting: Double Action
- Time: Active 45 minutes, Passive 3 hours, Total 3 hours 45 mins
- Flavor/Texture Hook: Shatteringly crisp skin with herb infused, velvety meat
- Perfect for: Stress free holiday hosting and big family gatherings
- Unlocking Juiciness with Turkey Cooking Basting
- The Physics of the Glistening Skin
- Essential Timings and Performance Metrics
- The Ultimate Holiday Shopping List
- Must Have Tools for Success
- Mastering the Oven Rotation Steps
- Fixing Mistakes and Saving Dinner
- Simple Dietary Substitution Ideas
- Storage and Leftover Magic
- Winning Presentation and Serving Ideas
- Turkey Cooking Basting FAQs
- 📝 Recipe Card
Unlocking Juiciness with Turkey Cooking Basting
The aroma of sizzling butter hitting fresh rosemary is basically my favorite part of the holidays. I still remember my first time hosting Thanksgiving; I was so terrified of serving a dry bird that I hovered over the oven like a nervous hawk.
I’d seen my grandmother use a bulb baster every twenty minutes, and I thought that was the only way. But after years of trial and error, I realized that just splashing liquid on the outside isn't enough. You have to work from the inside out and the outside in.
Today, we are moving past those sad, pale turkeys of the past. We’re talking about a glistening, mahogany colored centerpiece that actually tastes as good as it looks. It’s all about the fat to flavor ratio and knowing exactly when to leave the oven door shut.
Trust me, once you try this clarified butter technique, you'll never go back to plain old melted sticks. Let's get into how we make this happen without losing our minds in the kitchen.
You’re going to love how the smoked paprika and fresh thyme play together. It’s not just about moisture; it’s about building layers of flavor that soak into every fiber of the meat.
We aren't just roasting a bird; we are engineering a masterpiece of comfort food that your family will be talking about until next year. It's simpler than it looks, and honestly, the process is actually pretty relaxing once you get the rhythm down.
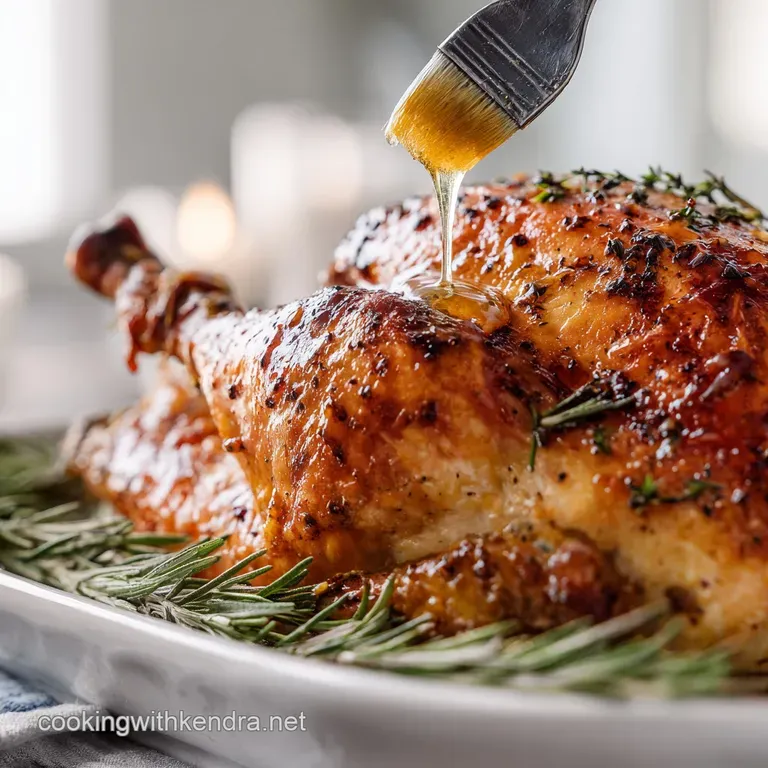
The Physics of the Glistening Skin
Lipid Induced Heat Transfer: Clarified butter has a higher smoke point and lower water content than standard butter, allowing it to fry the skin surfaces at a higher temperature.
This constant application of fat facilitates the Maillard reaction, ensuring a shatteringly crisp texture instead of a soggy, steamed finish.
| Roast Style | Cooking Time | Skin Texture | Best For |
|---|---|---|---|
| Fast (High Temp) | 12-15 mins per lb | Very dark, crispy | Experienced cooks |
| Classic (Low & Slow) | 15-20 mins per lb | Evenly golden, tender | Beginners/Large birds |
| The Hybrid Method | 13-16 mins per lb | Mahogany, juicy | Maximum flavor |
If you want the most flavor, use clarified butter. If you're in a massive rush, you can use high-quality oil, but you'll lose that nutty, rich profile that makes holiday poultry so special.
Essential Timings and Performance Metrics
When we talk about turkey cooking basting, timing is everything. If you open the oven too often, the temperature drops, and you end up with a rubbery bird. I like to keep a tight schedule.
We start with a heavy injection to season the meat from within, then we focus on the exterior every forty five minutes once the skin has set.
| Component | Science Role | Pro Secret |
|---|---|---|
| Clarified Butter | Heat conductor | Brush it on cold for a thicker coating |
| Chicken Bone Broth | Internal hydration | Use warm broth to prevent fat from seizing |
| Worcestershire Sauce | Umami catalyst | Enhances the natural "meatiness" of the turkey |
| Smoked Paprika | Color booster | Provides that "perfect" red gold hue |
Chef's Tip: Freeze your herb butter mixture for about 10 minutes before you start. It should be the consistency of soft peanut butter, which helps it "grip" the turkey skin instead of just sliding right off into the pan.
One thing I've learned the hard way: always dry the bird with paper towels until it's bone dry. If the skin is damp, your butter won't stick, and you'll end up steaming the meat rather than roasting it. It's a small step that makes a massive difference in the final crunch.
The Ultimate Holiday Shopping List
You’ll need to grab a few specifics to make this work. Don't skip the bone broth for the injection; the collagen in it helps keep the meat silky. I always tell my friends to look for a 13 lb whole turkey because it fits in almost any standard roasting pan and cooks much more evenly than those massive 20 pounders.
- 13 lb whole turkey: Make sure it's fully thawed and the giblets are gone.
- 1/2 cup chicken bone broth: This is the base for our internal moisture.
- 4 tbsp unsalted butter (melted): For the injection mix.
- 1 tbsp Worcestershire sauce: Adds a savory depth you can't get from salt alone.
- 1 tsp garlic powder & 1 tsp onion powder: Fine powders work better in injections than fresh.
- 1 tsp fine sea salt: Essential for seasoning the deep tissue.
- 1 cup unsalted butter (clarified): This is our "liquid gold" for the exterior.
- 2 tbsp fresh lemon juice: The acidity cuts through the heavy fat.
- 1 tbsp each fresh thyme & rosemary (minced): Fresh is non negotiable here.
- 1 tsp smoked paprika: For that incredible sunset color.
- Aromatics: 1 large yellow onion, 1 head garlic, 1 bunch sage, and 2 rosemary sprigs.
| Original Ingredient | Substitute | Why It Works |
|---|---|---|
| Clarified Butter | Ghee | Ghee is essentially clarified butter; it has the same high smoke point. |
| Chicken Bone Broth | Turkey Stock | Keeps the poultry flavor consistent and rich. |
| Smoked Paprika | Liquid Smoke (2 drops) | Provides a similar depth, but use very sparingly. |
If you are looking for a different vibe for your next gathering, this flavor profile is actually quite similar to the savory notes in my Green Chili Chicken recipe. Both rely on a strong liquid base to keep the protein from drying out during a long bake.
Must Have Tools for Success
You don't need a professional kitchen, but a few specific tools will make this so much easier. First, get a meat injector. It looks like a giant syringe and is the only way to get that broth and butter into the center of the breast.
A bulb baster is classic, but I actually prefer a silicone pastry brush for the exterior. It gives you way more control over where the fat goes.
Fat and Skin Science
Basting isn't just about moisture; it's about the "wash" effect. Every time you pour fat over the bird, you are replenishing the surface oils that have evaporated. This keeps the skin supple so it can stretch as the meat expands, preventing those unsightly tears in the middle of your presentation.
The Internal Injection Mix
This is the "secret sauce" for the inside. Combine the 1/2 cup broth, 4 tbsp melted butter, Worcestershire, and the dry spices. The goal is to create a thin, savory liquid that can easily pass through the needle without clogging.
Exterior Glistening Sauce
The exterior baste is much thicker. We combine that beautiful clarified butter with the fresh herbs and lemon. If you find the butter is too thin, let it sit on the counter for a few minutes. It should be glossy and pourable but have enough body to coat the bird.
Essential Cavity Aromatics
Don't just leave the inside empty! Stuffing the onion, garlic, and sage into the cavity creates a "flavor steam" that seasons the bird from the inside out. It's like an aromatic spa treatment for your turkey.
Mastering the Oven Rotation Steps
- Prep the turkey. Pat the 13 lb turkey completely dry inside and out. Note: This ensures the skin gets crispy rather than rubbery.
- Mix the injection. Combine the broth, 4 tbsp melted butter, Worcestershire, garlic powder, onion powder, and salt.
- Inject the bird. Use your syringe to deliver the liquid into the thickest parts of the breast and thighs. Inject until the meat slightly plumps up.
- Stuff the cavity. Insert the quartered onion, halved garlic head, sage, and rosemary sprigs into the turkey.
- Prepare the baste. Stir together the clarified butter, lemon juice, minced herbs, and smoked paprika.
- Initial coat. Brush a generous layer of the butter mixture over the entire turkey.
- Start roasting. Place the turkey in a preheated oven (175°C / 350°F) and cook for the first 45 minutes undisturbed.
- The Basting Cycle. Every 45 minutes, quickly open the oven and brush more butter mixture over the bird. Roast 3 hours total until the skin is mahogany and glistening.
- Temperature Check. Insert a probe into the thickest part of the thigh. Cook until it hits 74°C (165°F) and the juices run clear.
- The Rest. Remove the bird from the oven and let it sit for at least 30 minutes. Note: This allows the juices to redistribute so they don't flood the cutting board.
Fixing Mistakes and Saving Dinner
We've all been there the skin is burning, but the inside is still raw. Or maybe the basting liquid is just pooling in the bottom of the pan. Don't panic. Most turkey issues are easily fixed if you catch them early. If the skin is getting too dark, just tent it loosely with foil.
Skin Not Browning
If your bird looks pale after two hours, your oven might be running cold, or you didn't use enough paprika. Increase the heat by 15 degrees for the last half hour and give it a heavy brush of the clarified butter.
Basting Liquid Runoff
If the butter is just sliding off into the pan, the skin might still be too cold or too wet. Use a paper towel to dab the spots where the butter won't stick, then try again. The fat needs a dry surface to "grip."
| Problem | Root Cause | Solution |
|---|---|---|
| Dry Breast Meat | No internal injection | Focus basting on the breast and use foil tents earlier. |
| Soggy Skin | Oven temp too low | Increase heat and stop basting 20 mins before finishing. |
| Burned Herbs | Mincing too coarse | Strain the butter if herbs are charring too quickly. |
Common Mistakes Checklist:
- ✓ Forgot to thaw the turkey (it takes days, not hours!).
- ✓ Basting too often (opening the door kills the oven heat).
- ✓ Not using a meat thermometer (visual cues can be deceiving).
- ✓ Skipping the resting period (your meat will be dry as a bone).
- ✓ Ignoring the cavity aromatics (you're missing 30% of the flavor).
Simple Dietary Substitution Ideas
If you're cooking for a crowd with different needs, it's easy to tweak this turkey cooking basting method. The biggest hurdle is usually the butter. Luckily, there are some great swaps that don't sacrifice that "shatter crisp" skin we are looking for.
To scale this down for a small gathering, you can use the same injection and baste on a turkey breast instead of a whole bird. Reduce the cook time by about 50%, but keep the basting intervals the same.
If you are going big and roasting a 20 lb bird, increase your liquid ingredients by 1.5x, but don't double the salt it can become overwhelming.
- For half size birds: Use 60ml broth and 1/2 cup butter.
- For double size birds: Use 180ml broth and 1.5 cups butter.
- For smoked versions: See our How to Smoke recipe for temperature adjustments.
| Requirement | Substitute | Flavor Impact |
|---|---|---|
| dairy-free | Refined Coconut Oil | Great crispness, very mild tropical scent. |
| Low Sodium | Low sodium broth + no salt | Relies more on herbs for flavor; less "punchy." |
| Garlic Free | Asafetida (pinch) | Provides a similar savory note without the garlic. |
Storage and Leftover Magic
Freshly roasted turkey is a dream, but let's be real the leftovers are legendary. Store your carved turkey in an airtight container in the fridge for up to 4 days. If you want to freeze it, wrap it tightly in foil and then a freezer bag; it'll stay good for 3 months.
To reheat without drying it out, put the meat in a baking dish with a splash of broth, cover with foil, and warm at 150°C.
Don't you dare throw away that carcass! The bones are packed with flavor from the turkey cooking basting process. Toss them in a big pot with water, some celery, and carrots to make the best stock you've ever had. You can even use the leftover meat to upgrade a Broiled Turkey Avocado recipe for a quick lunch the next day. It’s a great way to use up every bit of that hard work.
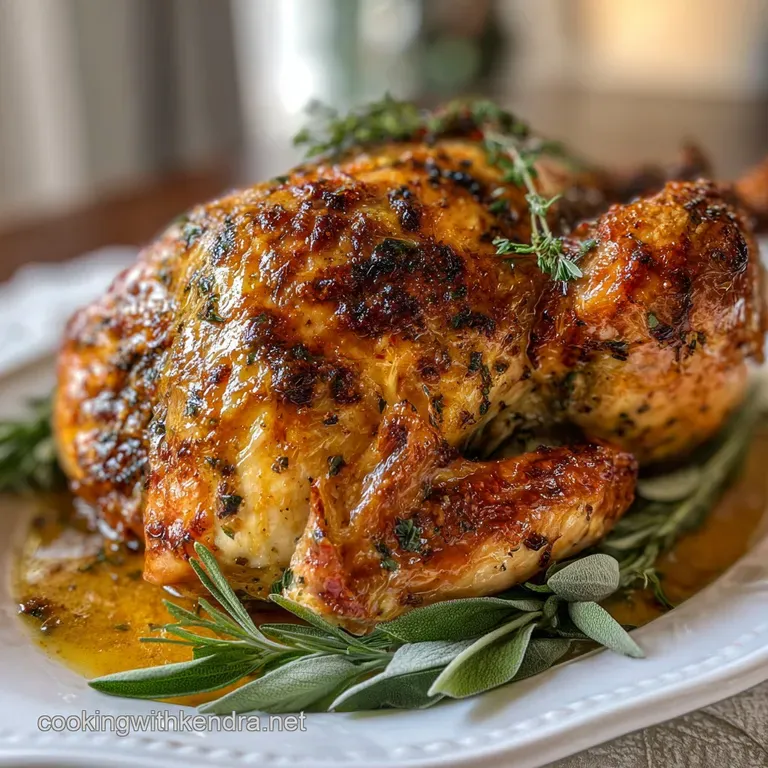
Winning Presentation and Serving Ideas
When it's time to serve, don't just hack away at the bird. Let it rest! This is the most important part. If you cut it too soon, all that beautiful moisture you basted into the meat will just run out. I like to garnish the platter with fresh sprigs of sage and rosemary to echo the flavors inside the bird.
Smoked Turkey Variation
If you have a smoker, this recipe translates beautifully. The clarified butter and smoked paprika actually help the smoke "stick" to the skin. You'll get a deeper color and a more intense wood fired flavor.
dairy-free Options
If you are skipping the butter entirely, use a high-quality olive oil for the exterior. It won't have the same "milky" richness, but it will give you a very clean, crisp finish that highlights the herbs perfectly.
Presentation Tips
Place the bird on a bed of roasted root vegetables. Not only does it look rustic and beautiful, but the veggies will soak up any of the herb butter drippings that escape during carving. It's an instant side dish that tastes like pure holiday magic. Right then, let's get that oven preheated and start prepping!
Trust me on this your family is going to be impressed.

Turkey Cooking Basting FAQs
Should I baste my turkey while cooking?
Yes, if you want the best flavor and texture. Basting helps keep the skin moist and crisp while the meat cooks, and allows you to add flavor to the exterior.
What is a good basting for turkey?
Clarified butter with herbs and spices is excellent. Using clarified butter prevents burning and adds richness, while fresh herbs like rosemary and thyme, plus a pinch of paprika, infuse flavor.
Is it better to rub a turkey with butter or olive oil?
Butter generally offers richer flavor and better browning. While olive oil can work, butter, especially clarified, has a lower smoke point and helps achieve that desirable mahogany color and crisp skin.
Does basting a turkey make it more moist?
Yes, external basting contributes to moisture retention, but internal methods are key. While basting keeps the surface moist and helps prevent drying, injecting the bird with broth or butter is more effective for deep moisture.
How often should I baste my turkey?
Every 30-45 minutes after the initial cooking period. Basting too frequently can lower the oven temperature and prolong cooking time; let the skin set first before starting your basting cycle.
Can I use chicken broth for basting?
Yes, chicken broth works well, especially for injections. For external basting, combining it with fat like butter is best for browning and flavor; for internal injections, it's a great way to add savory moisture, similar to how we use it in Chicken and Vegetable Soup: Easy, Hearty Homemade Recipe.
What liquid is best for injecting into a turkey?
A mixture of chicken bone broth and melted butter is ideal. The bone broth adds deep savory flavor and moisture, while the butter enriches the meat and aids in tenderization, much like the fat ratios used in How to Make the Best Grilled Turkey Burger with BBQ Peach Flavor to ensure juiciness.
Turkey Basting Method

Ingredients:
Instructions:
Nutrition Facts:
| Calories | 692 kcal |
|---|---|
| Protein | 88.6 g |
| Fat | 34.1 g |
| Carbs | 1.9 g |
| Fiber | 0.3 g |
| Sugar | 0.4 g |
| Sodium | 288 mg |
