Turning Dark Wood Cups: Creating Handmade Rustic Beauty
- Turning Dark Wood Cups: Creating Handmade Rustic Beauty
- Your Go-To Guide for Essential Cooking Ingredients
- Turning Dark Wood Cups: Creating Handmade Rustic Beauty
- Pro Tips & Secrets for Crafting Your Dark Wood Cups
- Perfect Presentation: Making That Cup Shine
- Storage & Make-Ahead: Keeping Your Craft Alive
- Creative Variations: Spice It Up, Baby!
- Complete Nutrition Guide: What’s in Your Handmade Wonder?
- Wrapping It Up: Get Crafting!
- Frequently Asked Questions
- 📝 Recipe Card
Turning Dark Wood Cups: Creating Handmade Rustic Beauty
Oh my gosh, let me take you back to a chilly saturday morning a while ago. i stumbled into my garage, sipping on my coffee, and spotted a stack of dark hardwood i had snagged at a flea market.
The rich grain whispered potential to me i could almost hear it saying, “turn me into something lovely!” that’s how i found myself diving into the world of woodturning.
So let’s chat about turning dark wood cups | handmade beauty and how this satisfying craft can brighten up your kitchen!
The Art of Woodturning
You ever think about how much history is packed into woodworking? this art form goes way back, with roots tracing to ancient cultures across the globe.
People have been making beautiful vessels for thousands of years. fast forward to today, turning wood cups is not just for ancient artisans anymore; it's as trendy as ever! more and more folks are hopping on board with handmade wood crafts , especially when they can create something both functional and beautiful.
Now, don’t sweat it if you’re a beginner. this project sits at a medium difficulty level , making it accessible for those still getting cozy with woodworking tools .
With about 2 to 3 hours on your hands including drying time for those finishes you’ll soon find yourself the proud owner of 2 to 3 stunning dark wood cups that look straight out of a rustic kitchen magazine!
Why Craft Dark Wood Cups?
Seriously, what's not to love? Not only do these cups heighten your drinkware game, but they also come with a pile of perks. Let’s break it down.
Health benefits: opting for handcrafted drinkware means you’re keeping chemical laden plastics at bay and going for something natural and safe.
Plus, with food safe finishes for wood , you don’t have to stress about any icky stuff leaching into your sips.
Uniqueness: every piece of wood has its own story can you imagine your guests’ reactions to those gorgeous unique wood grain patterns ? it’s like serving a drink in a little piece of nature.
Special occasions: whether you're hosting a cozy dinner party or giving a thoughtful gift, these cups serve beautifully for both homemade tea and fancy cocktails.
Trust me, they’ll be the talk of the town!
And guess what? You’re also practicing sustainable woodworking practices by creating something that doesn’t harm the environment. A total win-win!
Ready to Get Crafting?
So, are you feeling the vibe yet? imagine your new artisan crafted vessels on display or wrapped up as a personalized handmade gift for that special someone.
It’s functional art at its finest! not to mention, if you ever find yourself in a pinch for a unique gift, these cups will definitely level up your present giving game.
Before we roll up our sleeves and dive into the actual crafting, let’s gather what we need. not to worry! we’ll walk through those woodworking tools and gather the ingredients for our dark wood cups next.
Get your energy up. this is where we’ll catch some serious woodturning vibes and make those rustic beauties come to life!
Your Go-To Guide for Essential Cooking Ingredients
So, let’s talk about those game changing ingredients that can make or break your cooking experience. whether you’re a master chef or just trying to whip up a decent dinner, having the right stuff on hand is absolutely essential .
I can’t tell you how many times i’ve been knee deep in a recipe only to realize i was missing a core component.
Talk about a buzzkill!
Premium Core Components: The Foundation of Flavor
First off, let’s get into quality ! when you're picking up ingredients like flour or spices, ever notice that some brands just kick it up a notch? look for freshness indicators like expiration dates or well sealed packaging.
Here’s a quick cheat sheet:
- Flour : Preferably whole grain or unbleached. Store in a cool, dark place for up to 1 year .
- Spices : They lose potency pretty fast. If they’ve been sitting in your cupboard for more than 6 months , throw them out.
And it’s not just about freshness. you gotta pick the right stuff. when choosing produce, go for bright colors and firm textures.
Seriously, a good tomato can transform a basic salad into a taste explosion .
Signature Seasoning Blend: The Flavor MVP
Now, let’s spice things up! Having your own signature seasoning blend is like having a superpower in the kitchen. You can mix it up with:
- Essential spices : A combo of paprika, garlic powder, and cumin is my go-to!
- Herbs : Fresh basil and parsley can brighten up any dish. Always check for vibrant colors!
And don’t forget about regional variations. If you’re cooking something Southern, throw in a little cayenne for that kick. Honestly, experimenting with seasonings is half the fun!
Smart Substitutions: Your Kitchen Hack
Life happens, right? You might not have all the traditional ingredients at your fingertips. Smart substitutions can save the day!
- Common alternatives : No buttermilk? Mix some milk with lemon juice. Voila!
- Dietary modifications : gluten-free? Use almond flour instead of regular flour.
- Emergency replacements : Out of eggs? Use flaxseed or applesauce trust me, it works!
And hey, go seasonal! When tomatoes are in season, they taste amazing . But during winter? Maybe it’s time for some hearty root veggies instead.
Kitchen Equipment Essentials: The Right Tools
You wouldn’t be playing baseball with a tennis racket, would ya? The same goes for cooking! You need the right tools:
- Must have tools : A solid chef's knife, good steak knives, and plenty of pots and pans (cast iron, anyone?).
- Alternative options : Don’t have a whisk? A fork will do just fine.
And remember, storage is just as important as cooking. Keep your equipment organized and clean nothing worse than searching for a spatula at the bottom of a kitchen drawer!
So, you’re all set! with your ingredients prepped and your tools on hand, you’re ready to dive into creating your masterpiece.
Whether you're turning dark wood cups for that rustic beauty or whipping up a delightful dish, the time and care you put into sourcing your ingredients and tools really shows.
Just like crafting those beautiful handmade wood crafts , your cooking is all about art and soul.
Now that you’re fully stocked and prepped, let’s dive into the step-by-step instructions for turning dark wood cups and creating those rustic beauties that will have everyone asking, “where did you get those?”.
Ready? let’s get to it!
Turning Dark Wood Cups: Creating Handmade Rustic Beauty
Ah, the charm of turning dark wood cups ! there's just something special about crafting your own rustic kitchenware that speaks to the heart.
Each cup tells its own story, displaying unique wood grain patterns that can turn any ordinary drink into an experience.
I mean, come on who wouldn’t want a beautifully handcrafted beverage container just sitting on their kitchen shelf? let’s dive into the essential prep steps and expert techniques to create your very own wooden cups!
Essential Preparation Steps
First things first, let’s talk about mise en place . this fancy french term just means having everything organized and ready to go.
Gather your tools lathe, chisels, and all that jazz. and hey, don’t forget to put on your safety goggles.
Trust me; you’ll want those bad boys to avoid any flying wood chips piercing your eyeball like tiny missiles!
Next, let’s get our time management game on. preparing the wood should take you about 30 minutes . this includes selecting a lovely block of dark hardwood like walnut or mahogany.
Oh, and a little tip: inspect for knots or imperfections because they can mess with your beautiful cup design later on.
You’ll also want to keep your workspace organized. a cluttered area can lead to accidents, especially when working with power tools.
Keep everything within arm's reach, and make sure you have safety equipment like a dust mask. nobody needs to breathe in wood dust!
Step-by-step Process
Now, grab that dark hardwood block; let's get to turning! Here's a simple breakdown of the process:
Select Your Wood: Choose your desired block. Aim for about 6"x6"x3" of wood to get started.
Prepare Your Workspace: Set up your lathe securely. Make sure it’s stable and ready to rock!
Mount the Wood Block: Attach the block to the lathe. Use proper techniques to ensure it won’t fly off while spinning.
Rough Shape the Cup: Start with a roughing gouge to create a cylindrical shape. Keep it steady!
Hollow the Cup: Switch to a bowl gouge and hollow out the interior. Aim for a thickness of about 1/4 inch .
Fine tune the Shape: Use that skew chisel to refine the edges and make everything look snazzy.
Sand the Surface: Gradually use sandpaper from 120 to 320 grit . Say goodbye to tool marks!
Finish the Cup: Apply a food safe finish or mineral oil. Allow it to dry completely.
Final Inspection: Check for rough spots. Sand them down if needed for a smooth finish.
Enjoy Your Creation: Once it’s dried, show those cups off like the champion woodworker you are!
Expert Techniques
Okay, here come the advanced woodworking techniques . always remember to use high-quality wood for the best results. cheaper woods can warp and lead to a less than-beautiful cup.
When it comes to finishing, ensure you’re using food safe finishes . you wouldn’t want your drinkware to leach harmful stuff, right?
And a little quality checkpoint tip: regularly check your work for symmetry. a balanced cup not only looks aesthetically pleasing but is also more functional.
Don't forget, even seasoned woodworkers make mistakes, so keep some troubleshooting tips in mind. if you hit any bumps, step back, reassess, and power through!
Success Strategies
Lastly, let's talk about what to avoid in your woodworking journey. one common mistake is rushing through the sanding process.
I get it the excitement can make us skip steps, but don’t! take your time for that smooth finish.
And for a little quality assurance , make sure to try your cup out with a hot beverage after finishing.
If it holds up, pat yourself on the back. if not, remember that woodworking is a journey. embrace every lesson learned!
As you navigate this beautiful journey of crafting wooden cups , think of the satisfaction when you see your handcrafted creations on display.
Nothing beats the joy of sharing them with friends as artisanal drinkware, serving hot herbal teas or refreshing smoothies.
Stay tuned for the next section where we delve deeper into Additional Information about stunning wooden creations and how to enhance your woodworking skills even further!
Pro Tips & Secrets for Crafting Your Dark Wood Cups
Okay, let’s dish out some pro tips and secrets to elevate your dark wood cup game! first off, when you’re turning dark wood cups, remember that patience is key .
This isn’t just about making something; it’s about creating a piece of art. take your time with the lathe. when you’re using those woodworking tools, a steady hand means fewer big mistakes , and trust me, we want to avoid that awkward moment when a cup comes out looking more like a wonky ufo than a cool drink vessel!
Now, if you’re short on time, prepping your workspace can save you hours later on . set up everything before you start.
Have your wood block ready, along with your lathe, chisels, and other tools. trust me, you’ll thank yourself when you’re knee deep in wood shavings! plus, if you want to enhance the flavor er, i mean aesthetics of your project, consider scented finishes like beeswax mixed with essential oils.
It’s the little things that make a big difference!
Perfect Presentation: Making That Cup Shine
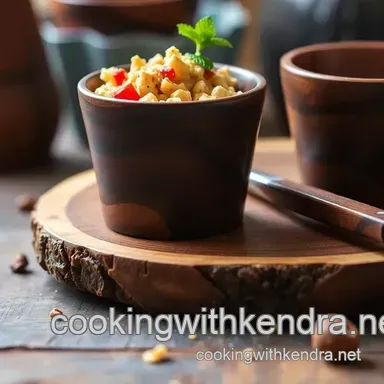
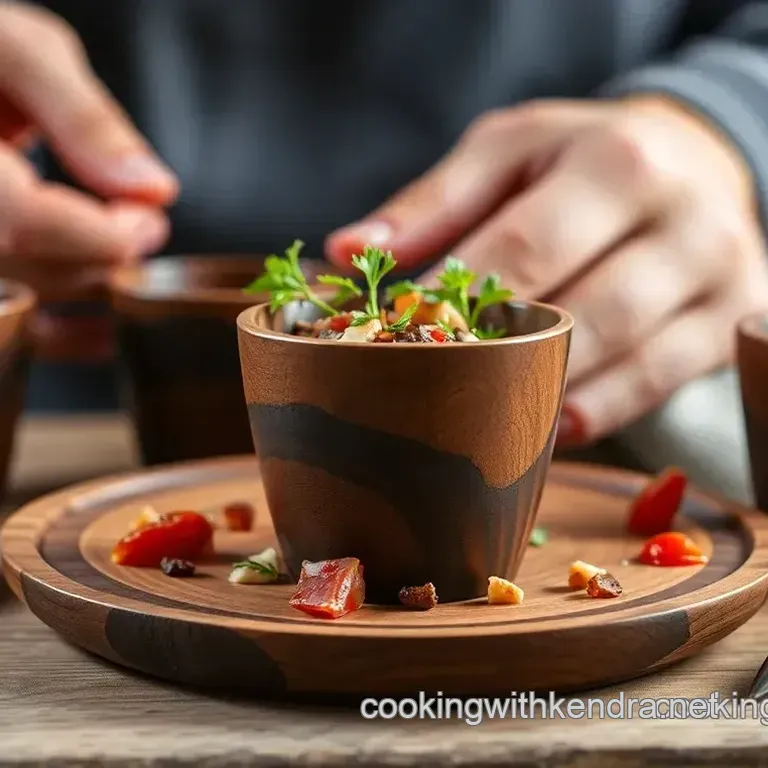
Presentation matters, folks! after you’ve created your fabulous cup, take a minute to admire it. when it comes to plating and garnishing , consider the natural beauty of your dark wood.
A simple garnish of greenery or a vibrant fruit can pop against the rich hues of your handmade drinkware. if you’re serving a drink in it, think about how the colors of the beverage contrast with the wood.
A bright, cold brew coffee looks stunning next to a rustic cup!
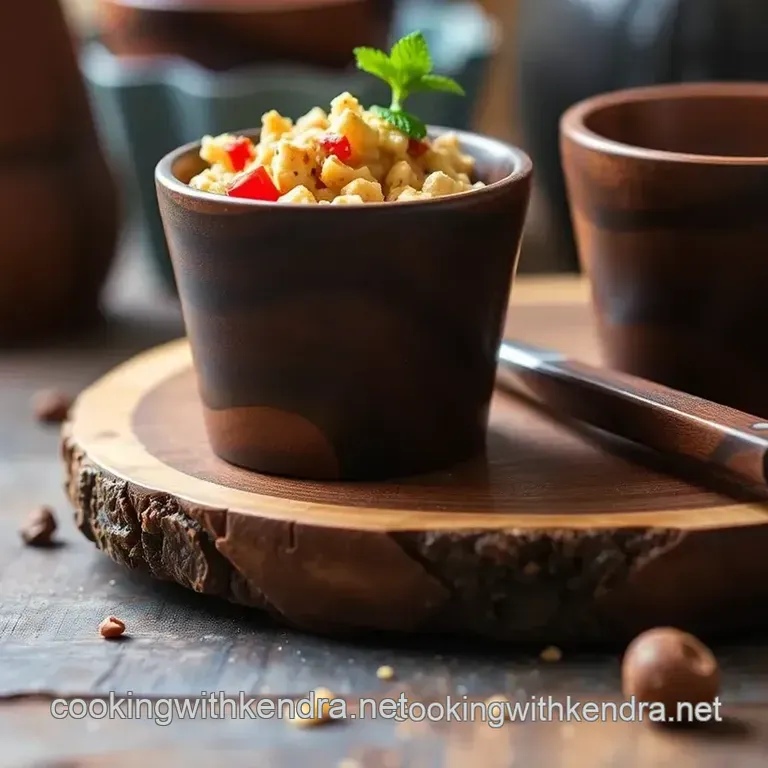
Don’t forget about color combinations ! since dark wood has such a beautiful grain, pair it with a simple, neutral tablecloth or a rustic wooden cutting board to let your craftsmanship shine.
It’s all about creating that visual appeal, making your passing guest say, "whoa, where did you get those gorgeous cups?"
Storage & make-ahead: Keeping Your Craft Alive
Keeping your cups in great shape is super important. for storage, a cool, dry place works best. avoid damp areas since moisture can warp that beautiful wood.
If you’re making these as gifts (hello, personalized handmade gifts !), finish them with food safe oils to keep them fresh, and they can be stored for weeks if not months without losing their charm.
Reheating isn't necessary with these cups, but if you make smaller wooden pieces, use a soft cloth to clean them. You want to keep that unique wood grain pattern looking sharp!
Creative Variations: Spice It Up, Baby!
Why stop at one design? go wild with the creative variations ! think about changing up the shape or size of your cups.
Do a tall, skinny cup for those trendy cocktails or a wider, shorter cup for an old-school vibe. fancy some texture? carve gentle lines into the cups, adding that artisan crafted flair.
If you’re feeling adventurous, throw in some seasonal twists with your finishes like using a darker stain in winter for that cozy vibe and lighter finishes in summer.
The possibilities are endless; each piece becomes unique , making your wooden works feel personal.
Complete Nutrition Guide: What’s in Your Handmade Wonder?
Now, let’s get down to the nitty gritty. while we’re not whipping up dinner here, your woodworking project can still be health conscious! when sealing your work, look for food safe finishes for wood .
Each cup, if crafted well with natural materials, can last you a long time, making them an eco-friendly option for your kitchen.
Kind of cool, right?
And speaking of portion guidance, these cups are perfect to serve up hearty servings of your favorite drinks without any worries of harmful chemicals leaching into your beverages!
Wrapping It Up: Get Crafting!
So there you have it, my friends! turning dark wood cups can be a fun adventure into the world of handmade beauty .
Every cup you turn carries a piece of your creativity and patience. whether you’re a newbie or have some experience under your belt, this project is all about exploration.
Don’t stress too much about perfection; enjoy the process and embrace those unique wood grain patterns that will make your pieces truly one of a kind.
So grab those woodworking tools and dive into this DIY wood cup project . You might just surprise yourself with the awesome drinkware you create. Happy turning!
Frequently Asked Questions
What materials do I need for Turning Dark Wood Cups | Handmade Beauty?
To create Turning Dark Wood Cups, you'll need a large block of dark hardwood like walnut, cherry, or mahogany, along with food safe wood finish or mineral oil for a protective coat. Don't forget the essential tools, including a lathe, wood chisels, and sandpaper in varying grits to achieve a smooth finish.
How do I ensure the cups I create are food safe?
To ensure your Turning Dark Wood Cups are food safe, use a food safe wood finish or mineral oil for sealing the wood after sanding. Always verify that the finishes are labeled as safe for items in contact with food and allow adequate drying time before use.
Can beginners make Turning Dark Wood Cups?
Yes, beginners can absolutely make Turning Dark Wood Cups, but they should have some basic familiarity with woodworking tools and lathe operation. Taking your time and practicing with different techniques will enhance your skills, and starting with softer woods can help ease the learning curve.
What are some tips for achieving the best finish on my wood cups?
To achieve the best finish on your Turning Dark Wood Cups, start with the coarsest sandpaper and gradually work your way to finer grits (up to 320). Ensure that you sand evenly and check for symmetry frequently.
Applying a couple of coats of your chosen finish, allowing each coat to dry fully, can also enhance the natural beauty and durability of the wood.
How should I store my handmade wood cups?
Store your handmade wood cups in a cool, dry place away from direct sunlight to prevent warping and fading. If you use them frequently, clean them with mild soap and water, and reapply food safe finish as needed to maintain their quality and appearance.
Can I customize the shape or size of my wood cups?
Absolutely! You can customize the size and shape of your Turning Dark Wood Cups to suit your preferences, such as making them taller, wider, or with unique designs. Experimenting with different styles can add a personal touch to your creations, making them one-of-a-kind pieces for your collection.
Turning Dark Wood Cups Handmade Beauty