Dinner Rolls: the Ultimate Buttery Fluffy Sunday Lunch Staple
- Mastering the Perfect Dinner Rolls: Your Sunday Roast Essential
- The Science of Supreme Fluffiness: Technique Breakdown
- Essential Pantry Items: Ingredients for Buttery Dinner Rolls
- Methodical Guide: From Dough Preparation to Golden Finish
- Troubleshooting Yeast Baking: Chef's Tips and Common Errors
- Extending Freshness: Storage and Freezing Your Baked Goods
- Beyond the Butter: Creative Pairings for Fluffy Dinner Rolls
- Recipe FAQs
- 📝 Recipe Card
Mastering the Perfect Dinner Rolls: Your Sunday Roast Essential
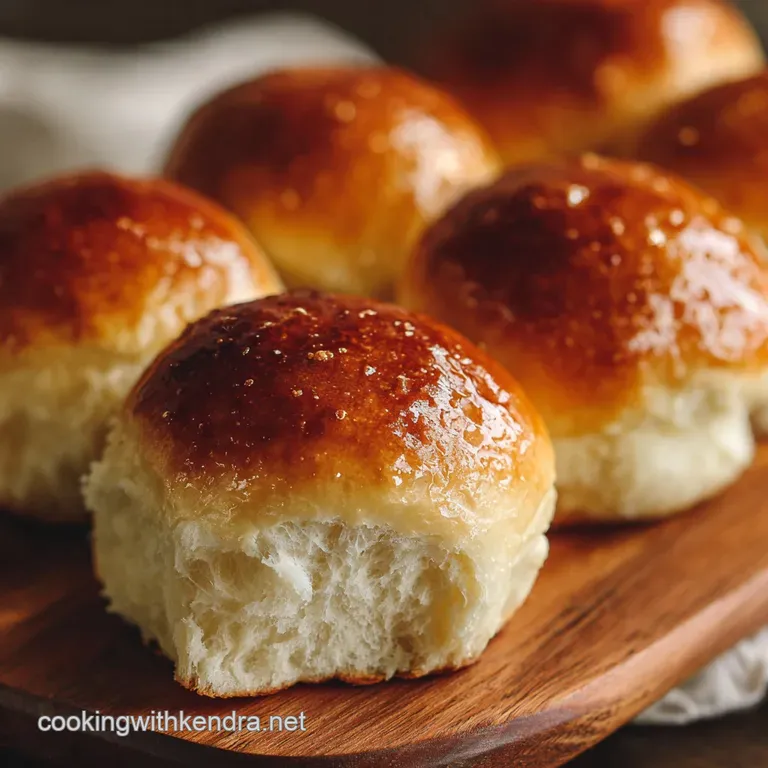
That smell. Oh my god, that deeply yeasty, slightly sweet, purely comforting cloud of warmth that takes over your entire kitchen when you bake bread. When those buttery, golden brown beauties finally emerge from the oven, still sizzling gently, they demand immediate attention and zero waiting time.
There is simply nothing better than tearing one open and watching the steam escape.
Now, I know yeast scares people senseless. It really does! But trust me, making these easy homemade rolls is one of the easiest baking challenges you can tackle, requiring almost zero complicated maneuvers.
They are incredibly cheap to make, they feed a massive crowd, and they instantly elevate any meal from standard weeknight fare to glorious Sunday feast status.
Forget the sad, dried out hockey pucks you sometimes find in a plastic bag at the store. We are chasing maximum fluffiness, rich flavor, and a buttery, tear apart texture here. Let's conquer the bread basket together and get these perfect homemade dinner rolls baking!
The Science of Supreme Fluffiness: Technique Breakdown
Why Home Baked Rolls Trump store-bought
The difference is texture, plain and simple. store-bought versions rely heavily on preservatives and stabilizers, leading to a dough that’s overly uniform and often tasteless.
When you bake these at home, the combination of high fat milk, rich butter, and a proper rise creates internal air pockets that shatter upon tearing. This is how you get that cloud like crumb.
The Secret to Overcoming Yeast Intimidation
Yeast is a living organism, not a mysterious chemical. It just needs warmth, sugar (food), and hydration to wake up. Many people fail because their liquid is either too cold (it stays asleep) or too hot (it instantly dies). You need that Goldilocks zone, usually between 105°F and 115°F.
Trust me, spending $10 on a proper kitchen thermometer is the single best investment you can make for bread making.
Defining the Ideal Dinner Roll Texture (Fluffy vs. Dense)
A perfect dinner roll should be pillowy soft, but not weak. If it’s too dense, you’ve either used too much flour or over kneaded it; if it’s too airy, you didn't knead enough to build the structure.
We are looking for a beautiful balance: an internal structure strong enough to hold shape, but tender enough to melt in your mouth. This structure is why dinner rolls recipe homemade is always better than anything pre-made.
The Role of Butter Temperature in Dough Development
I use melted butter in this recipe, but I let it cool down significantly before mixing it in. Why? Because solid butter would require extensive kneading to incorporate and distribute, which can overwork your gluten too early.
Using liquid butter guarantees that rich, buttery flavor is spread evenly throughout the dough without making it tough.
Ensuring a Robust Yeast Bloom (Activation Phase)
This step, often called the "proof," is your yeast insurance policy. If you add your warm milk, a pinch of sugar, and the yeast, and nothing happens no foam, no bubbles your yeast is dead, and you need a new batch. Don't proceed if the mixture isn't visibly frothy.
If you skip this, you’re just making a guess, and flat bread is usually the result.
Achieving the Perfect Gluten Structure (The Windowpane Test)
This is a classic baker's trick. After your dough is kneaded (either by hand or mixer), take a small piece. Gently stretch it out between your fingers. If you can stretch it thin enough to see light through it without it tearing like a delicate windowpane the gluten is perfect.
If it snaps immediately, keep kneading for another minute or two.
Chef's Note: I once rushed this step and ended up with rolls that tasted fine but crumbled when you tried to spread butter on them. Don't rush the kneading!
Essential Pantry Items: Ingredients for Buttery Dinner Rolls
Precision really matters in baking, especially when working with yeast. Measure your flour correctly, ideally with a kitchen scale. These are simple ingredients, but they need to work together.
| Ingredient | Role | Substitution (If You're Out!) |
|---|---|---|
| All-Purpose Flour | Structure | Bread flour (use slightly less liquid), or gluten-free Blend + Xantham Gum (results will vary). |
| Whole Milk | Moisture, richness | Half and half for extra richness, or use water for a leaner roll. Alternatively, use buttermilk for a subtle tang. |
| Active Dry Yeast | Leavening agent | Instant yeast (skip the blooming step), or use 1 tablespoon of sourdough starter instead (requires longer rise time). |
| Unsalted Butter | Flavour, tenderness | Coconut oil or refined vegetable oil (rolls will be less intensely buttery). |
| Sugar | Yeast food, flavour balance | Honey or maple syrup (subtle flavor change). |
Choosing the Right Flour: Bread vs. All-Purpose
I specifically call for All-Purpose flour in this recipe because we want tender, soft rolls not chewy baguettes. All-Purpose has a slightly lower protein content, which limits gluten development just enough.
If you use bread flour, your rolls will be chewier and a tiny bit tougher, so stick with AP for max fluffiness.
Dairy Decisions: Milk Fat Content Matters
Whole milk is the gold standard here because the fat coats the gluten strands, keeping them short and tender. Using skim milk or water will produce a roll that is still perfectly delicious, but it will be slightly less rich and won't stay soft as long after baking. Fat equals shelf life and softness.
The Yeast Factor: Instant vs. Active Dry
This dinner rolls recipe easy uses Active Dry yeast because I like to see that bubble action it proves the yeast is alive! If you only have Instant Yeast, just skip the first proofing step where you activate it in the milk.
Instead, whisk the Instant Yeast right into the flour and proceed with the recipe. Simple!
Methodical Guide: From Dough Preparation to Golden Finish
Kneading Precision: Developing the Dough Correctly
Whether you use a stand mixer or your own elbow grease, you must knead until the dough changes texture. Initially, it will look shaggy and messy. After 6– 8 minutes of kneading, it should transform into a smooth, elastic ball that just barely sticks to your fingers.
If your dough is pulling cleanly away from the sides of the mixer bowl, stop. Over kneading is the fastest way to tough rolls.
First Fermentation: The Importance of the Bulk Rise
This first rise (the bulk fermentation) is where the real flavor develops. Place your dough in a lightly oiled bowl, cover it well, and find the warmest spot in your house. For me, that’s usually next to the stove or on top of the fridge.
Let it double in size; this usually takes 60 to 75 minutes, but might take longer if your kitchen is chilly. Patience, my friend!
Scaling and Shaping: Creating Uniform Rolls
For perfect, tear apart results, you want all your rolls to be roughly the same size so they bake evenly. Dividing the dough and weighing each piece (aiming for about 60 65g) is a pro move, but you can eyeball it if you're not bothered by a few rebellious looking rolls.
The key to shaping is creating tension: roll each piece against a dry , unfloured surface using a cupped hand until the top surface is taut and smooth.
The Final Proof: How to Test for Readiness
The second proof is shorter (30- 45 minutes) but critical. The rolls should look puffy and nearly doubled, pressing snugly against each other in the pan. To test if they are ready, gently poke one with a floured finger.
If the indentation springs back slowly but doesn't fill completely, they are ready to bake. If the dent springs back instantly, proof a little longer. If the dent remains, they are over proofed bake them immediately!
Troubleshooting Yeast Baking: Chef's Tips and Common Errors
Why Your Rolls Are Dense (The Over Kneading Trap)
As mentioned, over kneading develops too much gluten, which leads to a tough, bready, and disappointingly dense roll. The fix? When mixing, always withhold about 1/4 cup of the flour. Only add it if the dough is still too wet to handle.
Most beginners add too much flour out of fear of sticky dough, and that’s a rookie error I made for years!
Temperature Control in the Kitchen
If your kitchen is cold, your dough won't rise properly or quickly. Instead of waiting three hours, preheat your oven to its lowest setting (like 170°F), turn it off, and place your covered dough inside for the rise. This creates a perfect, slightly warm environment.
The Solution for Rolls That Stick to the Pan
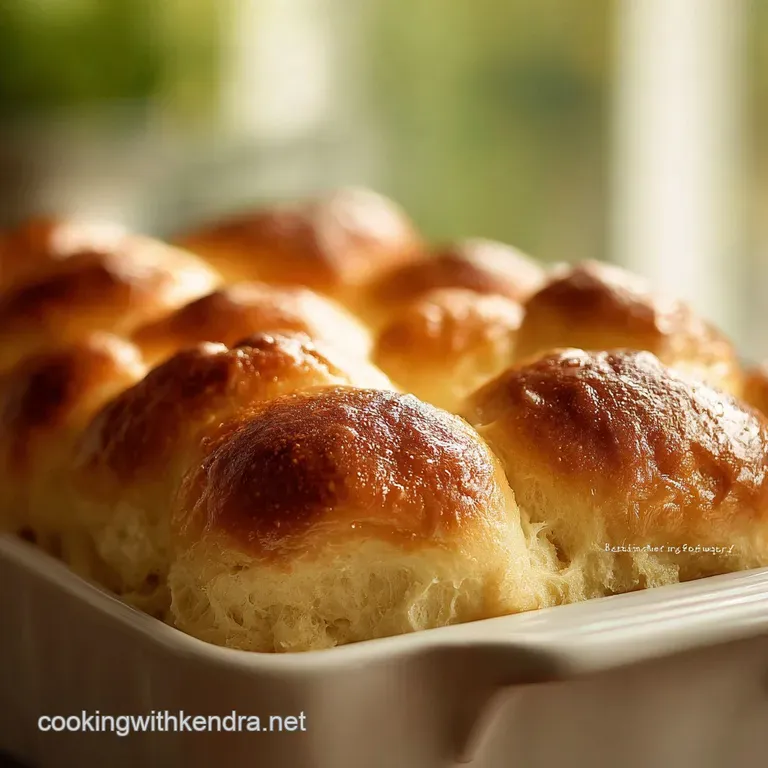
Use parchment paper! Even if you grease the pan heavily, the delicious melted butter from the rolls sometimes caramelizes and glues the bread to the dish. Lining the bottom of your 9x13 pan with parchment paper prevents this tragedy entirely.
Achieving that Signature Golden Top
While some people use an egg wash, I prefer simplicity. Brushing the rolls with plain milk right before they go into the oven gives a lovely, soft golden finish. And the minute they come out of the oven? Hit them immediately with melted butter. This is non-negotiable for maximum flavor and shine.
Extending Freshness: Storage and Freezing Your Baked Goods
Keeping Fresh Rolls Soft for Days
Dinner rolls are best eaten within the first 12 hours. If you have leftovers, store them tightly wrapped in plastic wrap or sealed in an airtight container at room temperature. They will remain soft for about 3 days, although they start to dry out after day two.
Do not refrigerate your bread —it speeds up the staling process rapidly.
Freezing Unbaked vs. Baked Dinner Rolls
This is a hot debate, but I lean toward freezing them after baking.
- To Freeze Baked Rolls: Bake completely, cool entirely, then place them in a freezer bag, squeezing out all the air. They keep well for up to 3 months. To reheat, wrap them loosely in foil and warm them from frozen at 350°F (175°C) for 10– 15 minutes. They taste practically fresh.
- To Freeze Unbaked Rolls: Shape the rolls and place them on a parchment lined tray. Freeze until solid, then transfer the solid rolls to a freezer bag. When ready to bake, thaw them overnight in the fridge, then place them in the baking dish and let them complete their final proof (about 1– 2 hours at room temp) before baking as usual.
Beyond the Butter: Creative Pairings for Fluffy Dinner Rolls
While these are glorious with just butter, they also make excellent platforms for flavor.
- Compound Butter: Serve them with a quick homemade honey cinnamon butter or a chive and garlic butter. This instantly makes them fancy.
- Sop Up the Stew: These homemade dinner rolls are the absolute perfect companion for any slow cooked, deeply saucy meal.
- Appetizer Spread: If you are having a party and need savory finger food alongside your bread, consider batch making some Tailgate snacks for a crowd: Robust Sausage Rolls with Cheddar or maybe some spicy Game Day Appetizers: Spicy Chorizo Cheddar Sausage Rolls to balance the richness.
- Sweet Breakfast Rolls: If you skip the salt in the dough and add a teaspoon of vanilla extract, you can turn these into sweet rolls perfect for breakfast by brushing them with a simple powdered sugar glaze.

Recipe FAQs
Why are my dinner rolls dense and not achieving that expected fluffiness?
Density is often the result of using too much flour or over kneading the dough. Excess flour restricts the moisture needed for a proper rise, while over kneading tightens the gluten structure too much.
Be precise with your measurements (spooned and leveled flour) and stop kneading as soon as the dough feels smooth and slightly tacky.
My dough barely rose during the proofing stage. What went wrong?
A poor rise is usually attributed to inactive yeast or liquids that were too hot. If the water used to activate the yeast is above 120°F, it can kill the yeast instantly, preventing fermentation.
Ensure your water is warm to the touch (105°F to 115°F) and that your yeast mixture foams up before incorporating the flour.
Can I prepare the dough ahead of time, perhaps the night before?
Yes, the cold proof method works wonderfully for dinner rolls and often enhances the flavor. After the first rise, shape the rolls and place them in your baking dish, then cover tightly with plastic wrap and refrigerate for up to 18 hours.
Let them sit at room temperature for about two hours before baking to allow them to finish proofing.
How should I store leftover dinner rolls, and how can I best reheat them?
Store fully cooled rolls in an airtight container at room temperature for up to three days to maintain freshness. To restore their "straight from the oven" softness, wrap the rolls loosely in aluminum foil and warm them in a 350°F oven for five to seven minutes.
I need a dairy-free or vegan option. Can this recipe be adapted successfully?
Absolutely; these rolls adapt beautifully to vegan substitutes without compromising the texture. Simply replace the dairy milk with a full fat plant milk, such as oat or soy milk, and substitute the butter with a quality vegan butter stick or refined coconut oil. The baking time and method remain the same.
My rolls are browning too quickly on top before they are cooked through. What should I do?
Quick browning often indicates that the top oven element is too hot or the oven temperature gauge is inaccurate. If you notice rapid color development, loosely tent the entire baking pan with aluminum foil for the remainder of the baking period.
This protects the delicate crust while allowing the interior to finish cooking.
Is it better to freeze dinner rolls baked or unbaked?
Both methods work well, but freezing them fully baked (and cooled) is often the easiest; thaw overnight and reheat briefly. If freezing unbaked, shape them and freeze on a tray, then transfer to a bag; when ready to bake, place frozen rolls directly into the pan, let them thaw and proof for 3 hours, then bake as directed.
Ultimate Buttery Dinner Rolls

Ingredients:
Instructions:
Nutrition Facts:
| Calories | 190 kcal |
|---|---|
| Protein | 5.0 g |
| Fat | 5.0 g |
| Carbs | 31.0 g |
