Chicken Enchilada Casserole: the Ultimate No-Roll Weeknight Bake
- The Ultimate Weeknight Chicken Enchilada Bake: Why We Skip the Roll
- Achieving Peak Flavor and Texture: The Science of Layering
- Essential Components for Your Ultimate Chicken Enchilada Casserole
- Adapting the Bake: Ingredient Swaps and Dietary Notes
- Comprehensive Step-by-Step Guide to the Chicken Enchilada Casserole
- Expert Tips and Troubleshooting Common Enchilada Mistakes
- Make-Ahead, Freezing, and Reheating Instructions
- What to Serve with Chicken Enchilada Casserole
- Recipe FAQs
- 📝 Recipe Card
The Ultimate Weeknight Chicken Enchilada Bake: Why We Skip the Roll
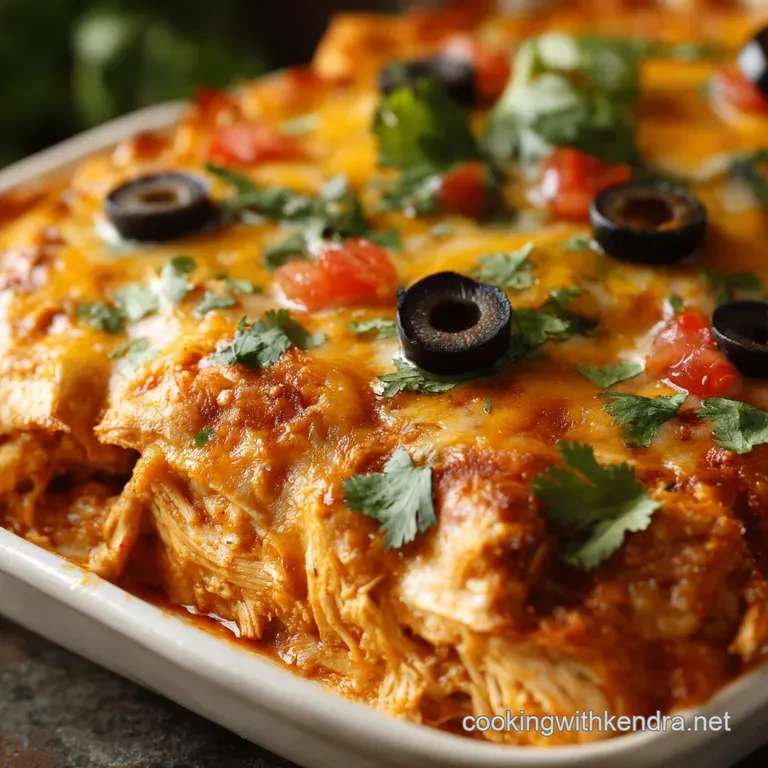
The moment this comes out of the oven, the smell alone is enough to stop the kids mid-argument. It’s that deep, smoky chilli powder aroma mixed with bubbling, slightly browned cheese that just screams comfort.
You get this incredible layering of creamy, savory shredded meat with a rich, velvety red sauce, and the tortillas act as perfect sponges for all that flavor. Seriously, the texture is spot-on every time.
Listen, I love traditional rolled enchiladas as much as the next person, but who has the time to meticulously roll 12 tiny corn tubes after a long Tuesday? This easy chicken enchilada bake is the ultimate weeknight hack.
It takes the core flavor profile of the best enchiladas and turns it into a simple, reliable, throw together casserole that is also incredibly inexpensive to feed a crowd. It’s my go-to when I have leftover rotisserie meat.
We are stacking, not rolling, folks. We are skipping the fussy steps and focusing entirely on building layers of deep, authentic Tex-Mex flavor. Grab your 9x13 dish, crank the oven, and let’s crack on with the definitive chicken enchilada casserole recipe that you will rely on forever.
Achieving Peak Flavor and Texture: The Science of Layering
The Magic of the No-Roll Method: All Flavor, Zero Fuss
The no-roll method is fantastic because it eliminates the biggest risk associated with enchiladas: dry, cracked tortillas. When you layer the tortillas flat, they act more like lasagna noodles, absorbing the sauce and moisture evenly from the filling and the top layer.
This results in an incredibly satisfying, unified dish where every bite has sauce, meat, and cheese. It’s the ultimate lazy day solution.
Tex-Mex Flavors, Casserole Comfort: Defining This Dish
This dish marries the rich depth of classic New Mexican red sauce with the creamy, satisfying heartiness of an American casserole. The secret to bridging that gap? Softened cream cheese blended into the filling.
It prevents the shredded meat from drying out during the bake, keeping everything moist and incredibly creamy a crucial element for a truly great chicken enchilada casserole .
Quick Prep: Making Chicken Enchilada Casserole Effortless
The reason this recipe stays under an hour from start to finish is the pre-cooked meat rule. Using pre-shredded or rotisserie meat cuts the cooking time by a solid 45 minutes. We are only taking 20 minutes to whip up the sauce and filling, leaving the rest to the oven.
That's efficiency, my friends.
Building the Depth: The Importance of a Rich Red Sauce
You absolutely cannot use jarred taco sauce here. The flavor foundation of any exceptional chicken enchilada casserole with red sauce comes from blooming your spices in fat. We quickly cook the chili powder, cumin, and oregano in the oil and flour roux before adding the stock.
This technique releases the essential oils in the spices, resulting in a dark, robust, and deeply smoky flavor that tastes like it took all day.
Preventing Soggy Tortillas: The Key to Structural Integrity
Soggy bottoms are the bane of the casserole world. The key to structural integrity here is threefold: first, cover the bottom of the pan with sauce, not just dry tortillas. Second, allow the sauce to thicken slightly during the simmer.
Third, and most importantly, let the entire casserole rest for 10 minutes after baking. This rest period is mandatory for the layers to set and the sauce to be fully absorbed, preventing a liquid mess.
Utilizing Shredded Meat for Optimal Succulence
Shredded meat, rather than cubed, provides superior texture and sauce adhesion. Use a fork, or better yet, throw the pre-cooked meat into a stand mixer with the paddle attachment; it shreds perfectly in about 30 seconds.
This allows the creamy sour cream/cream cheese mixture to coat every strand, ensuring the filling is moist and succulent throughout the bake.
Essential Components for Your Ultimate Chicken Enchilada Casserole
| Ingredient Category | Primary Ingredient | Why We Use It |
|---|---|---|
| Flavour Base | Red Chili Powder (Good Quality) | Provides smoky, earthy depth. |
| Thickener/Roux | All-Purpose Flour | Creates the required body for the red sauce. |
| Protein | Pre-cooked Shredded Chicken | Speedy prep and perfect texture absorption. |
| Creaminess | Sour Cream & Cream Cheese | Stabilizes the filling and adds essential moisture. |
| Structure | Tortillas (Flour or Corn) | Forms the necessary layers for the bake. |
Adapting the Bake: Ingredient Swaps and Dietary Notes
Every good home cook knows how to pivot when the pantry is looking sparse. Here are the essential swaps for your chicken enchilada casserole .
| Ingredient | Substitution Option | Notes on Swap |
|---|---|---|
| Shredded Chicken | Pre-cooked turkey or seasoned ground pork | Make sure any ground meat is fully cooked and drained of fat. |
| Sour Cream | Greek Yogurt or Crème Fraîche | Greek yogurt adds a nice tang; use full fat for texture. |
| Cream Cheese | 1/2 cup blended ricotta or cottage cheese | Ensures the filling remains creamy and doesn't dry out. |
| Chicken Stock | Vegetable Stock or Water + Bouillon Cube | Low-sodium is best so you control the salt level. |
| Flour (for Roux) | Cornstarch slurry (1 Tbsp cornstarch + water) | Great for gluten-free; add slurry after spices bloom. |
| Monterey Jack/Cheddar | Pepper Jack or Mozzarella | Pepper jack adds heat, mozzarella adds incredible stretch. |
Pantry Staples for the Quick Enchilada Sauce Base
The sauce needs good flavor. If you don't have enough stock, you can supplement with a touch of water, but boost the richness with extra tomato paste. Tomato paste is your friend; it adds necessary acidity and deep colour that stock alone can’t provide.
The Best Cheeses for Melt and Stretch
I swear by a Monterey Jack and mild Cheddar blend. It melts beautifully without becoming oily. You want something with low moisture and high fat content. Avoid pre-shredded cheese if possible; it often contains anti caking agents that hinder the smooth, uniform melt we are looking for.
Selecting the Right Tortillas for Layering Stability
I prefer flour tortillas (6 inch size) for a chicken enchilada casserole flour tortillas recipe because they are forgiving and easy to cut and layer without tearing.
If you prefer the authentic flavor of corn tortillas, make sure you lightly warm them or quickly dip them in the red sauce before layering. This softens them up, preventing them from becoming brittle or dry in the oven.
Adjusting the Heat Level Safely
The heat level should come entirely from your chili powder blend. If you want more fire, skip the extra jalapenos (they can add too much moisture) and stir in 1/2 teaspoon of cayenne pepper into the spice mix. Alternatively, finish the baked casserole with a drizzle of hot sauce, like Cholula, right before serving.
Swapping Out Dairy Components for Lactose Free Options
high-quality vegan sour creams and shredded cheese blends have come a long way. They work perfectly here. If you’re using vegan cheese, often a quick spritz of cooking spray over the top before baking helps it achieve that desirable golden brown crust.
Comprehensive step-by-step Guide to the Chicken Enchilada Casserole
Phase 1: Prepping the Filling and Sauce Components
- Start the Oven and Sauce Base: Preheat your oven to 375°F (190°C). In a medium saucepan, heat 2 tablespoons of oil over medium heat. Whisk in the flour to create a quick roux. Cook this paste for exactly one minute until it smells slightly nutty, stirring constantly.
- Bloom the Spices: Reduce the heat to low. Stir in all your spices chili powder, cumin, oregano, and garlic powder along with the tomato paste. Cook for 30 seconds. Trust me on this; cooking the spices in the fat is critical for true flavor depth.
- Finish the Sauce: Slowly whisk in the chicken stock until the mixture is completely smooth. Bring it to a simmer and let it thicken for 5– 7 minutes, stirring until it coats the back of a spoon. Season aggressively with salt and pepper. Set aside.
- Mix the Filling: In a large bowl, combine the shredded chicken, sour cream, cubed cream cheese, diced onion, and coriander. Mix until everything is beautifully coated and the cream cheese is mostly dispersed. Season this filling generously too.
Phase 2: Mastering the Casserole Layering Technique
- Base Coat: Spread about 1/2 cup of the prepared red sauce across the bottom of your 9x13 inch casserole dish. This acts as an initial moisture barrier and flavor bomb.
- First Tortilla Layer: Place 4 to 6 tortillas over the sauce base, overlapping slightly. Cut pieces as needed to fill in any major gaps; we want a mostly solid layer.
- First Filling Layer: Spread exactly half of the chicken mixture evenly over the tortillas. It should cover edge-to-edge.
- Sauce and Cheese Mid-Layer: Ladle 1 cup of the sauce over the filling, followed by 4 ounces (a generous cup) of the shredded cheese blend.
- Second Layer Repeat: Add the second layer of tortillas, the remaining chicken filling, and another 1 cup of sauce.
Phase 3: Baking to Golden, Bubbly Perfection
- Final Cheese Topping: Top the entire casserole with the remaining 4 ounces of shredded cheese.
- Bake Covered: Cover the dish tightly with foil. Bake for 20 minutes to heat the core through and steam the tortillas.
- Uncover and Finish: Remove the foil and bake for another 15– 20 minutes, until the cheese is beautifully golden brown and the sauce is bubbling maniacally around the edges.
- The Wait: Remove the dish and let it rest on the counter for a crucial 10 minutes. Serve hot, but not scorching!
Visual Guide: How Many Layers Are Optimal?
For a standard 9x13 dish, two layers of filling separated by two layers of tortillas is the sweet spot. Any more and you risk uneven cooking; any less, and it lacks the height and structure we want from a proper casserole.
Ensuring Edge-to-Edge Sauce Saturation
The biggest trick here is using enough sauce on the bottom layer and around the edges of the filling. When you ladle the sauce onto the chicken, don't just dump it in the center. Spread it gently with the back of a spoon, ensuring the sauce runs down the sides so it can soak into the tortillas underneath.
Expert Tips and Troubleshooting Common Enchilada Mistakes
Why is My Casserole Soggy? Fixing Excess Moisture
If your casserole turns into soup, two things likely happened: you skipped the rest period, or your chicken filling was too wet. If using canned cream of chicken soup (a popular ingredient in some chicken enchilada casserole with cream of chicken soup recipes, but not this one!), ensure you use less liquid.
If you use this scratch recipe, the key is the 10 minute mandatory rest. The starches in the tortillas need time to absorb the hot liquid and set up.
Chef’s Note: Never add watery vegetables like diced tomatoes to the filling. Too much added water will ruin the casserole’s structure and guarantee a soggy texture. Keep the moisture to the sauce and the creamy filling components only.
The Secret to Perfectly Melted and Browned Cheese
Use fresh block cheese that you grate yourself. The anti caking powders in pre-shredded varieties can interfere with the melt. For perfect browning, make sure the cheese is exposed to the direct heat of the oven for the final 15 minutes. If it browns too quickly, move the pan to a lower rack.
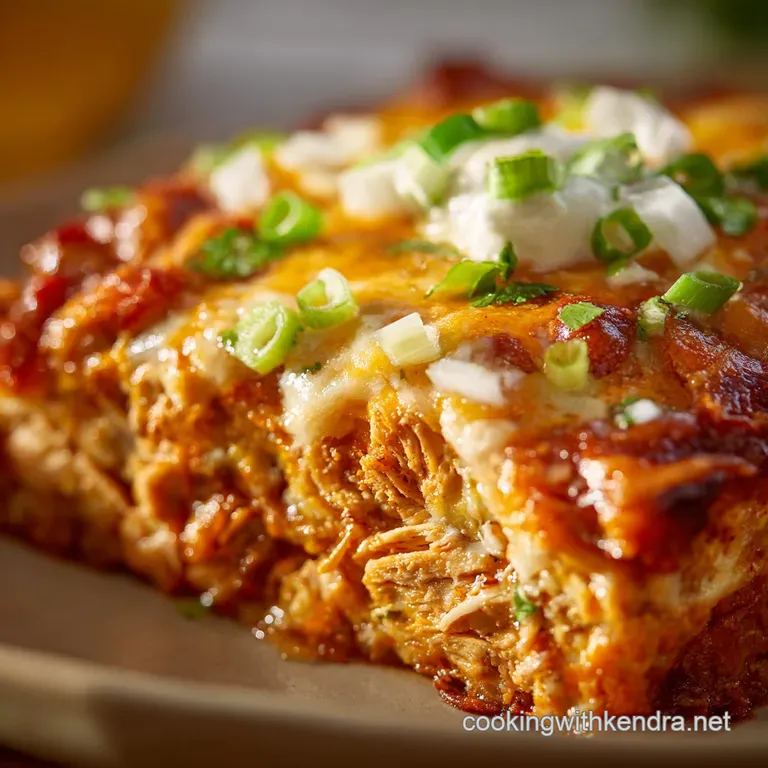
Elevating the Dish: Finishing Touches After Baking
Once the casserole has rested, never serve it naked! A generous sprinkling of fresh cilantro, a dollop of sour cream (or a swoop of Mexican crema), and a dash of hot sauce make all the difference.
For a burst of freshness that cuts through the richness, you could even add a light squeeze of lime juice right over the top.
make-ahead, Freezing, and Reheating Instructions
Can I Assemble the Casserole the Night Before?
Absolutely, and it’s brilliant. Assemble the entire casserole up to the point of baking (meaning, leave off the final layer of cheese). Cover it tightly with plastic wrap and foil and refrigerate for up to 24 hours.
When ready to bake, remove the plastic, add the final cheese layer, and add 10- 15 minutes to the initial covered bake time since the dish is starting cold.
Safe Freezing and Thawing for Best Results
This chicken enchilada casserole freezes exceptionally well! Assemble the entire dish (again, without the final layer of cheese), wrap it securely in plastic wrap, and then foil. It keeps well in the freezer for up to three months. To cook, thaw it completely in the refrigerator overnight.
Add the cheese and bake as directed, increasing the initial covered bake time by about 20 minutes.
Best Practices for Reheating Leftovers
Individual portions reheat best in the microwave, covered lightly, to retain moisture. For the whole casserole, cover it with foil and reheat in an oven at 350°F (175°C) until heated through (about 20 minutes).
Adding a tiny splash of stock or sauce around the edges before reheating prevents the sides from drying out.
What to Serve with Chicken Enchilada Casserole
Since the casserole is rich and cheesy, you want sides that are bright, acidic, and fresh.
- Fresh Crunch: A simple chopped lettuce salad tossed with a sharp vinaigrette (lime juice, olive oil, and a touch of honey) is essential for contrast.
- Hearty Comfort: For those cold nights when you need extra coziness, a cup of something savory alongside it is perfect. You could serve it with a small bowl of my Chicken Chili: The Ultimate Creamy White Chili Recipe for a true Tex-Mex feast.
- The Classics: Serve it with chunky guacamole, fresh pico de gallo, and maybe some refried beans.

Recipe FAQs
Why did my enchilada casserole turn out dry?
Dryness typically occurs if you overbake the dish or fail to adequately coat the tortilla layers with sauce. Ensure the edges of the tortilla pieces are fully submerged in sauce before baking, and keep the casserole covered loosely with foil for the first two-thirds of the cooking time.
This steaming action helps the tortillas soften and prevents moisture evaporation.
Can I use ground meat (beef or turkey) instead of shredded chicken?
Absolutely. Brown and season your ground meat thoroughly, drain any excess fat, and then mix it into the enchilada sauce just as you would the shredded chicken. Since ground meat is often leaner than chicken, you might need to add an extra tablespoon or two of sauce to ensure the filling stays moist throughout the bake time.
Can I assemble this casserole the day before I plan to bake it?
Yes, this is an excellent make-ahead meal. Assemble the entire casserole, cover it tightly with plastic wrap and then foil, and refrigerate for up to 24 hours. Be aware that the tortillas will absorb much of the liquid, so let the casserole sit at room temperature for 20 minutes before baking, and consider drizzling an extra splash of sauce over the top before adding the final cheese layer.
What kind of tortillas work best for this casserole corn or flour?
Standard 6 inch flour tortillas cut into strips or squares are generally preferred for a softer, doughier casserole texture, which blends well into the bake. If you prefer a stronger, authentic corn flavor, you may use corn tortillas, but blanching them briefly in warm oil or sauce first will help prevent them from becoming brittle or chewy.
How can I freeze the Chicken Enchilada Casserole?
This casserole freezes beautifully when unbaked. Assemble the dish entirely in a freezer safe aluminum pan, cover it tightly first with plastic wrap and then foil, and label it with the date.
When you are ready to enjoy it, thaw the casserole overnight in the refrigerator and bake as directed, potentially adding 10 15 minutes to the total bake time.
How do I adjust the spice level of the casserole?
To increase the heat, stir a small can of drained diced jalapeños or a tablespoon of chipotle powder directly into your filling mixture. If you want to keep the dish mild, simply ensure you are using a mild red enchilada sauce, and rely on cooling toppings like sour cream or plain Greek yogurt when serving.
Why does the cheese layer look greasy after baking?
Greasy cheese is usually a sign that it was baked at too high a temperature or for too long after the foil was removed. Using freshly grated block cheese is also helpful, as pre-shredded cheeses contain anti caking agents that can sometimes accelerate fat separation.
Try to only uncover the casserole for the last 5 to 7 minutes of baking.
Ultimate Chicken Enchilada Casserole Bake
Ingredients:
Instructions:
Nutrition Facts:
| Calories | 619 kcal |
|---|---|
| Protein | 39.0 g |
| Fat | 43.3 g |
| Carbs | 20.3 g |
