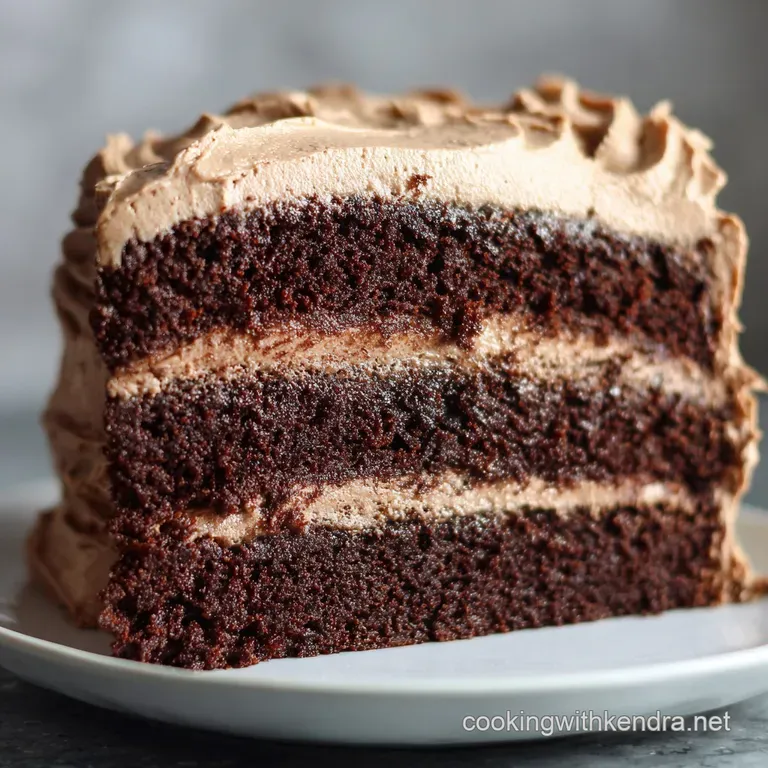
Chocolate Cake the Ultimate Intensely Moist Fudge Layer Cake
Why This Is the Last Chocolate Cake Recipe You'll Ever Need
Right then. Gather 'round, because if you're like me, you've tried dozens of "ultimate" chocolate cake recipes only to end up with a dry, crumbly hockey puck masquerading as dessert. I used to think the secret was simply adding more oil. Wrong.
The truth is, the magic happens when you treat the cocoa powder with respect. This isn’t just a good cake. This is the amazing chocolate cake recipe you need for birthdays, Tuesday nights, or when you just need a proper hug in food form.
It’s intensely moist, darkly rich, and so reliable I call it my Banker's Hours Chocolate Cake. It always delivers.
The Magic of Hot Coffee: Intensifying Cocoa Flavor
Look, if you don't drink coffee, I get it. But you have to use it in this cake. Why? When you add boiling liquid whether that’s strong coffee or just water to cocoa powder, you are literally ‘blooming’ the flavour.
This process breaks down the fat in the cocoa powder, releasing all those deep, chocolatey volatiles. It doesn’t make the cake taste like coffee, it just makes the chocolate flavour pop right out. Think of it like turning the volume knob up to eleven.
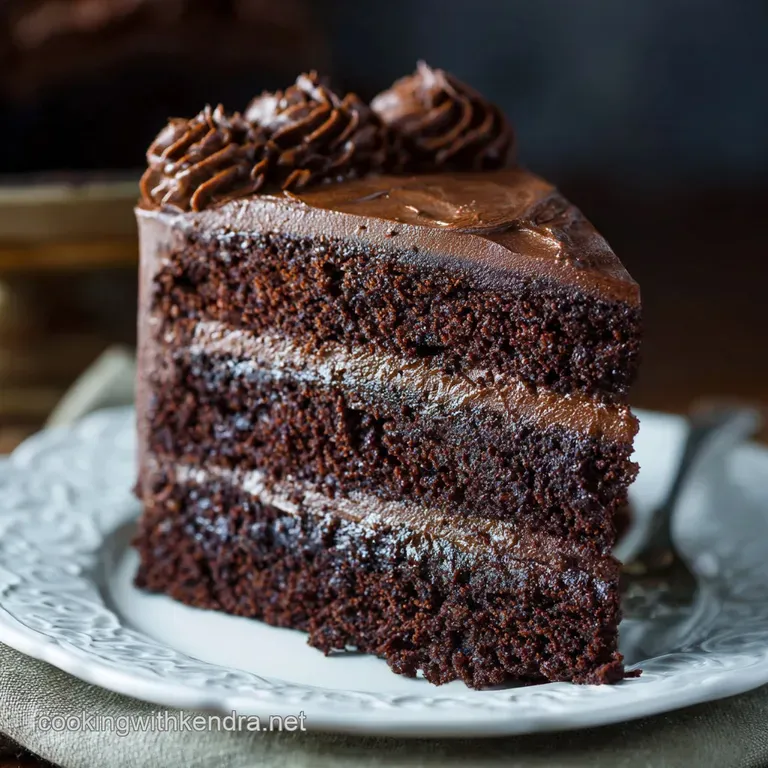
I remember the first time I tried this. I poured the hot coffee in and the batter went instantly thin and runny. My heart sank. I thought I’d ruined it. I baked it anyway, and the resulting chocolate cake was nearly black and had a texture that was almost fudgy. That’s the secret, people.
Don't be scared of the thin batter. It’s brilliant.
Defining 'Banker's Hours': Achieving Showstopper Richness
The 'Banker's Hours' name really refers to the sheer, uncompromising richness of this cake. This is not the time for healthy substitutions. This chocolate cake recipe moist result depends on whole ingredients: full and fat buttermilk, plenty of sugar, and neutral vegetable oil.
When you bake a cake for an occasion, you want people to stop mid and bite and ask, "Wait, what is in this?" This cake does that. We aren't skimping on the Dutch and process cocoa, either. This is crucial for that dark, brooding colour and deep flavour complexity.
It stands up beautifully to the rich Chocolate Buttercream Frosting we’re going to slather on it.
Curating Your Pantry for a World and Class Chocolate Cake
Before we crack on, let’s make sure your ingredients are lined up like little soldiers. The biggest mistake in baking is using cold eggs or hard butter. Temperature matters. Stop leaving your ingredients in the fridge until the last minute. Bring them out!
Dry vs. Wet: Essential Pantry Measurements
We are primarily using the ‘two cups of everything’ method for the dry ingredients, which keeps things simple, but there are two non and negotiables here: the cocoa and the buttermilk.
| Ingredient Detail | Why It Matters | My Personal Tip |
|---|---|---|
| Dutch and Process Cocoa | Gives the cake a deep, dark colour and richer flavour. | Standard (natural) cocoa can be slightly acidic, making the cake lighter. Stick to Dutch here. |
| Buttermilk | Its acidity reacts perfectly with the baking soda for maximum lift and tenderness. | If you don’t have it, use the milk + vinegar trick. It works just fine. |
Seriously, that Dutch and process cocoa is worth the slight extra expense. It makes all the difference in achieving the ultimate chocolate cake look and taste.
The Equipment Checklist: Essential Tools for Layer Cake Success
You don't need a professional kitchen, but a few tools make assembly so much easier.
- A Stand Mixer: Essential for the Chocolate Buttercream Frosting. Trying to whisk 4 cups of powdered sugar into butter by hand is how you end up needing a new shirt, maybe a new kitchen.
- Two 8 inch Pans: Consistency is key. Make sure they are the same size.
- Parchment Paper: Cut circles for the bottom of the pans. Game changer for easy release.
- Offset Spatula: Trust me, you can't get that gorgeous, smooth final coat without one. It is not the same as a regular knife.
The Frosting Foundation: Ingredients for the Perfect Chocolate Ganache Buttercream
This is technically an American buttercream (powdered sugar based) but we load it up with so much cocoa and butter it feels like a heavy, dense ganache frosting. Make sure your butter is truly soft you should be able to press a finger into it easily. This is vital for avoiding lumps.
Also, never underestimate the power of a tiny pinch of salt in the frosting. It stops the whole thing from tasting like you just ate a bag of pure sugar.
Related Recipes Worth Trying
- Salted Caramel Hot Chocolate The Ultimate Decadent Homemade Drink — Our Salted Caramel Hot Chocolate recipe is utterly irresistible Forget those mixesthis is the Ultimate Hot Chocolate experience featuring scratchmade...
- Nutella Cheesecake Dip The Ultimate Decadent NoBake Dessert — This creamy irresistible Nutella Cheesecake Dip is ready in 15 minutes Forget bakingour easy nobake recipe combines cream cheese and Nutella Dip for the...
- Chocolate Cupcakes with Coconut Frosting Almonds Decadent Recipe — These rich Chocolate Cupcakes with Coconut Frosting Almonds are your ultimate Almond Joy dessert Featuring fluffy Toasted Coconut Buttercream over a moist...
Master the Method: Step and by-Step Baking for Ultimate Moisture
This is where we slow down a bit. The mixing technique is straightforward, but the handling of the hot liquid and the subsequent cooling process is what separates the novices from the bakers.
Preparing the Pans: Ensuring an Effortless Release
If your cake sticks, the whole project is a write and off. We are going to grease the pans (butter or shortening works), dust them lightly with flour (or cocoa powder for an even darker crust), and then, crucially, place a circle of parchment paper right on the bottom. Why?
Because the centre bottom is the most likely place to stick, and the paper guarantees that effortless flip and out. No more scraping with a fork and ending up with cake shrapnel.
The Reverse Creaming Method: Incorporating Liquid Batter
While the initial steps follow a more traditional "dump and mix" approach by combining dry, then adding wet, the final step adding that hot liquid is unique. When you incorporate the hot coffee, mix only until smooth.
We do not want to develop the gluten here, which is the main culprit for tough, dry cakes. The resulting batter will be thin, almost like thick soup. Divide it evenly between the pans. (If you have a scale, now is the time to use it!)
The Crucial Cooldown: Handling Warm Layers to Prevent Cracking
Patience is not my virtue. I used to pull cakes out and try to frost them 15 minutes later. They’d crumble, the frosting would melt, it was a disaster. Do not do this!
CRITICAL WARNING: Let the cakes cool in their tins for exactly 10 minutes on a wire rack. Then, invert them onto the rack and carefully peel off the parchment paper.
They must cool completely I mean completely, until they feel cool to the touch before you even think about frosting. A warm cake layer is a cracking, crumbly layer.
Building the Tower: Layering and Crumb Coating Techniques
The crumb coat is the security blanket of layer cakes. It’s a super and thin, sacrificial layer of frosting designed solely to trap loose crumbs. If you skip this, the crumbs will mix into your beautiful, glossy outer coat and it will look messy. Trust me, I made that mistake on my mum’s 60th birthday cake.
Disaster.
- Place the first layer.
- Apply a thin layer of Chocolate Buttercream Frosting to the top and sides.
- CHILL IT. Put the whole cake in the fridge for 15 minutes. That coat needs to firm up.
- Once the crumb coat is tacky, you can apply the generous final layer, smoothing it out with your offset spatula.
Expert Tips for Elevating Your Homemade Chocolate Cake
Troubleshooting Common Chocolate Cake Baking Errors
If you find your cake is dense, you probably overworked the batter, developing too much gluten. If it sinks in the middle, your oven temperature might be off, or you checked on it too early.
- Dry Cake: Did you overbake it? Use an oven thermometer, because many home ovens lie. Check for doneness with a skewer or toothpick; when it comes out clean, take the cake out immediately.
- Crumbly Cake: The most common cause is either insufficient moisture (see above) or trying to handle the cake while it’s still warm.
- Lumpy Frosting: Your butter wasn't soft enough, or you didn't sift the powdered sugar and cocoa powder.
Storage and Shelf Life: Keeping Layers Moist for Days
This amazing chocolate cake recipe keeps incredibly well due to the high fat content and buttermilk.
For maximum freshness:
- Store the finished cake, covered loosely, at room temperature for up to three days. The fridge tends to dry out the crumb, so avoid it unless you’re dealing with extremely high temperatures or have a perishable filling.
- If you need to keep it longer, wrap the individual unfrosted layers tightly in plastic wrap and freeze them for up to a month. Thaw them overnight, still wrapped, before assembling.
Flavor Variations: Adjusting the Cake for Different Occasions
The base layer of this Milk Chocolate Cake is sturdy and deep, making it a fantastic foundation for other flavours.
- Peppermint Twist: Add 1/2 teaspoon of pure peppermint extract to the frosting ingredients, and top with crushed candy canes or thin mint chocolate pieces.
- Caramel Swirl: Use the chocolate cake recipe, but replace the filling layer with a homemade salted caramel sauce before adding a plain vanilla buttercream outer layer.
- Raspberry Dream: Fold 1 cup of fresh or frozen raspberries into the batter just before pouring it into the pans. Top the finished cake with a raspberry coulis.
Nutritional Snapshot: Serving Size and Calorie Breakdown
Okay, let’s be real. This Ultimate Chocolate Cake is an indulgence. This is not health food. This is happiness food. We use real butter, real sugar, and lots of rich cocoa. The estimate of around 500 calories per slice (assuming 12 generous servings) should tell you everything you need to know.
Enjoy it, don’t analyze it, and maybe walk an extra lap tomorrow. You deserve this.

Recipe FAQs
Why is my Chocolate Cake batter so runny when I add the hot coffee?
Don't panic, that runny consistency is exactly right! The hot liquid 'blooms' the Dutch process cocoa, intensifying the rich, dark chocolate flavour and guaranteeing that incredibly moist, tender crumb structure we're aiming for.
Do I really need to use Dutch Process cocoa for this ultimate fudge cake?
Yes, for that deep, near black colour and classic Devil's Food flavour, Dutch process is the proper choice; standard natural cocoa will yield a lighter colour and requires an acidity adjustment, which isn't needed here.
How long will this rich Chocolate Cake keep fresh, and how should I store it?
When stored properly under a cake dome or in an airtight container at room temperature, this cake is an absolute treat for up to 3 days; if it's dressed with the buttercream, avoid the fridge as it can dry the sponge, or you can freeze slices for a rainy day.
I don't have buttermilk handy; can I still proceed with the recipe?
Easy peasy if you're caught short, simply measure out your whole milk and stir in one tablespoon of white vinegar or lemon juice, letting it curdle for five minutes to achieve a perfectly serviceable buttermilk substitute.
My cake layers came out a bit dry, what went wrong?
Over baking is the usual suspect, so always check slightly before the timer the key is pulling it out right when the skewer comes out clean, not bone dry; for a quick fix, brush the warm layers with a simple sugar syrup before frosting.
Ultimate Moist Chocolate Cake Recipe
Ingredients:
Instructions:
Nutrition Facts:
| Calories | 180 kcal |
|---|---|
| Protein | 3.0 g |
| Fat | 8.0 g |
| Carbs | 24.0 g |
