Oreo Balls: Ultimate No-Bake Truffles
- The Ultimate No-Bake Oreo Truffles: Classic Three-Ingredient Decadence
- The Three-Ingredient Magic: Why No-Bake Truffles Are a Kitchen Essential
- Essential Components for Perfect Oreo Truffles
- Mastering the Method: Simple Steps to Decadent Oreo Truffle Balls
- Troubleshooting Your Truffles: Pro Tips and Fixes
- Make-Ahead Mastery: How to Store and Preserve Your Bites
- Presentation & Pairings: Elevating Your Oreo Treats
- Recipe FAQs
- 📝 Recipe Card
The Ultimate No-Bake Oreo Truffles: Classic Three Ingredient Decadence
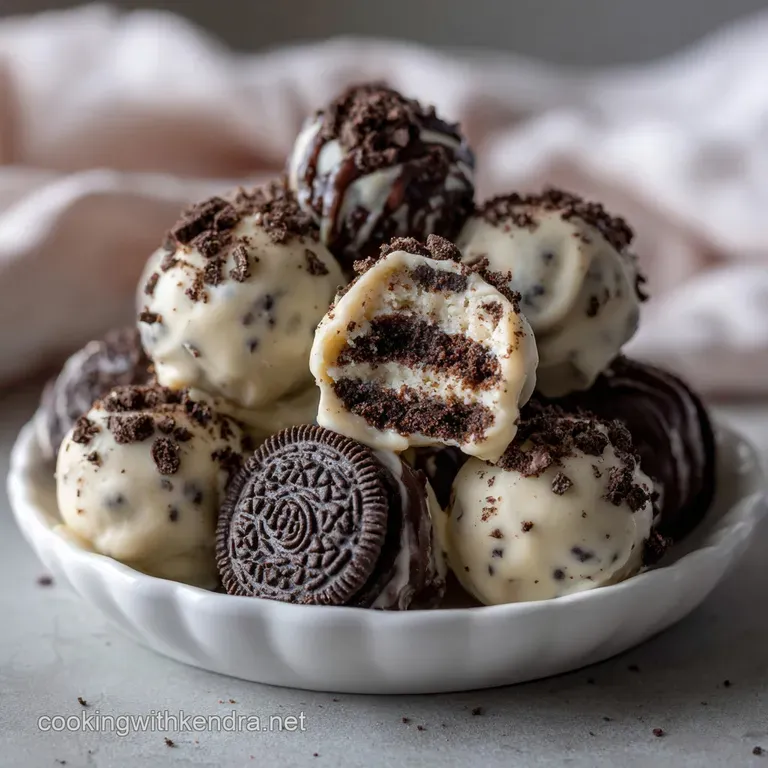
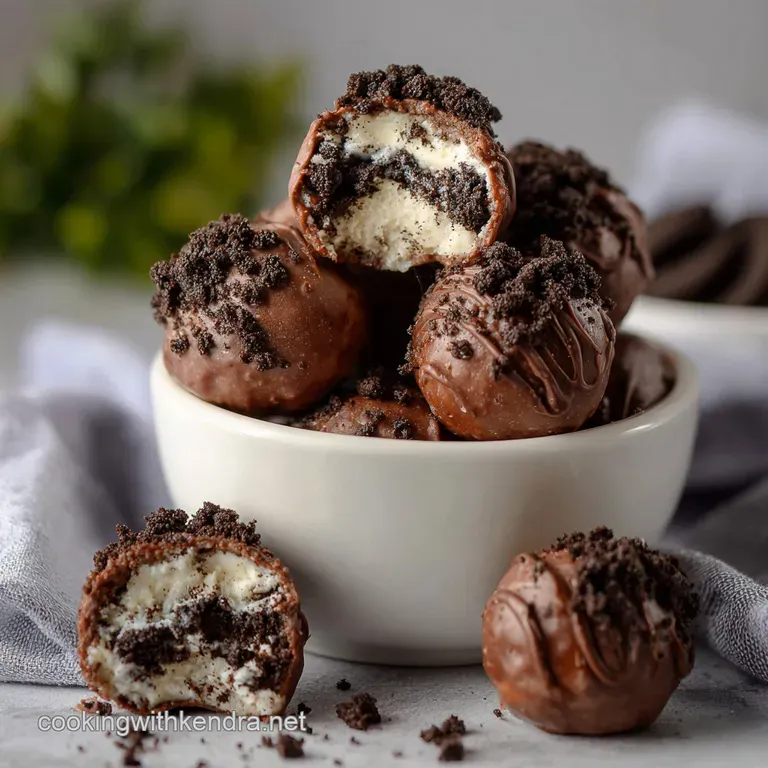
That perfect snap of chocolate, followed by an intensely rich, fudgy interior? Yes, please. These classic Oreo Balls are pure, unadulterated comfort food and the best part is they require zero baking skill and only three ingredients.
If you need a dessert that looks completely professional but takes about 15 minutes of actual hands-on effort, this specific method for Easy Oreo Balls is your secret weapon.
They are ridiculously simple, surprisingly cheap to produce in massive batches, and guaranteed to be the star of every party platter you grace.
Forget complicated tempering or fiddly techniques; we are making the ultimate version of this beloved confection, which also goes by the name of No-Bake Oreo Truffles .
I’ll walk you through exactly how to get the smoothest coating and the perfect fudgy texture for your treats every single time.
The Three Ingredient Magic: Why No-Bake Truffles Are a Kitchen Essential
The beauty of this recipe lies in its sheer simplicity. It’s a genius collision of textures: the fine, almost dusty crumb of the cookie wafer, the creamy fat of the filling, and the sharp tang of the cream cheese. When mashed together, these three things become more than the sum of their parts.
This specific Oreo Balls 3 Ingredients ratio ensures the mixture is pliable enough to roll but stable enough to hold its shape when chilled and dipped. Trust me, I once tried using reduced fat cream cheese, and the results were disastrous watery, greasy, and unwilling to set properly.
What Makes This Recipe Truly Ultimate?
It’s all in the texture contrast. A truly ultimate truffle should have a satisfying crunch from the chocolate shell, yielding immediately to a dense, fudgy core that melts in your mouth.
We achieve this by blitzing the whole cookie wafer and cream filling combined creating a binding agent that’s richer than simple cake crumbs.
The Difference Between Truffles and Cake Pops
Often, people mix up the terminology, but these are technically truffles, not cake pops. Cake pops typically start with baked cake that is crumbled and mixed with frosting, resulting in a lighter, airier texture.
Our Oreo Balls use raw, pulverized cookies blended with cream cheese, making them intensely dense, richer, and far more decadent. They are an indulgent bite, not a sugary sponge on a stick!
Quick Glance: Prep Time, Chill Time, and Yield
We’re talking minutes of actual work here. The real effort is in the waiting. If you're planning a party, you can make the base of these Oreo Balls days ahead of time which is why they are my go-to edible gift.
The Role of Fat in Binding the Mixture (Cream Cheese)
Why cream cheese? It’s the binder, darling. Full fat cream cheese has the perfect composition of fat and water to transform the dry, sandy cookie crumbs into a cohesive dough. This is key to successful Oreo Balls.
When the mixture is cold, the fat solidifies, locking the truffle’s shape into place so it won't fall apart when it hits the warm coating.
Why the Cookie to Cream Cheese Ratio is Crucial
You need exactly 14.3 ounces of Oreos to 8 ounces of cream cheese. If you use too much cream cheese, the mixture will be a sticky nightmare that adheres to your palms like glue. If you accidentally add too many cookie crumbs, your mixture will be dry and brittle, making it impossible to roll into those beautiful uniform spheres.
I recommend sticking rigidly to the 14.3 oz package size for flawless results.
Temperature Control: The Secret to Smooth Dipping
The temperature dynamic is everything when making Oreo Balls . The cream cheese needs to be soft (room temperature) when you mix it so it integrates smoothly. However, the rolled balls must be ice cold (straight from the fridge) when you dip them.
The contrast causes the warm chocolate coating to set almost instantly, preventing that tragic moment where the whole truffle slides off the fork.
Essential Components for Perfect Oreo Truffles
While the ingredient list is short, quality matters, especially with the coating. If you want truly delicious Chocolate Covered Oreo Truffles , don’t skimp on the chocolate.
Choosing the Right Cream Cheese Base
Always opt for full fat, brick style cream cheese. Do not use the whipped stuff in a tub! The whipped variety has too much air and moisture, throwing off our delicate binding ratio completely. If you want a slightly milder, richer flavour, you could substitute Mascarpone cheese, though it’s far more expensive.
Deciphering Chocolate Coatings: Wafers vs. Bars
Using high-quality melting wafers (like Ghirardelli or Merckens) is hands down the easiest path to a glossy, professional finish. They are specifically designed for dipping and require minimal fuss.
If you only have chocolate chips or bars, that’s fine, but you MUST add a teaspoon of coconut oil or vegetable shortening per cup of chocolate. This lowers the viscosity, making the dip thin and silky, ensuring your Oreo Balls coating is perfectly smooth.
Variation Notes: Flavor Substitutions for Original Cookies
The beauty of this base is that it’s highly adaptable!
- Mint Lovers: Use Mint Oreos and coat them in dark chocolate.
- Festive Fun: Use the seasonal Red Velvet Oreos for a stunning interior colour perfect for making Christmas Oreo Balls Recipe .
- Vanilla Vibe: Swap out Oreos for Golden Oreos for a lighter, vanilla forward truffle. If you do this, I recommend coating them in white chocolate.
Mastering the Method: Simple Steps to Decadent Oreo Truffle Balls
This process is straightforward, but attention to the feel of the mixture is key. Stop and feel it it should be like thick, slightly sticky modeling clay.
Crushing Techniques: Achieving the Fine Powder Consistency
A food processor is your best friend here. Throw the entire package wafers and cream filling right in. Pulse until you achieve a texture that looks like damp sand. You absolutely need it this fine.
If you have big chunks, the mixture won’t bind properly, and your Oreo Balls will be bumpy and prone to crumbling. If you don't have a food processor, use a heavy duty zip-top bag and a rolling pin, but be prepared for a serious arm workout.
Forming Uniform Spheres: Scooping and Rolling Tips
Uniformity is vital for aesthetic appeal. I always use a small 1 tablespoon cookie scoop. Scoop, then roll quickly between your palms. Don't overwork the mixture, or the heat from your hands will make it sticky. If the mixture starts to soften, pop it back in the fridge for 10 minutes.
The Essential Chilling Phase for Structural Integrity
After rolling, these spheres need to firm up. Place them on a parchment lined sheet and chill for a minimum of 30 minutes, or up to 2 hours. They must be firm and cold for dipping!
If you try to dip a room temperature ball, it will soften the instant it hits the warm chocolate and slide right off the fork.
The Double Dip Strategy for a Flawless Coating
If you find your coating is a little thin and you can still see the dark truffle underneath, you can employ the double dip strategy. After the first coat sets (just a couple of minutes in the fridge), gently dip the ball again, being mindful not to disturb the first layer too much.
This creates a beautifully thick, satisfying chocolate shell around your Oreo Balls .
Troubleshooting Your Truffles: Pro Tips and Fixes
We’ve all been there chocolate seizing, sticky mixtures, balls that refuse to set. Here are the fixes.
What to Do If Your Mixture is Too Sticky or Crumbly
Chef’s Note: The texture is everything. If the mixture (the Oreo Balls With Cream Cheese base) is sticky and hard to handle, you need more crumbs.
Grind about five more Oreos and mix them in, a tablespoon at a time, until the mixture pulls away cleanly from your hands. If it's too crumbly, add 1 teaspoon of softened cream cheese or even a splash of milk but proceed cautiously!
Preventing Chocolate Seizing During Melting
Chocolate seizures happen when even a tiny drop of water gets into the melted chocolate. Use a dry bowl and spoon, and if you are using a double boiler, make sure the water is simmering gently, not boiling vigorously (steam is the enemy). If your chocolate does seize and turn grainy, don't panic.
Stir in 1 teaspoon of vegetable shortening or refined coconut oil until it smooths out again.
Tips for Professional Looking Dipping and Garnishing
Use proper dipping tools or two forks. The key is balance. Drop the ball into the chocolate, roll it quickly to coat, then lift it out with the fork. Tap the side of the bowl sharply a few times to let the excess chocolate drip away.
Immediately place the truffle back on the parchment and add your sprinkles or reserved cookie crumbs before the chocolate sets. Work quickly!
make-ahead Mastery: How to Store and Preserve Your Bites
One of the great things about No Bake Oreo Cake Balls is their incredible shelf stability once coated. They last ages, meaning you can get a serious head start on holiday baking.
Refrigeration Guidelines for Short Term Storage
Once completely set, store your truffles in an airtight container in the refrigerator for up to 2 weeks. Layer them between sheets of wax or parchment paper to prevent sticking. They are actually best served slightly chilled they taste fudgier and the coating has a better snap.
The Complete Guide to Freezing Oreo Truffles
Yes, they freeze beautifully! This is my absolute favorite way to preserve them. Place the fully set and decorated Oreo Balls on a single layer on a baking sheet and flash freeze them for about an hour. Once solid, transfer them to a freezer safe, airtight container or bag.
They will keep perfectly for up to 3 months.
Thawing and Serving Frozen Bites
When you’re ready to serve, transfer the container from the freezer to the refrigerator overnight. This slow thaw prevents condensation (the enemy of chocolate coating) from forming.
If you want to serve them quickly, let them sit at room temperature for about 15– 20 minutes, just until the interior is softened enough to bite into.
Presentation & Pairings: Elevating Your Oreo Treats
These are already adorable, but with a little extra touch, they can look truly gourmet. Drizzle them with contrasting chocolate dark chocolate truffles get a white chocolate stripe, and white chocolate ones get dark chocolate. Simple, effective, and very chic.
And speaking of rolling things, if you love making different shapes and balls in the kitchen, you must try my recipe for Rice Balls Recipe: Proper Crispy Arancini with Mozzarella Core . They are savory, unlike these sweet treats, but the rolling satisfaction is similar!
Whether you’re wrapping them up as a gift or stacking them high for a party, this foolproof Oreo Balls recipe delivers perfection every single time. Get crushing!

Recipe FAQs
How long do Oreo Balls last, and how should I store them?
Store your Oreo Truffles in an airtight container in the refrigerator for up to 2 weeks. Due to the cream cheese base, they must remain chilled to maintain their structure and safety. For the best flavor and texture, however, allow them to sit at room temperature for about 10 minutes before serving.
My mixture seems too soft and sticky; how do I fix the consistency?
If your mixture is overly soft, it likely means the cream cheese was too warm or you didn't process the Oreos finely enough. Simply wrap the dough tightly and place it back into the freezer for 15 to 20 minutes to firm up. This brief chilling period will make the rolling process much easier and cleaner.
Why is the chocolate coating cracking after the truffles chill?
Cracking typically occurs due to extreme temperature shock applied to the outer layer of chocolate. Ensure your truffles are only chilled, not frozen solid, before dipping into the warm coating.
Additionally, make sure your melted chocolate is not excessively hot, as high heat destabilizes the cocoa butter and causes brittle setting.
Can I use low-fat or reduced fat cream cheese for this recipe?
While possible, it is highly recommended to use full fat cream cheese for the ultimate no-bake experience. The higher fat content provides essential structure and a richer, creamier mouthfeel, which helps bind the crushed Oreos without making the mixture watery or grainy.
Reduced fat versions often have higher moisture content, leading to a sloppier truffle mixture.
Can I make these Oreo Truffles dairy-free or vegan?
Yes, achieving a vegan truffle is straightforward by using gluten-free/vegan Oreos, substituting the standard cream cheese with a high-quality vegan cream cheese alternative, and choosing a certified dairy-free melting chocolate.
Ensure all three core ingredients are verified vegan, as the process remains exactly the same.
What are the best ways to customize the flavor of these truffles?
You can introduce flavor variety by adding 1/2 teaspoon of extract, such as peppermint, orange, or almond, directly into the truffle mixture during processing. For exterior customization, try coating them in white chocolate instead of milk chocolate, or rolling the set truffles in crushed nuts, espresso powder, or coconut flakes before the coating dries.
Can I freeze the finished Oreo Truffles?
Absolutely; Oreo truffles freeze beautifully for long term storage. After the chocolate coating has fully set, arrange them in an airtight container separated by layers of parchment paper. They will maintain their quality for 2 to 3 months; simply thaw them overnight in the refrigerator before serving.
Ultimate No Bake Oreo Balls

Ingredients:
Instructions:
Nutrition Facts:
| Calories | 1350 kcal |
|---|---|
| Protein | 14.8 g |
| Fat | 81.2 g |
| Carbs | 133.7 g |
