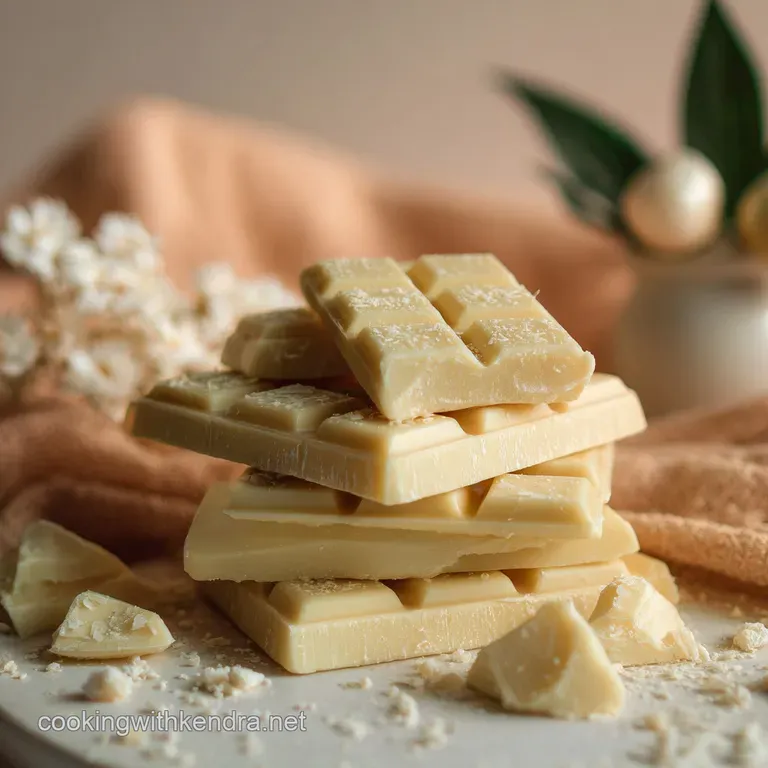
White Chocolate: Homemade Cake Recipe
- Time: Active 15 minutes, Passive 10 minutes, Total 25 minutes
- Flavor/Texture Hook: Buttery, floral, and snaps with a satisfying shatter
- Perfect for: Custom gift giving, gourmet baking, or a clean label snack
- Crafting the Dreamiest Silky Smooth Homemade White Chocolate
- Why This Specific Method Works
- Essential Recipe Metrics and Benchmarks
- Breakdown of Key Chocolate Components
- Shopping List and Smart Substitutes
- Essential Tools for Flawless Results
- Step By Step Cooking Process
- Fixing Common Chocolate Texture Mistakes
- Flavor Variations and Creative Swaps
- Storage Tips and Reheating Rules
- Serving Suggestions and Flavor Pairings
- White Chocolate FAQs
- 📝 Recipe Card
Crafting the Dreamiest Silky Smooth Homemade White Chocolate
Picture this: it is a rainy Tuesday, and I am standing in my kitchen, hovering over a bowl of melting cocoa butter. The air is thick with a scent that is part tropical vacation, part high end French patisserie floral, nutty, and impossibly rich.
I used to think making my own White Chocolate was a task reserved for people with fancy degrees and marble tempering slabs. My first attempt? Total disaster. I used granulated sugar because I was impatient, and I ended up with what I affectionately called "sweet beach sand." It was gritty, waxy, and frankly, a bit of a tragedy.
But that failure taught me everything about the importance of particle size and temperature control.
We are going for that elusive, glossy finish that makes a loud "snap" when you break a piece off. You want it to feel like silk on your tongue, not like a candle. Most people don't realize that the white stuff in the grocery store is often packed with vegetable oils and fillers.
When you make it yourself, you are using pure cacao gold. It’s a total shift in how you experience sweetness. We aren't just melting things together; we are creating a stable emulsion of fat and solids.
Right then, let's get into the heart of it. This isn't just about a recipe; it's about the feeling of successfully tempering a temperamental ingredient. You’ll feel like a total kitchen wizard when you unmold these and see that mirror like shine.
Trust me on this: once you taste the difference between real cocoa butter and the palm oil-laden alternatives, there is no going back. Grab your spatula, and let’s crack on with the science of the melt.
Why This Specific Method Works
Understanding the "how" behind the melt is what separates a grainy bar from a velvety one. It’s all about physics and chemistry working in tandem.
- Solid Suspension: Since sugar doesn't dissolve in fat, we use powdered sugar to ensure the particles are small enough that the human tongue cannot detect individual grains.
- Emulsion Stability: Milk powder acts as both a flavor enhancer and a structural filler, helping to bind the fat molecules into a cohesive, solid block.
- Starch Free Gloss: Using food grade cocoa butter ensures a high melting point, which gives the bar its signature shatter crisp texture at room temperature.
- Crystal Alignment: Controlled cooling encourages the formation of Beta V crystals, which are responsible for that professional glossy sheen and snap.
Essential Recipe Metrics and Benchmarks
Before you start melting, you need to know what "done" looks like. It is easy to overshoot the heat and scorch the delicate milk solids. This table helps you decide which method fits your kitchen setup best.
| Method | Time | Texture | Best For |
|---|---|---|---|
| Stovetop (Bain Marie) | 10 minutes | Utterly velvety | Precision tempering and maximum shine |
| Microwave (Short Bursts) | 4 minutes | Slightly softer | Quick batches for baking or melting |
| Oven (Low Temp) | 15 minutes | Toasted/Caramelized | Making "blonde" chocolate with deep nutty notes |
When using the stovetop, the key is the aroma. You should smell a light, nutty perfume. If it starts to smell like toasted popcorn, your heat is too high. I prefer the stovetop because I can see the exact moment the cocoa butter loses its yellowish tint and becomes clear. It is much more tactile. If you are looking for a different texture profile, perhaps for a filling, you might find inspiration in the technique used for The Cloud Nine recipe.
Breakdown of Key Chocolate Components
Every ingredient in this list serves a structural purpose. We aren't just adding things for flavor; we are building a stable solid fat matrix.
| Ingredient | Science Role | Pro Secret |
|---|---|---|
| Cocoa Butter | The structural lipid base | Use "deodorized" if you want a neutral flavor, "natural" for a heavy chocolate scent. |
| Milk Powder | Provides protein and solids | Toasted milk powder gives a cereal milk flavor that is truly addictive. |
| Vanilla Bean Paste | Aromatic complexity | The tiny seeds provide a visual cue of high-quality and depth. |
Shopping List and Smart Substitutes
The quality of your White Chocolate depends entirely on your raw materials. Don't skimp on the cocoa butter; it's the soul of the dish.
- Cocoa Butter (1 cup/150g): Ensure it is "food grade."
- Substitute: There is no true sub for the snap, but coconut butter (not oil) works for a "raw" fudge like version.
- Powdered Sugar (¾ cup/90g): Sift this twice.
- Substitute: Erythritol powder works for a low carb version. Why this? Keeps the texture smooth without the gritty crunch of granulated sugar.
- Full Fat Milk Powder (½ cup/60g): This adds the creamy mouthfeel.
- Substitute: Coconut milk powder for a dairy-free version. Why this? Provides the necessary solids to bulk up the cocoa butter fat.
- Sea Salt (1 pinch): Balances the high sugar content.
- Substitute: Pink Himalayan salt.
- Vanilla Bean Paste (½ tsp): For flavor.
- Substitute: Scraped seeds from one vanilla bean.
Essential Tools for Flawless Results
You don't need a lab, but a few specific tools will make your life much easier. I once tried to mix this with a regular spoon big mistake. You need something that can actually incorporate the powders into the fat without adding air bubbles.
Chef's Tip: Use a silicone spatula instead of a wooden spoon. Wood can hold onto moisture or old spice flavors, which is a recipe for seized chocolate.
- Double Boiler: Or a heat proof glass bowl over a pot of simmering water.
- Fine Mesh Sieve: For the powdered sugar and milk powder.
- Digital Thermometer: To track the tempering stages.
- Silicone Molds: These make unmolding a breeze without the risk of breaking the bars.
step-by-step Cooking Process
- Prep the double boiler. Fill a pot with 1 inch of water and bring to a simmer. Note: Ensure the bowl doesn't touch the water.
- Melt the cocoa butter. Place 1 cup of cocoa butter in the bowl and stir until completely liquid and translucent.
- Sift the solids. While melting, sift the ¾ cup powdered sugar and ½ cup milk powder together.
- Incorporate the powders. Gradually whisk the dry mix into the melted butter until no lumps remain and it looks glossy.
- Season the mix. Add the sea salt and vanilla bean paste.
- Emulsify the batch. Continue whisking over the heat for 2-3 minutes. Note: This ensures the sugar is fully coated in fat.
- Cool slightly. Remove from heat and stir until the temperature drops to about 90°F.
- Fill the molds. Pour the liquid into your silicone molds carefully.
- Tap out bubbles. Tap the molds firmly on the counter until all air bubbles rise to the surface and pop.
- Set the chocolate. Refrigerate for at least 2 hours until the bars feel rock hard and matte.
Fixing Common Chocolate Texture Mistakes
Chocolate is sensitive. One wrong move and it goes from silky to chunky. But don't panic; most things are fixable if you catch them early.
Why Your Chocolate Seized
If your mixture suddenly turns into a thick, grainy paste, moisture is the culprit. Even a single drop of steam from the bottom of your double boiler can cause the sugar to hydrate and clump.
Why Your Chocolate Is Waxy
This usually happens if the cocoa butter wasn't fully incorporated with the milk solids or if the ratio of fat to powder is too high. It feels like eating a candle because the fat isn't breaking down properly on the tongue.
| Problem | Root Cause | Solution |
|---|---|---|
| Grainy Texture | Un sifted sugar or cold milk powder | Re heat gently and whisk vigorously or use a milk frother to blend. |
| Dull Finish | Improper tempering/cooling | Melt it down and try the cooling process again with a "seed" of solid chocolate. |
| Soft at Room Temp | Too much vanilla liquid or moisture | Use vanilla paste instead of extract; keep the ratio of solids high. |
Common Mistakes Checklist
- ✓ Check that all tools are bone dry before starting (prevents seizing).
- ✓ Avoid boiling the water in your double boiler a gentle simmer is plenty.
- ✓ Never use liquid food coloring; it contains water which ruins the emulsion.
- ✓ Wipe the bottom of your bowl after removing it from the heat so no condensation drips into the mold.
- ✓ Don't rush the cooling process in the freezer; the fridge is better for stable crystals.
Flavor Variations and Creative Swaps
Once you have the base down, you can go wild with the customizations. This is where the homemade version really beats anything from a store. If you are feeling extra indulgent, you could even use these techniques to improve a Fudgy White recipe.
- For a White Chocolate Mocha Recipe: Add 1 teaspoon of finely ground espresso powder to the melting stage. It creates a caffeine infused bar that is brilliant for morning treats.
- For a White Chocolate Cookie Recipe: Instead of pouring into bars, let the chocolate set in a flat sheet and then chop it into irregular chunks. These won't disappear into the dough like store-bought chips; they stay creamy and rich.
- The "Matcha" Variation: Whisk in 1 tablespoon of high-quality matcha powder with the milk solids for a vibrant green, earthy flavor profile.
- The "Salted Pistachio" Twist: Press roasted pistachios into the back of the bars before they set for a beautiful color contrast and crunch.
Storage Tips and Reheating Rules
Storing your White Chocolate correctly is the difference between a fresh snap and a stale, soapy taste. Cocoa butter is a fat, and fats absorb odors from the fridge like a sponge.
Storage: Keep your bars in an airtight container. In the fridge, they will last about 2 weeks. For long term storage, you can freeze them for up to 3 months, but be sure to wrap them in parchment paper then foil to prevent freezer burn.
Zero Waste: If you have leftover scraps or a bar that didn't set quite right, don't toss it. Shave the "mistake" chocolate into your morning coffee or melt it down to make a dip for fruit. You can also use the leftover cocoa butter scraps to make a luxurious body balm it's that pure!
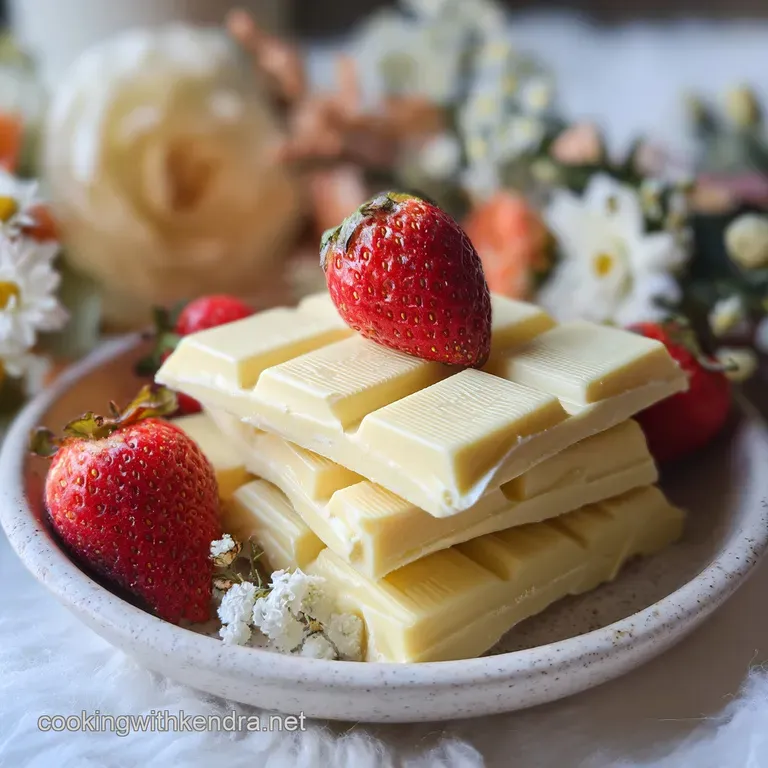
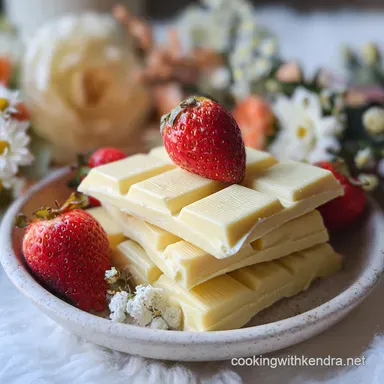
Serving Suggestions and Flavor Pairings
White Chocolate is often criticized for being too sweet, but that is because it is rarely paired correctly. It needs acidity or bitterness to shine.
Think about tart raspberries or a sharp passionfruit curd. The fat in the chocolate coats the tongue, making the sour notes of the fruit feel rounder and more pleasant. For a fun project, you could use this batch to create a Homemade Chocolate Covered recipe that uses your own custom flavored coating.
I also love serving this alongside a very dark espresso. The bitterness of the coffee cuts through the sugar, while the vanilla bean paste in the chocolate highlights the floral notes of the beans.
If you’re feeling adventurous, try a savory pairing like a sprinkle of smoked paprika or even a thin slice of salty manchego cheese. It sounds wild, but the salty sweet creamy combo is a total winner.
Enjoy the process, don't fear the melt, and remember even a "failed" batch of chocolate is still a bowl of sugar and cocoa butter. You really can't lose!

White Chocolate FAQs
What exactly is white chocolate?
It is primarily cocoa butter, sugar, and milk solids. Unlike dark or milk chocolate, white chocolate does not contain cocoa solids (the dark brown part of the cocoa bean), which is why it's pale in color and lacks that distinct chocolatey bitterness.
What is the unhealthiest chocolate?
There's no single "unhealthiest" chocolate. However, many commercially produced white chocolates can be higher in sugar and unhealthy fats due to added vegetable oils and fewer quality cocoa butter ingredients compared to homemade versions.
Is Milky Way a white chocolate?
No, a Milky Way bar is not white chocolate. It's a candy bar composed of nougat, caramel, and milk chocolate coating. White chocolate is a distinct type of confectionery made from cocoa butter.
What is the actual flavor of white chocolate?
It tastes sweet, creamy, and often has vanilla and buttery notes. Because it's made with cocoa butter, it has a rich, melt-in-your mouth texture and a flavor profile that is more akin to dairy and sugar than traditional chocolate.
Can I use white chocolate chips in baking?
Yes, but be mindful of how they melt. White chocolate chips often contain stabilizers to help them hold their shape better than bar white chocolate, which can affect their texture and meltability. For best results in recipes like No-Bake gluten-free Cookie Dough Delights, using good quality white chocolate bars and chopping them finely works wonders.
Why does my white chocolate seize up when melting?
It's usually due to moisture contamination. Even a tiny amount of water or steam can cause the sugar in white chocolate to clump and seize, turning it into a grainy paste. Always ensure your equipment is completely dry when melting chocolate.
Is white chocolate real chocolate?
Yes, in the sense that it contains cocoa butter. While it lacks cocoa solids, white chocolate is made from the fatty component of the cocoa bean, cocoa butter, along with sugar and milk. This technicality often leads to debates, but it's widely accepted as a form of chocolate.
White Chocolate Delight
Ingredients:
Instructions:
Nutrition Facts:
| Calories | 165 kcal |
|---|---|
| Protein | 1.3 g |
| Fat | 13.8 g |
| Carbs | 9.4 g |
| Fiber | 0 g |
| Sugar | 9.4 g |
| Sodium | 51 mg |
