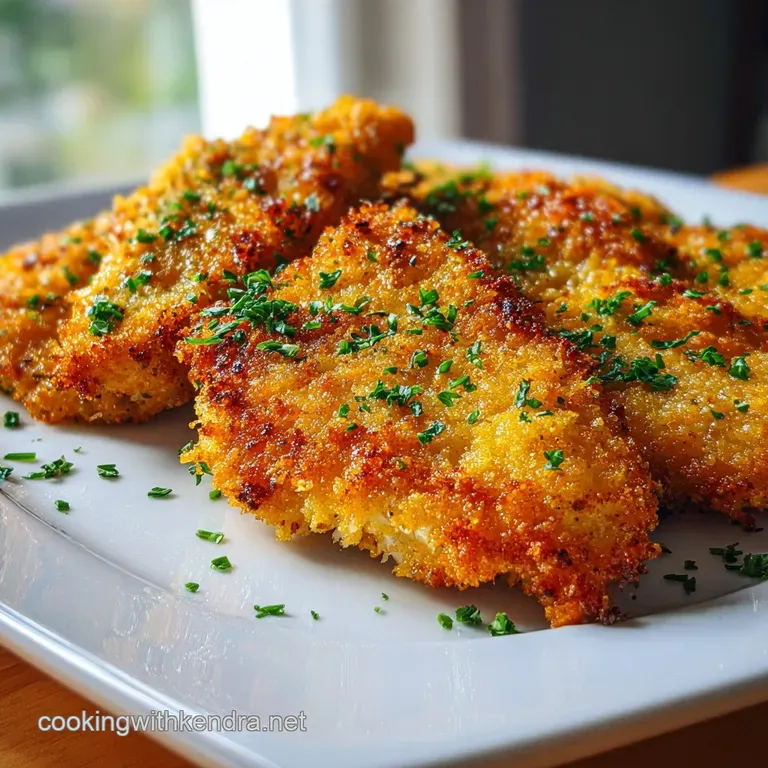
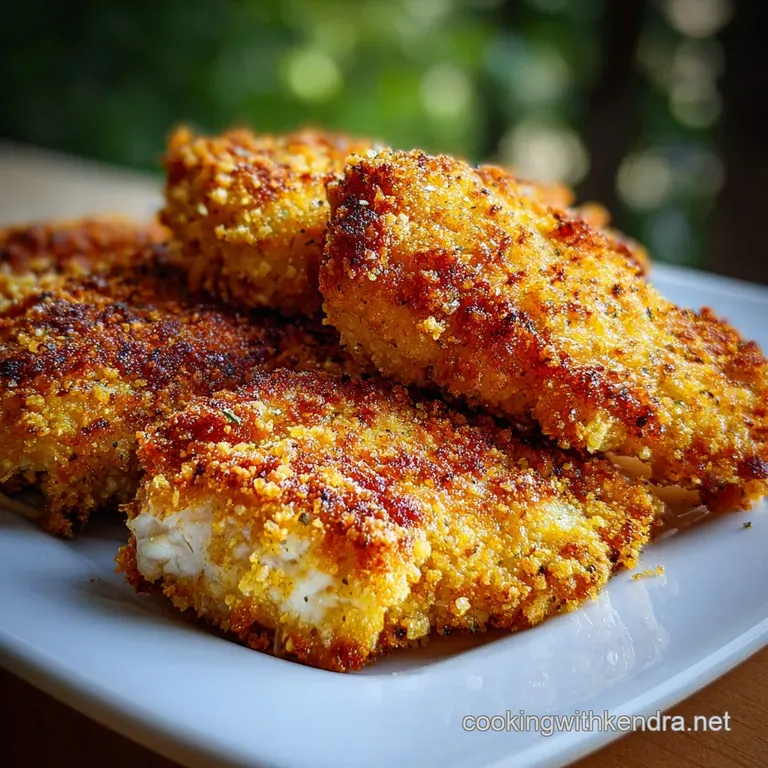
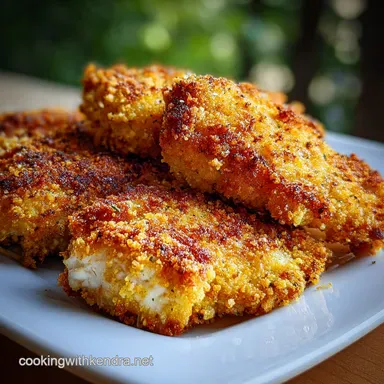
Baked Breaded Chicken with Toasted Panko
- Time: Active 15 minutes, Passive 20 minutes, Total 35 minutes
- Flavor/Texture Hook: Shatter crisp exterior with a juicy, garlic herb center
- Perfect for: Busy weeknights, picky kids, and budget conscious meal prep
- The Secret to Baked Breaded Chicken
- The Science of the Toasted Crumb
- Key Specifications and Prep Time
- Smart Shopping List and Ingredients
- Essential Equipment for the Crunch
- Simple Steps to Golden Chicken
- Pro Solutions for Perfect Results
- Flavor Swaps and Diet Tweaks
- Storage Advice and Reheating Tips
- Family Friendly Serving Ideas
- Myths
- Recipe FAQs
- 📝 Recipe Card
The Secret to Baked Breaded Chicken
We have all been there, standing in the kitchen on a Tuesday night, staring at a plate of chicken that looks more like wet cardboard than a meal. I remember my first attempt at this dish years ago. I thought I could just toss some breadcrumbs on a piece of meat and call it a day. The result?
A soggy, sad mess that actually slid right off the fork. It was a humble moment that sent me on a mission to find a way to get that deep fried crunch without actually touching a deep fryer.
After dozens of batches and a few smoke alarm incidents, I figured out the magic formula. It isn't just about the heat, it's about managing moisture and fat in a way that tricks the oven into acting like a frying pan. This version of Baked Breaded Chicken is now a staple in my house because it's reliable.
When you hear that first crunch as the knife cuts through the crust, you'll know exactly what I mean. It's a sound that says dinner is going to be good, and the best part is that your kitchen won't smell like a fast food joint for three days.
This recipe relies on a few smart tricks that I have picked up from professional kitchens and translated for our busy home lives. We're using a specific dredging technique that ensures the breading stays stuck to the meat, not the pan.
Plus, by pre toasting our breadcrumbs, we're giving the chicken a "head start" on color and texture. It's practical, it's fast, and it works every single time. Trust me, once you try the toasted crumb method, you will never go back to the old way.
The Science of the Toasted Crumb
Pre Gelatinization: Toasting the Panko with olive oil before baking creates a fat barrier that prevents the crumbs from absorbing chicken juices and getting soggy.
The Maillard Reaction: By starting with golden crumbs, we achieve a mahogany color and nutty flavor profile in 20 minutes that would otherwise take an hour in the oven.
Protein Cross Linking: Adding Dijon mustard to the egg wash creates a stronger chemical bond between the flour layer and the breadcrumbs, preventing the breading from "shedding" after cooking.
| Thickness | Internal Temp | Rest Time | Visual Cue |
|---|---|---|---|
| 1/2 inch | 165°F | 5 minutes | Juices run clear when poked |
| 3/4 inch | 165°F | 7 minutes | Firm feel, no springiness |
| 1 inch | 165°F | 8 minutes | Opaque center with no pink |
If you find yourself needing a faster meal on a night when even 35 minutes feels like too much, you might enjoy my Skillet Chicken with recipe which cuts down on the oven time significantly. It's a great alternative when you want that buttery flavor without the full breading process.
Key Specifications and Prep Time
To get the most out of this recipe, you need to know exactly what you are working with. We are aiming for a total time of 35 minutes, which is just enough time to toss a salad and set the table. The prep is the most active part, taking about 15 minutes of hands on work.
You’ll be setting up a three station dredging line, which sounds fancy but is really just three shallow bowls and a bit of focus.
The cook time is a solid 20 minutes at a high temperature. We want the oven hot so the heat hits that crust immediately, sealing in the moisture. We are using 1.5 lbs of boneless skinless chicken breast for this, which I find is the perfect amount for a family of four.
If you're feeding a hungrier crowd or want leftovers for lunch the next day, it scales up beautifully, though you’ll want to keep an eye on your oven racks to ensure even airflow.
| Component | Science Role | Pro Secret |
|---|---|---|
| Panko Breadcrumbs | Surface Area | Use Japanese style Panko for a jagged, lighter texture than standard crumbs |
| Dijon Mustard | Emulsifier | Acts as a "glue" to hold the egg wash to the slippery flour layer |
| Smoked Paprika | Color Catalyst | Provides a deep reddish hue that mimics the look of a deep fried finish |
When choosing your chicken, consistency is your best friend. I always pound my chicken to a uniform 1/2 inch thickness. This isn't just for stress relief, though it's great for that. It ensures that every part of the chicken cooks at the same rate, so you don't end up with dry, woody edges and a raw middle.
Smart Shopping List and Ingredients
- 1.5 lbs chicken breast: Look for boneless and skinless. Why this? Pounding them flat ensures they cook quickly and remain juicy.
- 2 cups Panko breadcrumbs: These are the secret to the crunch. Why this? Panko has more surface area than regular crumbs for a better shatter.
- 2 tbsp extra virgin olive oil: For toasting the crumbs. Why this? Fat carries flavor and helps the oven conduct heat to the crust.
- 0.5 cup all purpose flour: Your base layer. Why this? It dries the surface of the meat so the egg has something to grab.
- 1 tsp garlic powder: For savory depth.
- 1 tsp onion powder: Adds a subtle sweetness and aroma.
- 0.5 tsp smoked paprika: For that "fried" look and a hint of woodsmoke.
- 1 tsp sea salt: To season throughout.
- 0.5 tsp cracked black pepper: For a mild, sharp bite.
- 2 large eggs: The binder.
- 1 tbsp Dijon mustard: For flavor and "stickiness."
- 1 tbsp water: To thin the eggs for even coverage.
| Original Ingredient | Substitute | Why It Works |
|---|---|---|
| Panko Breadcrumbs | Crushed Cornflakes | High starch content creates a very similar crunch. Note: Use unsweetened only |
| Extra Virgin Olive Oil | Melted Butter | Adds a rich, dairy flavor. Note: May brown faster in the oven |
| Dijon Mustard | Yellow Mustard | Provides the same acidity and binding. Note: Slightly more vinegar forward |
If you happen to have leftovers or want to try a different flavor profile entirely, this chicken is incredible when sliced over an Oven Baked Caesar recipe. The creamy sauce from that recipe pairs perfectly with the crispy texture we're creating here today. It's a clever way to stretch your grocery budget over two different meals.
Essential Equipment for the Crunch
You don't need a professional kitchen, but a few specific tools will make your life much easier. First, a large rimmed baking sheet is non negotiable. It provides enough space for the chicken to sit without overcrowding, which is the number one cause of steaming rather than roasting.
If you can, use a wire cooling rack set inside that baking sheet. This allows air to circulate underneath the chicken, ensuring the bottom is just as crispy as the top.
A heavy rolling pin or a meat mallet is essential for that 1/2 inch thickness we talked about. If you don't have one, a heavy bottomed skillet works in a pinch. You’ll also want three shallow bowls or pie plates for your dredging station.
Using wide, flat containers makes it much easier to coat the chicken without making a massive mess on your counters.
Chef's Tip: Freeze your chicken for 10 minutes before pounding it. The slight firmness prevents the muscle fibers from tearing, giving you a much smoother, more professional looking cutlet.
Another trick I swear by is using a pair of tongs for the "wet" steps and your fingers for the "dry" steps. This prevents your hands from becoming "club hands," where you end up with more breading on your fingers than on the chicken itself.
It’s a small detail, but it keeps the process clean and efficient, which is exactly what we want on a busy weeknight.
Simple Steps to Golden Chicken
- Toast crumbs. Mix 2 cups Panko with 2 tbsp olive oil in a skillet over medium heat until golden and fragrant. Note: This ensures the crust is crispy, not soggy.
- Prep chicken. Pound 1.5 lbs chicken to 1/2 inch thickness. Note: Uniform thickness means uniform cooking.
- Mix flour. Combine 0.5 cup flour with garlic powder, onion powder, paprika, salt, and pepper in a shallow bowl.
- Whisk binder. Beat 2 eggs with 1 tbsp Dijon and 1 tbsp water until completely smooth and velvety.
- Flour dredge. Coat one piece of chicken in the flour mixture, shaking off any excess.
- Egg dip. Submerge the floured chicken into the egg mixture until no dry spots remain.
- Final crust. Press the chicken firmly into the toasted Panko until the coating is thick and even.
- Arrange rack. Place chicken on a wire rack set over a baking sheet.
- Bake hot. Cook at 400°F for 15-20 minutes until the internal temperature hits 165°F.
- Rest meat. Let the chicken sit for 5 minutes until the juices redistribute.
When you're pulling the chicken out of the oven, look for that specific mahogany color. It should look like it just came out of a deep fryer. The smell of the smoked paprika and garlic hitting that hot oil in the crumbs is honestly better than any air freshener.
It's the scent of a home cooked meal that everyone is actually going to be excited to eat.
Phase 1: The Golden Prep
Don't skip the toasting step. If you put white Panko in the oven, it stays white and soggy where it touches the meat. By browning them in the skillet first, you're locking in that "fried" texture. It only takes about 3 to 5 minutes, but it's the difference between a "meh" dinner and a "wow" dinner.
Keep the crumbs moving in the pan so they don't burn.
Phase 2: The Dredging Station
Set up your bowls in order: Flour, then Egg, then Panko. This flow is logical and prevents you from dripping egg wash all over your floor. When you press the chicken into the Panko, really use the heel of your hand to push the crumbs into the meat.
You want a thick, insulating layer of crunch that won't fall off during the bake or when you're slicing it later.
Pro Solutions for Perfect Results
Why is my breading falling off?
This usually happens because the chicken was too wet when it hit the flour, or the flour layer was too thick. Flour acts like a primer for paint; if the primer is clumpy, the paint won't stick. Make sure to pat the chicken dry with paper towels before you even start dredging.
Then, shake the chicken vigorously after the flour step so only a fine, translucent dust remains.
Why isn't my crust mahogany colored?
If you skip the oil in the Panko or your oven isn't hot enough, the breading will stay pale. The oil is what conducts the heat into the crumbs to create that browning. If you’re worried about it, you can give the breaded chicken a very light spray of oil right before it goes into the oven.
This helps the heat distribute evenly across all those jagged Panko edges.
| Problem | Root Cause | Solution |
|---|---|---|
| Soggy bottom | Lack of airflow | Use a wire rack over the baking sheet to let air circulate |
| Tough chicken | Overcooking | Use a thermometer and pull at exactly 165°F |
| Breading slips off | Wet surface | Pat chicken dry with paper towels before dredging in flour |
Common Mistakes Checklist
- ✓ Pat the chicken completely dry before starting (prevents the flour from turning into a paste).
- ✓ Shake off every bit of excess flour (too much flour creates a "barrier" that causes breading to slip).
- ✓ Don't skip the Dijon in the egg wash (it adds flavor and helps the binder stick).
- ✓ Ensure the oven is fully preheated before the chicken goes in (essential for that immediate sear).
- ✓ Let the chicken rest on a rack, not a flat plate, after cooking (prevents steam from softening the bottom).
Flavor Swaps and Diet Tweaks
If you are looking to save a few dollars at the grocery store, you can easily swap the Panko for crushed saltine crackers or even dry breadcrumbs you make from the heels of your sandwich bread. Just be sure to toast them with a little extra oil, as they tend to be denser than Panko.
You won't get that exact "shatter" crunch, but it will still be a very satisfying, crispy meal that the family will love.
For a gluten-free version, swap the all purpose flour for a 1:1 gluten-free blend and use gluten-free Panko or crushed pork rinds. Pork rinds actually make an incredible crust that is naturally low carb and extremely crispy.
If you go the pork rind route, you can skip the salt in the breading mixture, as they are already quite seasoned.
- If you want a spicy kick, add 1 tsp of cayenne pepper to the flour mixture.
- If you want a cheesy crust, mix 1/4 cup of grated Parmesan into the Panko after toasting.
- If you want an herb forward flavor, add 1 tbsp of dried Italian seasoning to the breadcrumbs.
| Method | Time | Texture | Best For |
|---|---|---|---|
| Standard Oven | 20 mins | Crispy & Even | Feeding a full family |
| Air Fryer | 12 mins | Extra Crunchy | Small batches or singles |
| Convection | 15 mins | Very Brown | Getting that mahogany color fast |
Scaling this recipe is straightforward. If you are cooking for two, just halve everything. If you are doubling it for a party, keep the spices at about 1.5x the original amount so they don't become overwhelming. When doubling, make sure you use two separate baking sheets rather than crowding one.
If you crowd the pan, the chicken will steam and you'll lose that beautiful crunch we worked so hard for.
Storage Advice and Reheating Tips
Baked Breaded Chicken is surprisingly good the next day, provided you store it correctly. Let the chicken cool completely on a wire rack before putting it in a container. If you put hot chicken into a plastic tub, the steam will turn your crispy crust into mush. It will stay fresh in the fridge for up to 3 days.
For longer storage, you can freeze the breaded (but unbaked) chicken for up to 2 months. Just bake it straight from frozen, adding about 10 minutes to the total time.
When it comes to reheating, the microwave is your enemy. It will make the chicken rubbery and the crust soggy. Instead, use an oven or a toaster oven set to 350°F. Place the chicken on a rack and heat for about 10 minutes. This will revive the crunch and keep the meat juicy.
If you have an air fryer, 3 to 4 minutes at 360°F works like a charm and makes it taste almost exactly like it was just cooked.
Zero Waste Tip: Don't throw away those leftover breadcrumbs or the bits of flour! You can mix the leftover seasoned flour and crumbs with an extra egg to make "hushpuppy" style fritters, or save the toasted crumbs to sprinkle over a mac and cheese bake later in the week.
Family Friendly Serving Ideas
This chicken is a total chameleon when it comes to sides. My kids love it with a side of honey mustard or a simple BBQ sauce. If you want to keep things a bit more "adult," a squeeze of fresh lemon juice right before serving cuts through the richness of the breading and brightens the whole dish.
It's a simple touch that makes it feel like a bistro meal rather than a quick weeknight fix.
- The Picnic Style: Serve cold or room temperature with a creamy potato salad and pickles.
- The Comfort Bowl: Slice the chicken and serve it over mashed potatoes with a quick gravy.
- The Healthy Mix: Place hot sliced chicken over a bed of arugula with shaved parmesan and a balsamic glaze.
Whatever way you choose to serve it, the star is that crust. It’s a budget friendly way to make a pound and a half of chicken feel like a special occasion. You aren't just making dinner; you're making a meal that people will actually remember.
And since there's no big pot of oil to clean up afterward, you might even have time to enjoy a second glass of wine while the dishwasher does the heavy lifting. That, to me, is the ultimate kitchen win.
Myths
Myth: Searing the meat "seals in" the juices. In reality, searing creates flavor through the Maillard reaction but does nothing to prevent moisture loss. Moisture retention is actually controlled by the internal temperature of the meat, which is why we pull the chicken at 165°F.
The breading acts as an insulator, slowing down the heat transfer so the inside stays juicy while the outside gets hot enough to crisp.
Myth: You need a lot of oil for a crispy crust. While fat helps, the real key to a crispy oven bake is airflow and moisture control. Using a wire rack and pre toasting the crumbs does more for the texture than drenching the chicken in oil.
Excess oil can actually lead to a greasy, heavy crust that falls off the meat.
Myth: Pounding chicken makes it dry. Actually, the opposite is true! Pounding the chicken breaks down tough muscle fibers and ensures that the thin edges don't overcook while the thick center is still raw.
By making the piece uniform, you ensure every bite is cooked perfectly, which keeps the whole piece much juicier than a thick, uneven breast.

Recipe FAQs
Can I bake breaded chicken instead of frying?
Yes, baking is a fantastic alternative to frying. Baking significantly reduces added fat while achieving a satisfactory crunch, especially when using Panko breadcrumbs and a high oven temperature of 400°F.
Is it better to bake chicken at 350 or 400 in the oven?
Bake at 400°F for the best texture. A higher temperature promotes rapid dehydration of the crust, creating crispness before the internal meat has a chance to dry out. Lower temperatures, like 350°F, can result in a pale, softer crust.
At what temperature do I bake breaded chicken?
Set your oven to 400°F. This high heat is crucial for achieving that desirable mahogany color and shatteringly crisp exterior without overcooking the interior.
How long should breaded chicken be in the oven at 400 degrees?
Bake for 15 to 20 minutes, checking for doneness. Cooking time depends entirely on the thickness of your chicken cutlets; always verify the internal temperature reaches 165°F using a reliable thermometer.
Why is my baked breaded chicken soggy on the bottom?
The bottom is likely steaming instead of crisping due to lack of airflow. Place the breaded chicken on a wire rack set inside your baking sheet; this allows hot air to circulate underneath, ensuring the bottom crust dries out just as effectively as the top.
What is the secret to making the breading stick firmly in the oven?
Use a proper three step dredging process with Dijon mustard as an adhesive. After dredging in flour, dip the chicken in an egg wash fortified with Dijon; this acidic binder creates a stronger bond than egg alone. If you enjoyed mastering this adhesion technique, see how the same principle of stable layering works in our Chicken and Vegetable Soup recipe where texture matters.
Is it true I must use fresh Panko breadcrumbs for the best result?
No, this is a common misconception; dried Panko is fine, but toasting is mandatory. You must toast the Panko with olive oil before coating the chicken to jump start the crisping process and achieve that deep color quickly in the oven.
Baked Breaded Chicken Secrets
Ingredients:
Instructions:
Nutrition Facts:
| Calories | 544 kcal |
|---|---|
| Protein | 61.2 g |
| Fat | 16.3 g |
| Carbs | 33.7 g |
| Fiber | 1.6 g |
| Sugar | 1.2 g |
| Sodium | 765 mg |
