Bakery Style Chocolate Chip Cookies: Ultra-Chewy Chunks with Crisp Edges

- The Big City Baker’s Secret: Mastering the Ultimate Chewy Cookie
- Cookie Science Decoded: Achieving the Perfect Chew and Crunch
- Essential Components for Authentic Bakery Style Chocolate Chip Cookies
- Precision Baking: How to Assemble the Ultimate Cookie Dough
- Troubleshooting Your Bake: Pro Tips for Chewy Chocolate Chunk Results
- Preserving the Perfection: Storing Baked Cookies and Freezing Dough
- The Perfect Pairing: Enhancing Your Chocolate Chunk Experience
- Recipe FAQs
- 📝 Recipe Card
The Big City Baker’s Secret: Mastering the Ultimate Chewy Cookie
Okay, stop everything you are doing right now. Have you ever walked past a proper bakery when they just pulled a sheet of cookies from the oven? That deep, complex aroma of caramel butter mixed with dark, molten chocolate is pure magic.
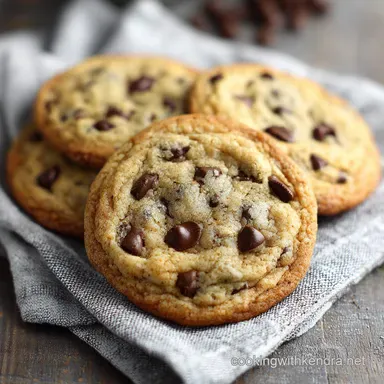
These aren't just cookies; they are magnificent, thick domes with those perfect, satisfyingly crinkled edges and centres that practically weep gooey, dark chocolate.
Honestly, this Bakery Style Chocolate Chip Cookies recipe is a total lifesaver when you need a serious dose of comfort without leaving the house. We’re using incredibly standard pantry ingredients, but the technique makes them taste like a million bucks.
Forget spending five dollars per cookie; you can make a dozen of these ultimate, ultra chewy chocolate chunk cookies for the price of one fancy cup of coffee.
I’ve made every single mistake in the book trying to achieve this specific chewiness and thickness. Flat, greasy cookies, dry cookies, cakey cookies I've failed them all. But after years of testing (and eating a truly enormous amount of dough), I finally cracked the code on the bakery secrets.
Let’s stop talking and start whipping up this incredible dough, shall we?
Cookie Science Decoded: Achieving the Perfect Chew and Crunch
The Unmatched Appeal of Bakery Style Chocolate Chip Cookies
It’s truly all about contrast here, friend. We want a soft, deeply fudgy interior that gives a satisfying resistance when you bite into it. That interior must contrast sharply with those shatteringly crisp, caramelized edges we worked so hard to achieve.
That specific balance of chew and snap is what separates a decent homemade biscuit from a high end bakery treat. Achieving this magic requires strictly balancing our moisture levels and ensuring we control the spread.
Why We Prioritize Chocolate Chunks Over Chips
This is a non-negotiable tip, seriously. Standard chocolate chips often contain stabilizers (waxes) to help them hold their teardrop shape during over high heat baking. That’s why they never fully melt into those beautiful, molten puddles we desperately crave!
We use rough chopped chocolate chunks or professional callets because they melt dynamically , creating glorious, sprawling pockets of pure, liquid chocolate within the cookie structure.
Setting the Stage: Essential Kitchen Tools for Cookie Success
Listen, you absolutely need a digital kitchen scale for the flour, trust me on this one. I used to scoop flour right from the bag and ended up with dense, dry, tough cookies every single time. Measuring flour by volume is the primary reason most home bakers struggle with cookie consistency.
You also need a large scoop (around 3 or 4 ounces) because these thick chewy cookie recipes demand hefty portions to maintain that majestic, thick dome shape.
The Role of Melted Butter in Creating Caramelized Edges
Okay, here is the secret sauce for the ultra chewy texture: using melted butter instead of creaming it with the sugar. When you cream butter, you incorporate air, which creates a lighter, cake like texture, perfect for something like my Sugar Cookie Recipe: Tender Cut-Out Cookies That Hold Their Shape . Melted butter inhibits gluten formation and allows the sugar to dissolve completely, leading to a much fudgier, denser centre and those beautiful, deeply caramelized edges. If you take an extra five minutes to brown the butter first, you unlock an intensely nutty, toffee like flavour that is genuinely addictive.
The Brown Sugar Advantage: Maximizing Moisture and Chewiness
Brown sugar is truly liquid gold for texture. It’s not just sugar; it's granulated sugar mixed with moisture rich molasses. That molasses content is pure magic in baking. We use a high ratio of brown sugar to white sugar because the molasses retains essential moisture, preventing the cookies from drying out and maximizing that incredible, signature chewiness.
White sugar provides structure and helps with the crispness, but brown sugar provides the deep flavour and the soul.
Understanding Maillard Reaction for Deeper, Maltier Flavor
The Maillard reaction sounds horribly technical, but it just means browning or more accurately, the chemical reactions that create new, delicious flavours when sugars and proteins are heated.
We encourage this reaction by using brown sugar and baking the cookies just long enough to turn the edges deeply golden brown. This process develops compounds that taste like toast, toffee, and malt.
The ultimate trick is pulling them out of the oven when they look slightly underdone in the middle to halt the reaction before they get dry.
Essential Components for Authentic Bakery Style Chocolate Chip Cookies
Choosing Your Chocolate: Why high-quality Chunks Matter
As mentioned, we are ditching the chips entirely, friend. For the deepest, most complex flavour, I like a blend of 60% bittersweet and 70% dark chocolate callets or roughly chopped baking bars. This creates a really dynamic range of bitter and sweet pools.
| Ingredient | The Key Function | My Recommended Substitute |
|---|---|---|
| All-Purpose Flour | Provides essential structure and bulk. | Use a reliable 1:1 gluten-free Blend (you may need a splash of milk). |
| Melted Butter | Creates fudginess; prevents cakiness. | high-quality plant based baking block (avoid liquid oils or soft margarine). |
| Brown Sugar | Molasses for moisture, chew, and colour. | Dark Brown Sugar works perfectly for a richer, deeper flavour profile. |
| Eggs/Yolk | Yolk adds richness; whole egg binds everything. | No viable replacement for the egg structure here; stick to the yolks! |
| Baking Soda | Promotes spread and activates browning. | 1 tsp of baking soda is crucial; do not swap it for baking powder alone. |
White vs. Brown Sugar Ratio: The Key to Texture Control
Our recipe uses a deliberate excess of brown sugar over white sugar. Granulated white sugar contributes to spread and ensures crispness, leading to the necessary edge snap. The hefty amount of brown sugar, however, is the chief architect of the ultra chewy result.
Getting this ratio right in this case, roughly 2.5 parts brown to 1 part white is the difference between a flat, greasy cookie and a thick, magnificent dome.
Deciphering Leavening Agents: Baking Soda vs. Baking Powder
We are using both baking soda and a touch of baking powder, which is critical for lift and spread control. Baking soda reacts with the acidic molasses in the brown sugar, causing spread and browning.
Baking powder is double acting; it lifts the cookie up quickly during the early bake, helping to create that highly desirable, slightly puffy, thick dome shape and preventing unwanted flatness.
Salt Selection: Achieving the Final Flavor Balance
Do not skimp on the salt inside the dough. The fine sea salt is essential for balancing the intense, concentrated sweetness from all that brown sugar. But the flaky sea salt sprinkled on top just before baking?
That’s for the sensory experience it provides a textural crunch and a sharp, bright burst of flavour that makes the whole cookie pop.
Precision Baking: How to Assemble the Ultimate Cookie Dough

The Creaming Versus Whisking: Handling the Melted Butter Dough
Since we used melted butter, we bypass the traditional creaming step entirely. Instead, we whisk the melted butter vigorously with the sugars and salt. Whisking ensures the sugar starts dissolving immediately, which begins to build the structure needed for that gorgeous chew.
After adding the eggs and extra yolk, you must whisk again until the mixture becomes notably pale and thick, almost like a thin, pale custard.
The Critical 24 Hour Chill: Why Dough Hydration is Non-Negotiable
I know, waiting for perfect cookies is the absolute worst part. I once tried to skip the chilling step entirely, and my cookies spread into one giant, flat, greasy sheet. The 24 hour chill allows the flour to fully hydrate it soaks up all the liquid, preventing the cookies from spreading too rapidly in the oven.
Even more importantly, this time allows the flavours to deepen and mature, tasting far richer than a 'no-chill' batch ever could.
Shaping Perfection: Achieving Those Tall, Majestic Cookie Mounds
Use your massive scoop (3 or 4 ounces) to portion the dough, and roll them vertically. We are aiming for tall, vertical mounds, not flat discs. Before placing them on the sheet, try the trick I use for my Nutella Stuffed Chocolate Chip Cookies: Ultimate Chewy Gooey Bombs : tear the dough ball in half and gently put the ragged halves back together, rough side up. This exposes more surface area, helping create those fantastic, irregular crinkled textures.
The Oven Strategy: Rotational Baking for Even Golden Edges
Bake only one sheet at a time on the middle rack. Even the best ovens have hot and cool spots. So, halfway through the bake (around 7 minutes), pull the tray out and rotate it 180 degrees. This ensures even browning across the entire batch.
Keep a very close eye on them; if the edges start browning too quickly, you need to pull them out, regardless of what the timer says.
Troubleshooting Your Bake: Pro Tips for Chewy Chocolate Chunk Results
Stop the Spreading: Why Cookies Go Flat and How to Fix Them
Flat cookies are usually caused by three things: dough that was too warm when it hit the oven, not enough flour (did you weigh it?), or an imbalance in the fat-to-sugar ratio. The primary fix? Always chill your dough for a minimum of 2 hours, and preferably 24.
If the dough looks noticeably greasy after mixing, gently beat in 1 2 extra tablespoons of weighed flour, chill it well, and try again.
The Scoop Trick: Achieving Consistent Size and Even Baking
Consistency matters, big time. If you bake small cookies next to giant ones, they simply won't cook at the same rate, resulting in burnt edges on the small ones and raw centres on the big ones. Use your large scoop (or measuring cup) to ensure every cookie starts exactly the same size.
Consistent portions lead directly to consistent baking results.
The Post Bake Flatten: Getting Those Signature Crinkled Edges
Chef's Note: This is the critical, non-optional step if you want that truly professional "bakery" look. About 8 minutes into the bake, when the cookies have puffed up but the edges are still soft, pull the tray out of the oven. Now, drop the tray hard onto the counter once or twice. The air trapped inside releases, the sides collapse slightly, and the dough shrinks, instantly creating those gorgeous ripples and crinkles along the edge.
Preserving the Perfection: Storing Baked Cookies and Freezing Dough
Best Practices for Freezing Raw Cookie Dough Portions
This dough freezes absolutely brilliantly! Scoop the chilled dough portions onto a parchment lined sheet pan and freeze them solid for about 1 hour. Once they are hard, transfer them into a heavy duty freezer bag or airtight container. They will keep perfectly for up to 3 months.
When you want a fresh cookie, bake them straight from frozen, adding only 3– 5 minutes to the total baking time.
Re-Warming Stored Cookies to Restore That Bakery Freshness
Baked cookies stored airtight at room temperature stay perfectly fresh for 4 5 days, but they do firm up slightly after day one. To instantly revive them, preheat your oven to 175°C (350°F). Pop a cookie onto a tray and warm it for about 5 minutes.
They emerge gooey, soft, and tasting exactly like they came out of the oven minutes ago.
The Perfect Pairing: Enhancing Your Chocolate Chunk Experience
Ideal Beverages to Complement Malty Cookie Flavors
Because these cookies have deep, caramelized, malty flavours (thanks to the brown sugar and long bake), they pair beautifully with robust, contrasting drinks. Think strong, dark roasted coffee, a tall cold glass of whole milk, or even a strong, unsweetened black tea to cut through the richness. If you’re baking these later in the year, they are the perfect counterbalance to the warming spices in my Pumpkin Chocolate Chip Cookies: The Softest, Spiced Fall Recipe .

Recipe FAQs
Why is chilling the dough non-negotiable for this recipe?
Chilling serves two critical purposes: it solidifies the melted butter, preventing the cookies from spreading too thinly and resulting in greasy, flat disks. More importantly, it allows the flour to fully hydrate, concentrating the sugars and leading to that intense, chewy, deeply flavored cookie texture we are aiming for.
My cookies spread too much and are thin. What went wrong?
Excessive spreading is usually caused by insufficient chilling time or by adding too little flour. Ensure your dough balls are firm and cold before entering the oven, and use the 'spoon and level' method when measuring flour to guarantee accuracy.
Additionally, make sure your baking sheet is cool before placing the dough on it.
Can I use all granulated white sugar instead of the specified brown sugar?
While substitution is possible, using only white sugar will significantly change the outcome of these "chewy" cookies. Brown sugar is essential because its high moisture content and molasses component lock in softness and caramel flavor, which are necessary for the signature ultra chewy center.
Using all white sugar will yield a much crispier, less flavorful result.
Is it necessary to use chocolate chunks, or can I use regular chocolate chips?
You may absolutely use standard chocolate chips, though chunks are preferred by many bakery professionals. Chunks melt more slowly and create larger, more distinct pockets of gooey, molten chocolate throughout the dough.
Regardless of shape, always opt for a high-quality dark chocolate (60-70% cacao) for the best flavor contrast.
How should I store the finished cookies to maintain their chewiness?
Store baked cookies in an airtight container at room temperature for up to five days. To actively prevent them from drying out and turning hard, place a half slice of fresh bread inside the container; the cookies will absorb the moisture from the bread, keeping them soft.
Can I freeze this cookie dough for baking at a later date?
This dough freezes exceptionally well. Scoop the chilled dough balls onto a parchment lined sheet, flash freeze until solid, and then transfer them to a heavy duty freezer bag for up to two months.
When ready to bake, simply place the frozen dough balls directly on the baking sheet and add 2 4 minutes to the suggested baking time.
My edges are crisp, but my centers seem raw. Are they done?
The Big City Baker cookie is intentionally designed to look slightly underbaked and puffy in the center when removed from the oven, as they continue cooking on the hot baking sheet. Look for fully set edges and a top surface that has turned a deep golden brown, even if the center still looks glossy and soft.
They will firm up as they cool.
Bakery Style Chewy Chocolate Cookies
Ingredients:
Instructions:
Nutrition Facts:
| Calories | 380 - 420 kcal |
|---|---|
| Fat | 20 - 25 g |
| Fiber | 2 - 3 g |
