Southern Buttermilk Fried Chicken
- Time: Active 20 minutes, Passive 140 minutes, Total 160 minutes
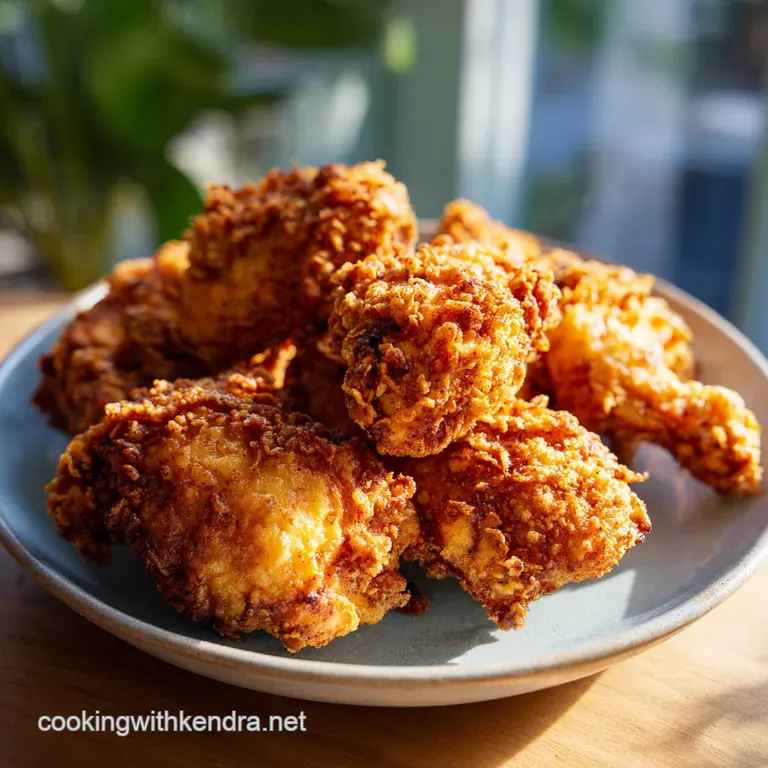
- Flavor/Texture Hook: Shatter crisp crust with a tangy, velvety interior
- Perfect for: Sunday family dinners or impressive weekend comfort cooking
The Ultimate Buttermilk Fried Chicken Recipe
If you have ever stood over a stove, watching a beautiful piece of chicken turn a dull, soggy brown instead of a glorious golden tan, you know the heartbreak of a bad fry. I remember one summer afternoon trying to impress my grandmother with a "shortcut" version that involved skipping the soak.
The result was a dry, sad mess where the skin slid off like a wet blanket. That was the day I learned that a truly great buttermilk fried chicken recipe isn't just about the heat; it is about the chemistry of the crust and the patience of the brine.
This method gives you that iconic Southern style crunch that practically rings in your ears when you take a bite. We are talking about a crust so craggy and thick that it holds up to the meat without feeling heavy or oily.
You are looking for that specific contrast: the initial sharp crack of the seasoned flour followed by the silky, juice filled meat that has been tenderized by the buttermilk. It is a sensory experience that feels like a warm hug from a cast iron skillet.
We are going to focus on a few non negotiable steps today the double dredge, the "shaggy" flour trick, and the mandatory rest period. These aren't just suggestions; they are the difference between a mediocre snack and a meal that people will still be talking about next Thanksgiving.
So, grab your Dutch oven and let's get into why this specific process works so well.
Why the Crust Stays Crispy
The secret to a crust that won't quit lies in how we manage moisture and protein. Fried chicken is a battle against steam; if the moisture from the meat escapes too quickly, it softens the flour. If the flour is too dense, it becomes a hard shell rather than a light, flaky one.
We solve this by introducing cornstarch into our all purpose flour, which lowers the overall gluten content and creates a more brittle, "shatter like" texture.
- Acidic Tenderization: The lactic acid in the buttermilk breaks down tough protein fibers, ensuring the chicken stays velvety after its time in the hot oil.
- Enzymatic Breakdown: Beyond just flavor, buttermilk contains enzymes that continue to work on the meat's structure during that 140 minutes of prep time.
- Hydration Bonding: Letting the chicken rest after dredging allows the dry flour to "grab" onto the wet brine, creating a glue like bond that prevents the coating from falling off in the pan.
- Starch Dilution: Adding cornstarch to the flour mix interferes with gluten development, which is why the final product is crispy rather than bready.
| Method | Time | Texture | Best For |
|---|---|---|---|
| Stovetop (Dutch Oven) | 20 minutes | Maximum cragginess and traditional golden color | Authentic Southern flavor and texture |
| Oven Baked (Wire Rack) | 35 minutes | Lighter, less oily, but slightly smoother crust | Healthier alternative for weeknights |
| Air Fryer | 18 minutes | Very crunchy but can be prone to dry spots | Small batches and quick cleanup |
Choosing the right method depends on your goal, but for this specific buttermilk fried chicken recipe, the stovetop fry in peanut oil is the gold standard. It provides the most even heat distribution and allows the "shaggy" bits of dough to bloom into those delicious crispy ridges we all crave.
Core Component Analysis
To get the best results, you need to understand the roles each ingredient plays in the bowl. We aren't just tossing things together; we are building layers of flavor and structural integrity.
For instance, using peanut oil isn't just a fancy choice it's about the high smoke point that allows the chicken to cook through without the oil breaking down and tasting burnt.
While this deep fry method is the king of comfort, I’ve found that mastering the balance of fat and acid is useful in other dishes too, like when I’m whisking together the umami rich sauce for a classic chicken marsala. The principles of heat management are surprisingly similar across the board.
| Ingredient | Science Role | Pro Secret |
|---|---|---|
| Full fat Buttermilk | Tenderizer and glue | Don't use low-fat; the fat helps the spices stick to the skin. |
| Cornstarch | Texture modifier | This is what makes the crust "shatter" instead of just being crunchy. |
| Peanut Oil | Frying medium | It has a high smoke point (232°C) which prevents a bitter, smoky kitchen. |
| Kosher Salt | Moisture control | It seasons the meat deeply while helping the proteins retain juice. |
Each of these components works in harmony to protect the meat from the aggressive heat of the oil. The buttermilk acts as a protective, flavored barrier, while the flour and cornstarch form a sacrificial crust that absorbs the direct energy of the frying process.
Essential Tool Selection
You don't need a professional kitchen, but a few specific tools will make your life much easier. First and foremost, a heavy bottomed vessel like a Dutch oven or a large cast iron skillet is vital.
These materials hold heat much better than thin stainless steel, meaning your oil temperature won't plummet the second you drop the chicken in.
You will also want a reliable instant read thermometer. Guessing the internal temperature of bone in chicken is a recipe for disaster. We are looking for 165°F (74°C) at the thickest part of the meat.
A wire rack is another "must have." Never drain your fried chicken on paper towels! Paper towels trap steam under the chicken, which immediately turns your hard earned crispy crust into a soggy mess.
Chef's Note: If you have a candy thermometer that clips to the side of the pot, use it. Monitoring the oil temperature in real time is the only way to ensure your second and third batches turn out as good as the first.
The Cooking Sequence

Success with this buttermilk fried chicken recipe comes down to the order of operations. You can't rush the brine, and you certainly can't skip the rest period. Each step is designed to build a better bond between the meat and the coating.
- Whisk the marinade. Combine 2 cups of buttermilk, 2 tbsp Dijon mustard, 1 tbsp hot sauce, 1 tbsp salt, and the spices in a bowl. Note: The mustard acts as an emulsifier to help the spices stay suspended.
- Submerge the chicken. Place your 3 lbs of chicken pieces into the brine. until every inch is coated.
- Refrigerate for 2 hours. This 120 minute soak is where the tenderization happens. Note: Don't go over 24 hours or the acid will turn the meat mushy.
- Prepare the dredge. Whisk 3 cups of flour, 1/2 cup cornstarch, and the remaining dry spices in a separate bowl.
- Create the "shaggy" mix. Drizzle 3 tbsp of the buttermilk marinade into the flour and toss with a fork. until small craggy clumps form.
- Coat the chicken. Press the chicken firmly into the flour mixture. Note: Press hard to ensure those "shaggy" clumps stick to the skin.
- Rest on a rack. Let the dredged chicken sit for 15 minutes. until the flour looks slightly damp.
- Heat the oil. Bring 1 quart of peanut oil to 350°F (175°C) in your Dutch oven.
- Fry in batches. Maintain 300-325°F oil temp and cook for 12-15 minutes until deep golden brown and 165°F internal.
- Drain and cool. Move the chicken to a clean wire rack for 5 minutes before serving.
Solving Common Problems
Even with the best instructions, things can go sideways. The most common heartbreak is "the slip" where you take a bite and the entire crust falls off in one piece. This usually happens because the chicken was too wet when it hit the flour, or you didn't let it rest long enough for the coating to hydrate.
If you find that the frying process feels a bit too chaotic or if you've had a few "fry fails" in a row, it might be worth practicing your sauce work on something more forgiving, like a creamy chicken casserole. However, once you nail the timing here, you'll never go back.
Why Your Coating is Falling Off
This is almost always a moisture issue. If the chicken skin is too slick, the flour won't grab. The 15 minute rest period after dredging is the "glue" phase. During this time, the moisture from the buttermilk soak starts to hydrate the flour, turning it into a paste that bonds directly to the chicken.
Why the Outside is Burnt but the Inside is Raw
This happens when your oil is too hot. If the oil is at 375°F or higher, the crust will brown in minutes, but the heat won't have enough time to penetrate to the bone. Always aim for that 300-325°F (150-160°C) range while the chicken is actually in the pot.
| Problem | Root Cause | Solution |
|---|---|---|
| Greasy/Oily Crust | Oil temperature was too low | Ensure oil returns to 350°F before starting a new batch. |
| Pale/Soft Crust | Overcrowding the pan | Fry only 3-4 pieces at a time so the temperature doesn't drop. |
| Tough/Dry Meat | Overcooking or skipping brine | Use a thermometer and never skip the 2 hour buttermilk soak. |
Common Mistakes Checklist
- ✓ Never use chicken straight from the fridge; let it sit out for 20 minutes to take the chill off.
- ✓ Don't use a lid; covering the pot traps steam and ruins the crunch.
- ✓ Stop using paper towels; a wire rack allows air to circulate around the entire piece.
- ✓ Avoid checking the internal temp every minute; you'll lose heat and poke holes for juices to escape.
- ✓ Don't skip the cornstarch; it's the only way to get that professional "shatter" texture.
Swaps and Sizing Adjustments
If you are cooking for a crowd or just for two, you need to adjust more than just the chicken count. When doubling the recipe, don't double the cayenne pepper immediately spices can become overwhelming when scaled linearly. Start with 1.5x and taste your flour.
For those who want to save a few dollars, you can swap the peanut oil for vegetable oil. While you lose a bit of that nutty depth, the result is still very high-quality. Just make sure whatever oil you choose has a high enough smoke point to handle the 20 minutes of cook time.
| Original Ingredient | Substitute | Why It Works |
|---|---|---|
| Peanut Oil | Vegetable or Canola Oil | High smoke point. Note: Lacks the subtle nutty flavor of peanut oil. |
| Full fat Buttermilk | Whole Milk + 1 tbsp Lemon Juice | Creates a similar acidic environment to tenderize the meat. |
| Dijon Mustard | Yellow Mustard | Adds a similar tang and helps the brine emulsify. |
If you want...
- Extra Heat: Add 1 tbsp of ghost pepper hot sauce to the brine and double the cayenne in the dredge.
- Faster Cleanup: Use a deep cast iron skillet instead of a Dutch oven, though be careful of oil splatters.
- Lighter Version: Replace 1 cup of flour with 1 cup of panko breadcrumbs for a more "airy" crunch.
Handling the Leftovers
Storing fried chicken is an art form. If you just throw it in a plastic container while it's still warm, the residual steam will turn the crust into mush by morning. Always let the chicken reach room temperature on a wire rack before putting it in the fridge.
- Fridge
- Store in an airtight container for up to 4 days.
- Freezer
- Wrap individual pieces in foil and freeze for up to 3 months.
- Zero Waste
- Don't throw away the bones! Fried chicken bones make an incredibly rich, smoky stock for soups or gravies. You can also chop up cold leftovers to top a salad or make a killer cold chicken sandwich.
Reheating: Never use the microwave unless you want rubbery skin. Instead, put the chicken on a wire rack over a baking sheet and heat in a 350°F (175°C) oven for 10-15 minutes.
This will re crisp the skin and heat the meat through without drying it out.
Service and Folklore
There is a long standing myth that you should add an egg to your buttermilk brine. In my experience, while an egg adds a bit of "lift" to the batter (making it more like a tempura), it actually makes the crust softer and more bread like.
If you want that classic Southern cragginess, stick to just buttermilk and the "shaggy" flour clumps.
Another myth is that you need to salt the chicken after it comes out of the fryer. While a tiny pinch of flaky sea salt at the end is nice, the real seasoning must happen in the brine and the dredge.
If you don't season the flour properly, the crust will taste like plain cardboard regardless of how much salt you sprinkle on top at the table.
When serving, keep it classic. A side of mashed potatoes with gravy or some honey drizzled biscuits is all you really need. This buttermilk fried chicken recipe is the star of the show, so don't feel the need to overcomplicate the presentation.
A simple sprinkle of fresh parsley or a few lemon wedges on the side provides a bright contrast to the rich, salty goodness of the bird. Trust me, once you hear that first crunch, you'll know exactly why we put in the work. Let's get cooking!

CRITICAL: Very High in Sodium
1180 mg 1180 mg of sodium per serving (51% 51% of daily value)
The American Heart Association recommends limiting sodium intake to no more than 2,300mg per day, and ideally to 1,500mg for most adults.
Tips to Reduce Sodium
-
Halve the Kosher Salt-25%
Reduce the 2 tablespoons of Kosher salt to 1 tablespoon. Kosher salt is less dense than table salt, so halving the amount will significantly cut sodium without drastically altering the texture of the brine.
-
Choose Low-Sodium Hot Sauce-10%
Opt for a low-sodium or no-salt added hot sauce. Many regular hot sauces can be surprisingly high in sodium. Check labels carefully for the sodium content per serving.
-
Boost Flavor with Herbs and Spices
Emphasize fresh herbs like rosemary, thyme, or parsley, and additional spices like cumin or coriander. These can add complexity and depth of flavor without contributing any sodium.
-
Rethink Dijon Mustard-5%
Dijon mustard can contain a fair amount of sodium. Consider using a mustard powder mixed with a little vinegar and water, or a very small amount of low-sodium Dijon. If using regular Dijon, try using just 1 tablespoon.
Recipe FAQs
How long do you leave chicken in buttermilk before frying?
Submerge the chicken for 2 hours in the refrigerator. This allows the acid in the buttermilk to tenderize the meat thoroughly before you begin the dredging process.
What does buttermilk do to fried chicken?
It acts as a tenderizer and flavor base. The acidity breaks down tough muscle fibers while providing a tangy foundation for the salt, smoked paprika, garlic powder, and black pepper marinade.
Do you rinse buttermilk off chicken before baking?
No, never rinse the chicken. You need the residual buttermilk on the surface to help the flour and cornstarch mixture adhere, which creates the essential crust.
Do you rinse chicken off after soaking in buttermilk?
No, discard the idea of rinsing entirely. Simply remove the pieces from the brine and let the excess drip off before pressing them into the seasoned flour.
Is it true that I should rinse the chicken to remove excess salt?
No, this is a common misconception. The recipe relies on that specific amount of salt in the brine and the dredge to season the meat and the crust all the way through.
How to ensure the crust has a professional shatter?
Drizzle 3 tablespoons of the marinade into the flour mixture to create craggy clumps. If you enjoyed creating this textured coating, you can see how similar breading techniques provide structural integrity in other fried classics.
How to avoid a soggy crust after frying?
Drain the chicken on a wire rack instead of paper towels. Using a rack allows air to circulate around the entire piece, preventing steam from softening the coating you worked so hard to crisp.
Buttermilk Fried Chicken
Ingredients:
Instructions:
Nutrition Facts:
| Calories | 584 kcal |
|---|---|
| Protein | 39.8 g |
| Fat | 36.2 g |
| Carbs | 24.5 g |
| Fiber | 1.2 g |
| Sugar | 1.4 g |
| Sodium | 1180 mg |
