Cooking Prime Rib in Oven: Reverse Sear
- Time: Active 30 minutes, Passive 4 hours, Total 4 hours 30 minutes
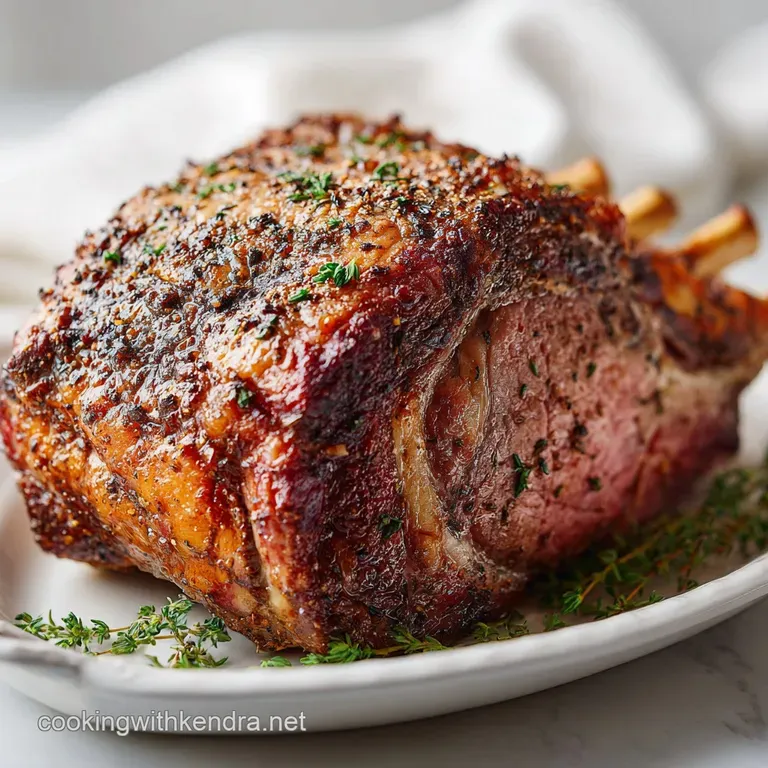
- Flavor/Texture Hook: A mahogany colored, salty crust that yields to a velvety, melt in-your mouth interior.
- Perfect for: Holiday gatherings or a high end family Sunday dinner that stays within a reasonable budget.
- Simple Techniques for Cooking Prime Rib in Oven
- The Thermodynamics of the Reverse Sear
- Component Analysis and Pro Secrets
- The Essential Components for Your Feast
- Tools for Achieving Professional Results
- A Step-by-Step Guide to Roasting Success
- Solving Common Culinary Roadblocks and Errors
- Flavor Adaptations and Smart Ingredient Alternatives
- Timing and Size Adjustments
- Maintaining Freshness and Repurposing Your Leftovers
- Elegant Plating and Visual Finishing Touches
- Very High in Sodium
- Recipe FAQs
- 📝 Recipe Card
Simple Techniques for Cooking Prime Rib in Oven
There is a specific sound that happens when you pull a perfectly roasted rib out of the heat it’s a faint, rhythmic sizzle as the rendered fat bubbles against the herb flecked crust. I remember the first time I tried cooking prime rib in oven for a big Christmas dinner. I was terrified.
I had spent a significant chunk of my grocery budget on this massive hunk of meat, and the pressure to not turn it into expensive shoe leather was overwhelming. I followed a traditional "high heat first" recipe I found online, and the result was... fine. But "fine" isn't what you want for a celebration.
It had a thick, dry gray band around the edges and was barely rare in the very center.
That experience sent me down a rabbit hole of testing. I realized that the secret to a professional grade roast isn't a fancy commercial kitchen or a thousand dollar oven; it is all about managing moisture and heat. I've since learned that the most reliable way to get that restaurant quality finish is the reverse sear.
We start low, let the enzymes in the meat do their work, and then finish with a blast of heat to create a crust that practically crackles. This budget smart approach ensures you get the most out of your 8 lbs of beef without needing expensive gadgets or "prime" graded cuts that cost twice as much.
Trust me, once you hear that first "shatter" of the crust under your carving knife, you’ll never go back to the old way of roasting. This recipe is designed to be approachable for any home cook, focusing on the steps that actually move the needle on flavor.
We aren't just making dinner; we're making a centerpiece that people will be talking about until next year. Let's get into the specifics of why this method works so well.
The Thermodynamics of the Reverse Sear
Enzymatic Tenderization: Holding the beef at a low temperature for a longer period allows naturally occurring enzymes (calpains) to break down tough connective tissues before they tighten up. This results in a much more velvety texture than over high heat roasting.
Evaporative Cooling Control: By starting in a cool oven, we slowly dry out the exterior of the meat, which means when we finally crank the heat for the sear, we aren't wasting energy evaporating surface moisture. This leads to a faster, more even browning known as the Maillard reaction.
Thermal Gradient Reduction: Cooking at 200°F to 250°F minimizes the temperature difference between the outside and the center of the roast. This eliminates the "gray ring" and ensures the entire slice is the same perfect shade of pink.
| Cooking Metric | Target Value | Timing / Visual Cue |
|---|---|---|
| Pull Temperature | 115°F - 120°F | Meat feels firm but yields to pressure |
| Resting Duration | 30 - 45 minutes | Juices reabsorb into the muscle fibers |
| Searing Heat | 500°F | Exterior turns mahogany and starts to sizzle |
| Final Serving Temp | 130°F - 135°F | Perfect medium rare with edge to edge pink |
Component Analysis and Pro Secrets
| Ingredient | Science Role | Pro Secret |
|---|---|---|
| Kosher Salt | Protein Denaturation | Apply 24 hours early to pull salt into the center of the muscle. |
| Ghee (or Butter) | Heat Conduction | Ghee has a higher smoke point than butter, allowing for a cleaner sear without acrid smoke. |
| Fresh Rosemary | Volatile Oil Infusion | Finely mince to release more oils; the fat in the ghee carries this flavor deep into the crust. |
| Black Pepper | Texture & Piquancy | Use a coarse grind to create "peaks and valleys" on the surface for more crunch. |
It is worth noting that while we are focusing on this specific roast, many of these principles apply to other cuts. For instance, if you are looking for a more economical weeknight meal, the way we handle heat here is very similar to the technique used in our How to Cook recipe for chuck roast, where slow heat transforms a tough cut into something spectacular.
The Essential Components for Your Feast
For this recipe, we are using a Standing Rib Roast (3 bones, approx. 8 lbs). This size is the "sweet spot" for family gatherings, comfortably feeding 6 people with enough left over for some pretty legendary sandwiches the next day.
I always suggest a bone in roast because the bones act as a natural roasting rack and provide a bit of thermal insulation for the bottom of the meat.
- 1 Standing Rib Roast (3 bones, approx. 8 lbs): Why this? The bones protect the meat from direct heat and add incredible flavor to the pan drippings.
- Substitute: A boneless ribeye roast works too, but reduce cook time by about 20 minutes.
- 3 tbsp Kosher Salt: Why this? Coarse grains stay on the surface longer to create a better brine.
- Substitute: 1.5 tbsp fine table salt (but be careful not to over salt).
- 2 tbsp Coarsely cracked black pepper: Why this? Large bits provide a spicy "shatter" in the crust.
- Substitute: 1 tbsp pre ground pepper, but it won't be as fragrant.
- 4 tbsp Grass fed ghee or softened butter: Why this? Fat is the vehicle for the herb flavors and aids in browning.
- Substitute: high-quality beef tallow or even a neutral oil like avocado oil.
- 4 cloves Garlic, minced: Why this? Adds a savory depth that balances the richness of the beef fat.
- Substitute: 1 tsp garlic powder mixed into the salt rub.
- 1 tbsp Fresh rosemary, finely chopped: Why this? Its piney notes are the classic pairing for roasted beef.
- Substitute: 1 tsp dried rosemary, crushed between your fingers to release oils.
- 1 tbsp Fresh thyme, finely chopped: Why this? Provides a subtle, earthy background note.
- Substitute: 1 tsp dried thyme.
Tools for Achieving Professional Results
You don't need a professional kitchen, but a few specific tools make cooking prime rib in oven much less stressful. First and foremost, a reliable meat thermometer is non negotiable.
I prefer a leave in probe thermometer so I don't have to keep opening the oven door, which lets all that precious low heat escape.
You'll also need a heavy duty roasting pan. If you don't have one, a large cast iron skillet (like a 12 inch Lodge) works beautifully for a 3 bone roast. The thick metal holds heat evenly.
I also recommend a small bowl for mixing your herb compound and a sharp carving knife for those clean, beautiful slices at the end. If your roast didn't come pre tied, some kitchen twine is helpful to keep the meat tucked tightly against the bones, ensuring even cooking.
A step-by-step Guide to Roasting Success

Step 1: The 24 Hour Dry Brine
Pat the 8 lb Standing Rib Roast bone in completely dry with paper towels. Rub the 3 tbsp Kosher Salt over every inch of the meat and fat cap. Note: This draws moisture out, concentrates the beef flavor, and then pulls the seasoned liquid back into the fibers. Place it on a rack over a tray and refrigerate uncovered for at least 12 hours, preferably 24.
Step 2: The Tempering and Herb Rub
Remove the roast from the fridge 2 hours before you plan to start cooking. In a small bowl, mix the 4 tbsp ghee, 4 cloves minced garlic, 1 tbsp rosemary, 1 tbsp thyme, and 2 tbsp cracked pepper. Slather this mixture over the top and sides of the roast.
Note: Bringing the meat closer to room temperature ensures the center doesn't stay icy while the outside cooks.
Step 3: The over Low heat Journey
Preheat your oven to 250°F. Place the roast in your roasting pan, bone side down. Insert your thermometer probe into the thickest part of the meat, making sure it isn't hitting a bone.
Roast for about 3 to 4 hours until the internal temperature hits 115°F for rare or 120°F for medium rare.
Step 4: The Essential Rest
Remove the roast from the oven and transfer it to a cutting board. Tent it loosely with foil. Let it rest for at least 30 to 45 minutes. Note: Do not skip this! The temperature will continue to rise about 5-10 degrees (carryover cooking), and the juices will settle.
If you cut it now, all that flavor will run out on the board.
Step 5: The over High heat Finish
While the meat rests, crank your oven to 500°F (or its highest setting). Once the oven is screaming hot and the meat has rested, put the roast back in for 6 to 10 minutes until the exterior is dark brown and crackling. Watch it closely so the herbs don't burn.
Step 6: Carving and Serving
Since we already rested the meat, you can carve it immediately after the sear. Use a long knife to slice against the grain. Serve each slice with a spoonful of the juices from the board. For a classic pairing, this is the moment to bring out a Horseradish Sauce for recipe to cut through the rich fat.
Solving Common Culinary Roadblocks and Errors
One of the biggest scares when cooking prime rib in oven is timing. Because every oven and every specific roast is different, the "minutes per pound" rule is often a lie. Always go by temperature. If your meat is reaching the target temperature way faster than expected, don't panic.
You can hold a rested roast for up to an hour and a half before doing the final sear.
Why Your Crust Isn't Crispy
If the exterior looks pale or soggy, it’s usually because the meat wasn't dry enough before going into the oven. Surface moisture is the enemy of the Maillard reaction. Next time, ensure you dry brine uncovered in the fridge; this acts like a mini dehydrator for the fat cap.
| Problem | Root Cause | Solution |
|---|---|---|
| Thick Gray Ring | Oven temperature too high | Lower oven to 200°F and increase time. |
| Cold Center | Didn't temper the meat | Leave roast on counter for 2 full hours before cooking. |
| Tough Meat | Sliced with the grain | Find the direction of the muscle fibers and cut across them. |
Common Mistakes Checklist
- ✓ Forgetting to pat the meat dry: Even after the brine, wipe away any literal droplets of water.
- ✓ Using a cold roasting pan: If you have the time, let the pan sit in the preheating oven for 10 minutes.
- ✓ Hitting the bone with the thermometer: This will give you a false high reading. Aim for the very center of the muscle.
- ✓ Searing before resting: If you sear first and then rest, the crust will soften and lose its "shatter" quality.
- ✓ Cutting too soon: If you see a puddle of red juice on your board, you didn't rest it long enough.
Flavor Adaptations and Smart Ingredient Alternatives
If you are trying to keep costs down, you don't always need the "Prime" grade from the butcher. A "Choice" grade roast from a warehouse club like Costco is often excellent and significantly cheaper.
The slow cooking method we use here is specifically designed to make even leaner or less expensive cuts taste like a million bucks.
If you don't want to buy a whole bunch of fresh herbs, you can use a high-quality dry herb blend, but make sure to rehydrate them in the ghee for 10 minutes before rubbing them on the meat.
This prevents the dried leaves from tasting like "hay." If you're out of ghee, beef tallow is a fantastic budget smart choice that adds even more "beefy" flavor to the crust.
| Feature | Fresh Herbs & Ghee | Dried Herbs & Oil |
|---|---|---|
| Flavor Profile | Bright, floral, and aromatic | Concentrated, earthy, and savory |
| Texture | Soft bits that meld into the crust | Can be slightly crunchy/woody |
| Cost Impact | $5 - $8 extra | Uses pantry staples ($0 extra) |
Chef's Tip: If you want to take the flavor to the next level without spending more, save the fat that renders out in the pan. Use it the next morning to fry eggs or roast potatoes it’s liquid gold!
Timing and Size Adjustments
Adjusting this recipe for a smaller or larger crowd is simple as long as you keep the "Low and Slow" principle in mind. If you are doing a small prime rib roast oven recipe (say, 2 bones or about 4-5 lbs), the cook time will drop significantly, usually taking about 2 to 2.5 hours to reach the pull temp.
The resting and searing times remain exactly the same.
If you are doubling the recipe for a massive party, don't just double the cook time. Two 8 lb roasts in the oven will take only slightly longer than one, as long as there is plenty of space between them for air to circulate. However, you should reduce the salt and spices to about 1.5x the original amount; otherwise, the flavor can become overwhelming. For another quick cooking beef option that's great for smaller groups, check out my How to Cook recipe for flank steak which sears up in minutes.
Maintaining Freshness and Repurposing Your Leftovers
Storage: Wrap leftovers tightly in plastic wrap or store in an airtight container. It will stay fresh in the fridge for up to 4 days. I don't recommend freezing the cooked slices if you can help it, as the texture of the fat changes, but if you must, it will last 2 months.
Zero Waste: Never throw away the bones! They make the most incredible beef stock you've ever tasted. Simmer them with an onion, a carrot, and some peppercorns for 4 hours. Also, any small scraps of meat are perfect for a "Philly style" cheesesteak or added to a Homemade Chicken Noodle Casserole recipe for a beefy twist on a comfort classic.
Elegant Plating and Visual Finishing Touches
When it comes to presenting your roast, less is usually more. Since the meat itself is so dramatic, I like to serve it on a large wooden board or a white ceramic platter. Surround the roast with a few whole sprigs of rosemary and thyme to lean into that "occasion" feel.
When you carve, aim for slices about 1/2 inch to 3/4 inch thick. This thickness allows the guest to appreciate the contrast between the crispy outer edge and the velvety interior. If you have pan drippings, don't hide them in a gravy boat drizzle a small amount directly over the slices just before they hit the table.
This adds a beautiful sheen and one final hit of salt and fat that makes the first bite truly unforgettable.
Three Ways to Serve Your Roast
- The Traditionalist: Served with creamy mashed potatoes and a side of au jus made from the pan drippings.
- The Modern Bistro: Sliced thin over a bed of dressed arugula with shaved parmesan and a squeeze of lemon.
- The Budget Hero: Served as "French Dip" sandwiches on toasted hoagie rolls with the leftover juices for dipping.
Debunking Kitchen Myths
One common myth is that you must sear the meat first to "lock in the juices." Science has proven this false; searing doesn't create a waterproof barrier. In fact, searing first often leads to a larger gray ring because the exterior stays hot for the entire cooking process.
Another myth is that the "500 rule" (cooking at 500°F then turning the oven off) works for all roasts. This is risky because it depends entirely on how well your specific oven holds heat. The reverse sear is much more consistent and yields a far better crust.
Cooking prime rib in oven doesn't have to be a high stakes gamble. By respecting the temperature, giving the meat the rest it deserves, and using a few smart budget swaps, you can create a meal that feels truly indulgent without the stress. Now, go grab that roast and get seasoning!

Very High in Sodium
2840 mg mg of sodium per serving (123% % of daily value)
The American Heart Association recommends limiting sodium intake to about 2,300mg per day for optimal health.
Tips to Reduce Sodium in Your Standing Rib Roast
-
Reduce Kosher Salt-25%
Significantly reduce the amount of Kosher salt. Start by using just 1 tablespoon instead of 3. You can always add more at the table, but you can't take it away during cooking.
-
Unsalted Butter Alternative-10%
If using butter instead of ghee, choose unsalted butter to control the sodium content. This eliminates a hidden source of sodium.
-
Fresh Over Powdered-5%
Ensure you are using freshly minced garlic. Garlic powder often contains added salt, so avoid it completely.
-
Herb Power
Emphasize fresh herbs like rosemary and thyme. These add flavor without sodium. Consider adding other herbs like oregano, sage or marjoram.
Recipe FAQs
How many hours does it take to cook a prime rib in the oven?
It varies greatly, budget 3.5 to 5 hours total, including resting. The reverse sear method involves 3 to 4 hours roasting at a low temperature (250°F) until it hits 115°F, followed by a 45-minute rest, and a final 10-minute blast at 500°F.
Is it better to cook prime rib at 325 or 350?
No, stick much lower, use 250°F for the initial cook. Cooking at 325°F or 350°F promotes a thick gray band around the edges; the low and slow reverse sear is preferred to achieve edge-to-edge pinkness.
What is the 500 rule for prime rib?
The 500 Rule refers to searing at 500°F after the primary roast. This technique is part of the reverse sear method where you finish the roast at very high heat for 6-10 minutes to achieve a dark, crunchy crust without overcooking the interior.
What is the best method to cook a prime rib?
The reverse sear method is overwhelmingly the best technique for consistent results. This involves slow roasting at a low temperature (250°F) until near the desired final temperature, followed by a quick, high heat sear to develop the crust.
Should I sear prime rib before roasting it low and slow?
No, this is a common misconception that leads to uneven cooking. Searing first heats the exterior too rapidly, causing significant moisture loss and guaranteeing a large, overcooked gray ring around the edges of your roast.
How long should I dry brine my prime rib before cooking?
Dry brine for a minimum of 12 hours, but 24 hours is ideal for the best bark. Patting the roast dry and covering it liberally with kosher salt allows the salt to penetrate deep into the muscle fibers for maximum seasoning and surface drying.
What internal temperature should I pull the prime rib off the heat?
Pull the roast when your thermometer reads 115°F for rare or 120°F for medium rare. This accounts for carryover cooking during the long rest period; remember to let it rest for at least 45 minutes before the final 500°F sear.
Cooking Prime Rib In Oven

Ingredients:
Instructions:
Nutrition Facts:
| Calories | 685 kcal |
|---|---|
| Protein | 46g |
| Fat | 54g |
| Carbs | 1.8g |
| Fiber | 0.4g |
| Sugar | 0.1g |
| Sodium | 2840mg |
