Cannoli Filling: Chef Marcuss Smooth Creamy Recipe
- Unlocking the Secret to Authentic Sicilian Ricotta Cream
- The Science of Smoothness: Why Proper Ricotta Prep is Crucial
- Essential Components: Sourcing the Best Ingredients for the Filling
- Crafting the Cream: Detailed Step-by-Step Instructions
- Troubleshooting Your Cannoli Cream: Chef Marcus’s Expert Advice
- Longevity of Luxury: Storing and Preparing Ahead
- Presentation Perfection: Garnishing and Pairing the Finished Dessert
- Recipe FAQs: Chef Marcus’s Cannoli Filling
- 📝 Recipe Card
Unlocking the Secret to Authentic Sicilian Ricotta Cream
I’m going to be straight with you: there’s the stuff you get at the average bakery, and then there’s real Cannoli Filling . You know, the kind that hits your tongue, impossibly smooth, cool, and bursting with that perfect tangy sweet balance?
The aroma of citrus and vanilla always transports me straight to a bustling market in Palermo.
Stop paying way too much for grainy, watery, or overly sweet versions. This Authentic Cannoli Filling recipe is ridiculously easy to master once you understand the one non-negotiable rule (spoiler alert: it involves patience, not power).
If you can drain cheese and stir ingredients, you can make this filling. It's affordable, fast (the active time, anyway), and will absolutely destroy any store-bought equivalent.
I've tested every shortcut known to man blender vs. mixer, cold sugar vs. warm, overnight rest vs. immediate piping. What follows is the definitive guide to achieving that signature, silken texture for your perfect Homemade Cannoli Recipe. Let’s get that ricotta prepped.
The Science of Smoothness: Why Proper Ricotta Prep is Crucial
My biggest kitchen disaster involving an Italian dessert came from trying to rush this exact recipe. I skipped the 24 hour drain, thought I could power through with cornstarch, and ended up with a runny, sloppy mess that instantly dissolved my beautiful shells. Trust me, the moisture content is everything.
The best Ricotta Cannoli Filling starts bone dry.
The True Texture: Velvety Smooth vs. Grainy
The difference between amazing Cannoli Filling and forgettable stuffing comes down to two things: removing water and dissolving sugar. If you don't drain the ricotta fully, it thins out the moment you add sugar, resulting in gritty soup.
We need the final product to be thick enough to pipe and hold its shape for hours without weeping.
A Culinary Journey Back to Palermo (The Filling's Origin)
Traditional Italian Desserts are beautiful because they celebrate simple, high-quality ingredients. Sheep’s milk ricotta is the original star of the show. While finding true sheep's milk ricotta outside of Italy can be a challenge, the principles remain the same: high fat content, high protein, and extremely low moisture.
This is why this particular Cannoli Filling carries such historical weight it requires attention to detail.
What Makes Chef Marcus’s Formula Stand Out?
We are using a quick food processor blitz after the initial 24 hour drain, which is a modern hack that guarantees that velvet texture. A lot of old-school recipes skip this, relying on extensive sifting, but I find the processor saves time and delivers unbeatable smoothness for this Easy Cannoli Filling Recipe.
It also helps the vanilla and orange zest truly meld into the cheese.
The Moisture Barrier: Why Draining Ricotta is Non-Negotiable
Ricotta is basically curdled whey and milk, meaning it holds a ton of excess liquid. If that liquid isn't removed, it leaches into your sugar, turning the resulting cream slack and watery. Think of it like making a proper Chicken Cottage Pie: Creamy Filling Crispy Cheesy Mash ; you wouldn't use watery ingredients in that either! Draining concentrates the flavor and drastically improves the structure of the resulting Cannoli Filling .
Achieving the Perfect Sweetness Tang Balance
A common mistake is adding too much white sugar. We use powdered (confectioners’) sugar because it dissolves instantly and completely, smoothing the texture. The acidity of the ricotta should remain slightly noticeable, acting as a crucial counterpoint to the sweetness.
The pinch of salt and the bright orange zest elevate this balance beautifully.
The Power of the Overnight Chill (For Flavor Marriage)
After mixing, you must give the filling at least two hours in the fridge. This rest allows the sugar to fully dissolve, eliminating any residual graininess. More importantly, it gives the vanilla, cinnamon, and orange zest time to infuse every particle of the Ricotta Cannoli Filling.
The flavors deepen, marry up, and the texture firms up perfectly for piping.
Essential Components: Sourcing the Best Ingredients for the Filling
You can't make magic with mediocre ingredients. Since there are only a handful of items in this recipe, each one has to be top-notch.
Ricotta Quality Check: Full Fat vs. Impostors
Always, always buy whole milk, full fat ricotta. The reduced fat stuff contains way more water and doesn't have the rich body we need. You’ll be draining half the flavor out of the skim milk versions!
If you absolutely cannot find full fat, you can substitute a portion with mascarpone for added richness, which helps stabilize the Creamy Cannoli Filling.
Granulated Sugar vs. Confectioners' Sugar: The Textural Difference
| Sugar Type | Result | Substitution Tip |
|---|---|---|
| Granulated Sugar | Grainy, gritty texture; pulls moisture out. | Avoid for Cannoli Filling. |
| Confectioners' Sugar | Silky smooth finish; dissolves rapidly. | Mandatory for smooth cream. |
We use confectioners' sugar because of its finely milled starch component, which helps absorb any tiny residual moisture while ensuring a perfectly smooth texture. If you only have granulated sugar, pulse it in a coffee grinder until it is pulverized, then measure and sift.
Flavor Enhancers: Zest, Vanilla, and Optional Chocolate Chips
The orange zest is non-negotiable for an Authentic Cannoli Filling Recipe. It provides a bright, essential lift that cuts through the richness. Use high-quality vanilla extract, not imitation stuff. For those who love a bit of decadence, the mini chocolate chips folded in at the very end provide a delightful crunch and intensity. Sometimes I use dark chocolate slivers instead; it just depends on my mood! This can rival even the best Chocolate Cake with Cream Filling: Decadent Moist Layer Cake Recipe for sheer luxury.
Crafting the Cream: Detailed step-by-step Instructions

This process is broken down into four manageable phases. Do not skip or rush the passive time.
Phase I: Ensuring Bone Dry Ricotta Before Mixing
- Prep the Draining Station: Grab a large fine mesh sieve and line it meticulously with two layers of high-quality cheesecloth (or a new, clean linen tea towel). Place this sieve over a deep bowl to catch the whey.
- Load the Ricotta: Scoop all 32 oz of the whole milk ricotta into the lined sieve. Gather the ends of the cheesecloth, gently twist them shut, and place the ricotta package into the fridge.
- The Wait: Let the ricotta drain for a minimum of 12 hours. 24 hours is ideal. The resulting ricotta mass should look dry, firm, and significantly reduced in size. This step is the key to perfect Cannoli Cream. Discard the collected liquid (whey).
Phase II: The Optimal Blending Sequence (Avoiding Heat)
- Process for Perfection (The Pro Hack): Scrape the drained, dense ricotta into a clean food processor bowl. Pulse in short bursts (30 60 seconds total) until the ricotta transforms into an unbelievably silky paste. Scrape down the sides and ensure it's homogenous.
- Move to Bowl: Immediately transfer the processed ricotta into a large mixing bowl. Don’t leave it in the food processor —we don't want it to warm up. If you prefer a slightly more traditional, textured result, skip the processor and just whisk vigorously by hand for 2 minutes.
Phase III: Sweetening and Flavor Infusion
- The Dry Ingredients: Sift your 1 cup of confectioners' sugar directly over the ricotta. Add the vanilla extract, orange zest, salt, and cinnamon. Sifting prevents grainy lumps from ruining your Cannoli Filling.
- Gentle Fold: Using a rubber spatula, gently fold and stir the ingredients together until everything is just combined and the mixture is uniformly creamy white. Stop mixing immediately once the color is consistent. Over mixing can ruin the texture and cause it to thin out.
Chef’s Note: Do not add the chocolate chips or any wet inclusions yet! They will weep moisture and compromise the final texture if added too early. The best Cannoli Filling is achieved through layers of patience.
Phase IV: The Final Rest (Mandatory Refrigeration)
- Cover and Chill: Cover the bowl tightly with plastic wrap, pressing the wrap gently onto the surface of the filling to prevent a skin from forming.
- The Flavor Marriage: Refrigerate the mixture for a minimum of 2 hours, or up to 2 days. This chilling period allows the sugar to disappear entirely and intensifies the flavor of your Homemade Cannoli Recipe.
Troubleshooting Your Cannoli Cream: Chef Marcus’s Expert Advice
I've been there the filling is too runny, too sweet, or strangely grainy. Let's fix those common errors before they happen.
How to Rescue a Grainy Filling
Graininess usually means the sugar hasn't fully dissolved. The Fix: Return the filling to the fridge for several more hours, or even overnight. If it’s still grainy after a prolonged rest, you likely used granulated sugar.
Run a small batch through the food processor quickly, then mix it back into the main batch.
The Danger of Over Processing the Ricotta
While I love the food processor for achieving that incredible smoothness, excessive blending creates friction and warms the cheese, which makes it runny. If your Cannoli Filling is suddenly slack and loose, you overheated it.
The Fix: Add 1 2 tablespoons of dry milk powder and vigorously chill for 4 hours. The milk powder helps bind the excess moisture.
Piping Technique and Consistency Notes
Before piping, the Cannoli Filling should be thick enough to hold a stiff peak. If it’s still soft, whisk it for 30 seconds and return it to the fridge. Use a strong piping bag, and if you are using a star tip, ensure the ricotta is uniform and doesn't have large chunks of chocolate that could clog the tip.
The presentation matters just as much as the flavor!
Longevity of Luxury: Storing and Preparing Ahead
Refrigerating Unfilled Cannoli Cream
This is where the recipe shines for party prep! Your finished Cannoli Cream can be kept tightly covered in the refrigerator for up to 4 days. The flavor actually improves slightly after 24 hours. Just give it a gentle stir before transferring it to the piping bag.
Can You Freeze Ricotta Filling?
Honestly? No. Please don’t. While you can freeze almost anything, the texture of ricotta fundamentally changes when frozen and thawed. The whey separates, leaving you with a watery, curdled mess that you cannot recover for a quality Cannoli Filling .
If you need a frozen dessert, try making something specific, like a rich semifreddo.
Best Practice for Filling Shells Just Before Serving
This is the golden rule: Fill your shells no more than 30 minutes before you plan to serve them. The crispness of the shell (the cannolo ) is paramount.
Once the filling touches the shell, the moisture immediately begins its nefarious work of turning your crunchy masterpiece into mush. Pipe, plate, and present!
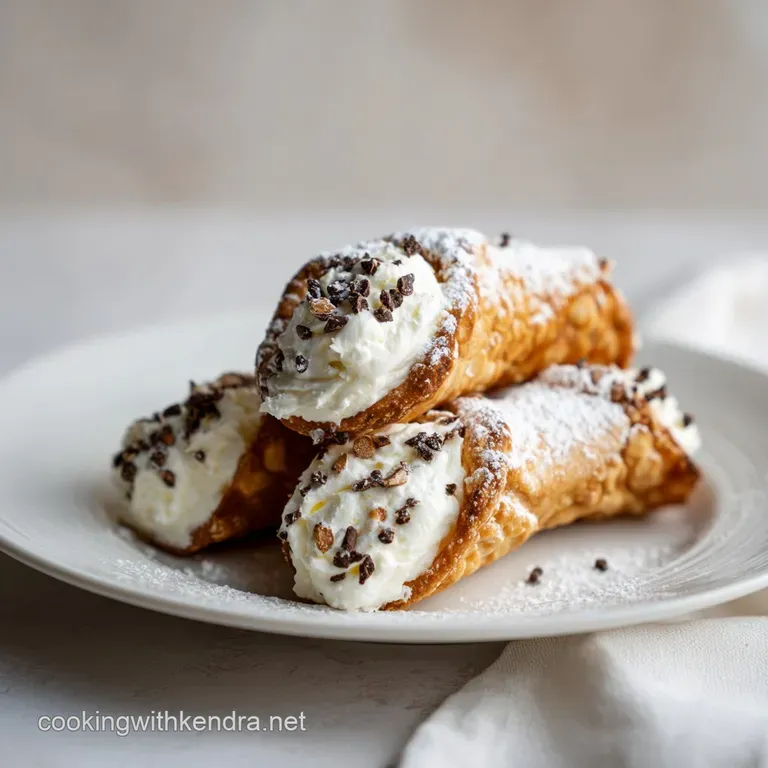
Presentation Perfection: Garnishing and Pairing the Finished Dessert
Once your shells are filled with the perfect, creamy Cannoli Filling , the final touches elevate the experience.
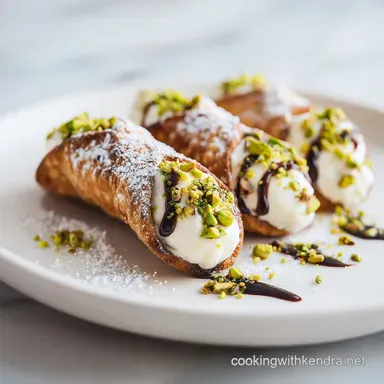
We want dramatic, vibrant garnishes that speak to the Sicilian heritage of the dish. I usually set aside a small bowl of mini chocolate chips, some chopped pistachios, and maybe a little bowl of extra orange zest. Dip each end of the filled shell gently into your chosen garnish.
For a decadent dessert table, pair the finished cannoli with coffee, or perhaps a sip of homemade Limoncello. If you’re preparing other desserts, remember this rich, tangy filling contrasts wonderfully with something like the intense ginger flavor of the filling in my Chicken Dumpling Filling: The Velvety Ginger Jiaozi Recipe (I love global dessert pairings!). Enjoy the crunch, the cool creaminess, and the vibrant flavor of the best Homemade Cannoli Recipe you will ever make!

Recipe FAQs: Chef Marcus’s Cannoli Filling
Why is my cannoli filling grainy or weeping liquid?
Graininess usually results from skipping the critical draining step or over processing the ricotta. Always drain full fat ricotta overnight in a cheesecloth to remove excess whey, then process it briefly with the sugar until smooth.
If the filling starts weeping after mixing, it means the sugar has drawn moisture out; mix gently and fill immediately to prevent excessive separation.
How long can I store the finished cannoli filling in the refrigerator?
Unfilled cannoli cream, properly sealed in an airtight container, can be stored safely in the refrigerator for 3 to 4 days. Always keep the filling refrigerated until just before use, as dairy products require constant cold temperatures. Give it a gentle whisk before piping to restore its airy texture after storage.
Can I freeze the leftover cannoli filling?
Freezing is generally not recommended for traditional ricotta based fillings, as the high moisture content tends to separate and become very grainy upon thawing. The delicate, velvety texture that defines great cannoli will be compromised by the freeze thaw cycle.
If you have leftovers, they are best used within a few days or incorporated into a baked dessert.
When is the absolute best time to fill the cannoli shells?
Cannoli shells should always be filled just before serving, ideally within 30 minutes to an hour of consumption. If the filling sits in the shell for too long, the moisture will migrate out of the ricotta, causing the crispy pastry to become unpleasantly soggy.
If preparing ahead, store the filling and shells separately and set up a filling station right before your guests arrive.
What are some traditional flavour variations besides mini chocolate chips?
Traditional Sicilian variations often include mixing in candied citrus peel, especially finely diced orange or citron, for a bright counterpoint to the sweet cream. For a deeper flavor profile, incorporate finely ground cinnamon, or a small dash of high-quality dark rum or Marsala wine during the final mixing stage.
Another popular addition is finely chopped, toasted pistachios mixed into the cream or used as a garnish.
Can I use cream cheese or mascarpone instead of ricotta?
While you can substitute these ingredients, the final product will lose the characteristic tang and lightness of authentic cannoli, which relies on ricotta. Mascarpone creates a much richer, heavier cream with a lower acid profile.
If substituting, ensure the alternative dairy is thoroughly chilled and consider adding a small squeeze of lemon juice to mimic ricotta’s traditional tang.
Is it possible to adapt this recipe to be vegan or dairy-free?
Yes, specialized vegan ricotta substitutes made from pressed almonds or cashews can be used successfully, provided they are very well drained and chilled. You will need to carefully balance the sugar content and ensure the mixture remains extremely firm before piping.
Using powdered sugar instead of granulated sugar can also help absorb residual moisture and improve smoothness.
Creamy Cannoli Filling Recipe
Ingredients:
Instructions:
Nutrition Facts:
| Calories | 550 kcal |
|---|---|
| Protein | 9.3 g |
| Fat | 20.8 g |
| Carbs | 90.8 g |
