Fried Chicken Breast: the Golden Standard for Crispy Buttermilk Fillets
- Introducing the Perfect Crispy Fried Chicken Breast: Achieving Home-Cooked Excellence
- The Science of the Crunch: Why This Fried Chicken Breast Recipe Delivers
- Required Components: Ingredients for the Buttermilk Soak and Crispy Coating
- Master the Method: Step-by-Step Guide to Frying Chicken Fillets
- Troubleshooting and Expert Tips for Perfect Fried Chicken Breast
- Pairing Perfection: Best Sides for Your Crispy Fillets
- Storing and Reheating Leftover Fried Chicken Fillets
- Recipe FAQs
- 📝 Recipe Card
Introducing the Perfect Crispy Fried Chicken Breast: Achieving Home Cooked Excellence
Can we just talk about that moment? You know the one. That sound when the knife hits the crust a deep, satisfying thwack followed by a shatter. Then the aroma hits: savoury spices, a hint of smoke, and that pure, golden fried scent that floods the whole house.
That is the smell of comfort food done right, and it’s exactly what we’re aiming for today.
Fried chicken breast can be a total disaster if you aren't careful, ending up drier than the Sahara. But when you nail it, it’s a weeknight lifesaver. It’s fast, it’s cheap, and it’s versatile.
Forget spending hours waiting on bone-in pieces to cook through; we’re using thin fillets for maximum surface area and speed.
I've learned (the hard way, naturally) all the sneaky little tricks that take this from "fine" to "phenomenal." We’re ditching the complex brines and focusing on three core principles: uniform thickness, a quick buttermilk tenderizer, and a coating that doesn't quit.
Let’s crack on and get you that ultimate crunchy crust.
The Science of the Crunch: Why This Fried Chicken Breast Recipe Delivers
The Moisture Challenge: Why Chicken Fillets Dry Out (and Our Solution)
Chicken breast is lean, lean, lean. It cooks fast, which is great, but that also means it’s unforgiving. The second it passes 165°F (74°C), moisture starts aggressively leaving the building. Our solution? Pound it thin and even.
Pounding ensures rapid, uniform cooking , meaning the inside is done just as the crust achieves peak golden brown perfection.
What Makes the Buttermilk Soak Essential for Tenderizing
Buttermilk is not just for flavour, though it brings a subtle tang. The mild acidity in buttermilk starts to gently break down the protein fibres in the chicken breast. This process tenderizes the meat without making it rubbery, unlike some high acid marinades.
It also provides the perfect sticky surface for our dry coating to grab onto.
Recipe Overview: Time, Yield, and Difficulty Rating
This recipe is surprisingly quick once the marinating is done. We are looking at about 15 minutes of active prep time. We get four perfect, generously sized fillets out of two large breasts.
This sits comfortably in the medium difficulty range not because it’s hard, but because you absolutely must control the oil temperature.
The Role of Acid in Tenderizing Fillets
Acid changes the game. When proteins are exposed to acid, they denature (unfold). This keeps the meat supple and juicy while also helping the seasoning penetrate deep inside. That subtle lift of hot sauce and the buttermilk's tang really work overtime here.
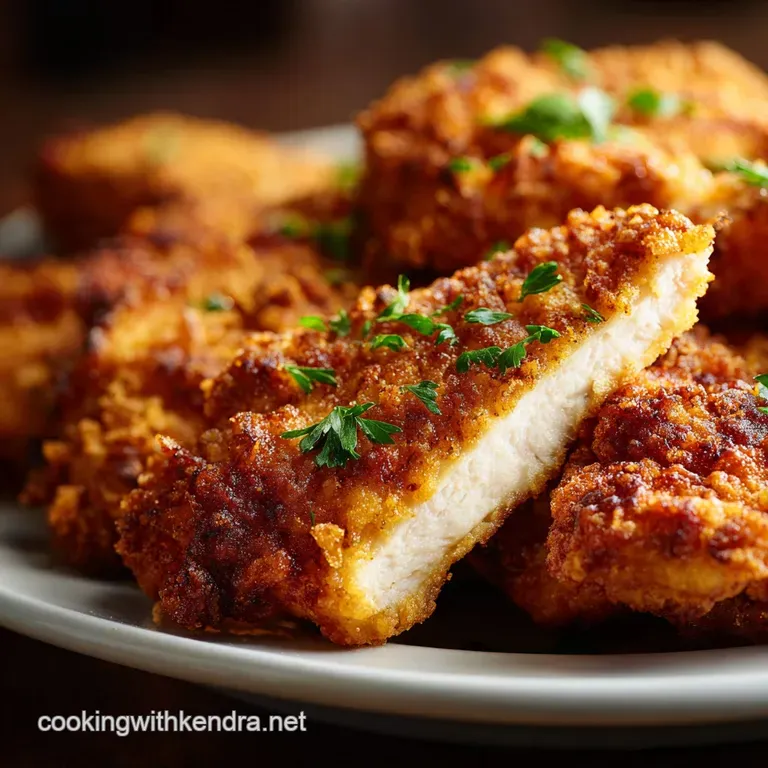
Achieving the Flakiest, Craggiest Coating Texture
This is my secret weapon! We use a high ratio of starch to flour (cornstarch is your best friend). Starch inhibits gluten development and doesn't absorb oil the same way flour does, resulting in a lighter, shatteringly crispy crust instead of a dense, cakey one.
Temperature Control for Maximum Juiciness
If the oil is too cold, the coating absorbs oil and becomes greasy and soggy. Gross. If the oil is too hot, the coating burns before the inside cooks. The sweet spot is 325°F 350°F (160°C 175° C).
This temperature crisps the outside fast while giving the inside just enough time to hit 165°F. You simply must use a thermometer, friend.
Required Components: Ingredients for the Buttermilk Soak and Crispy Coating
This spice blend is non-negotiable, seriously. It needs serious flavour to stand up to the frying. You want to see heavy seasoning, not pale white flour.
Preparing the Chicken Fillets: Selection and Sizing
Always choose large, boneless, skinless chicken breasts. I slice them horizontally or butterfly them, then separate to create two thinner cutlets from each piece. Pounding them down to 3/4 inch ensures every bite is tender.
Building the Ultimate Coating Seasoning Blend
We are layering flavour here. Smoked paprika adds a gorgeous colour and depth, while garlic and onion powder are the savoury backbone. Don't skimp on the cayenne. Even if you don't like heat, a pinch helps round out the flavour profile.
Essential Oil Selection and Frying Depths
You need a neutral oil with a high smoke point. Canola, peanut, or vegetable oil work beautifully. You don't need a deep fryer; 1 to 1.5 inches of oil in a heavy Dutch oven is plenty. That heavy pot maintains heat better than a thin skillet.
Buttermilk Alternatives (Acid + Milk Ratios)
What if you forgot the buttermilk? It happens. Don't panic.
| If you don't have Buttermilk | Use this simple hack instead |
|---|---|
| Buttermilk | 1 cup Whole Milk + 1 Tbsp White Vinegar or Lemon Juice |
| Why it Works | The acid curdles the milk slightly, creating the necessary tang and texture. |
Flour and Starch Substitutes for Coating
If you don't have cornstarch, rice flour or potato starch are fantastic alternatives. They all provide that essential airy crispness. If you only have all-purpose flour, you can still proceed, but the crunch won't be quite as dramatic.
Master the Method: step-by-step Guide to Frying Chicken Fillets
Stage 1: The Buttermilk Marinade Setup and Timing
Get your fillets pounded and into the buttermilk soak right away. Stir in the hot sauce it doesn't make it hot, it adds complexity. 30 minutes is the minimum time, but I try to aim for 2 hours in the fridge.
This makes a noticeable difference in the texture of the finished chicken breast.
Stage 2: The Double Dip Coating Technique for Maximum Crunch
This isn't really a double dip, but it’s a double adhesion moment. Remove the fillet from the marinade, let it drip slightly, and immediately press it FIRMLY into the seasoned flour/starch mix. Use your hands to really pack the flour onto every surface. We want that craggy, gorgeous texture.
Chef's Note: Don't pat the coating off! The wet buttermilk mixing with the dry flour creates those gorgeous little clumps, which fry up into the perfect, crunchy "shrapnel."
Stage 3: Achieving the Golden Fry and Internal Temperature Check
Get that oil thermometer clipped to the side of the pot and wait for the oil to hit 325°F (160°C). Cook in small batches usually just two fillets at a time. Flipping after 3– 4 minutes, you’ll notice the crust has set and is turning that deep golden colour.
Check the internal temperature; when it hits 165°F (74°C), they are ready.
Stage 4: Proper Draining and Resting for the Crispiest Finish
This is non-negotiable for preserving that crunch. Never place fried chicken on paper towels! Paper towels trap steam and turn the bottom crust soggy within minutes. Transfer the fillets immediately to a wire rack set over a baking sheet.
Hit them with a light sprinkle of sea salt the second they leave the oil. The residual heat finishes the cook while the crust stays airy and dry.
Troubleshooting and Expert Tips for Perfect Fried Chicken Breast
Fixing a Soggy Crust: The Oil Temperature Trap
If your crust is soggy and greasy, your oil temperature was too low. The flour sucked up all that fat before the crust had time to seal and crisp. If your temperature dips below 300°F (150°C) after adding the chicken, take the fillets out and wait for the oil to recover before continuing.
Don’t Skip the Pounding: Why Thickness Matters
I once skipped the pounding because I was feeling lazy. Disaster! The edges were overcooked and crunchy (in a bad way), but the middle was still pink. Pounding them out to a consistent thickness ensures even cooking and keeps the fillet moist right up to the 165°F target.
Common Mistakes When Handling the Coating
The biggest mistake is moving the dredged chicken directly from the flour to the fryer. You MUST let the coated fillets rest for 10– 15 minutes at room temperature.
This period allows the moisture from the buttermilk to hydrate the flour, essentially creating a durable adhesive glue. If you skip this, the coating will flake off in the hot oil.
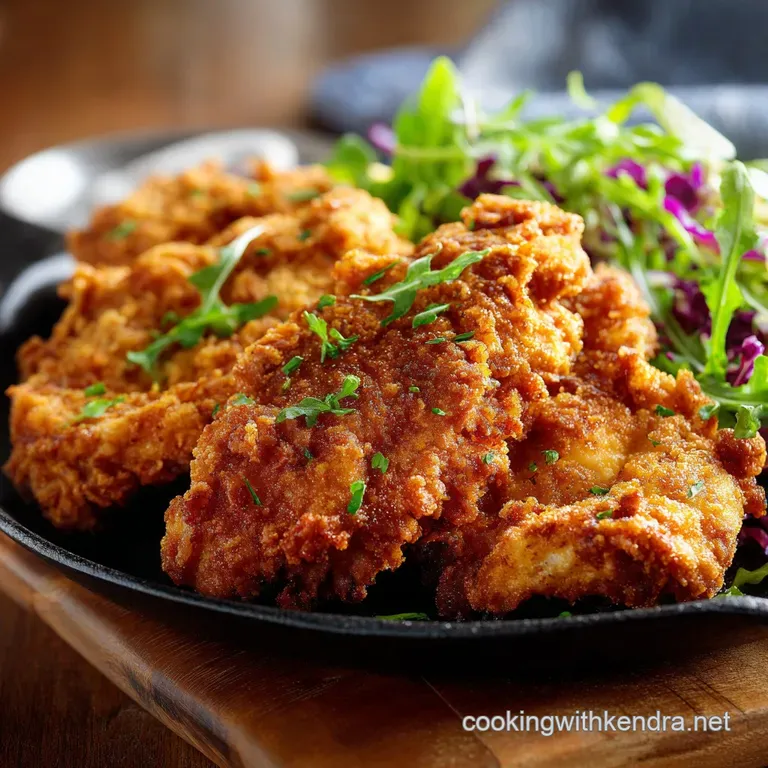
Pairing Perfection: Best Sides for Your Crispy Fillets
Classic Comfort Sides and Slaws
You can’t go wrong with classic comfort. Creamy mashed potatoes and gravy are heavenly with these crispy fillets. If you are serving this for a hearty weeknight dinner, try serving it alongside my famous scratch made Chicken Divan: The Ultimate scratch made Comfort Casserole minus the extra chicken, obviously!
Light and Acidic Counterpoints
Because this chicken is rich and satisfying, a bright, acidic side cuts through the fat beautifully. Think simple vinegar based coleslaw, quick pickled cucumbers, or even a basic garden salad dressed with a sharp vinaigrette.
Suggested Sauces and Dips
Sometimes the best thing you can do is stack this golden fillet on a soft bun with lettuce and sauce. If you’re building an incredible sandwich, check out the smoky aioli I created for my Grilled Chicken Sandwich Recipe with Smoky Chipotle Lime Aioli . Other great options include spicy ranch or a classic honey mustard.
Storing and Reheating Leftover Fried Chicken Fillets
This is one of those recipes that actually reheats well, provided you store it properly.
Leftovers keep safely in the fridge for 3 to 4 days. Always store them in an airtight container, allowing the chicken to cool completely before sealing. If you seal it while warm, the crust steams itself right into sogginess.
But does it freeze well? You bet! You can freeze the fried fillets individually on a baking sheet, then transfer them to a freezer bag for up to 2 months. To reheat, skip the microwave entirely. Preheat your oven or, better yet, your air fryer to 400°F (200°C).
Reheat for 8– 12 minutes until the crust is revived and sizzling hot. The air fryer is your best friend for bringing back that glorious crunch.
 : PIN FOR LATER")
Recipe FAQs
Why is my fried chicken breast dry even though I used a buttermilk marinade?
Dryness is usually a result of overcooking. Since chicken breasts are thin and extremely lean, they cook very quickly compared to bone-in pieces. Use an instant read thermometer to pull the chicken immediately when it reaches an internal temperature of 165°F (74°C).
How can I prevent the crispy coating from falling off the chicken while frying?
The coating needs time to properly "set." After the final dredge and pat, place the coated fillets on a wire rack and let them rest, uncovered, for 15 20 minutes before they go into the hot oil. This resting period allows the moisture from the buttermilk to hydrate the flour, creating a robust, sticky bond.
What is the ideal temperature for the frying oil, and why is it so important?
The oil temperature should be maintained strictly between 325°F and 350°F (160°C 175°C). If the oil is too cold, the chicken will absorb excessive grease and become soggy; if it’s too hot, the crust will burn quickly before the interior meat has a chance to cook through completely.
I don't have buttermilk. Can I use milk and vinegar instead?
Yes, you can create a serviceable substitute by mixing one cup of whole milk with one tablespoon of white vinegar or lemon juice, letting it stand until slightly curdled (about 5 minutes).
While true cultured buttermilk provides a superior tang and tenderisation, this quick substitute will still offer enough acid to prepare the chicken for the coating.
Do I need to pound the chicken breast before marinating?
It is highly recommended to pound the thickest parts of the breast to an even half inch thickness before soaking. This ensures the meat cooks uniformly and prevents the edges from drying out while waiting for the thicker centre to finish. Pounding also slightly tenderises the fibres further.
How long can I safely store leftover fried chicken, and how should I reheat it?
Leftover fried chicken can be safely stored in an airtight container in the refrigerator for up to 3 4 days. To reheat, avoid the microwave as it turns the crust soggy; instead, use an oven or air fryer set to 350°F (175°C) until piping hot.
Can I bake or air-fry the chicken instead of deep frying it?
Absolutely. For a healthier alternative, lightly spray the fully dredged fillets with cooking oil and bake at 400°F (200°C) for about 20 minutes, flipping halfway. While the texture will be slightly different than deep fried, this method still yields a delicious and satisfyingly crispy crust.
Crispy Fried Chicken Breast Recipe
Ingredients:
Instructions:
Nutrition Facts:
| Calories | 520 kcal |
|---|---|
| Fat | 30 g |
| Fiber | 1 g |
