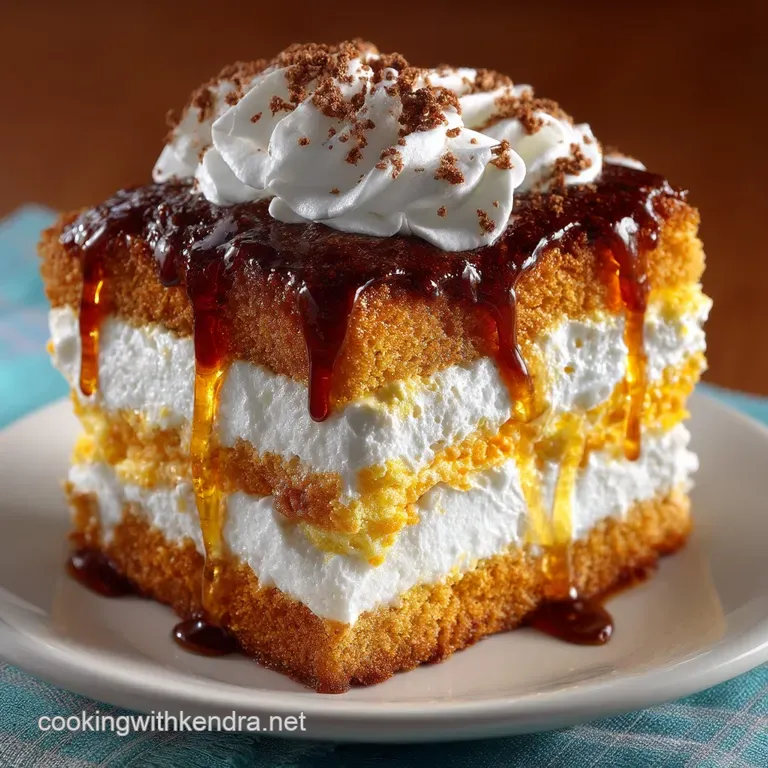
The Golden Delight Layer Cake a Grownup Twinkie Dream
- Elevating Childhood Nostalgia: Why This No-Bake Twinkie Cake is a Must-Try
- Gathering Your Supplies for the Ultimate No-Bake Dessert
- Phase One: Whipping Up the Dreamy French Vanilla Cream
- Assembling Your Luxurious Layered Twinkie Cake
- Troubleshooting and Advanced Preparation Tips
- Recipe FAQs
- 📝 Recipe Card
Elevating Childhood Nostalgia: Why This No-Bake Twinkie Cake is a Must Try
There are very few snacks that embody American childhood quite like the Twinkie. That iconic golden sponge and mysterious cream filling hold a powerful place in our culinary memory. But let's be honest as adults, we sometimes crave a little more sophistication than a cellophane wrapped treat.
Enter the Twinkie Cake , a recipe designed to capture all the joyful essence of that original Food Cakes experience while transforming it into a truly elegant, no-fuss dessert suitable for any dinner party.
This is more than just assembly; it’s the realization of a true Grown-Up Twinkie Dream . Best of all? Zero oven time is required, making this one of the most painless Layer Cake Recipes you’ll ever tackle.
The Magic Behind the Golden Delight Layer Cake
What sets our version, the Golden Delight Layer Cake , apart is the combination of speed and texture. While standard Baked Dessert Recipes require precise measurements and lengthy cooling times, this layered beauty needs only 20 minutes of active prep time.
The magic happens during the chill phase, which requires a minimum of four hours (but is best left overnight). During this time, the foundation of snack cakes softens, absorbing moisture from the decadent cream filling and melding seamlessly into a uniform, moist, sliceable cake texture.
This simple, no-bake approach ensures the Twinkie cake recipe is accessible to every skill level, promising a stunning centerpiece without the culinary stress.
Comparing Homemade to the Iconic store-bought Treat
The key difference between this layered masterpiece and the original snack is, quite simply, quality. The store-bought Twinkie filling is famously light but artificial. Our homemade version replaces that with a rich, stabilized French vanilla cream cheese filling.
We further enhance the experience by incorporating fresh, natural fruit layers tangy crushed pineapple and tender banana slices creating a harmony of flavors often found in classic American banana split cakes.
The resulting dessert is immensely creamy, perfectly balanced between sweet and tart, and delivers on the promise of Yummy Sweets far exceeding the processed original.
Unveiling the Sophisticated French Vanilla Filling
The foundation of the Golden Delight Layer Cake 's success lies in its fluffy, stabilized center. To achieve this, we move beyond simple instant pudding, opting instead for a mixture based on full fat cream cheese and heavy whipping cream.
The softened cream cheese is first beaten with sifted confectioners’ sugar and a touch of salt to balance the sweetness, alongside high-quality vanilla bean paste for depth. Once blended, this creamy base is folded into freshly whipped, stiff peaked heavy cream.
This two-step process ensures the filling remains robust and stable, resisting weeping even after hours of chilling, thereby guaranteeing structural integrity for the entire Twinkie Cake .
Gathering Your Supplies for the Ultimate No-Bake Dessert
Preparing for this easy assembly task requires collecting ingredients that are readily available in any standard grocery store. Efficiency is the name of the game here, so having everything measured and prepped before you begin the whipping process will ensure a smooth assembly line.
Essential Pantry Items for the Golden Sponge Layer
The required base material is exactly what you’d expect: one standard 10-count box of the beloved golden snack cakes. These will be tightly packed into the bottom of a 9x13 inch casserole dish to form the canvas for our creation.
Beyond the base, you'll need the foundational elements for our filling: an eight ounce block of fully softened cream cheese, three cups of heavy whipping cream (kept cold until use), and half a cup of sifted confectioners' sugar.
Crucial for texture are the fruit elements: a 20-ounce can of crushed pineapple and four large, ripe bananas.
Crafting the Stabilized Cream Cheese Center
To achieve that rich, sophisticated flavor we desire, incorporate one teaspoon of quality vanilla bean paste or extract into the cream cheese mixture, along with a quarter teaspoon of fine sea salt this small amount of salt subtly enhances the vanilla and prevents the filling from tasting flat.
For the fruit layers, the preparation of the crushed pineapple is non-negotiable; it must be completely drained of all its juice, using a fine mesh colander and gentle pressing to remove every drop of excess moisture. The bananas should be sliced evenly, approximately one centimeter thick.
Recommended Tools for Swift Layering Success
Since we are avoiding the oven entirely, our tools list is focused on mixing and shaping. The most critical item is an electric mixer either a stand mixer fitted with the whisk attachment or a sturdy hand mixer as whipping three cups of heavy cream by hand is a workout nobody needs!
You will also require a large mixing bowl, a 9x13 inch baking dish for assembly, and an offset spatula for achieving those professionally smooth layers of cream filling.
Related Recipes Worth Trying
- Moist Pistachio Cake Recipe Brown Butter Rosewater Frosting — Forget dry bakes This Moist Pistachio Cake recipe uses nutty brown butter and ground pistachios for a truly decadent crumb Topped with a heavenly rosewater...
- Foolproof NoBake Chocolate Chip Cheesecake Sturdy Creamy and FussFree — The ultimate NoBake Chocolate Chip Cheesecake recipe that sets beautifully every time Zero faff a crunchy digestive biscuit base and an airy easy chocolate...
- Devils Food Chocolate Cupcakes with Silky Salted Caramel Frosting — Stop searching Get the chefs recipe for intensely moist dark Chocolate Cupcakes with Salted Caramel Frosting Perfectly balanced sweetness and a silky...
Phase One: Whipping Up the Dreamy French Vanilla Cream
The success of your Grown-Up Twinkie Dream relies heavily on the quality and stability of the filling. Start by creaming the softened cream cheese with the confectioners’ sugar, vanilla, and salt until the mixture is utterly homogenous smooth, light, and entirely free of lumps.
In a separate, scrupulously clean bowl (ideally one that has been chilled briefly), pour in the cold heavy whipping cream. Whip this on medium high speed until you achieve stiff peaks. A stiff peak means the cream holds its shape rigidly when the whisk is lifted.
Now for the crucial combining step: gently incorporate about one-third of the whipped cream into the cream cheese mixture to lighten the base. Then, fold in the remaining cream carefully until just combined, moving the spatula slowly from bottom to top.
This folding technique is essential to retain the air and keep the filling light.
Assembling Your Luxurious Layered Twinkie Cake
With the golden base laid and the French vanilla filling whipped to perfection, assembly is quick and immensely satisfying. This simple structure is what transforms basic ingredients into a stunning Golden Delight Layer Cake .
Achieving the Perfect Light and Airy Consistency
Before assembly, take a moment to admire the cloud like texture of your stabilized cream filling. To ensure this texture translates into the finished cake, apply the cream filling gently. When spreading the first half of the cream over the prepared Twinkie base, use broad, soft strokes with your offset spatula.
Pressing too hard will deflate the cream and potentially disturb the Twinkie layer underneath, leading to a denser final product.
Preparing the Fruit Layers (Draining Pineapple and Slicing Bananas)
As previously stressed, liquid is the enemy of this no-bake creation. Ensure your crushed pineapple has been rigorously drained. Once the first layer of cream is down, scatter the dried pineapple evenly. Next, layer the sliced bananas.
If you prepared the bananas ahead of time, a light toss with lemon juice will have protected them from browning, maintaining the pristine aesthetic of the interior layers.
The Proper Technique for Base and Middle Layers
After gently pressing the Twinkies to form a uniform base across the bottom of the 9x13 inch pan, the layering sequence is critical. The foundation layer of cream serves as both glue and moisture for the sponge.
This is followed by the pineapple, which provides a tangy counterpoint to the sweetness, and then the bananas. This sequence sponge, cream, fruit, fruit provides an optimal distribution of moisture and stability, guaranteeing a successful slice once chilled.
Expert Tips for a Clean Top Coat and Garnish
The final layer is the remaining half of the French vanilla cream. Spread this carefully over the bananas, ensuring it reaches all edges of the pan and creates a smooth, level surface. Before chilling, cover the dish tightly with plastic wrap, being careful not to let the film touch the delicate cream surface.
The dessert must chill for at least four hours to allow the cream to fully set and the flavors to marry. Reserve the garnish maraschino cherries and chopped nuts until just moments before serving to ensure the presentation is fresh and vibrant.
Troubleshooting and Advanced Preparation Tips
Even though this Twinkie Cake is exceptionally easy, a few key preparation pointers can elevate your final product from good to unforgettable.
Ensuring Your Twinkie Cake Sets Firmly Every Time
The most common issue with any no-bake layered cream dessert is instability. If your cake is weeping or overly soft, the culprit is almost always excess moisture. The two main sources are under drained crushed pineapple or insufficient chilling time.
Always maximize the chilling period overnight ( 8 hours) is truly ideal for the cream to stabilize perfectly and for the base to achieve the desired cake like consistency.
Plus,, ensure your heavy cream was whipped to proper stiff peaks; a soft peak cream will not hold up under the weight of the fruit layers.
Handling Leftovers: Optimal Storage for Maximum Freshness
This dessert keeps beautifully, provided it is stored correctly. Simply cover the 9x13 pan tightly with plastic wrap and keep it refrigerated. Leftovers are excellent for up to three to four days. However, be aware that bananas, even when treated with lemon juice, may begin to oxidize and soften slightly after day two.
Slicing the cake with a knife dipped in hot water and wiped dry between cuts will ensure the remaining portions look as pristine as the first slice.
Delicious Flavor Variations and Fruit Swaps
While the banana and pineapple combination delivers a classic flavor profile, this Twinkie cake recipe is highly adaptable. For a delightful change, consider the "Strawberry Fields" variation, substituting the pineapple and bananas entirely with a mix of sliced fresh strawberries and quartered raspberries.
Alternatively, if you prefer a richer filling with less tang, swap the cream cheese for an equal amount of velvety mascarpone cheese. For those seeking extra crunch in their Yummy Sweets , consider pressing a layer of graham cracker crumbs mixed with melted butter into the base of the pan before adding the Twinkies.
These Layer Cake Recipes are meant to be personalized.
Understanding the Nutritional Snapshot of This Dessert
As a decadent, creamy dessert, the Golden Delight Layer Cake falls firmly into the category of celebratory Baked Dessert Recipes (even without the oven!). Due to the generous use of heavy cream and cream cheese, it is understandably rich.
Based on 12 servings, each slice delivers approximately 450 to 500 calories. This dessert is meant to be savored as a special treat, acknowledging that the primary caloric contributions come from the high fat content in the dairy and the sugar content inherent in the Twinkies and added fruit.
Recipe FAQs
Does this really taste like a gigantic Twinkie Cake, or is it too fancy?
While we've elevated this dessert using a richer cream cheese filling, the fundamental nostalgic flavour remains the star of the show. The Twinkie base absorbs the moisture from the fruit and cream during chilling, creating that signature dense, moist sponge texture we all remember.
It truly is a proper easy win for a sophisticated take on a classic treat!
Four hours of chilling seems ages can I rush the setting time?
Patience is absolutely key here, old bean! The minimum 4-hour chill (ideally 8 hours or overnight) is essential. This time allows the stabilised cream to firm up completely and gives the Twinkies enough time to absorb the filling’s moisture without turning into a mushy mess.
If you try to slice it too early, you risk a sloppy, runny dessert, and we can’t have that.
What if I need to skip the pineapple or bananas? Does that mess up the structure?
You can certainly swap the fruit to suit your taste, but the fruit layers play a vital role in cutting through the richness of the heavy cream and cream cheese. Try substituting the pineapple for canned mandarin oranges (crucially, they must be well drained!) or use sliced strawberries and raspberries instead of bananas.
Remember, drainage is king; if the fruit is wet, the base will weep, and your lovely layers will collapse.
How long will this Golden Delight Layer Cake keep in the fridge?
This magnificent layer cake is best enjoyed within 2 to 3 days of assembly. Because we use fresh bananas, they may begin to oxidise and soften after the third day, which can affect both flavour and appearance.
Ensure the dish is tightly covered with cling film to prevent the cream from drying out or absorbing any fridge smells. Job done!
I need to serve a massive crowd. Should I double the recipe in a bigger pan?
For best results, we recommend making two separate 9x13 inch dishes rather than attempting one gigantic pan. Doubling the recipe in a single, larger pan can make the chilling process inconsistent and the centre may struggle to set properly.
Alternatively, you could easily assemble the ingredients vertically in a large trifle bowl for a lovely, impressive presentation with less fuss.
Easy Nobake Twinkie Cake

