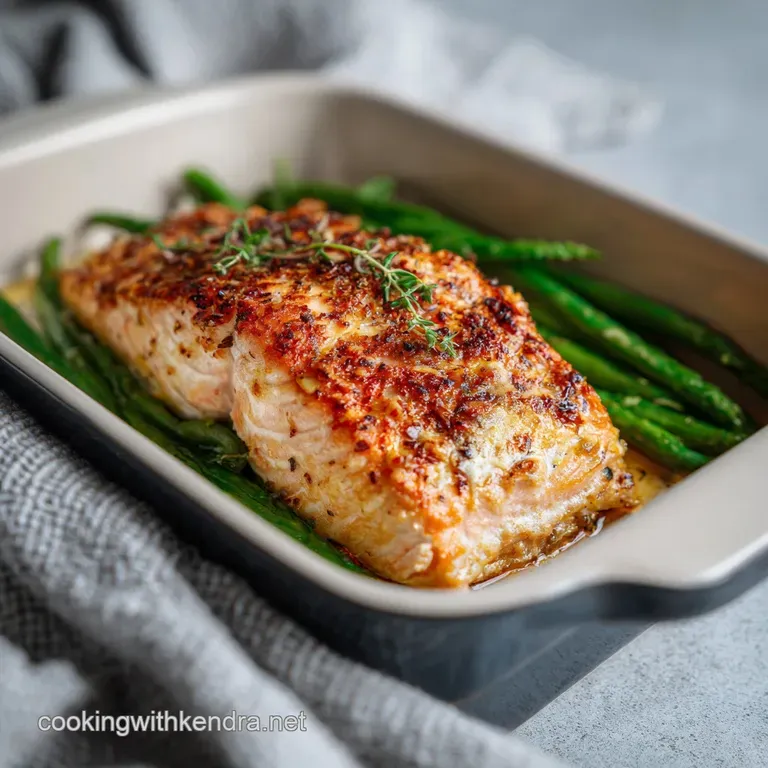
Our Favorite Easy Oven Baked Salmon
- Time: Active 10 minutes, Passive 12 minutes, Total 22 minutes
- Flavor/Texture Hook: Flaky, buttery edges with a bright, citrus garlic zing.
- Perfect for: Stressful weeknights or a low effort Sunday family dinner.
- Why our favorite easy oven baked salmon is a weeknight lifesaver
- Key Success Metrics and Precision Cooking Checkpoints
- Component Deep Dive and Ingredient Analysis
- Choosing the Best Fillets and Fresh Flavor Essentials
- Simple Kitchen Tools for a Faster Cleanup
- Step by Step Guide to a Perfectly Flaky Fillet
- Fixing Dry Salmon and Avoiding Common Mistakes
- Easy Flavor Swaps to Change Your Routine
- Storage and Reheating Tips for Meal Preppers
- How to Plate and Serve This Family Favorite
- Kitchen Myths Debunked
- Recipe FAQs
- 📝 Recipe Card
Why our favorite easy oven baked salmon is a weeknight lifesaver
Picture this: It is 5:45 PM on a Tuesday. The kids are hovering near the pantry, the dog is nudging his bowl, and you have exactly zero energy to scrub a cast iron skillet. This is the exact moment when our favorite easy oven baked salmon saves the day.
I remember one specific night after a long soccer practice when I almost gave up and ordered pizza. Instead, I pulled a fillet from the fridge, did a quick 10 minute prep, and had everyone sitting down to a hot, home cooked meal before the delivery driver would have even left the shop.
The house smelled like fresh lemon and toasted garlic, not fishy or heavy, and that first bite of velvety, flake apart salmon felt like a small victory in a chaotic week.
We have all been there with salmon sometimes it comes out dry, or that weird white stuff bubbles up all over the top. It can be frustrating! But this method is built for the busy home cook who wants a reliable win. We aren't doing anything fancy or using specialized gadgets.
It is just about understanding how a little bit of butter and the right oven temp can transform a simple fillet into something that tastes like it came from a fancy bistro.
What you can expect here is a dish that is bright, savory, and incredibly forgiving. Because we are using a mix of olive oil and butter, we get the flavor of a pan sear without the risk of burning the garlic on the stove. This recipe is my go to because it fits into the rhythm of a real family life.
You can prep the side salad while the salmon roasts for 12 minutes, and by the time the timer dings, dinner is actually ready. No hovering over a splashing pan, no smelling like oil for three days just simple, honest food that everyone actually wants to eat.
Key Success Metrics and Precision Cooking Checkpoints
The Fat Barrier: Mixing butter with olive oil creates a thicker coating that clings to the fish, acting as an insulator so the heat doesn't dry out the delicate proteins too fast.
The Tempering Secret: Letting the fish sit out for 15 minutes before it hits the heat allows the fibers to relax, which means the salmon cooks evenly from the edge to the center.
Cellular Moisture Retention: Seasoning with salt right before the oil goes on helps the salt dissolve into a brine that draws moisture into the muscle fibers rather than pushing it out.
| Cooking Method | Total Time | Texture Outcome | Best For |
|---|---|---|---|
| Oven Baked | 22 minutes | Uniformly tender, buttery flakes | Hands off family dinners |
| Pan Seared | 15 minutes | Crispy skin, very firm exterior | Restaurant style presentation |
| Poached | 20 minutes | Soft, silky, very moist | Salads or cold platters |
Choosing between the oven and the stovetop usually comes down to how much cleaning you want to do. While pan searing gives you that famous "shatter" on the skin, the oven baked method provides a more consistent, velvety texture through the whole piece of fish.
For a busy weeknight, the oven wins every time because it's much harder to overcook the middle while waiting for the outside to brown.
If you are looking for more ways to use these techniques, you might find that this Pan seared salmon provides a great comparison for those nights when you actually want to stand by the stove. The oven method we’re doing today, however, is all about that "set it and forget it" convenience that keeps the kitchen peaceful.
Component Deep Dive and Ingredient Analysis
| Ingredient | Science Role | Pro Secret |
|---|---|---|
| Center cut Salmon | Primary Protein | Choose center cut fillets because they have a uniform thickness, ensuring the tail doesn't dry out before the middle is done. |
| Unsalted Butter | Flavor & Insulation | Melted butter contains milk solids that caramelize slightly in the oven, giving the fish a rich, nutty backbone. |
| Fresh Lemon Juice | Acid Denaturation | The acid begins to "cook" the surface of the fish slightly, helping the garlic and oregano stick better to the flesh. |
| Minced Garlic | Aromatics | Use fresh cloves instead of the jarred stuff; the natural oils in fresh garlic react better with the heat for a sweeter finish. |
Working with 1.5 lbs of center cut salmon fillet is the sweet spot for a family of four. If you can, try to find a piece that is roughly the same thickness from one end to the other.
If you end up with a piece that has a very thin tail section, I usually tuck that thin part under itself so the whole thing cooks at the same rate. It’s a small trick that prevents those crispy, dry edges that nobody likes.
Choosing the Best Fillets and Fresh Flavor Essentials
For this recipe, we are keeping the ingredient list tight and focused. Every item serves a specific purpose in building that garlic lemon profile.
- 1.5 lbs center cut salmon fillet: Look for vibrant color and firm flesh. Why this? Center cuts offer the most even cooking and best fat to meat ratio for roasting.
- 1 tbsp extra virgin olive oil: This provides the base for our emulsion. Why this? It has a higher smoke point than butter, preventing the sauce from smoking at 400°F.
- 1 tbsp unsalted butter, melted: The heart of the flavor profile. Why this? Adds a luxurious mouthfeel that oil alone cannot replicate.
- 1/2 tsp sea salt: Vital for bringing out the natural sweetness of the fish.
- 1/4 tsp cracked black pepper: Use freshly cracked for a bit of floral heat.
- 3 cloves garlic, minced: This provides the savory punch. Why this? Fresh garlic mellows beautifully during a 12 minute bake.
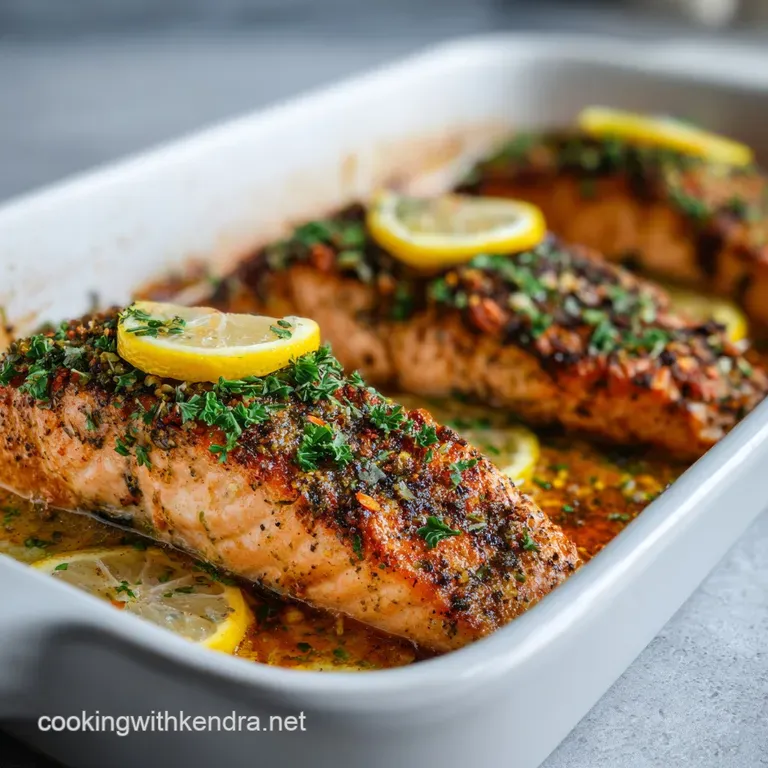
- 1/2 lemon, juiced: Brightness to cut through the fat.
- 1/2 lemon, sliced into thin rounds: For aesthetics and localized steaming.
- 1 tsp dried oregano: Adds an earthy, Mediterranean vibe.
- 1 tbsp fresh parsley, chopped: The final pop of color and freshness.
If you don't have fresh parsley on hand, you can skip it, but don't skip the lemon. The interaction between the citric acid and the salmon protein is what prevents the dish from feeling too "oily." If you're out of oregano, dried thyme or even a bit of dill works wonders as a substitute.
The key is to keep the herbs dried for the baking phase so they don't burn, then hit it with the fresh stuff right at the end.
| Original Ingredient | Substitute | Why It Works |
|---|---|---|
| Sea Salt | Kosher Salt | Similar clean taste. Note: Use slightly more if using Diamond Crystal brand. |
| Dried Oregano | Dried Thyme | Both are "woody" herbs that handle 400°F heat without turning bitter. |
| Unsalted Butter | Ghee | Same fat content. Note: Adds a more intense toasted flavor and handles heat better. |
The butter olive oil combo is really the star here. While you could use just oil to keep it lighter, that one tablespoon of butter makes the salmon feel like a "treat" meal rather than "diet" food.
Honestly, don't even bother with low-fat spreads here; they contain too much water and will cause the salmon to steam rather than roast, leaving you with a soggy texture.
Simple Kitchen Tools for a Faster Cleanup
One of the reasons this is our favorite easy oven baked salmon is that it requires almost no equipment. We aren't pulling out the heavy duty processors or even multiple pans.
- Large Rimmed Baking Sheet: This is your main stage. The rim is important just in case any of the butter or juices try to make a run for it.
- Parchment Paper: This is my number one tip for busy cooks. It prevents the skin from sticking and makes cleanup a five second job.
- Small Mixing Bowl: For whisking your garlic butter emulsion.
- Whisk or Fork: To combine the oil and butter until they look creamy.
- Pastry Brush or Spoon: To coat the salmon.
- Instant Read Meat Thermometer: This is the only "tech" I insist on. It takes the guesswork out of doneness.
If you don't have parchment paper, you can use aluminum foil, but be sure to grease it well. Salmon skin has a way of bonding to foil like industrial glue if you aren't careful. I personally prefer parchment because it doesn't react with the lemon juice, which can sometimes give the fish a slight metallic taste if cooked on bare foil for too long.
step-by-step Guide to a Perfectly Flaky Fillet
Phase 1: The Tempering & Prep
- Take your 1.5 lbs of salmon out of the fridge exactly 15 minutes before you plan to cook. Note: This prevents the "thermal shock" that causes the muscle fibers to tighten and squeeze out moisture.
- Use a thick wad of paper towels to pat the salmon skin and flesh completely dry. Do this until the paper towel comes away bone dry.
- Preheat your oven to 400°F (200°C). Line your baking sheet with parchment paper so nothing sticks.
- Lay the salmon on the sheet and sprinkle the 1/2 tsp sea salt and 1/4 tsp black pepper evenly across the top.
Phase 2: The Emulsion Application
- In your small bowl, combine the 1 tbsp olive oil, 1 tbsp melted butter, 1/2 lemon juice, 3 minced garlic cloves, and 1 tsp dried oregano.
- Whisk vigorously until the oil and butter stop looking separate and become a cloudy, unified sauce.
- Pour this mixture over the salmon. Use a brush to make sure the sides are coated; this acts as a seal to keep the juices inside.
- Arrange your lemon slices on top of the fillet. They will release a tiny bit of steam that keeps the top layer velvety.
Phase 3: The Precision Bake
- Place the tray on the center rack and bake for 10-12 minutes. Watch for the flesh to turn opaque and the edges to start sizzling.
- Check the internal temperature. You are looking for 125-135°F for a perfect medium flake.
- Remove immediately and let it rest for 2-3 minutes on the pan.
- Shower the whole thing with 1 tbsp fresh parsley and serve while the butter is still bubbling.
But what about the sogginess? Most people get soggy salmon because they skip step number two. If there is water on the surface of the fish, it has to evaporate before the roasting begins. That means your fish is steaming in its own puddle for the first five minutes.
Drying it thoroughly ensures that the garlic butter mixture actually sticks and roasts rather than just sliding off into the pan.
Fixing Dry Salmon and Avoiding Common Mistakes
The biggest heartbreak in the kitchen is spending money on a beautiful piece of fish only to have it come out like a piece of dry cardboard. Usually, this happens for one of two reasons: either the oven was too cold for too long, or the fish stayed in just two minutes past its prime.
Why Your Salmon Has White Goo
Have you ever seen those white, spongy blobs that pop out of the salmon as it bakes? That is called albumin. It is a perfectly safe protein, but it usually means the fish was cooked too fast at too high a temperature, or it was overcooked.
By tempering the fish (Step 1) and keeping our oven at 400°F, we minimize this. If you see a lot of it, it’s a sign to pull the fish out immediately!
Why Your Salmon Is Tough
If the fish feels "rubbery," it likely didn't have enough fat to protect it, or it was cooked until it hit 145°F or higher. While the USDA recommends 145°F, most home cooks find that salmon is much more enjoyable when pulled at 130°F, as carryover heat will bring it up a few more degrees while it rests.
| Problem | Root Cause | Solution |
|---|---|---|
| White blobs on top | Cooked too fast or overdone | Pull from oven 2 minutes earlier next time; don't skip tempering. |
| Skin sticks to pan | Surface was wet or no liner | Use parchment paper and pat the skin extremely dry before roasting. |
| Garlic tastes bitter | Garlic burnt in the heat | Ensure garlic is mixed into the oil/butter emulsion to protect it from direct heat. |
Common Mistakes Checklist
- ✓ Never cook salmon straight from the fridge; the outside will overcook before the middle is warm.
- ✓ Always use a timer. Two minutes is the difference between "silky" and "dry."
- ✓ Don't forget to pat the fish dry. Moisture is the enemy of a good roast.
- ✓ Use a meat thermometer. Visual cues can be deceiving depending on the thickness of the fillet.
- ✓ Let it rest! Just 3 minutes allows the juices to redistribute so they don't run out when you slice it.
Easy Flavor Swaps to Change Your Routine
Once you have mastered the basic garlic lemon butter foundation, you can start playing with the profile to suit your family’s mood.
For a Mediterranean Twist
Swap the oregano for a tablespoon of capers and some chopped sun dried tomatoes. The saltiness of the capers pairs beautifully with the buttery salmon. This version goes great over a bed of spinach or with some roasted artichoke hearts on the side.
For a Hot Honey Glaze
If your family likes a little sweet and heat, whisk a tablespoon of honey and a teaspoon of red pepper flakes into the butter mixture. The honey will caramelize in the 400°F oven, creating a sticky, glossy coating that children usually love.
For a Silky, Herb Heavy Version
If you have a garden full of fresh herbs, you can skip the dried oregano and use a mix of fresh dill, chives, and parsley. Just remember to add the fresh herbs after the salmon comes out of the oven so they stay bright green and flavorful rather than turning brown in the heat.
If you find yourself wanting something a bit more substantial for a Sunday dinner, you might want to try serving this alongside a Cheesy Chicken Casserole or a similar hearty side. While salmon is light, pairing it with something comforting makes for a very satisfying meal.
Storage and Reheating Tips for Meal Preppers
Salmon is actually a fantastic meal prep protein if you handle it correctly. I often cook an extra half pound just so I can have it for lunch the next day.
Storage: Keep your leftover salmon in an airtight glass container in the fridge for up to 3 days. I prefer glass because it doesn't retain the fish scent like plastic containers can.
Zero Waste Tip: Don't throw away the skin if you aren't a fan of eating it. You can crisp it up in a dry pan for two minutes until it's like a cracker, then crumble it over a salad for a boost of omega-3s and crunch.
Or, use the leftover flaked salmon to make quick salmon cakes by mixing it with an egg, some breadcrumbs, and a bit of mustard.
Reheating: This is where most people go wrong. Never, ever microwave salmon on high power. It will turn it into a rubber ball. Instead, put it in a cold oven, set it to 275°F, and let it warm up for about 8-10 minutes with a splash of water or a tiny pat of butter on top.
This "low and slow" approach preserves the moisture we worked so hard to keep during the initial bake.
How to Plate and Serve This Family Favorite
Presentation doesn't have to be hard. Because this recipe uses lemon slices on top, it already looks "finished" when it comes out of the oven. I like to bring the whole baking sheet to the table (on a trivet, of course) because there is something so cozy about serving family style.
When you go to serve, use a wide spatula to slide between the skin and the parchment. If you did it right, the skin might stay attached to the parchment, and you'll get a clean, beautiful piece of fish for the plate.
Garnish with that extra parsley right at the table for a bit of "chef flair" that always makes the kids go "ooh."
We usually serve this with a quick steamed broccoli or a bright arugula salad. The acidity in the salad dressing mimics the lemon in the salmon, creating a really cohesive meal. If it's a particularly cold night, a scoop of fluffy jasmine rice is the perfect vessel for soaking up all that leftover garlic butter from the pan.
Kitchen Myths Debunked
"You must wash your fish before cooking." This is actually a safety hazard! Washing salmon in the sink can spread bacteria around your kitchen surfaces. A thorough pat down with paper towels is all you need to get it clean and ready for the oven.
"Salmon is only done when it flakes easily with a fork." By the time it flakes easily in the oven, it is actually starting to overcook. You want it to be just on the edge of flaking. The residual heat will finish the job on the plate, ensuring the center stays moist rather than chalky.
"Frozen salmon isn't as good as fresh." Actually, "fresh" salmon in many stores has been previously frozen and thawed anyway. high-quality flash frozen salmon is often fresher than the "fresh" fillets that have been sitting in the display case for two days.
Just make sure to thaw it completely in the fridge before starting this recipe.

Recipe FAQs
How to ensure the salmon is perfectly flaky?
Bake at 400°F for exactly 10 12 minutes. Using a meat thermometer is essential here to reach an internal temperature of 125-135°F, which guarantees a tender, silky texture rather than a dried out finish.
Is it true I can cook salmon straight from the refrigerator?
No, this is a common misconception. You must temper the fish on the counter for 15 minutes before cooking so the center reaches the correct temperature at the same time as the exterior.
How to keep the salmon from tasting fishy or dry?
Pat the fillet completely dry with paper towels before seasoning. Removing surface moisture prevents the fish from steaming in its own juices, allowing the garlic butter emulsion to adhere properly for a flavorful, crusty finish.
How to store leftovers for the best texture?
Seal the salmon in an airtight glass container and refrigerate for up to 3 days. Glass is superior to plastic for maintaining freshness without absorbing lingering odors, which is a principle we also apply to our tuna and sweetcorn pasta storage.
Is it necessary to rest the fish after baking?
How to tell if the salmon is done without a thermometer?
Look for the flesh to turn opaque and flake easily with a fork. While visual cues work, a thermometer is much more reliable since fillet thickness varies significantly; always aim for that 125-135°F range for the best results.
How to use the leftover salmon skin?
Crisp the skin in a dry pan over medium heat for two minutes. Once it reaches a cracker like consistency, crumble it over salads or vegetable dishes to add a savory, nutrient dense crunch to your meal.
Easy Oven Baked Salmon

Ingredients:
Instructions:
Nutrition Facts:
| Calories | 414 calories |
|---|---|
| Protein | 34 g |
| Fat | 28 g |
| Carbs | 2 g |
| Fiber | 0 g |
| Sugar | 0 g |
| Sodium | 375 mg |
