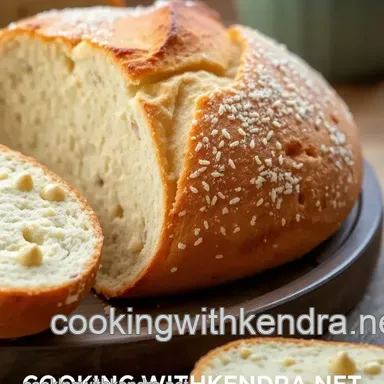
Sourdough Rice Cooker Bread
- About sourdough rice cooker bread
- The complete guide to authentic sourdough rice cooker bread
- The magic behind this recipe
- Health & nutrition highlights
- Recipe at a glance
- Quality ingredients breakdown
- Kitchen equipment essentials
- Expert cooking method
- Expert kitchen wisdom
- Perfect presentation
- Storage & make - ahead
- Creative variations
- Expert faq solutions
- Complete nutrition guide
- 📝 Recipe Card
About sourdough rice cooker bread
Sourdough bread has a rich historical background, tracing its roots back thousands of years, ancient egyptians are credited with the first known use of sourdough, and since then, it has evolved into various styles across different cultures, this unique method of fermentation not only gives sourdough its distinctive
Tangy flavor but also results in a wonderfully chewy texture that many people adore today, when paired with the convenience of a rice cooker, making delicious sourdough becomes accessible to everyone yes, even if you’re not an expert baker.
The beauty of this recipe lies in its simplicity and adaptability, using your homemade sour dough starter and rice cooker allows you to create flavorful bread without needing fancy equipment or techniques, plus, it's perfect for those who may lack an oven or just want to keep their kitchen cool during hot summer months.
The end result ? a crusty loaf that's bursting with flavor a simple pleasure that warms both heart and home .
The complete guide to authentic sourdough rice cooker bread
Sourdough rice cooker bread embodies a rich culinary heritage, reflecting traditions passed down through generations, originating from humble beginnings as a way to preserve grains and make them more digestible, sourdough's fascinating origin story tells us about human ingenuity in food preparation .
Culturally significant in many societies from rustic french villages to italian kitchens sourdough continues to be celebrated today for both its taste and health benefits, in modern times, there's been a surge in popularity as more people embrace cooking at home, whether enjoyed fresh out of the rice cooker or toasted
For breakfast alongside butter or jam, this loaf captures the essence of comfort food while offering something wholesome for every meal .
The magic behind this recipe
What makes sourdough rice cooker bread so magical is the unique flavor combinations created by fermentation, the process introduces complex flavors that give each bite depth; it’s like tasting history itself. plus let’s be real it’s pretty foolproof when using your trusty rice cooker.
You can avoid common pitfalls often associated with traditional baking methods .
This expert - tested technique takes away much of the guesswork involved in bread - making while saving time too. no need for constant monitoring; simply let your rice cooker do all the hard work while you go about your day (or binge - watch your favorite shows), it’s surprisingly easy once you get into it.
Health & nutrition highlights
Now let's discuss some key nutritional benefits because who doesn’t love guilt - free indulgence ? sourdough is packed with essential nutrients thanks to its whole grain base along with probiotics formed during fermentation which can aid digestion and overall gut health .
If you're considering dietary restrictions such as gluten sensitivities (not celiac disease), slow - fermented breads like this one might work well for you due to lower gluten content compared to regular white breads.
Additionally bonus points it contains fewer preservatives than store - bought options since you're crafting it yourself.
When enjoying slices filled with wholesome goodness instead processed options loaded up on additives you’re choosing balanced nutrition over empty calories.
Recipe at a glance
So how long will this take ? here’s what you need :
- total preparation time : 20 minutes
- cooking time : 1 hour
- skill level required : medium
- serving size details : makes about 8 slices
- cost efficiency : budget - friendly ingredients lead towards cost - effective meals without compromising quality
In conclusion . . .making delicious sourdough rice cooker bread combines tradition and innovation seamlessly while bringing joy into everyday cooking experiences you’ll wonder why you ever hesitated before diving into this delightful project. so gather those ingredients and let’s bake some magic together.
Quality ingredients breakdown
When it comes to making sourdough bread in a rice cooker, the quality of your ingredients can make all the difference, let’s dive into the core components that’ll help you whip up a loaf that’ll have everyone asking for seconds.
Premium core ingredients
Flour selection
- all - purpose flour : use 100g of high - quality all - purpose flour, look for brands that use unbleached flour; this gives better flavor and texture .
- whole wheat flour : grab 100g as well, opt for whole grain varieties since they pack more nutrients and give your bread a hearty taste .
- bread flour : for the main dough, you’ll need 500g of bread flour, choose one with higher protein content (around 12 - 14%) to ensure good gluten development .
Water considerations
- lukewarm water : you’ll want about 250ml, warm enough to activate yeast but not hot think baby bottle temperature, tap water works fine, but avoid chlorinated water if possible; it can stifle fermentation .
Sugar boost (optional)
- adding a tablespoon of sugar can really kickstart fermentation in your sourdough starter. if you're watching your sugar intake, feel free to skip this step it'll still be delicious .
Storage guidance
Keep flours in airtight containers at room temperature away from direct sunlight, whole wheat flour has a shorter shelf life due to its oils consider refrigerating or freezing if you buy in bulk.
Signature seasoning blend
While sourdough is pretty fantastic on its own, some extra seasoning can elevate those flavors even further.
Spice combinations
For this recipe, we keep things simple with just sea salt (10g), but don’t shy away from experimenting later on. a pinch of garlic powder or onion powder could add depth without overpowering .
Herb selections
Fresh herbs like rosemary or thyme are fantastic additions after kneading; they lend an aromatic touch that'll make your kitchen smell divine.
Flavor enhancers
Consider adding seeds like sunflower or sesame right before shaping the dough for added crunch and flavor a great way to customize.
Smart substitutions
Sometimes we run out of something mid - bake no worries. here are some easy swaps :
Alternative options
If you don't have whole wheat flour handy, try spelt flour instead for similar health benefits and a slightly nuttier taste .
Dietary swaps
Gluten - free ? no problem. look for gluten - free all - purpose blends that work cup - for - cup with regular flours but check packaging instructions first.
Emergency replacements
Out of sea salt ? regular table salt will do just fine a quick swap without sacrificing too much flavor .
Seasonal variations
Springtime ? toss in some fresh chives or dill during mixing time for bright flavors that scream “spring”.
Kitchen equipment essentials

You don’t need fancy gadgets here just reliable tools will do wonders when baking sourdough rice cooker bread.
Must - have tools
1, mixing bowls : get yourself two medium - sized bowls one for mixing dry and another for wet ingredients . 1, wooden spoon/spatula : perfect tool to mix everything together without too much mess.
1, measuring cups & spoons : accuracy matters when measuring ingredients; invest in good ones so there's no guesswork involved .
Recommended appliances
1, rice cooker : obviously essential here. make sure yours has a steaming pot setting that's where the magic happens. 1, kitchen scale : it might seem old - school but weighing ingredients leads to consistent results every time it’s worth it.
Helpful gadgets
A bench scraper is handy when working with sticky doughs and helps clean up surfaces easily… trust me on this one.
Home alternatives
Don’t have parchment paper ? just grease up your steaming pot lightly with oil it'll keep things from sticking nicely while baking away .
Pro ingredient tips
To level up your ingredient game :
1,
selection secrets
when buying flours, look at expiration dates closely the fresher the better. check local mills if possible they often provide freshly milled options full of flavor .
1, quality markers for yeastiness heaven in sourdough starter consistency should be bubbly and thick not runny; that's how you'll know it's ready.
1, storage solutions store opened bags tightly sealed using clips or rubber bands and consider vacuum sealing long - term storage items like whole - grain flours.
1, money - saving tips buy bulk sizes whenever you can this method saves money over time plus encourages experimentation as you'll have plenty on hand.
So there ya go a complete guide through each ingredient needed to craft an amazing loaf using your trusty rice cooker while maintaining quality standards throughout every step along the way. happy baking friends you’re gonna crush this sourdough adventure together.
Expert cooking method
When it comes to making delicious sourdough bread in your rice cooker, following a structured approach can make all the difference, let's break this down step by step to ensure you achieve perfect results .
Essential preparation steps
Mise en place details
Before diving into the cooking process, gather all your ingredients and tools, you’ll need :
ingredients :
- 100g all - purpose flour
- 100g whole wheat flour
- 200ml lukewarm water
- optional : 1 tablespoon sugar for the starter
-
for bread :
- 500g bread flour
- 300ml active sourdough starter
- 250ml lukewarm water
- 10g sea salt
tools : a clean glass jar, mixing bowls, measuring cups and spoons, a spatula or wooden spoon, plastic wrap or damp cloth, and of course, your trusty rice cooker.
Having everything ready will help you move smoothly through each step without scrambling around .
Prep techniques
Start by preparing your sourdough starter if you haven't already, mix equal parts of both flours with lukewarm water and optional sugar in a clean jar, stir well until no dry bits are left, cover loosely and let it sit for about five to seven days at room temperature don’t forget to feed it daily.
While waiting for that magical fermentation process (which can be quite mesmerizing), organize your workspace so that everything is within reach when you're ready to bake .
Time management
Creating sourdough takes time but is totally worth it. allocate about an hour on baking day plus additional hours for rising, plan your schedule accordingly; maybe pair this with coffee breaks or some light reading during the rises.
Professional cooking method
Step - by - step process
Once your starter is bubbly and has doubled in size after feeding :
1, measure out 300ml of active sourdough starter . 1, in a large bowl, add 500g of bread flour along with 10g sea salt . 1, gradually pour in 250ml of lukewarm water while stirring until combined into a shaggy dough .
Now here comes the fun part kneading. knead that dough on a lightly floured surface for about 5 10 minutes until it’s smooth but still slightly sticky .
Temperature control
Keep things cozy. ensure your kitchen temperature is warm enough (ideally between 70°f - 80°f ) during rising times; this helps yeast do its thing efficiently .
For cooking in the rice cooker :
- fill the pot with one cup of water before starting .
- set it to "cook" mode once heated it should be hot but not boiling over.
Timing precision & success indicators
Letting your dough rise properly is crucial :
1, first rise should take about four hours look for doubled volume as an indicator. 1, after shaping into a round loaf and resting again for another 30 60 minutes , you want puffiness indicating readiness before cooking .
Expert techniques
Professional methods & critical steps
Achieving success involves patience :
- punch down gently after first rise it releases trapped air bubbles which helps develop flavor .
- shape carefully without deflating too much air; this creates structure.
Precision points include checking internal temperatures aiming for around 190°f (88°c) when fully baked ensures doneness .
Quality checks
During cooking :
- peek occasionally through steam venting (without opening) just to see how things are browning up. if it's looking more pale than golden brown at around the fifty - minute mark ? maybe give it ten more minutes but keep an eye on color change.
Success strategies
Sometimes things don’t go as planned and that's okay. here are some troubleshooting tips :
1, if dough isn’t rising well ? make sure it's warm enough where you're proofing. 1, too sticky ? a little extra flour while kneading usually does wonders but watch out not to overdo it. 1, if it's dense after baking ?
It might have needed longer fermenting time next round or perhaps less added moisture next time ?
To assure quality results every time : always check ingredient freshness the older they get can affect taste significantly.
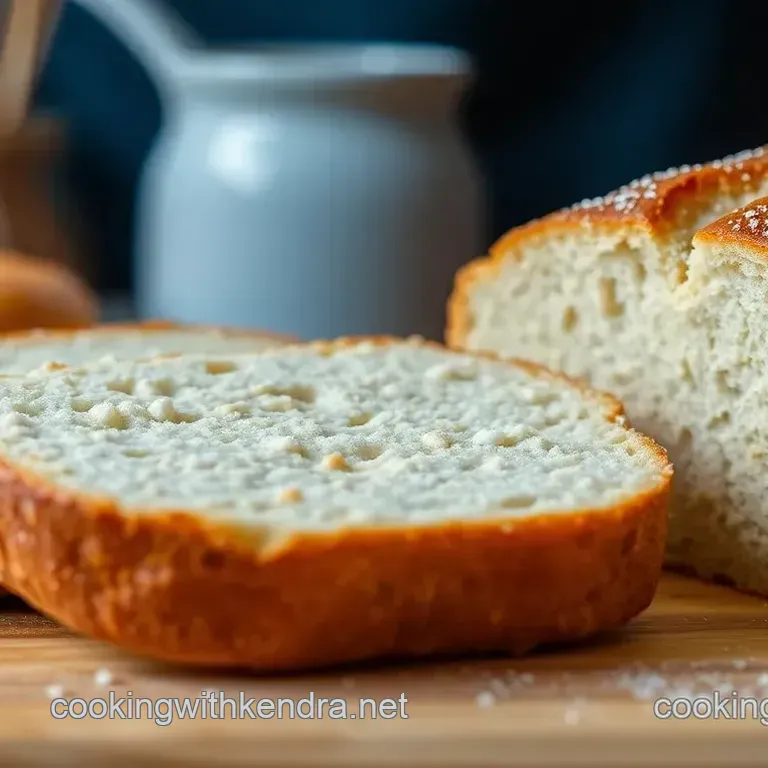
Finally a sprinkle of love always adds magic. once cooled completely on wire racks post - baking, slice away those gorgeous pieces like they're artwork. enjoy them fresh or toasted with butter or topped high with avocado you've earned every bite.
Follow these steps closely, embrace any hiccups along the way and you'll find yourself crafting delightful homemade sourdough effortlessly using just a simple rice cooker.
Expert kitchen wisdom
When it comes to making sourdough bread, a little expert kitchen wisdom goes a long way, one key tip from professional bakers is to keep your starter healthy and happy, a bubbly, active sour dough starter and rice cooker combo can yield some seriously delicious results, don't rush the fermentation process; patience is
Your best friend here.
Also, mastering the kneading technique can make all the difference in achieving that perfect texture, when you knead, focus on folding and stretching rather than just pushing down, this helps develop gluten without overworking the dough .
Lastly, always measure ingredients by weight for accuracy this small step can guarantee baking success every time.
Perfect presentation
Let’s talk about how to make your beautiful loaf of sourdough look as good as it tastes. plating techniques matter just as much as flavor, when serving slices of bread, consider arranging them on a wooden board with some fresh herbs or colorful veggies for that rustic touch .
Garnish ideas ? how about drizzling olive oil or balsamic vinegar around your sliced bread ? it adds depth to the presentation while inviting guests to dig in. for those instagram - worthy shots, try placing an avocado toast topped with radishes next to your freshly baked loaf it’s all about visual appeal.
Storage & make - ahead
Storing homemade sourdough properly keeps it fresh longer, to store leftover slices, wrap them tightly in plastic wrap or place them in an airtight container at room temperature for up to three days, if you want them to last longer (who wouldn’t ?), pop those slices into the freezer.
Just remember : when reheating frozen slices, let them thaw first before giving them a quick toast .
For make - ahead options, consider preparing the dough one day earlier and letting it rise overnight in the fridge, this slow fermentation boosts flavor and makes morning prep super easy just shape and bake.
Creative variations
Baking isn’t just about sticking to traditional recipes; it's also fun experimenting with creative variations. think outside the box try adding roasted garlic or sun - dried tomatoes into your dough for unexpected flavors that'll impress everyone at dinner .
If you're looking for dietary modifications, swap out half of that bread flour with whole grain flour for added nutrition or even gluten - free alternatives if needed (but be mindful; gluten - free requires specific adjustments), seasonal twists like pumpkin puree in fall or herbs during summer can elevate your
Sourdough game too.
Regional variations are also worth exploring add spices typical of various cuisines like za'atar or italian herbs based on what excites you most .
Expert faq solutions
Got questions ? you’re not alone. common concerns often revolve around how long should i let my sourdough rise ? a general rule of thumb is until doubled in size but pay attention it varies depending on temperature and humidity levels .
What if my bread doesn’t rise enough ? well… don’t panic. it could mean either underfeeding your starter or environmental factors playing tricks on you (like too cold), troubleshooting guides suggest adjusting water temperatures next time around.
To ensure success each time you bake : trust yourself and have fun experimenting along the way.
Complete nutrition guide
Let’s break down why this homemade goodness deserves a spot on our plates : each slice packs approximately 150 calories filled mostly with carbohydrates but offers decent fiber content too which aids digestion.
The health benefits are noteworthy : consuming whole grains improves heart health while providing sustained energy throughout busy days ahead. portion guidance recommends enjoying two pieces paired thoughtfully alongside protein - rich toppings like eggs or hummus that's nutritious satisfaction right there .
Whether toasted as breakfast fuel or served alongside soups/stews at dinner parties the nutritional perks combined with deliciousness truly hit home every single bite.
Cook Easy Sourdough Bread In 80 Minutes