Meatloaf Recipe Cooked at 400 with Savory Glaze

- Time: Active 15 minutes, Passive 45 minutes, Total 1 hours
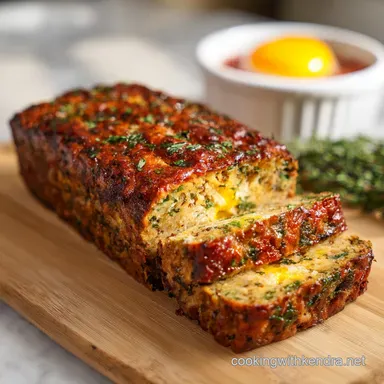
- Flavor/Texture Hook: Savory, umami rich beef with a tacky, sweet heat glaze and a velvety interior
- Perfect for: Busy weeknights when you need comfort food fast without the mushy texture of slow baking
- The Ultimate Meatloaf Recipe Cooked at 400
- Why This Method Always Wins
- Critical Numbers for Success
- Essential Ingredients and Smart Swaps
- Tools for a Better Bake
- Precise Steps for Juicy Meatloaf
- Fixing Common Kitchen Mishaps
- Flavor Twists for Variety
- Saving and Reheating Leftovers
- Perfect Sides for Dinner
- High in Sodium
- Recipe FAQs
- 📝 Recipe Card
The Ultimate Meatloaf Recipe Cooked at 400
You know that specific sound when you pull a pan out of the oven and the fat is doing a little dance around the edges? That rhythmic sizzle is the first thing you'll notice with this dish.
Most people are terrified of high heat with ground beef, thinking they'll end up with a dry, crumbly mess that feels like eating a wool sweater. But that's exactly where they go wrong.
This article shares a truly exceptional meatloaf recipe cooked at 400 with a savory glaze that solves every single "loaf related" trauma you've ever had.
I used to be a "325 for ninety minutes" kind of cook because that's what my grandmother did. Her meatloaf was fine, but it always had that grey, steamed look on the outside and a texture that was a bit too close to baby food.
One Tuesday night, I was running late, the kids were starving, and I cranked the dial to 400 out of pure desperation. I expected a disaster. Instead, I got a crust that was nearly crispy and a middle that stayed perfectly pink and moist. It was a total accident that turned into our family's favorite Tuesday tradition.
Honestly, don't even bother with the low-fat ground beef here. You need the fat to stand up to that 400 degree air, or you're just making a very large, very dry hamburger. We're going for a texture that's sturdy enough to slice but soft enough to melt when it hits your tongue.
Right then, let's get into why this high temp trick actually works so well.
Why This Method Always Wins
Cooking at a higher temperature isn't just about saving time, though that's a massive bonus when the "I'm hungry" chorus starts in the living room. It changes the physical structure of the meat and the glaze. It's a method that prioritizes the contrast between the outside and the inside, much like a well seared steak.
- Maillard Acceleration: The high 400 degree heat triggers the Maillard reaction almost immediately, creating a dark, savory crust that "low and slow" methods simply can't achieve.
- Glaze Dehydration: At this temperature, the water in the ketchup and vinegar evaporates rapidly, leaving behind a concentrated, tacky lacquer that clings to the meat instead of sliding off.
- Panade Protection: The mixture of milk and Panko forms a gel like matrix that holds onto beef juices, acting as a thermal buffer so the protein doesn't tighten up too fast.
- Fat Rendering: The 80/20 fat ratio renders quickly at high heat, essentially frying the exterior of the loaf in its own juices while keeping the interior basted.
Cook Method Comparison
| Method | Time | Texture | Best For |
|---|---|---|---|
| Classic (325°F) | 1 hours 30 mins | Uniformly soft, no crust | Traditionalists with time |
| High Heat (400°F) | 45 minutes | Crispy edges, juicy core | Busy weeknights & flavor lovers |
| Slow Cooker | 6 hours | Very soft, almost fall apart | Hands off morning prep |
When you use the higher heat, you're essentially mimicking the effect of a professional broiler. This technique is similar to how I handle the sear in my How to Cook recipe for flank steak. The goal is to maximize flavor on the surface without sacrificing the moisture trapped within the fibers. You'll find that the 45 minute mark is the sweet spot where the center hits that safe internal temperature just as the glaze reaches a deep, mahogany color.
over High heat Surface Caramelization
Science: Thermal energy at 400°F creates a rapid moisture loss zone on the surface, allowing sugars to polymerize and proteins to brown before the internal moisture can escape. This creates a pressurized environment that keeps the center tender.
Critical Numbers for Success
Before we start mixing, let's look at the blueprint. Getting the proportions right is the difference between a loaf that holds its shape and a pile of loose meat. I've found that 2 lbs of beef is the "Goldilocks" amount for a standard baking sheet or loaf pan.
It’s enough to feed six people but not so thick that the center stays raw while the outside burns.
Component Analysis
| Ingredient | Science Role | Pro Secret |
|---|---|---|
| 80/20 Ground Beef | Fat to Protein Balance | Use cold meat to keep fat from melting during mixing |
| Panko Breadcrumbs | Structural Matrix | Panko shards create air pockets for a lighter texture |
| Whole Milk | Hydration | Full fat milk proteins help tenderize the beef fibers |
| Large Eggs | Protein Binder | Whisk them before adding to ensure even distribution |
I always tell my friends to treat the panade (the milk and breadcrumb mix) like the soul of the dish. If you skimp on the milk or use dry, dusty breadcrumbs, you'll feel it in the final bite. We want that velvety feel, not something that tastes like a dehydrated burger.
Essential Ingredients and Smart Swaps
Getting the right ingredients on the counter makes the process feel like a breeze. We’re using basic pantry staples, but the way they interact is pure kitchen magic. Don't worry if you're missing one or two things; there's almost always a workaround that keeps the budget in check without losing the soul of the meal.
- 2 lbs ground beef (80/20 blend): Why this? The 20% fat is non negotiable for over high heat moisture retention.
- Substitute: Ground turkey (93/7) mixed with 2 tbsp olive oil to mimic beef fat.
- 1 cup Panko breadcrumbs: Why this? Larger surface area than regular crumbs for a lighter "crumb" texture.
- Substitute: Crushed saltine crackers or quick oats for a denser, more rustic feel.
- 1/3 cup whole milk: Why this? Hydrates the crumbs to prevent them from sucking moisture out of the meat.
- Substitute: Beef broth or heavy cream for an even richer result.
- 2 large eggs: Why this? The "glue" that keeps your slices from falling apart on the plate.
- Substitute: 1/4 cup unsweetened applesauce or a "flax egg" if you're avoiding poultry.
- 1 medium yellow onion, finely grated: Why this? Grating releases juices that flavor every single bite of meat.
- Substitute: 2 tbsp onion powder, though you'll miss that fresh moisture.
- 3 cloves garlic, minced: Why this? Adds sharp, aromatic depth that balances the sweet glaze.
- Substitute: 1 tsp garlic powder mixed into the meat.
- 2 tbsp Worcestershire sauce: Why this? The ultimate umami bomb; provides that "steakhouse" savory note.
- Substitute: Soy sauce or balsamic vinegar for a similar salty/acidic punch.
- 1.5 tsp kosher salt & 1/2 tsp pepper: Why this? Essential seasoning to wake up the beef flavors.
- 1/2 cup tomato ketchup: Why this? The base of the glaze that provides acidity and sugar for browning.
- Substitute: Tomato paste mixed with a little water and extra sugar.
- 2 tbsp brown sugar, packed: Why this? Caramelizes at 400°F to create that tacky, finger licking coating.
- Substitute: Honey or maple syrup (note: the glaze will be thinner).
- 1 tbsp apple cider vinegar: Why this? Cuts through the richness of the fat and sugar.
- Substitute: White vinegar or lemon juice.
- 1 tsp smoked paprika & 1 tsp garlic powder: Why this? Adds a "grilled" aroma and extra savory layers to the glaze.
Ingredient Swap Guide
| Original Ingredient | Substitute | Why It Works |
|---|---|---|
| Panko (1 cup) | Quick Oats (1 cup) | High fiber, absorbs moisture well. Note: Results in a denser loaf. |
| Whole Milk (1/3 cup) | Greek Yogurt (1/4 cup) | Adds tang and moisture. Best for ground turkey versions. |
| Brown Sugar (2 tbsp) | Honey (1.5 tbsp) | Provides sweetness. Note: Glaze will be stickier and darker. |
If you're looking for a different kind of comfort bake that uses these same pantry staples, you should definitely check out my Chicken Broccoli Rice recipe. It’s another one of those "throw it in a pan and let the oven do the work" meals that my family obsesses over.
Tools for a Better Bake
You don't need a professional kitchen, but a few specific items make this recipe foolproof. I stopped using a deep loaf pan years ago. Why? Because a deep pan essentially steams the sides of the meat. If you want that "all over" crust, a rimmed baking sheet is your best friend.
- Rimmed Baking Sheet: Essential for letting hot air circulate around the entire loaf.
- Box Grater: For the onion. Trust me, grating is better than chopping.
- Large Mixing Bowl: Give yourself space to mix without squishing the meat.
- Instant Read Thermometer: The only way to know it's done without cutting into it.
- Small Whisk: For getting the glaze perfectly smooth.
Chef's Tip: Line your baking sheet with parchment paper, but leave a one inch margin around the edges. This makes cleanup easy but allows the fat to render onto the pan for better browning.
Precise Steps for Juicy Meatloaf

Let's get cooking. The trick here is speed and a light touch. If you manhandle the meat, you'll squeeze out the air and end up with a hockey puck. Keep everything cold until the moment it hits the oven.
1. The Setup and Panade
Preheat your oven to 400°F. In your large mixing bowl, combine the 1 cup Panko and 1/3 cup milk. Note: Letting these sit for 5 minutes creates a paste that keeps the beef tender.
2. The Flavor Base
To the milk/Panko mixture, add the 2 beaten eggs, the grated yellow onion, minced garlic, Worcestershire sauce, dried thyme, salt, and pepper. Stir this into a slurry. Doing this before the meat goes in prevents overmixing.
3. Incorporating the Beef
Add the 2 lbs of ground beef to the bowl. Use your hands (yes, get in there!) to gently fold the meat into the flavor base. Stop as soon as you don't see any more streaks of breadcrumbs.
4. Shaping the Loaf
Transfer the mixture to your rimmed baking sheet. Shape it into a loaf about 9 inches long and 4 or 5 inches wide. Bake for 20 minutes without any glaze. until the surface looks opaque and "set."
5. Mixing the Savory Glaze
While the meat par bakes, whisk together the ketchup, brown sugar, apple cider vinegar, garlic powder, and smoked paprika in a small bowl.
6. Applying the Glaze
Pull the pan out and use a spoon or brush to coat the top and sides of the loaf generously with the glaze.
7. The 400°F Finish
Return the pan to the oven and bake for another 20 to 25 minutes. until the glaze is bubbling and dark mahogany.
8. The Temperature Check
Insert your thermometer into the thickest part of the loaf. You are looking for 160°F. The temperature will rise a few degrees as it rests.
9. The Mandatory Rest
Slide the meatloaf onto a cutting board. Wait 10 full minutes before slicing. Note: This allows the juices to redistribute so they don't flood the board.
10. Serving
Slice into thick rounds and serve while the glaze is still tacky and warm.
Fixing Common Kitchen Mishaps
Even with a solid plan, things can go sideways. I've had loaves that looked like they survived a volcanic eruption and others that were swimming in a lake of grease. It happens to the best of us!
Why Your Meatloaf Falls Apart
If your slices are crumbling, you likely didn't have enough binder or you didn't let it rest. The eggs and Panko need that 10 minute resting period after baking to "set" the structure.
If it's already on the plate and falling apart, serve it over mashed potatoes and call it "Deconstructed Meatloaf" it still tastes the same!
The Bottom is Soggy
This usually happens if the onion was too watery or the meat was extra fatty. Grating the onion is great for flavor, but if it's a very juicy onion, give the shreds a quick squeeze before adding them to the bowl. Also, make sure you aren't using a deep loaf pan; the flat baking sheet lets that moisture evaporate.
Problem Solver
| Problem | Root Cause | Solution |
|---|---|---|
| Greasy texture | Fat didn't render out | Use a wire rack over your baking sheet to lift the meat up |
| Burnt glaze | Too much sugar or too high in oven | Move the rack to the middle position and tent with foil if needed |
| Dry interior | Overcooked or lean meat | Always use 80/20 beef and pull at exactly 160°F |
Common Mistakes Checklist
- ✓ Pat the meat cold don't let it sit at room temp before mixing (prevents fat smear).
- ✓ Don't overwork the mix; treat it like biscuit dough, not bread dough.
- ✓ Measure the milk carefully; too much will make the loaf "slump."
- ✓ Use a rimmed sheet, never a flat cookie sheet (the grease will spill!).
- ✓ Let it rest for 10 minutes (this is the hardest but most important step).
Flavor Twists for Variety
Once you've mastered the base, you can start playing with the profile. I've found that this over high heat method works for almost any flavor palette because the core technique of the panade stays the same.
The Spicy "Zesty" Twist
Swap the ketchup in the glaze for your favorite BBQ sauce or Sriracha. You can also add chopped jalapeños into the meat mix. The 400°F heat will char the peppers slightly, giving the whole thing a smoky, southwestern vibe.
The gluten-free Alternative
You can easily swap the Panko for crushed gluten-free crackers or even almond flour. If using almond flour, use 3/4 cup instead of a full cup, as it’s more dense. This version will be a bit more tender, so be extra careful when slicing.
The Decision Shortcut
- If you want a crispier crust, bake it on a wire rack set over the baking sheet.
- If you want a sweeter bite, double the brown sugar in the glaze and apply a second coat halfway through.
- If you want a sturdier slice, use a mix of 1 lb beef and 1 lb ground pork.
Saving and Reheating Leftovers
Meatloaf is arguably better the next day. The flavors have time to mingle, and the texture becomes much firmer, making it the king of sandwich meats.
- Fridge: Store in an airtight container for up to 4 days.
- Freezer: Wrap individual slices in plastic wrap, then foil. They'll stay good for 3 months.
- Reheating: Don't use the microwave if you can help it; it makes the meat rubbery. Instead, sear a slice in a buttered skillet for 2 minutes per side. It recreates that "crust" and tastes incredible.
- Zero Waste: Crumble leftover meatloaf into a pan and use it as a base for a quick Bolognese sauce or as a topping for "Meatloaf Nachos."
Perfect Sides for Dinner
Since the oven is already at 400°F, you might as well use that heat for your sides! I love roasting broccoli or green beans on a second sheet pan at the same time. They'll finish right as the meatloaf is coming out to rest.
If you're looking for something more decadent, this meatloaf is a dream next to a Spaghetti and meatballs recipe or even just a massive pile of garlic mashed potatoes. The savory glaze acts like a built in gravy that ties everything on the plate together. Trust me, once you try the 400 degree method, you’ll never go back to those soggy, hour long bakes again. Enjoy the sizzle!

High in Sodium
845 mg mg of sodium per serving (37% % of daily value)
The American Heart Association recommends limiting sodium intake to about 2,300mg per day.
Tips to Reduce Sodium in Your Meatloaf
-
Reduce Added Salt-25%
Decrease the amount of kosher salt from 1.5 tsp to 0.75 tsp. This will significantly reduce the sodium content without drastically affecting flavor. You can always add more salt to taste after cooking.
-
Low-Sodium Ketchup-20%
Use a low-sodium or no-salt added ketchup. Many brands offer varieties with significantly less sodium than regular ketchup, which can make a noticeable difference.
-
Low-Sodium Worcestershire-15%
Opt for a low-sodium Worcestershire sauce. If you can't find it, reduce the amount used by half and add a splash of balsamic vinegar for depth of flavor.
-
Leaner Ground Beef-10%
Choose a leaner ground beef (e.g., 90/10 blend). While not a direct sodium reduction, excess fat can amplify the perception of saltiness, so reducing fat can allow you to use less salt overall.
-
Boost Flavor with Aromatics
Enhance the flavor profile by increasing the amount of grated onion and minced garlic. These aromatics add depth of flavor and can help to compensate for reduced sodium.
-
Spice it Up
Experiment with herbs and spices like oregano, rosemary, or smoked paprika. These add flavor complexity without any sodium.
Recipe FAQs
Can meatloaf be cooked at 400 degrees?
Yes, 400°F is ideal for a superior crust. Cooking at this higher temperature accelerates the Maillard reaction, creating a savory, dark exterior quickly. This contrasts nicely with the moist interior, which is protected by the panade.
Do you put glaze on meatloaf before baking?
No, apply the glaze halfway through baking. Start baking the loaf plain for 20 minutes; this sets the structure and allows surface moisture to evaporate. Applying the glaze too early causes it to burn before the meat is fully cooked.
Do I bake my meatloaf covered or uncovered?
Bake it completely uncovered for the best crust. Covering the meatloaf traps steam, leading to a softer, paler exterior and preventing the glaze from caramelizing properly.
How long do you cook a 2lb meatloaf at 400 degrees?
Approximately 40 to 45 minutes total cook time. Bake uncovered for the first 20 minutes, apply glaze, and then return to the oven for another 20 to 25 minutes until the internal temperature reaches 160°F.
What is the secret to a non-crumbly, juicy meatloaf?
Use 80/20 ground beef and do not overmix the meat. The fat content is crucial for moisture retention at high heat, and gentle folding keeps air pockets intact, resulting in a tender texture. If you master texture control here, you'll find the same principles apply when working with tougher cuts, like in our Italian Beef Stew Classic Spezzatino with Tender Braised Beef.
Why is my meatloaf glaze running off instead of sticking?
The glaze lacked sufficient sugar or the baking temperature was too low. High heat (400°F) rapidly dehydrates the glaze, concentrating the sugars and creating that tacky lacquer. If it runs, try adding a bit more brown sugar next time.
Can I use lean ground beef (93/7) for this recipe?
No, this method requires the fat from 80/20 beef. Lean meat will dry out quickly at 400°F because there is insufficient fat to self baste the loaf. You must add back healthy fat, perhaps by incorporating 2 tablespoons of olive oil to mimic the necessary richness.
Meatloaf Cooked At 400
Ingredients:
Instructions:
Nutrition Facts:
| Calories | 528 kcal |
|---|---|
| Protein | 33.4 g |
| Fat | 31.2 g |
| Carbs | 25.8 g |
| Fiber | 1.2 g |
| Sugar | 13.5 g |
| Sodium | 845 mg |
