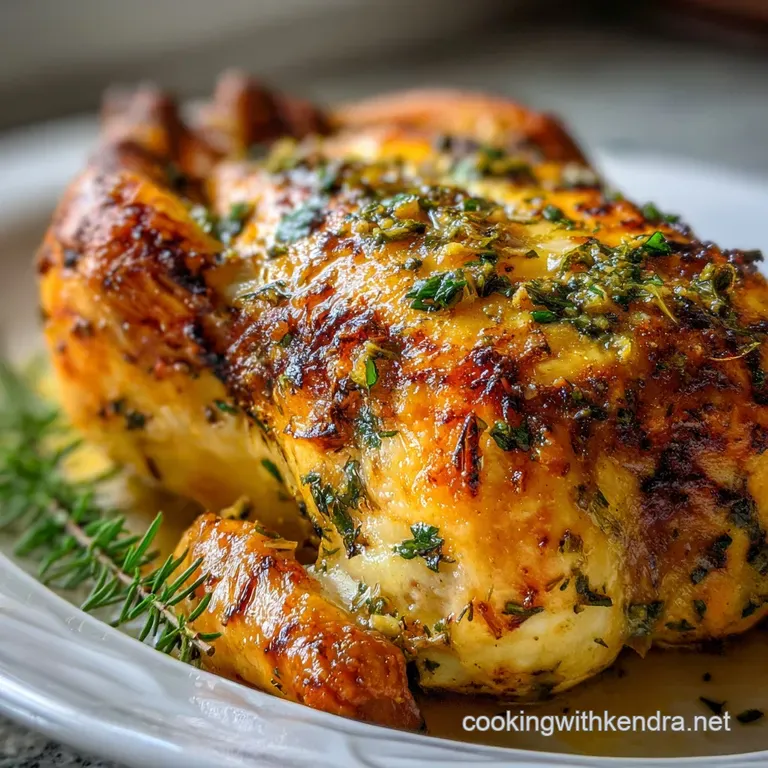
Oven Cooked Whole Chicken with Garlic and Herbs

- Time: Active 20 minutes, Passive 1 hours 15 mins, Total 1 hours 35 mins
- Flavor/Texture Hook: Shattering skin with velvety, garlic infused meat
- Perfect for: Sunday family dinner or high protein meal prep
The smell of roasting garlic hitting hot butter is basically my love language. I remember the first time I tried roasting a whole bird, I was so terrified of it being dry that I kept opening the oven door every ten minutes to poke it. Big mistake.
All I did was let the heat out and end up with a rubbery, pale mess that looked more like it had been steamed than roasted. It was a sad Tuesday night dinner, let me tell you.
But we live and learn, right? I started experimenting with compound butters and realized that the real magic happens under the skin, not just on top. This article shares a delicious recipe for Oven Cooked Whole Chicken with Garlic and Herbs.
Now, when I pull this out of the oven, the sizzle is so loud it practically drowned out my kids' complaining about having to set the table.
We are going for that specific, deep golden hue that makes you want to skip the plates and just dig in with your hands. There is something deeply grounding about a roast chicken. It is the ultimate comfort food that feels fancy but actually requires very little hands on work once you get the technique down.
Let's get into how we make this work every single time without the stress.
Secrets Behind This Roast
The Physics of the Crust: Salt draws moisture to the surface of the skin, which then evaporates in the high heat, allowing the Maillard reaction to create a crisp, browned exterior. This prevents the skin from becoming flabby or tough during the long cook time.
Subcutaneous Fat Insulation: Placing compound butter directly between the meat and the skin creates a heat conductive barrier that bastes the breast meat from the outside in. This ensures the leanest part of the bird stays juicy while the skin fries in the butter.
Vertical Heat Circulation: By resting the chicken on a bed of hardy vegetables like carrots and potatoes, you allow air to move underneath the bird. This prevents the "soggy bottom" syndrome and ensures the underside of the thighs actually cooks through.
Aromatic Steam Injection: Stuffing the cavity with lemon and onion creates an internal steam chamber that seasons the meat from the inside out. As the lemon heats up, it releases citric acid vapors that help break down tough connective tissues.
| Thickness | Internal Temp | Rest Time | Visual Cue |
|---|---|---|---|
| 4.5 lb Bird | 165°F (Breast) | 15 minutes | Juices run clear when poked |
| 5.5 lb Bird | 165°F (Breast) | 20 minutes | Drumstick moves easily in socket |
| 6.5 lb Bird | 165°F (Breast) | 25 minutes | Skin is mahogany and tight |
Getting the temperature right is the difference between a dry bird and a succulent one. I always pull my chicken at 160°F because carryover cooking will bring it up to that safe 165°F mark while it rests on the counter.
If you wait until the thermometer hits 165°F in the oven, you'll likely end up at 170°F or higher by the time you carve it, which is the fast lane to Dry Town.
Ingredient Component Analysis
| Ingredient | Science Role | Pro Secret |
|---|---|---|
| Unsalted Butter | Fat medium for herbs | Use European style butter for higher fat content and less water |
| Smoked Paprika | Color and depth | Provides a deep reddish orange glow without overcooking the skin |
| Fresh Rosemary | Volatile oil source | Bruise the leaves before chopping to release the oils faster |
| Whole Lemon | Acidic tenderizer | Poke holes in the lemon before stuffing to let the juice steam out |
Choosing the right bird is just as important as how you cook it. I always look for a "natural" chicken that hasn't been injected with a saline solution, as those tend to release too much liquid and steam the skin instead of roasting it. If you find yourself wanting to try different flavor profiles later, you can use these same techniques with The Homemade Chicken recipe for a Mediterranean twist on leftovers.
Choosing Your Ingredients
- 4.5 lb whole chicken: Make sure the giblets are removed and the bird is patted bone dry. Why this? Dry skin is the only way to achieve a loud, satisfying crunch.
- 1 large yellow onion: Quartered for the cavity and the roasting pan. Why this? Provides a sweet, aromatic base for the drippings.
- 1 whole lemon: Halved to provide steam and brightness. Why this? The acid cuts through the heavy fat of the butter.
- 1 head garlic: Halved crosswise for the cavity plus 4 minced cloves for the butter. Why this? Garlic mellows as it roasts, becoming sweet and spreadable.
- 0.5 cup unsalted butter: Softened to room temperature. Why this? Soft butter mixes easily with herbs and sticks to the meat.
- 1 tbsp salt/pepper/paprika blend: Our primary seasoning for color and bite. Why this? Paprika gives that rotisserie style look we all love.
- 1 tsp dried oregano and dried thyme: Concentrated herbal notes. Why this? Dried herbs hold up better to long roasting than fresh ones.
- 3 large carrots and 1 lb baby gold potatoes: The vegetable foundation. Why this? These absorb the chicken fat and become incredibly tender.
If you don't have fresh rosemary, you can use an extra teaspoon of dried rosemary, but keep in mind it's much more potent. I often swap the baby gold potatoes for red potatoes if that is what I have in the pantry, and they work just as well since they hold their shape under heat.
| Original Ingredient | Substitute | Why It Works |
|---|---|---|
| Unsalted Butter | Ghee (Clarified Butter) | Higher smoke point. Note: You lose the milky flavor but get crispier skin. |
| Baby Gold Potatoes | Sweet Potatoes | Sturdier texture. Note: Adds a sugary depth that caramelizes quickly. |
| Fresh Rosemary | Fresh Sage | Similar resinous quality. Note: Sage is more earthy and less piney. |
Must Have Kitchen Equipment
You don't need a professional kitchen, but a solid heavy duty roasting pan or a large cast iron skillet (like a Lodge 12 inch) makes a massive difference. The thick metal retains heat and prevents the vegetable juices from scorching before the chicken is done.
I also swear by a digital meat thermometer with a probe that stays in the oven.
A good pair of kitchen shears is also helpful if you need to trim any excess fat or skin near the cavity. I once tried to use a regular butter knife for this and nearly took a finger off, so trust me, get the shears.
Finally,, a small mixing bowl for your compound butter is essential so you can mash everything together into a velvety paste.
step-by-step Guide
- Preheat and Prep. Set your oven to 425°F. Remove the chicken from the fridge 30 minutes early. Note: Cold meat takes longer to cook and can cause uneven results.
- Dry the Bird. Use paper towels to pat the chicken completely dry inside and out until the skin feels tacky.
- Prepare the Vegetables. Toss the potatoes, carrots, and half the onion with 2 tbsp olive oil and a pinch of salt. Note: This prevents them from sticking to the pan.
- Create the Butter. Mix the softened butter, minced garlic, smoked paprika, oregano, thyme, and parsley in a bowl until a smooth paste forms.
- Stuff the Cavity. Place the lemon halves, the remaining onion quarters, the halved garlic head, and rosemary sprigs inside the chicken.
- Apply Butter Under Skin. Gently lift the skin over the breast and thighs, then slide about two thirds of the garlic butter underneath until the meat is fully coated.
- Season the Exterior. Rub the remaining butter over the outside of the skin and sprinkle generously with the salt and pepper blend.
- Arrange the Pan. Place the chicken on top of the vegetables in your roasting pan or skillet.
- Roast the Chicken. Bake for 1 hours 15 mins until the skin is deep mahogany and the internal temp hits 160°F.
- Rest and Carve. Remove from the oven and let the bird sit for 15 minutes until the juices settle back into the meat.
Chef's Tip: If you want the skin to be extra thin and crackling, use a hair dryer on the cool setting to blow dry the skin for 2 minutes before you apply the butter. It sounds crazy, but it works better than just paper towels.
Troubleshooting Common Issues
The Skin Is Soggy
This usually happens because there was too much moisture in the pan or the bird wasn't dried properly. If you notice the skin looking pale halfway through, turn the oven up to 450°F for the last 10 minutes, but watch it closely so the garlic in the butter doesn't burn.
The Vegetables Are Burnt
If your carrots and potatoes are looking too dark before the chicken is done, add a splash of chicken broth or water to the pan. This creates a bit of steam that protects the veggies while they finish softening in the chicken drippings.
The Breast Is Dry
This is the classic roasting tragedy. It happens when the breast reaches 165°F way before the thighs. To fix this next time, try roasting the chicken breast side down for the first 20 minutes, then flipping it over to finish.
This lets the fat from the back and thighs baste the breast.
| Problem | Root Cause | Solution |
|---|---|---|
| Rubbery Skin | Oven temp too low | Ensure oven is preheated to at least 425°F for the initial sear. |
| Bloody Thigh Joints | Uneven heat | Move the bird lower in the oven or tent the breast with foil. |
| Bitter Aftertaste | Burnt minced garlic | Make sure minced garlic is mostly tucked under the skin. |
Common Mistakes Checklist
- ✓ Never wash the chicken in the sink (it just spreads bacteria and ruins the skin).
- ✓ Don't skip the resting period; the meat will lose all its juice the second you cut it.
- ✓ Ensure the butter is truly soft; cold butter will clump and won't spread under the skin.
- ✓ Avoid crowding the vegetables; they need space to roast rather than steam.
- ✓ Use a thermometer rather than relying on time alone, as every oven behaves differently.
Adjusting for Different Sizes
When you need to feed a crowd or just yourself, the ratios change slightly. If you are doubling the recipe and roasting two chickens, make sure they aren't touching in the pan. You'll need to increase the salt and spices to about 1.5x the original amount, but keep the liquids (like the lemon juice) nearly the same to avoid a soggy environment.
For a smaller 3 lb bird, reduce the cook time by about 20% and check the temperature at the 45 minute mark. If you're using a massive 6 lb roaster, you may want to lower the temperature to 375°F after the first 30 minutes to ensure the middle cooks through without the skin burning. If you end up with too much meat, you can easily shred the leftovers for a Chicken Stew recipe the next day.
Roasting Myths Debunked
One of the biggest myths is that you need to baste the chicken every 15 minutes. Honestly, every time you open that door, you lose heat and humidity, which actually makes the meat dryer and the skin softer. The compound butter under the skin does all the basting for you from the inside.
Another common misconception is that "clear juices" are the only sign of doneness. While it's a good indicator, pinkness near the bone can be totally safe and is often just a result of the chicken's age or the freezing process. Trust your digital thermometer over the color of the juice every single time.
Finally,, searing the meat in a pan before roasting does not "lock in juices." Science shows that moisture loss is consistent regardless of searing. The only reason to sear is for flavor and color, which our over high heat roasting and paprika butter blend handle perfectly without the extra step.
Smart Storage Methods
Leftover roast chicken is a gift. Keep it in an airtight container in the fridge for up to 4 days. If you want to freeze it, I recommend shredding the meat off the bone first; it stays much juicier that way and takes up less space. Frozen cooked chicken is good for about 3 months.
When reheating, add a teaspoon of water or broth to the container to keep it from drying out in the microwave.
Don't you dare throw away that carcass! The bones, the neck, and even the roasted onion and garlic skins from the pan are gold. Throw them into a large pot with some water, a couple of celery stalks, and a bay leaf.
Simmer it for 4 hours, and you'll have a bone broth that is worlds better than anything you can buy in a carton. I also like to save the leftover "schmaltz" (the fat in the pan) to fry eggs the next morning. It is life changing.
Excellent Serving Ideas
If you want to keep it classic, serve this with a side of steamed green beans or a crisp garden salad to balance the richness. The potatoes and carrots in the pan are already a full meal, but a piece of crusty sourdough bread is essential for mopping up the garlic butter juices that pool on the plate.
For a more modern take, you could serve the sliced chicken over a bed of arugula with a quick lemon vinaigrette. The heat from the chicken slightly wilts the greens, and the peppery flavor of the arugula cuts through the savory herbs perfectly. If you're feeling ambitious, a side of Cheesy Chicken Broccoli recipe can turn this into a massive family feast that will leave everyone in a happy food coma.
If you want X, do Y: If you want extra crispy skin, leave the chicken uncovered in the fridge for 4 hours before cooking. If you want more gravy, deglaze the roasting pan with half a cup of white wine while the chicken rests.
If you want spicier flavor, add half a teaspoon of cayenne pepper to your butter mixture.

Recipe FAQs
What internal temperature should the chicken reach?
165°F in the breast. Pull the chicken from the oven at 160°F, as carryover cooking will raise it to the safe temperature during resting.
How do I ensure the chicken skin is crispy and not soggy?
Pat the chicken completely dry and use high initial heat. Moisture is the enemy of crispy skin; removing all surface water and starting at 425°F helps achieve that shatter like texture.
Can I prepare the chicken ahead of time?
Yes, season up to 24 hours ahead. Applying the dry rub and letting it sit in the refrigerator helps draw out more moisture for even crispier skin.
Why is my chicken breast dry after roasting?
The breast cooks faster than the thighs. To counter this, try roasting breast side down for the first 20 minutes, allowing the thigh fat to baste the breast meat, or ensure you're not overcooking it.
Do I need to baste the chicken while it's roasting?
No, basting is not necessary. The compound butter placed under the skin acts as a self basting mechanism, keeping the meat moist from the inside out and achieving a deeply flavored skin.
What should I do with the chicken drippings?
Save them for incredible flavor. The fat in the pan, known as schmaltz, can be used to fry eggs or roast vegetables for an added layer of deliciousness.
Can I use dried herbs instead of fresh?
Yes, but use them carefully. Dried herbs are more potent; use about one-third the amount of dried herbs compared to fresh herbs, as they hold up well to long roasting times.
Oven Cooked Whole Chicken

Ingredients:
Instructions:
Nutrition Facts:
| Calories | 672 kcal |
|---|---|
| Protein | 45.2 g |
| Fat | 43.8 g |
| Carbs | 23.6 g |
| Fiber | 3.8 g |
| Sugar | 4.1 g |
| Sodium | 468 mg |
